Budget-Friendly DIY Approaches to Visually Enlarge Small Living Areas
Living in a small space can often feel cramped and limiting, but with some creativity and do-it-yourself (DIY) techniques, you can transform your compact living area into a visually expansive and inviting environment. This article explores various budget-friendly DIY approaches that leverage optical illusions, smart design, and practical hacks to make small rooms appear larger. Drawing inspiration from international home improvement websites and interior design blogs, we will delve into methods that are easy to implement, cost-effective, and tailored to enhance spatial perception. Whether you're in a studio apartment, a tiny house, or a compact room, these strategies will help you maximize your living area without breaking the bank. The structure follows a total-summary format: starting with an overview, diving into detailed methods with clear subsections like advantages, disadvantages, and step-by-step implementations, and concluding with a recap of key takeaways. By avoiding vague suggestions and focusing on specific, actionable DIY projects, this guide aims to provide a comprehensive resource for anyone looking to visually enlarge their small living spaces.
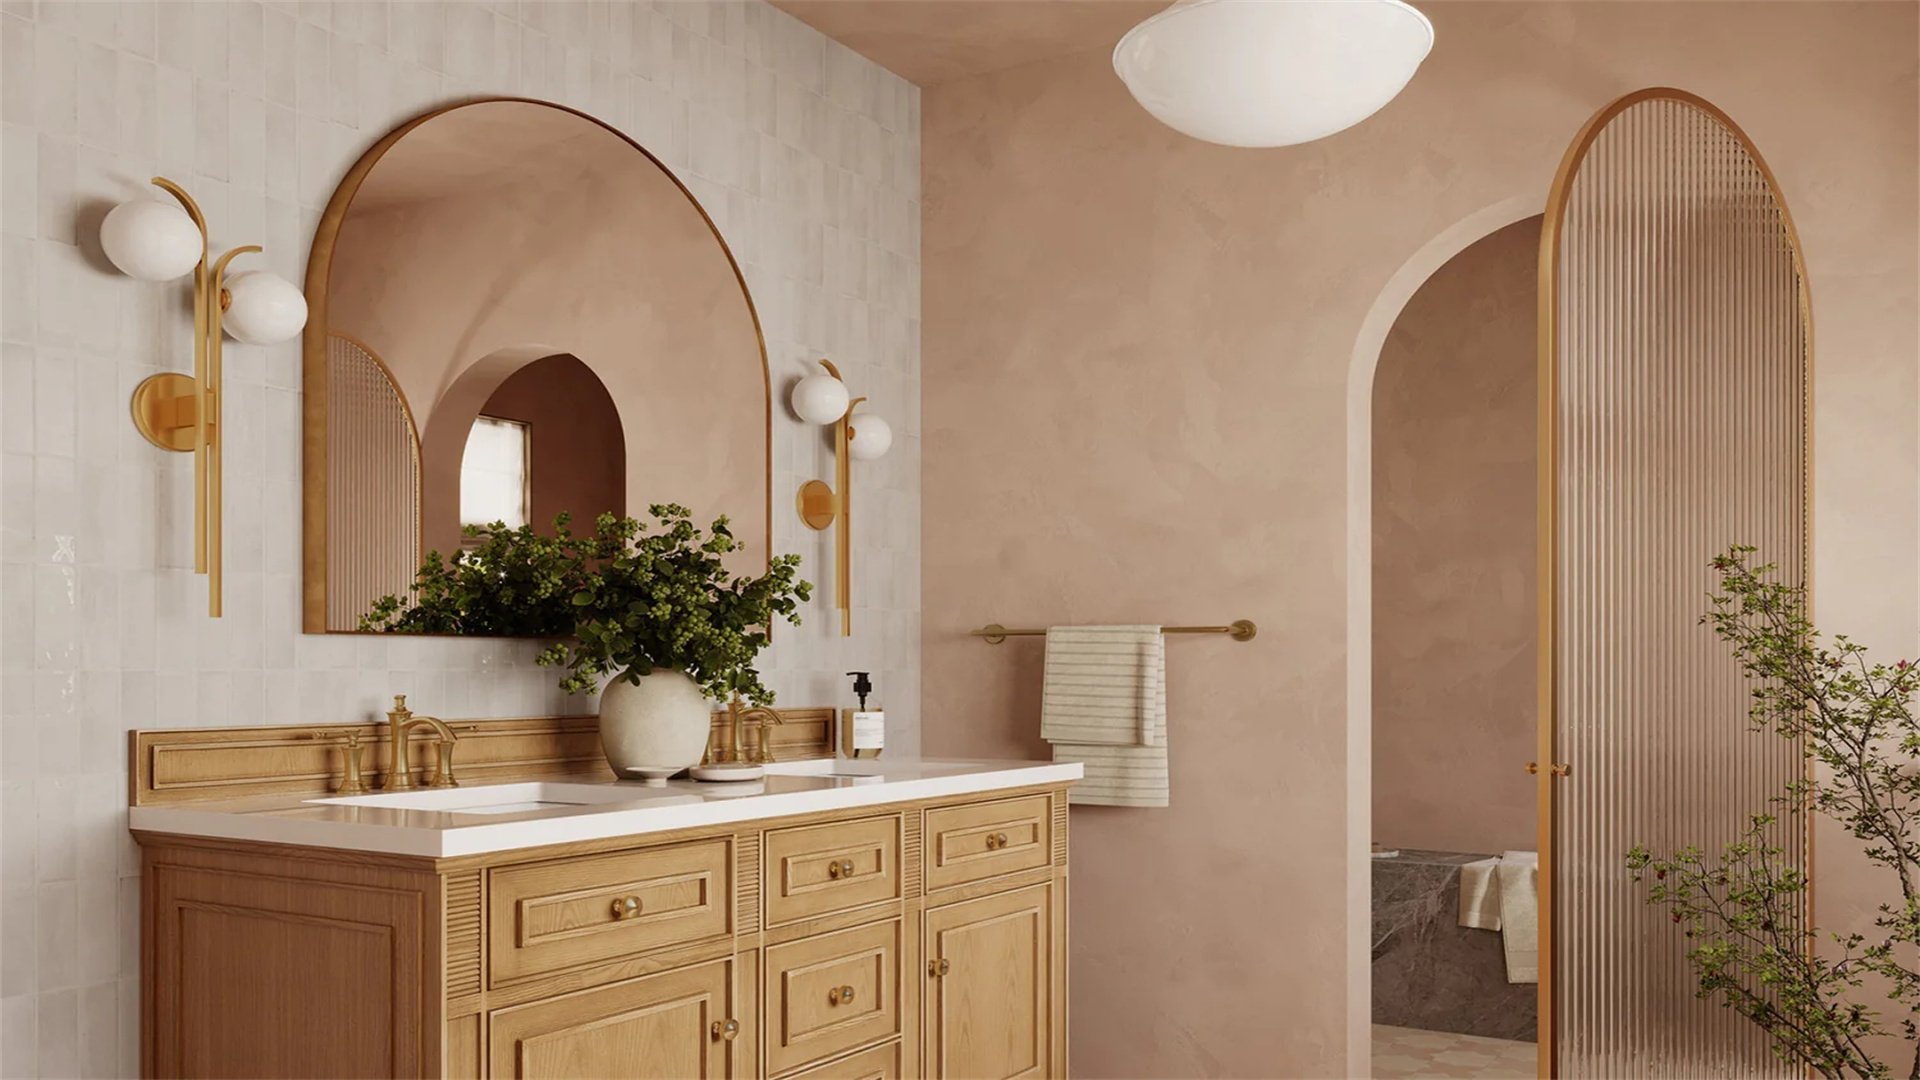
🎈 Method 1: Strategic Use of Mirrors and Reflective Surfaces
Mirrors are a classic tool in interior design for creating the illusion of depth and space. By reflecting light and views, they can make a room feel twice as large. This method involves placing mirrors strategically to amplify natural light and extend visual boundaries. It's a popular technique seen on DIY websites like Houzz and Apartment Therapy, where users share tips on incorporating mirrors without a high cost. The key is to choose mirrors that complement your decor and position them to maximize their effect. For instance, placing a large mirror opposite a window can bounce sunlight around the room, while a mirrored wall can create a seamless, expansive look. This approach is not only affordable but also versatile, as mirrors come in various shapes, sizes, and frames that can be DIY-crafted from thrift store finds or old materials.
Advantages
- Cost-Effective: Mirrors can be purchased inexpensively at discount stores, garage sales, or online marketplaces, and old frames can be repurposed with mirror panels.
- Easy Installation: Most mirrors are lightweight and can be hung with basic tools like nails, hooks, or adhesive strips, making it a quick DIY project.
- Enhances Lighting: By reflecting both natural and artificial light, mirrors brighten up dark corners, reducing the need for additional lighting fixtures and saving on energy costs.
- Versatile Decor: Mirrors add a decorative element to any room, serving as focal points or blending into the background, depending on the style.
Disadvantages
- Potential for Glare: If placed incorrectly, mirrors can create harsh glares from sunlight or lamps, causing discomfort or obscuring views.
- Maintenance: Mirrors require regular cleaning to avoid smudges and dust, which can diminish their reflective qualities and aesthetic appeal.
- Space Constraints: In very small rooms, large mirrors might overwhelm the space or make it feel cluttered if not balanced with other elements.
- Safety Concerns: Improper installation can lead to mirrors falling and breaking, posing a risk of injury, especially in homes with children or pets.
How to Implement
- Assess Your Space: Identify areas with limited light or tight corners, such as near windows, hallways, or behind furniture, where mirrors can have the most impact. Measure these spots to determine the appropriate mirror size.
- Choose the Right Mirror: Opt for frameless mirrors for a modern, seamless look, or select framed mirrors that match your decor. Consider DIY options like attaching mirror tiles to a wall or upcycling an old window frame with mirror inserts.
- Position Strategically: Hang a large mirror opposite a window to reflect outdoor views and light, or place multiple smaller mirrors in a gallery wall arrangement to create depth. Avoid positioning mirrors directly facing cluttered areas, as this can amplify the mess.
- Install Safely: Use sturdy wall anchors or adhesive strips designed for heavy items. For larger mirrors, enlist a helper to ensure level placement and prevent accidents. Test the stability before finalizing.
- Enhance with Lighting: Pair mirrors with DIY lighting projects, such as string lights or LED strips, to boost reflection. For example, place a mirror behind a table lamp to double the light output and create a cozy ambiance.
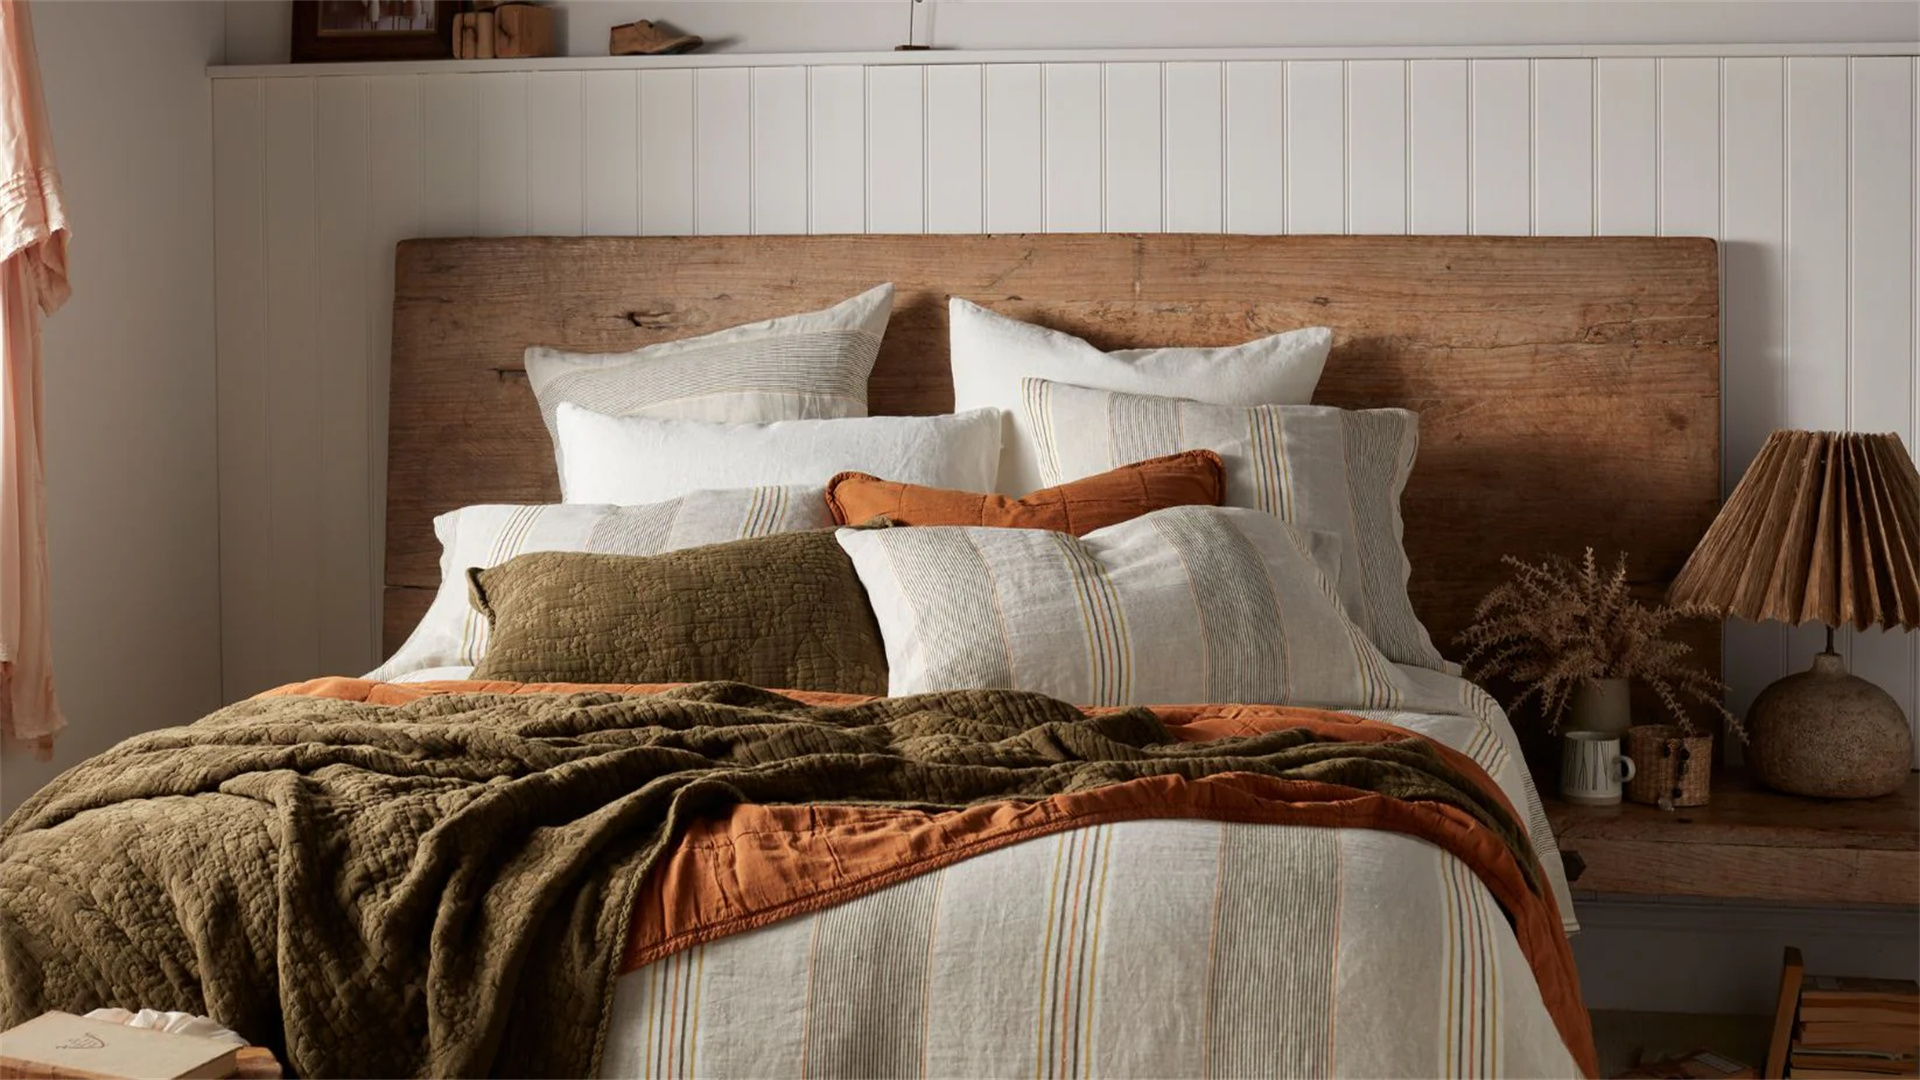
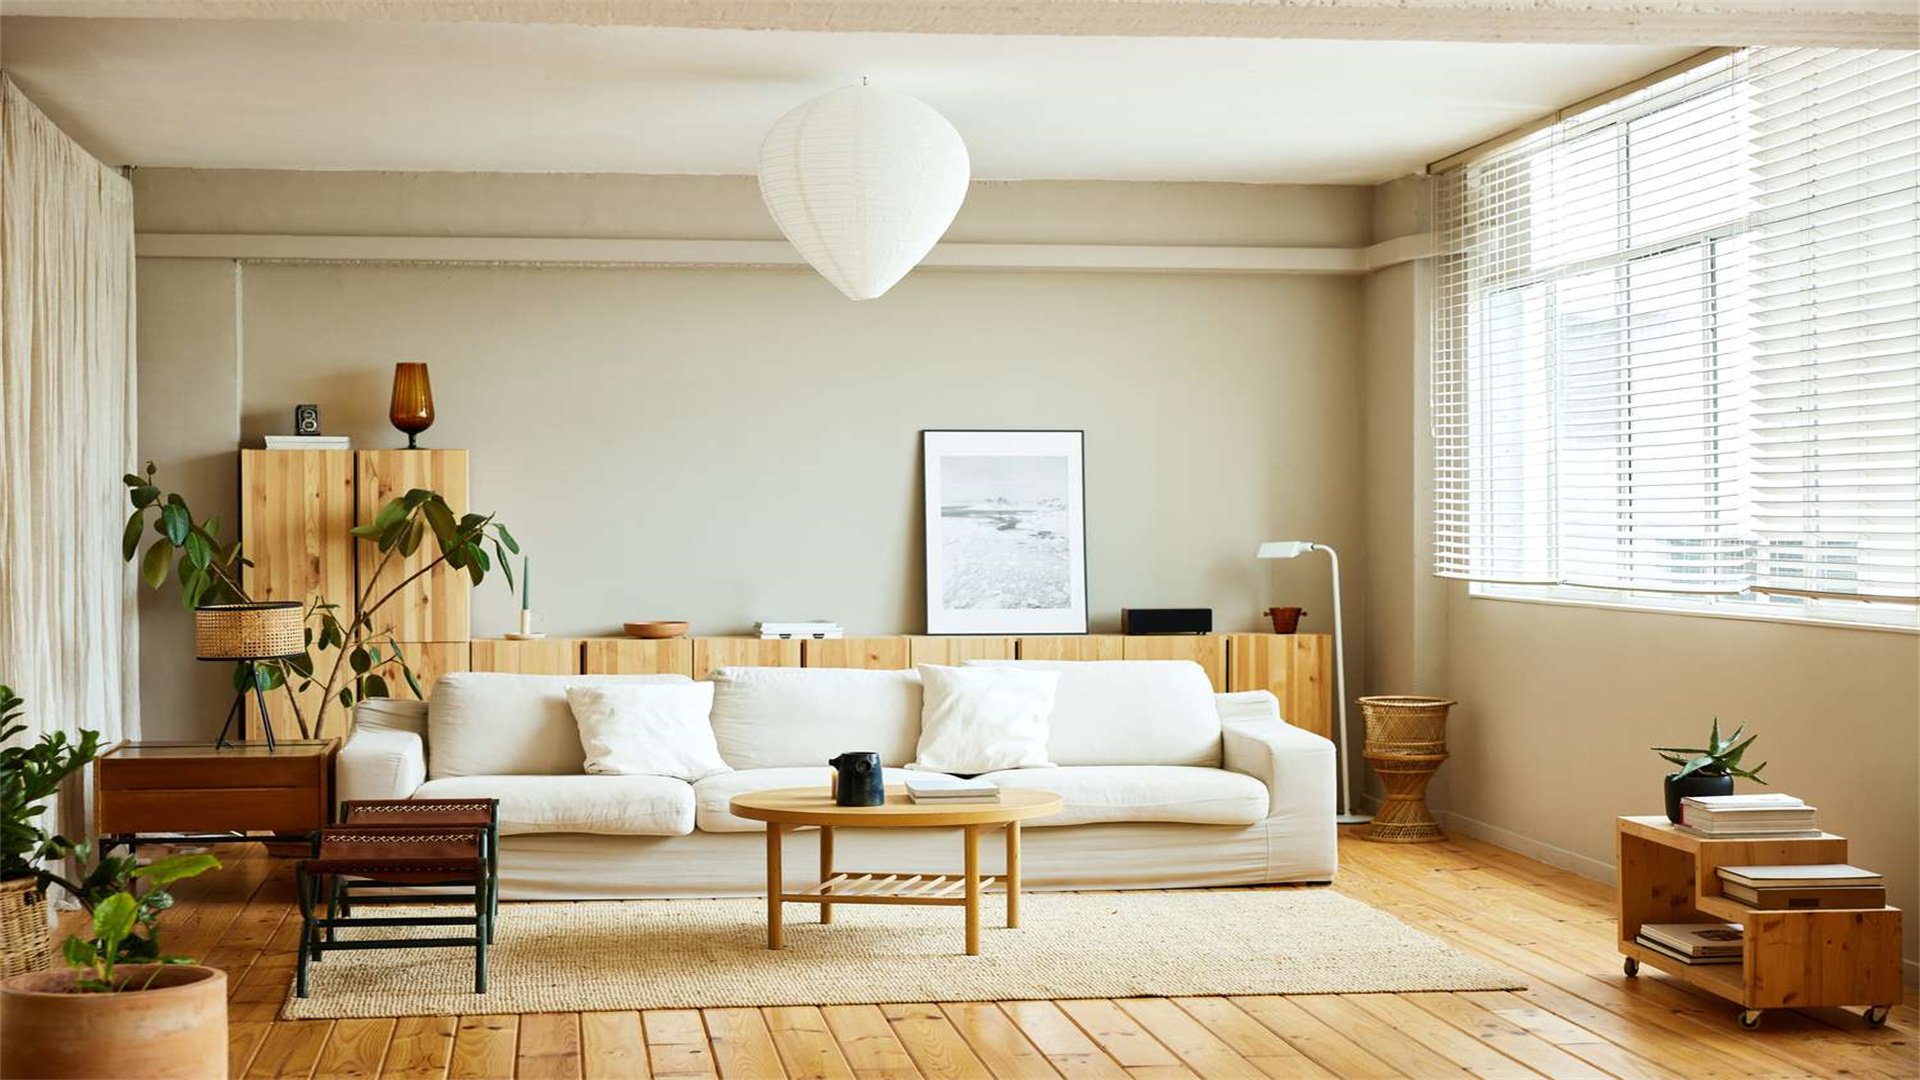
🎨 Method 2: Light Color Palettes and Paint Techniques
Color plays a crucial role in perceiving space: light hues tend to recede, making walls appear farther apart, while dark colors absorb light and can make a room feel confined. This method focuses on using light, neutral color schemes and DIY paint techniques to visually expand small living areas. Inspired by resources like Sherwin-Williams and Benjamin Moore blogs, which emphasize the psychological effects of color, this approach involves selecting shades like whites, pastels, and soft grays to create an airy, open feel. Additionally, techniques such as accent walls, stripes, or ombre effects can add dimension without overwhelming the space. By doing the painting yourself, you save on labor costs and can customize the look to suit your taste. This is a foundational DIY project that requires minimal tools but offers maximum impact, transforming a room's atmosphere with just a few coats of paint.
Advantages
- Affordable Materials: Paint is relatively inexpensive, especially when bought in bulk or during sales, and basic supplies like brushes, rollers, and tape are reusable for future projects.
- Quick Transformation: Painting a room can be completed over a weekend, providing an immediate visual upgrade that makes the space feel larger and brighter.
- Customizable: DIY painting allows for creative techniques, such as sponging, stenciling, or color blocking, which can enhance depth and interest without adding physical clutter.
- Improves Mood: Light colors are known to promote a sense of calm and openness, contributing to a more pleasant living environment.
Disadvantages
- Preparation Work: Proper painting requires thorough prep, including cleaning walls, patching holes, and taping edges, which can be time-consuming and tedious.
- Potential for Mistakes: Inexperienced DIYers might encounter issues like drips, uneven coverage, or color mismatches, leading to additional costs for corrections.
- Limited Durability: Paint can chip or fade over time, especially in high-traffic areas, necessitating touch-ups or repaints to maintain the effect.
- Allergies and Odors: Paint fumes may cause respiratory irritation, requiring ventilation and safety gear, which can be inconvenient during the project.
How to Implement
- Plan Your Color Scheme: Choose light, neutral colors like off-white, light beige, or soft blue for walls and ceilings. Consider using a monochromatic palette with varying shades to add subtle contrast and depth. Refer to color wheels or online tools to visualize combinations.
- Prepare the Room: Clear the space of furniture and cover floors with drop cloths. Clean walls to remove dust and grease, then fill any cracks with spackle and sand smooth. Apply painter's tape to edges, trim, and outlets for clean lines.
- Apply Primer: Use a stain-blocking primer to ensure even paint absorption and hide previous colors, especially if switching from dark to light shades. This step enhances durability and color accuracy.
- Paint with Techniques: For a standard look, use a roller for large areas and a brush for corners. To create visual enlargement, try DIY techniques like vertical stripes with slightly darker shades to draw the eye upward, or paint an accent wall in a light, contrasting color to define space without shrinking it. For example, paint one wall a pale gray to add depth while keeping others white.
- Finishing Touches: Allow paint to dry completely before removing tape and replacing furniture. Add complementary decor, such as light-colored curtains or rugs, to reinforce the airy feel. Consider using glossy or satin finishes to reflect more light.
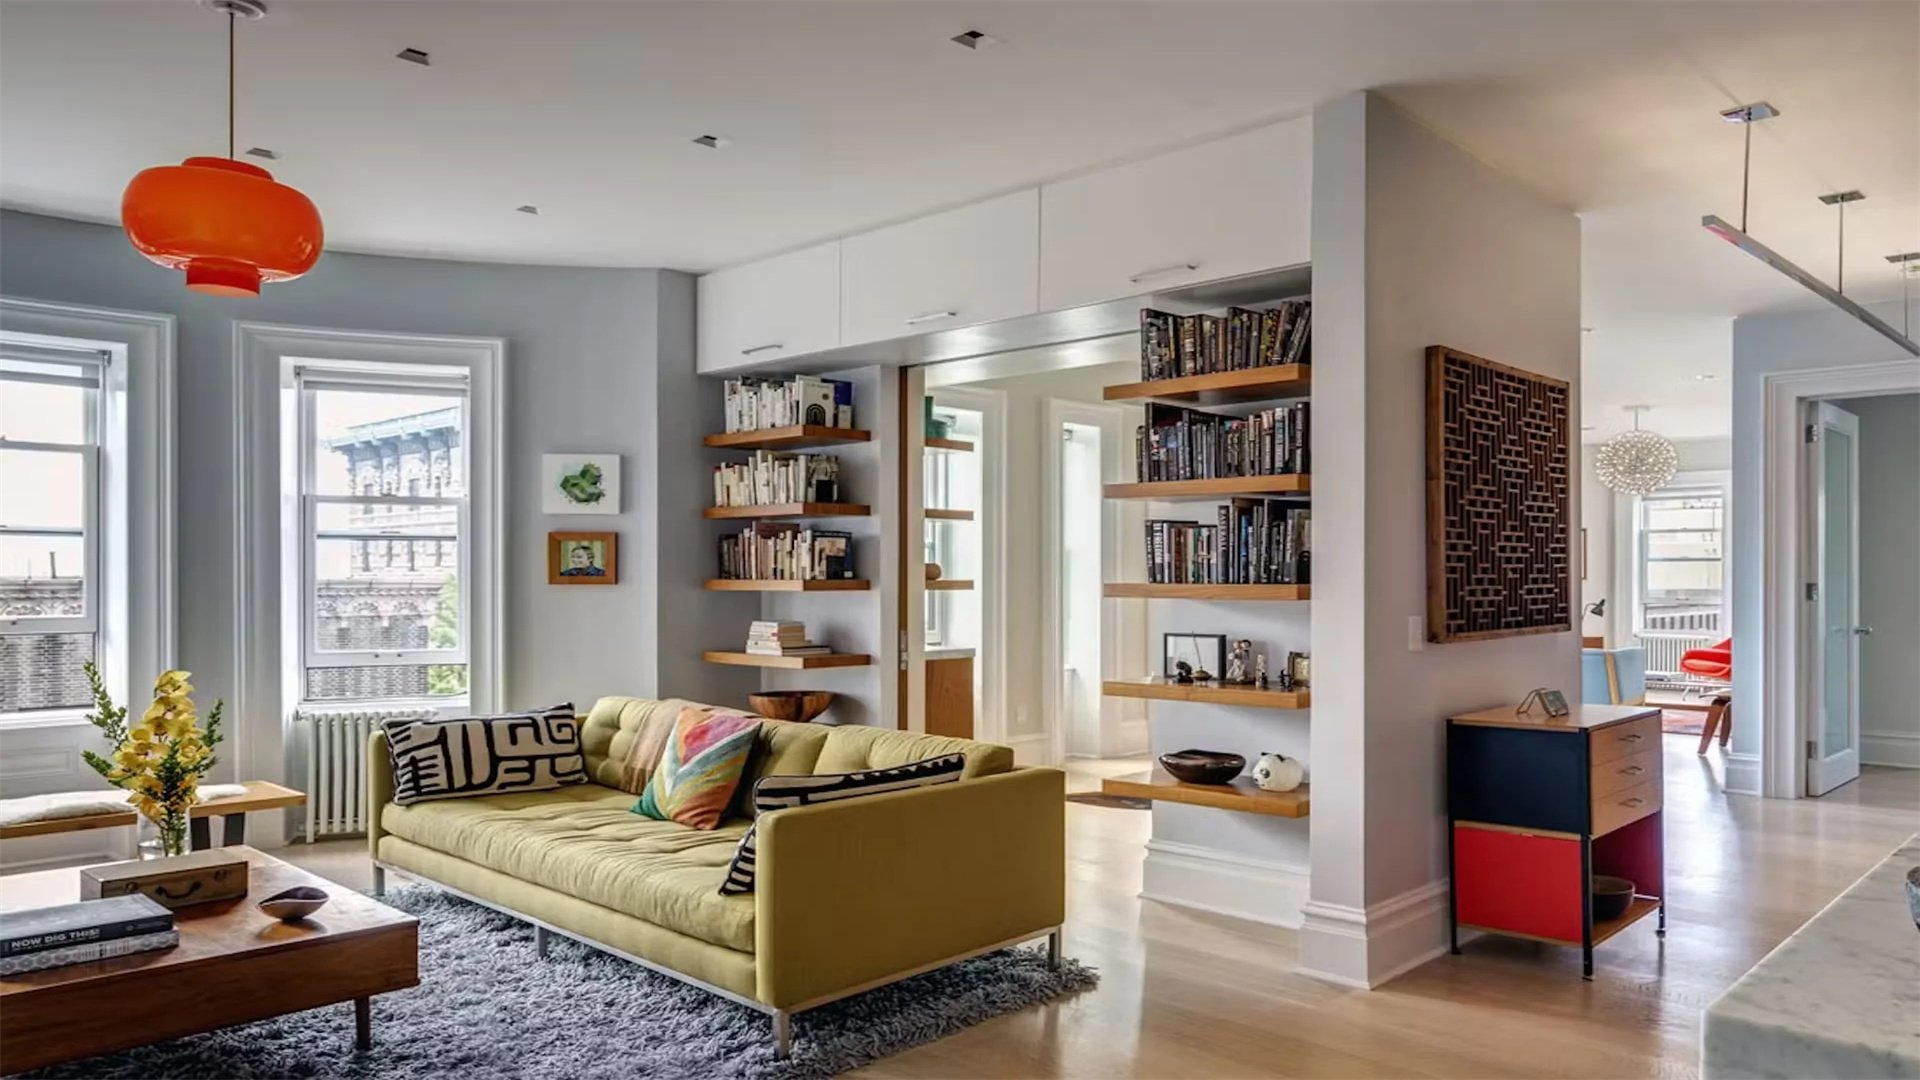
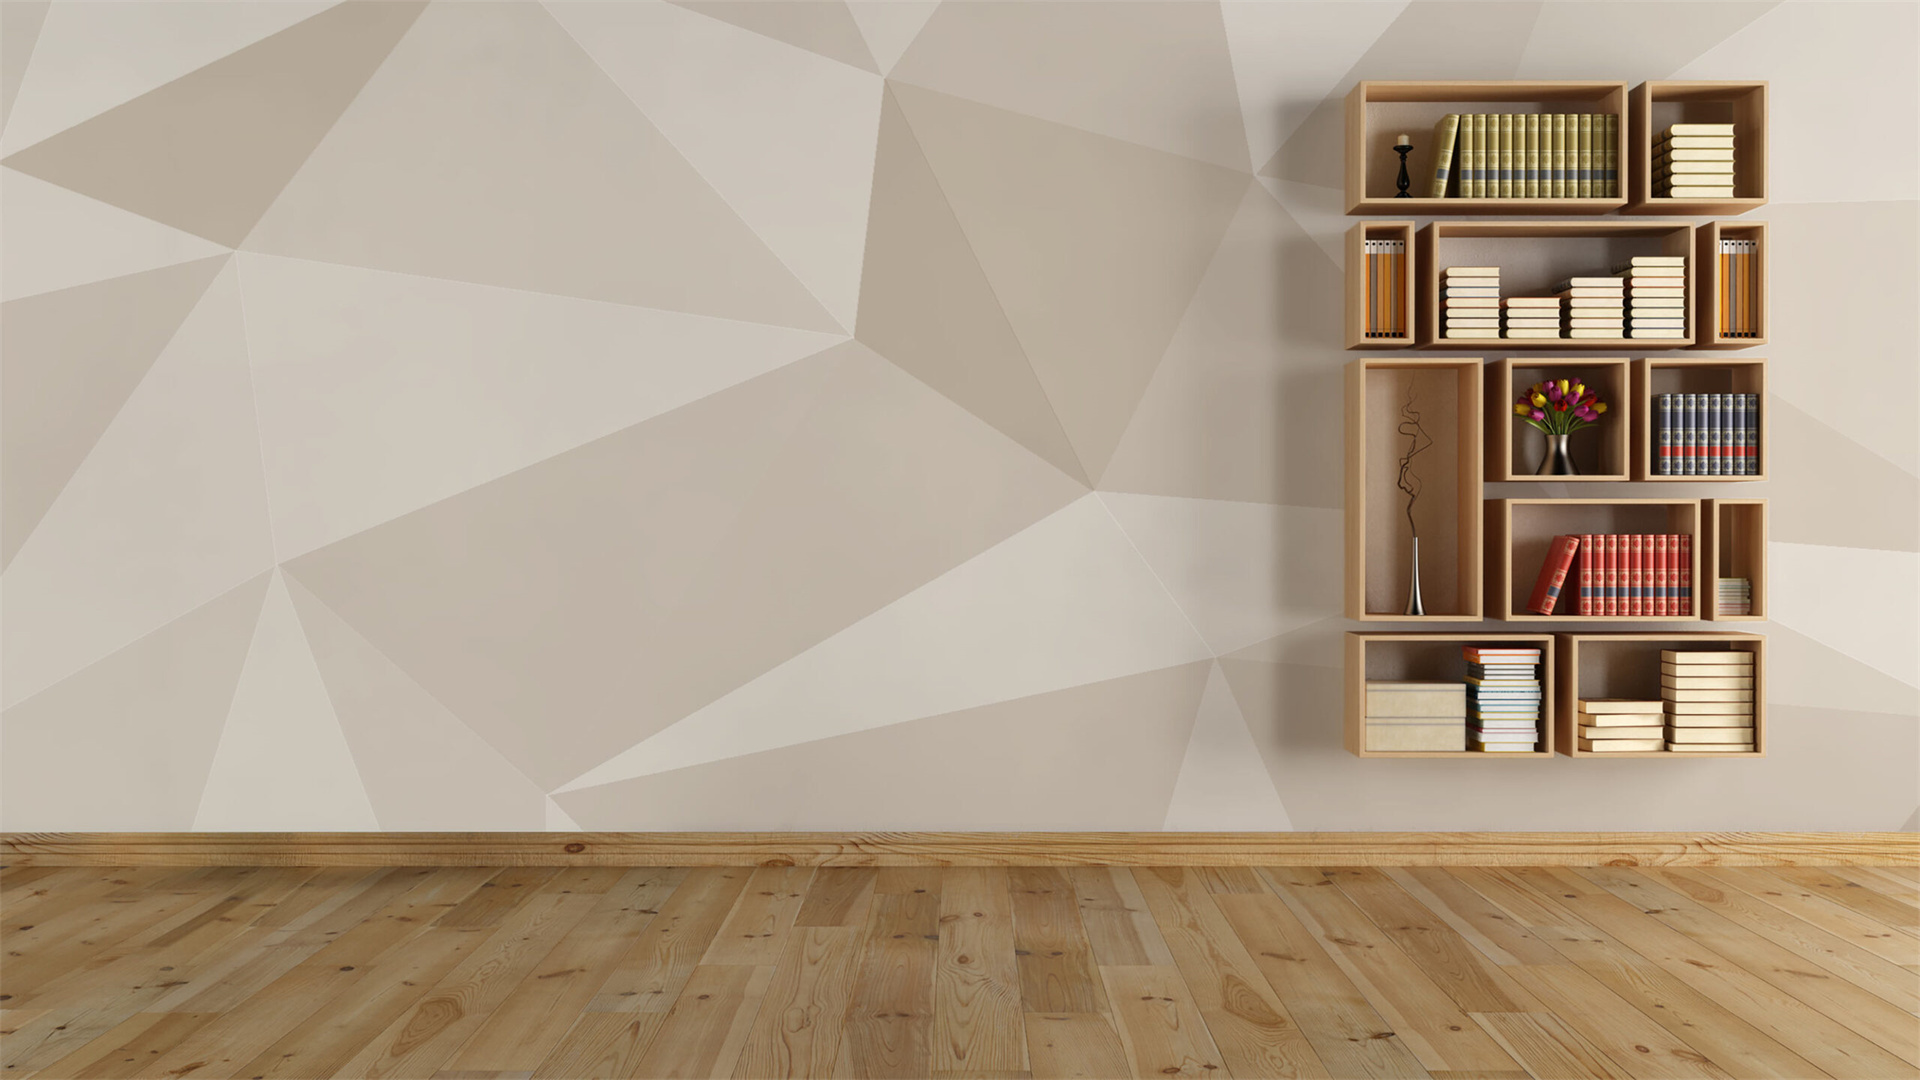
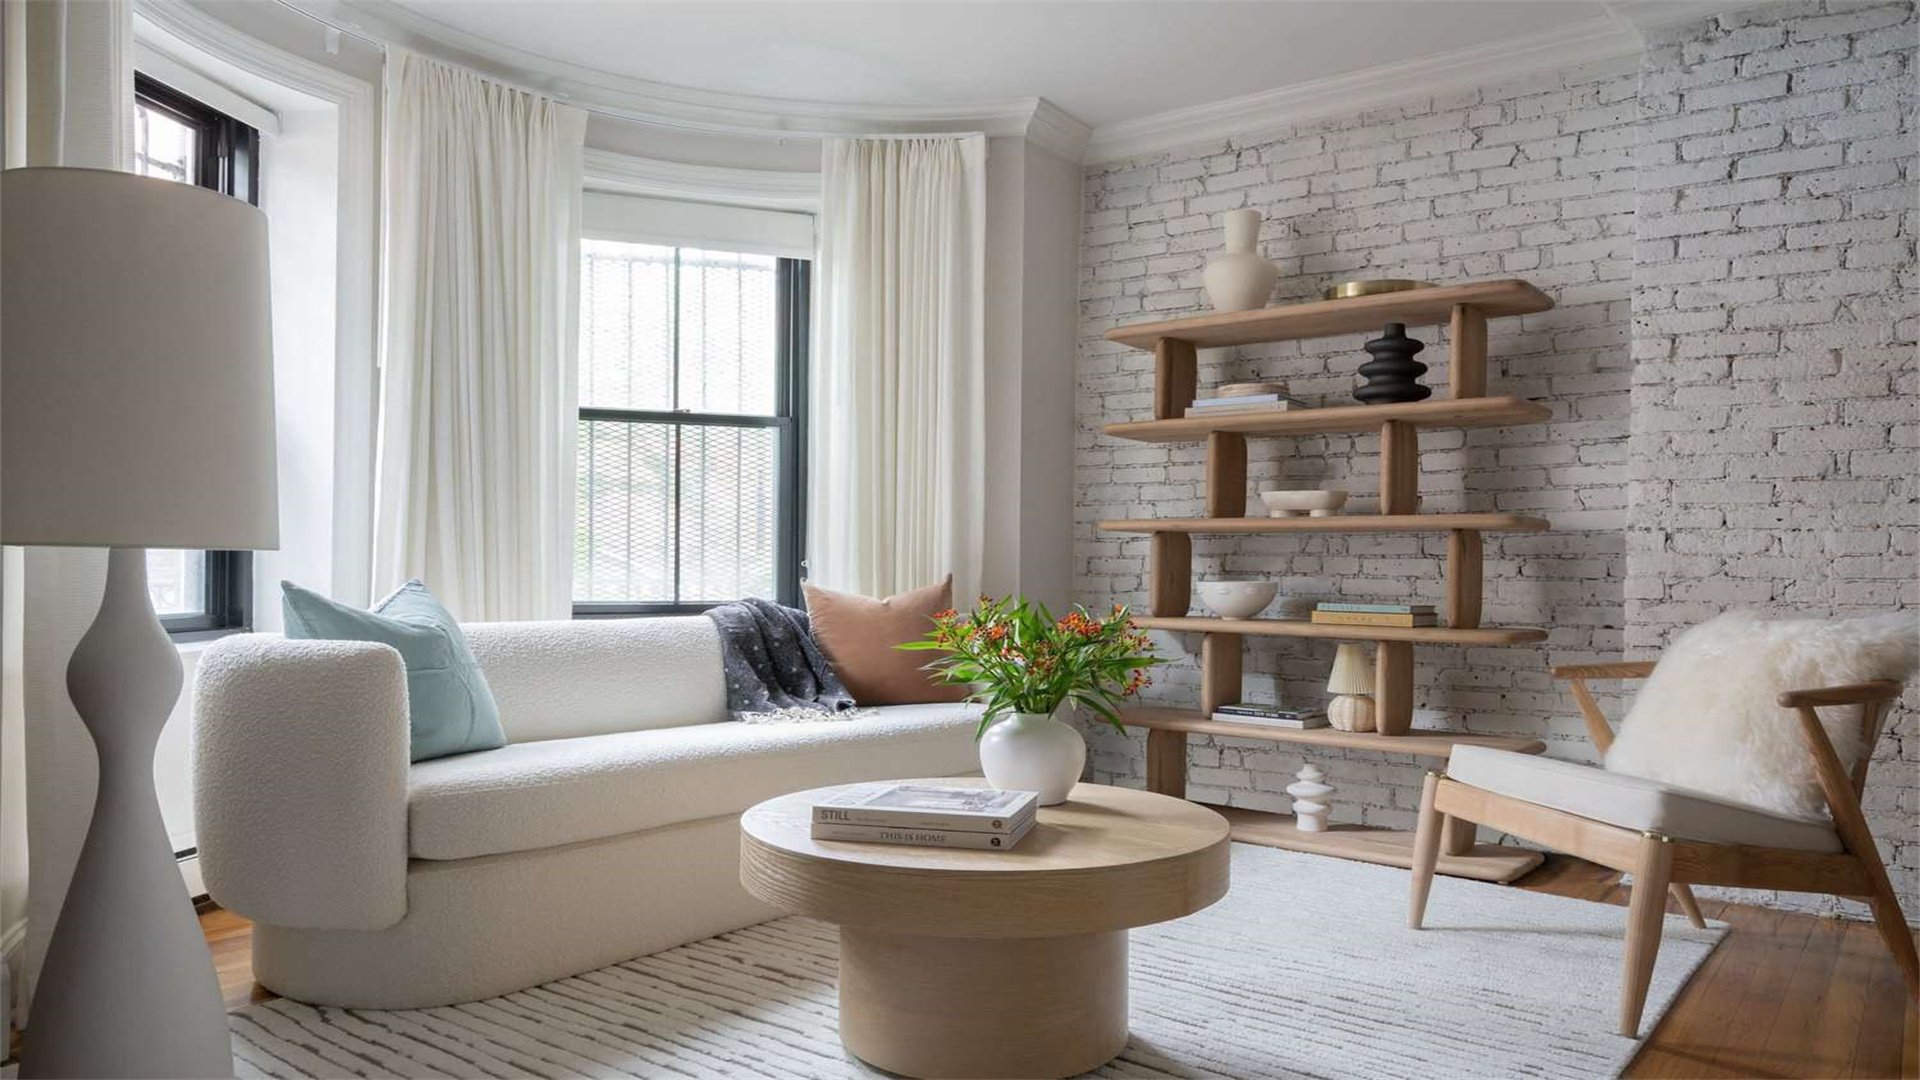
📦 Method 3: Maximizing Vertical Space with DIY Storage
In small living areas, floor space is precious, so looking upward is key. This method involves utilizing vertical space through DIY storage solutions that draw the eye up and keep clutter off the ground. Websites like IKEA Hackers and Pinterest showcase numerous projects for building shelves, racks, and organizers that make use of walls and ceilings. By installing floating shelves, hanging baskets, or tall bookcases, you can store items efficiently while creating the illusion of height and openness. This approach not only saves money compared to buying custom furniture but also allows for personalized designs that fit exact dimensions. It's a practical way to combine functionality with aesthetics, as vertical storage can display decor or hide essentials, contributing to a more organized and spacious feel.
Advantages
- Space-Saving: Vertical storage frees up floor area, making rooms feel less crowded and more navigable, which is crucial in small apartments or studios.
- Customizable Designs: DIY projects enable you to build shelves or racks tailored to your space, using materials like reclaimed wood, pipes, or brackets that are often cheaper than pre-made options.
- Multi-Functional: Vertical storage can serve multiple purposes, such as holding books, plants, or kitchen supplies, while also acting as a decorative element that adds visual interest.
- Encourages Organization: By providing designated spots for belongings, this method helps reduce clutter, which is essential for maintaining a sense of openness.
Disadvantages
- Installation Challenges: Mounting items on walls requires drilling and securing to studs, which can be difficult for renters or those with limited DIY skills, and may damage surfaces if done incorrectly.
- Weight Limitations: DIY shelves might not support heavy items unless properly reinforced, leading to potential collapses or safety hazards if overloaded.
- Aesthetic Risks: Poorly designed or uneven installations can look messy and detract from the room's appeal, counteracting the goal of visual enlargement.
- Time Investment: Building and installing custom storage can be time-consuming, especially for complex projects like ceiling-mounted racks or ladder shelves.
How to Implement
- Assess Vertical Opportunities: Look at empty walls, corners, and above doors or windows where storage can be added. Measure these areas to plan projects that fit seamlessly without obstructing pathways or light sources.
- Choose DIY Projects: Select simple projects based on your skill level. For beginners, floating shelves made from wooden boards and brackets are easy; for more advanced DIYers, consider a floor-to-ceiling bookcase or a hanging pot rack. Gather materials like lumber, screws, anchors, and tools such as a drill and level.
- Build and Install: For floating shelves, cut wood to size, sand edges, and attach brackets to the wall studs before securing the shelf. Ensure everything is level using a spirit level. For taller structures, like a vertical garden frame, assemble it on the ground first, then mount it securely with heavy-duty anchors.
- Organize Thoughtfully: Arrange items on vertical storage to maintain a clean look. Place heavier items lower for stability and use baskets or bins to hide clutter. Incorporate decorative pieces like plants or art to draw the eye upward and create a sense of height.
- Maintain and Adapt: Regularly dust and reorganize storage to prevent it from becoming overcrowded. As needs change, adjust or expand DIY projects, such as adding more shelves or repurposing racks for new uses.
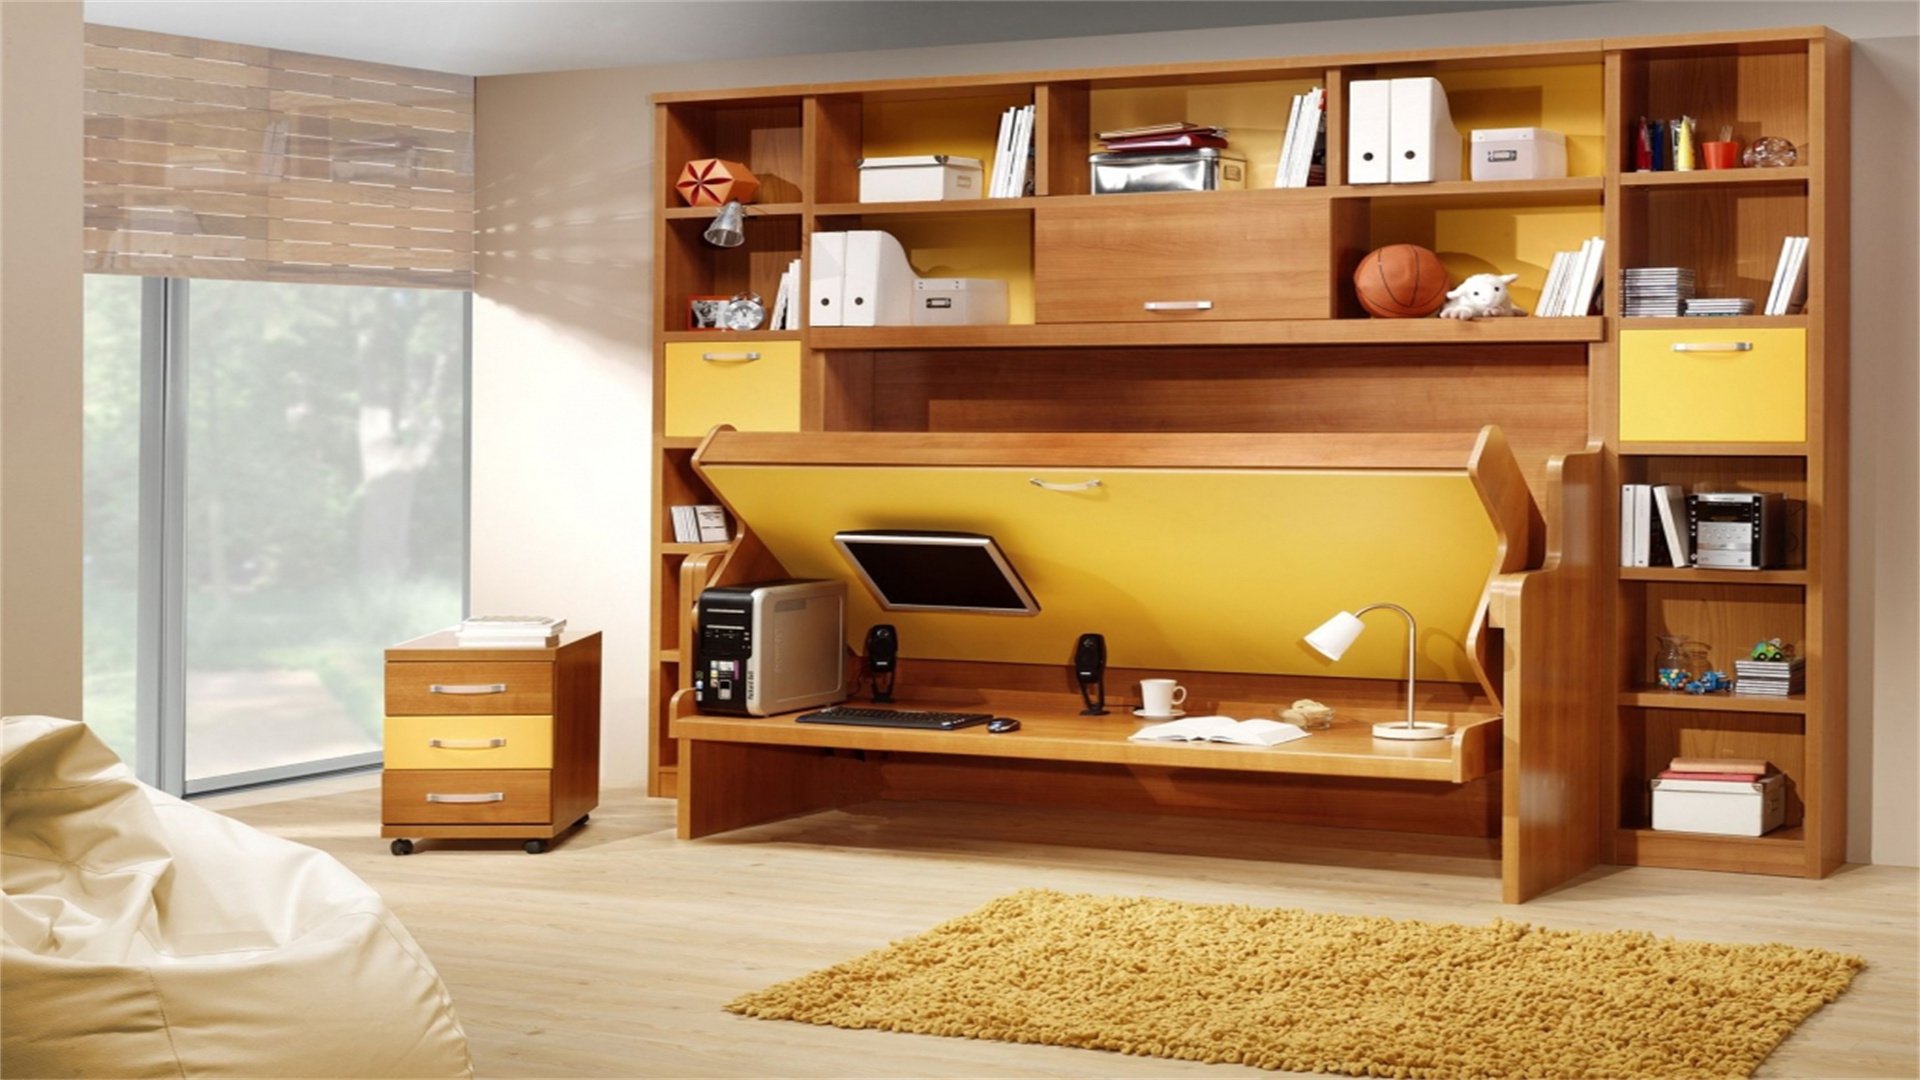
🛋️ Method 4: Multipurpose and Foldable Furniture
Furniture that serves multiple functions or can be folded away is a game-changer for small living areas. This method involves DIY projects to create or modify furniture that maximizes utility without occupying constant space. Inspired by tiny house movements and websites like DIY Network, it includes ideas like sofa beds, nesting tables, and wall-mounted desks. By building these pieces yourself, you save money and customize them to fit your exact dimensions and style. For example, a DIY ottoman with storage inside can provide seating, a footrest, and hidden storage, while a fold-down table can serve as a dining area or workspace when needed and tuck away when not in use. This approach reduces visual clutter and enhances flexibility, making rooms feel larger and more adaptable to daily activities.
Advantages
- Space Efficiency: Multipurpose furniture consolidates functions, reducing the number of pieces needed and freeing up floor space, which directly contributes to a more open visual feel.
- Cost Savings: Building furniture from scratch or repurposing old items is often cheaper than buying specialized small-space furniture, and materials can be sourced from thrift stores or scrap yards.
- Customization: DIY allows for tailoring furniture to specific needs, such as a bench that doubles as storage or a bookshelf that integrates a desk, ensuring a perfect fit for your layout.
- Enhanced Flexibility: Foldable or movable furniture enables quick reconfiguration of a room for different purposes, like entertaining or working, without permanent space dedication.
Disadvantages
- Skill Requirements: Some projects, like building a Murphy bed or convertible sofa, require advanced carpentry skills and tools, which might be daunting for novice DIYers.
- Durability Concerns: DIY furniture may not be as sturdy as commercially made pieces, especially if constructed with low-quality materials, leading to wear and tear over time.
- Time-Consuming: Designing and building custom furniture can take weeks, depending on complexity, delaying the visual benefits of a larger-looking space.
- Aesthetic Limitations: Without professional finishings, DIY pieces might look homemade or mismatched, potentially clashing with the room's decor if not carefully planned.
How to Implement
- Identify Needs: List the functions your living area must serve, such as sleeping, dining, or storage. Prioritize pieces that can combine roles, like a bed with drawers underneath or a coffee table that lifts into a desk.
- Plan DIY Projects: Research designs online or in DIY books. For a simple start, consider a storage ottoman made from a wooden crate and cushion, or a wall-mounted drop-leaf table using hinges and a plank. Sketch plans with measurements and gather materials like plywood, screws, and hardware.
- Construct with Care: Follow step-by-step instructions, using tools like saws and drills safely. For foldable items, ensure hinges and locks are secure to prevent accidents. Sand and paint or stain pieces to match your decor, adding protective finishes for durability.
- Incorporate into Space: Place multipurpose furniture strategically to optimize flow. For instance, position a DIY sofa bed against a wall to open up the center of the room, or install a fold-down desk in a corner to minimize obstruction when folded.
- Test and Adjust: Use the furniture regularly to ensure it functions well. Make adjustments as needed, such as adding casters for mobility or reinforcing joints for stability, to maintain both practicality and the illusion of space.
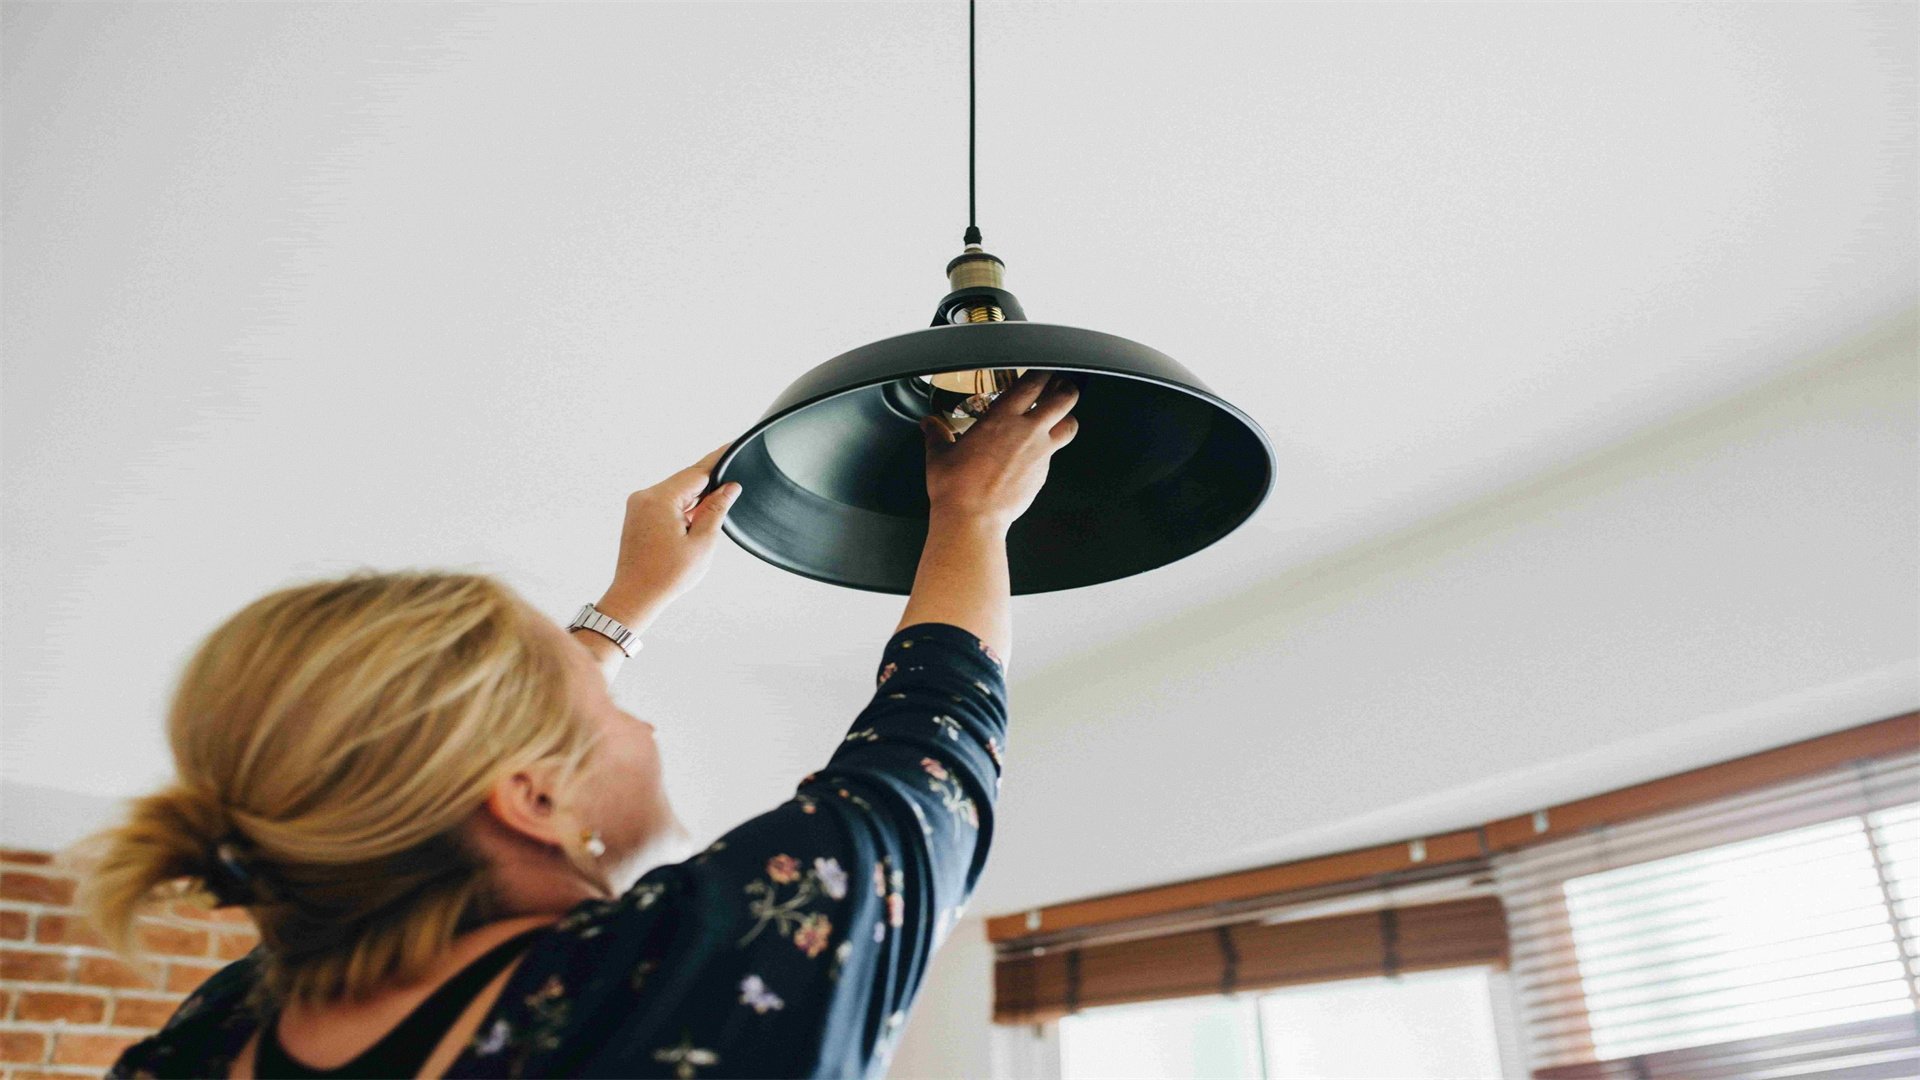
💡 Method 5: Strategic Lighting and DIY Fixtures
Lighting is a powerful tool for altering perception: well-lit spaces feel more open and inviting, while poor lighting can make even large rooms seem cavernous. This method focuses on DIY lighting solutions that enhance brightness and create layers of light to visually enlarge small living areas. Drawing from resources like Lighting.com and DIY blogs, it involves using multiple light sources, such as floor lamps, sconces, and string lights, to eliminate shadows and draw attention to key areas. By making your own fixtures, like pendant lights from mason jars or LED strips under shelves, you can achieve a customized look at a fraction of the cost. This approach not only improves functionality but also adds decorative elements that elevate the room's aesthetic, making it feel more expansive through illuminated focal points and reflected light.
Advantages
- Affordable Creativity: DIY lighting projects often use inexpensive materials like paper lanterns, ropes, or recycled items, allowing for unique designs without high expenses.
- Enhanced Ambiance: Layered lighting—combining ambient, task, and accent lights—creates depth and dimension, making rooms feel larger by highlighting different zones.
- Energy Efficiency: By incorporating LED bulbs or solar-powered lights into DIY fixtures, you can reduce energy consumption and save on utility bills while maintaining brightness.
- Easy Installation: Many DIY lighting projects, such as plug-in sconces or battery-operated lights, require no wiring, making them accessible for renters or those with limited electrical skills.
Disadvantages
- Safety Risks: Working with electricity can be hazardous if not done properly; DIY projects involving wiring should be approached with caution or professional guidance to avoid shocks or fires.
- Inconsistent Lighting: Poorly planned DIY fixtures might produce uneven light distribution, creating dark spots that make a room feel smaller or cluttered.
- Maintenance Needs: Homemade lights may require frequent adjustments or repairs, especially if made from delicate materials, adding to long-term effort.
- Aesthetic Challenges: Without a cohesive design, DIY lighting can look mismatched or amateurish, detracting from the room's overall spacious feel.
How to Implement
- Assess Lighting Needs: Evaluate your living area for dark corners, insufficient task lighting, or areas that feel closed off. Plan to use a mix of overhead, wall-mounted, and portable lights to cover all zones.
- Choose DIY Projects: Start with simple ideas, such as wrapping string lights around a frame for a DIY art piece or converting a tin can into a pendant light. For more advanced projects, consider installing LED strips under cabinets or building a floor lamp from plumbing pipes. Gather materials like bulbs, sockets, cords, and decorative elements.
- Build Safely: Follow tutorials carefully, and for electrical projects, ensure all connections are insulated and tested before use. Use low-voltage options like battery-operated lights for safety. For example, to make a mason jar pendant light, drill a hole in the lid, insert a socket kit, and secure it with a cord.
- Install for Maximum Impact: Place lights to accentuate vertical space—for instance, install sconces high on walls to draw the eye upward, or use floor lamps in corners to bounce light off ceilings. Avoid overly bright or harsh lights that create glare; instead, opt for warm, diffused lighting that spreads evenly.
- Layer and Adjust: Combine different light sources: use ambient lighting from overhead fixtures, task lighting for reading nooks, and accent lighting to highlight artwork or shelves. Dimmer switches or smart bulbs can add flexibility, allowing you to adjust brightness based on time of day and mood, enhancing the sense of space.
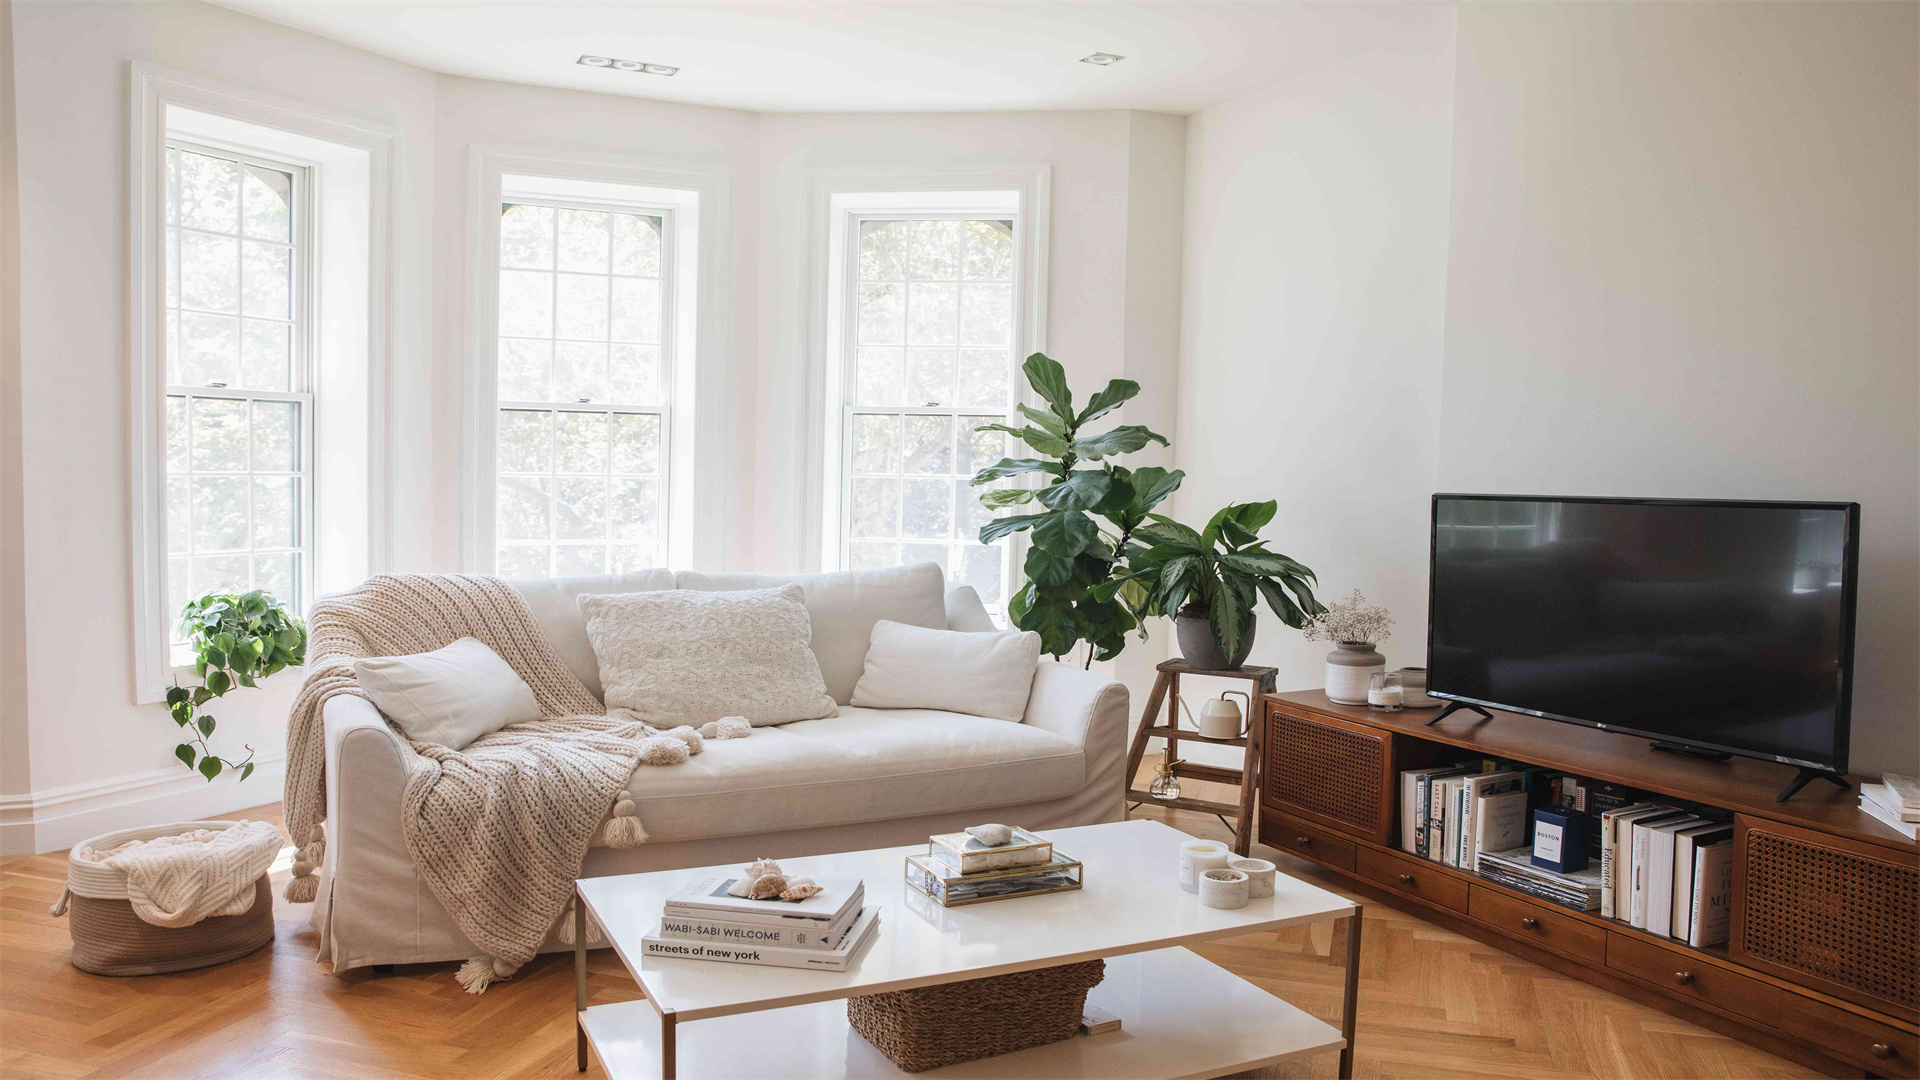
🧹 Method 6: Minimalist Decor and Decluttering DIYs
Clutter is the enemy of small spaces, as it visually shrinks a room by creating visual noise and blocking sightlines. This method emphasizes a minimalist approach through DIY decluttering projects and decor choices that promote simplicity and order. Inspired by movements like KonMari and websites like The Spruce, it involves creating storage systems, purging unnecessary items, and selecting decor that enhances openness. By DIYing organizational tools, such as drawer dividers from cardboard or wall hooks from branches, you can maintain tidiness without spending much. Additionally, opting for fewer, larger decor pieces—like a single statement art instead of multiple small frames—can make walls feel more expansive. This strategy not only clears physical space but also fosters a calming environment that feels larger and more intentional.
Advantages
- Cost-Free or Low-Cost: Decluttering often involves sorting and donating items, which costs nothing, and DIY organizers can be made from recycled materials, minimizing expenses.
- Immediate Visual Impact: Removing clutter instantly opens up floor and surface areas, making a room appear larger and more breathable, with clear lines and unobstructed views.
- Promotes Mindfulness: A minimalist approach encourages thoughtful consumption and organization, leading to a sustainable lifestyle that reduces future clutter accumulation.
- Customizable Systems: DIY storage solutions can be tailored to specific items, such as custom bins for electronics or racks for shoes, ensuring everything has a place and reducing visual chaos.
Disadvantages
- Emotional Attachment: Decluttering can be challenging if you're attached to belongings, potentially causing stress or hesitation in letting go of items that contribute to clutter.
- Time-Intensive: Thorough decluttering requires sorting through all possessions, which can take days or weeks, delaying the visual benefits of a larger-looking space.
- Risk of Over-Minimalism: Stripping a room of too many personal touches might make it feel sterile or unwelcoming, counteracting the goal of a cozy, enlarged living area.
- Maintenance Demands: Keeping a minimalist space requires ongoing effort to avoid recluttering, which might be difficult for busy households or those with accumulating items.
How to Implement
- Start with a Decluttering Plan: Set aside time to go through each area of your living space. Use the "keep, donate, discard" method to sort items, focusing on removing duplicates, unused goods, and anything that doesn't serve a purpose or bring joy. Refer to minimalist guidelines for inspiration.
- DIY Organizational Tools: Create simple storage solutions to maintain order. For example, cut cardboard boxes into drawer organizers for kitchen utensils, or repurpose mason jars as holders for office supplies. Use natural materials like wooden crates for rustic shelves that add decor while hiding clutter.
- Curate Decor Mindfully: Choose a few large-scale decor pieces, such as a big mirror or a single plant, to anchor the room without overwhelming it. DIY decor like a large canvas painted in light colors can serve as a focal point. Avoid small, scattered items that create visual fragmentation.
- Implement Storage Systems: Designate specific spots for everything, using DIY labels or color-coded bins to make organization intuitive. Install floating shelves or hooks to keep items off floors and surfaces, ensuring pathways remain clear.
- Maintain Regularly: Schedule weekly tidying sessions to prevent clutter buildup. Adapt DIY systems as needs change, such as adding more hooks for new items or repurposing organizers for different uses, to sustain the minimalist aesthetic and spacious feel.
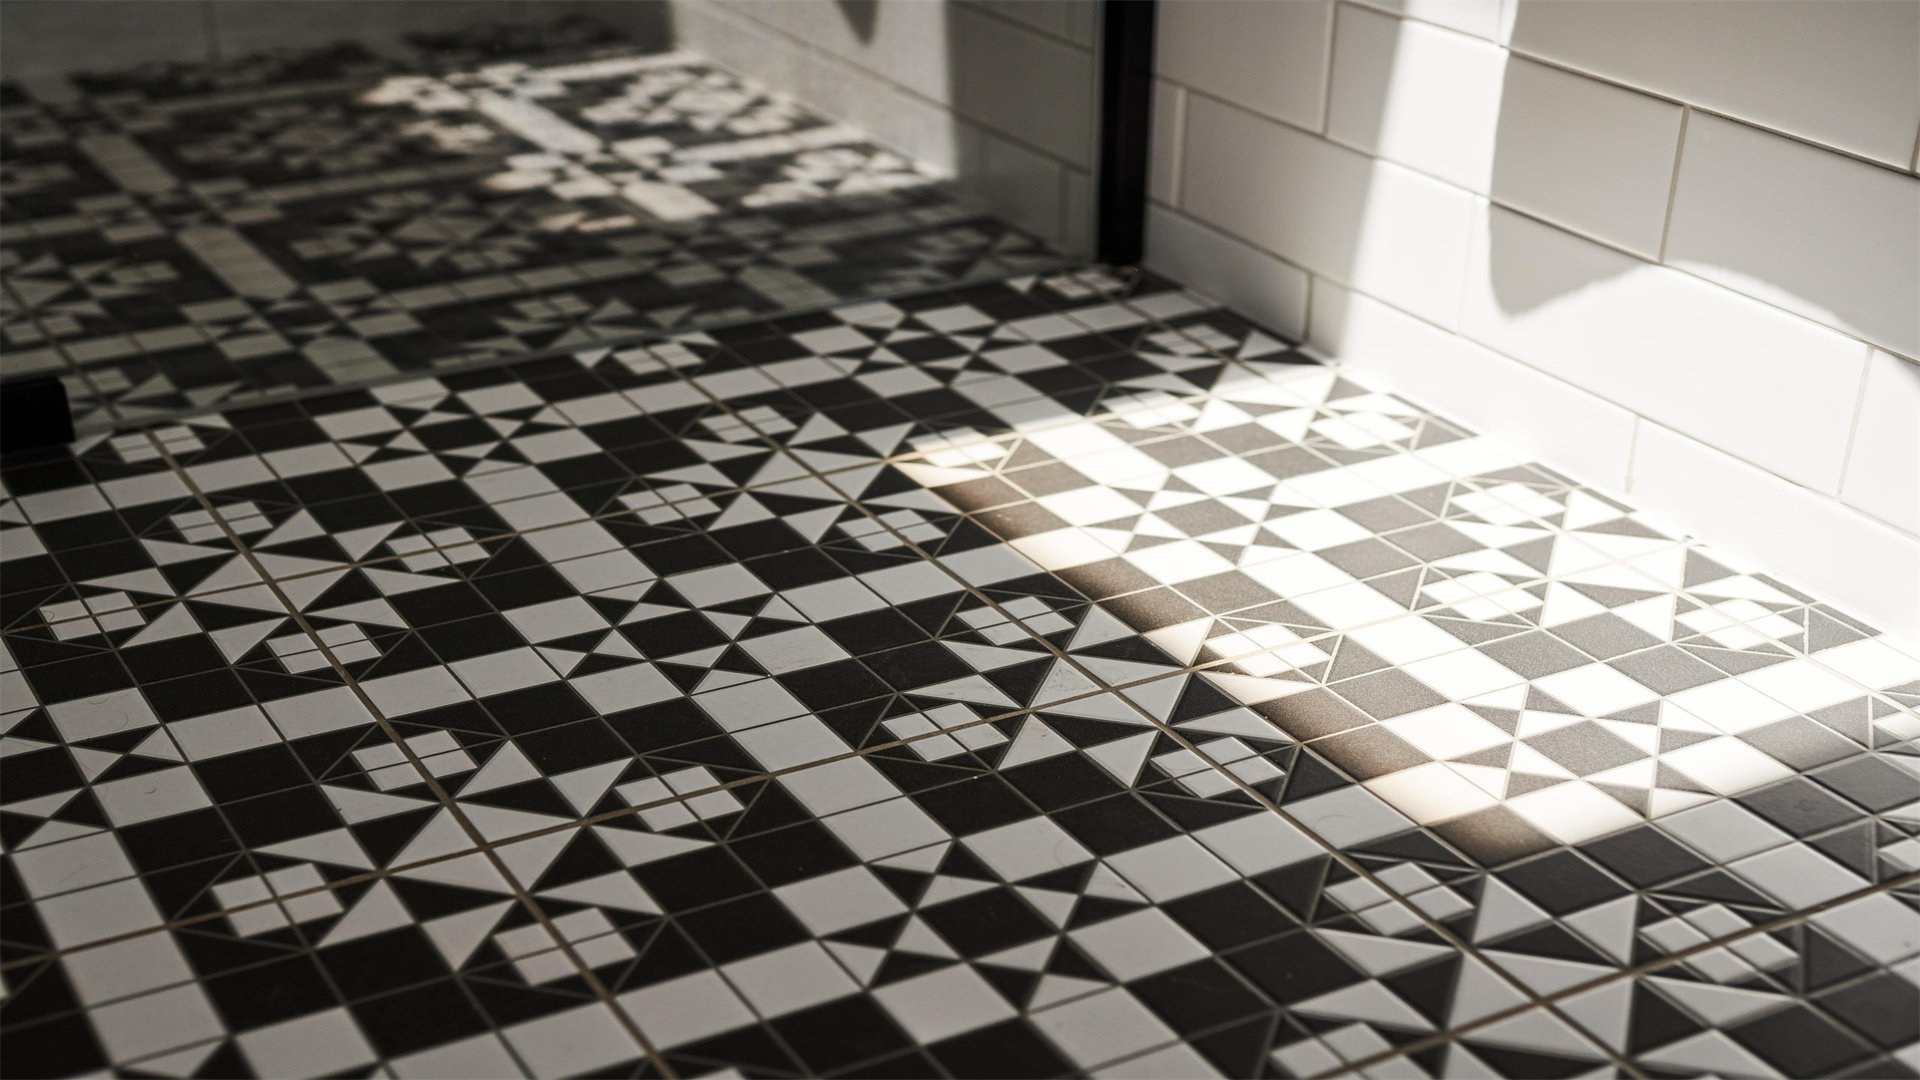
🎭 Method 7: Using Stripes, Patterns, and Optical Illusions
Visual tricks through patterns and lines can dramatically alter spatial perception. This method involves DIY projects that incorporate stripes, geometric patterns, or optical illusions to stretch the appearance of small living areas. Based on design principles from sites like Architectural Digest, it includes painting stripes on walls, laying diagonal floor tiles, or adding patterned textiles that guide the eye in a way that expands space. For instance, vertical stripes on walls can make ceilings seem higher, while horizontal stripes can widen a narrow room. By doing these projects yourself, you can experiment with colors and scales to achieve the desired effect without hiring a professional. This approach is creative and low-cost, relying on paint, tape, or fabric to transform surfaces and create dynamic, space-enhancing visuals.
Advantages
- Low Material Costs: Stripes and patterns can be achieved with basic supplies like painter's tape, stencils, or fabric paint, which are affordable and widely available.
- High Visual Impact: Even small applications, such as a striped accent wall or a patterned rug, can create significant optical illusions that make rooms feel larger and more dynamic.
- Customizable Designs: DIY allows for personalization—you can choose stripe widths, pattern densities, and colors that complement your decor and exact spatial needs.
- Reversible Changes: Many pattern projects, like removable wallpaper or painted stripes, can be easily updated or removed if you change your mind, offering flexibility without permanent alteration.
Disadvantages
- Precision Required: Creating straight stripes or symmetrical patterns demands careful measuring and taping, which can be tricky for beginners and lead to messy results if rushed.
- Risk of Overwhelm: Overusing patterns or choosing busy designs might make a room feel chaotic and smaller, contradicting the goal of visual enlargement.
- Time-Consuming Application: Projects like hand-painting patterns or laying tile with optical designs can take longer than solid color applications, requiring patience and attention to detail.
- Limited to Surfaces: This method primarily affects walls, floors, or textiles, so it may not address spatial issues related to furniture or clutter, needing complementary approaches.
How to Implement
- Plan the Illusion: Decide on the desired effect—to heighten, widen, or deepen the space. For higher ceilings, use vertical stripes; for wider rooms, horizontal stripes; for depth, consider a chevron pattern on floors. Sketch layouts and choose colors that contrast subtly, like light and dark shades of the same hue.
- Prepare Surfaces: Clean and prime walls or floors as needed. For paint projects, measure and mark lines using a level and pencil. Apply painter's tape along the marks, pressing edges firmly to prevent bleed-through. For fabric projects, wash and iron textiles before applying patterns.
- Execute with Care: For painted stripes, apply paint between tape lines, using rollers for even coverage. Remove tape while paint is slightly tacky for clean edges. For DIY patterned rugs, use stencils and fabric paint on plain rugs, following tutorials for best results. Consider alternatives like removable wallpaper strips for renters.
- Incorporate in Layers: Combine patterns with other methods—for example, pair a striped wall with mirrors to amplify the effect. Use patterned curtains to draw the eye upward or a diagonal tile layout on a small floor to create movement and expansion.
- Evaluate and Adjust: Step back to assess the visual impact. If patterns feel too bold, soften them with solid-colored furniture or lighting. Make adjustments as needed, such as repainting stripes in a different width or adding complementary decor to balance the look.
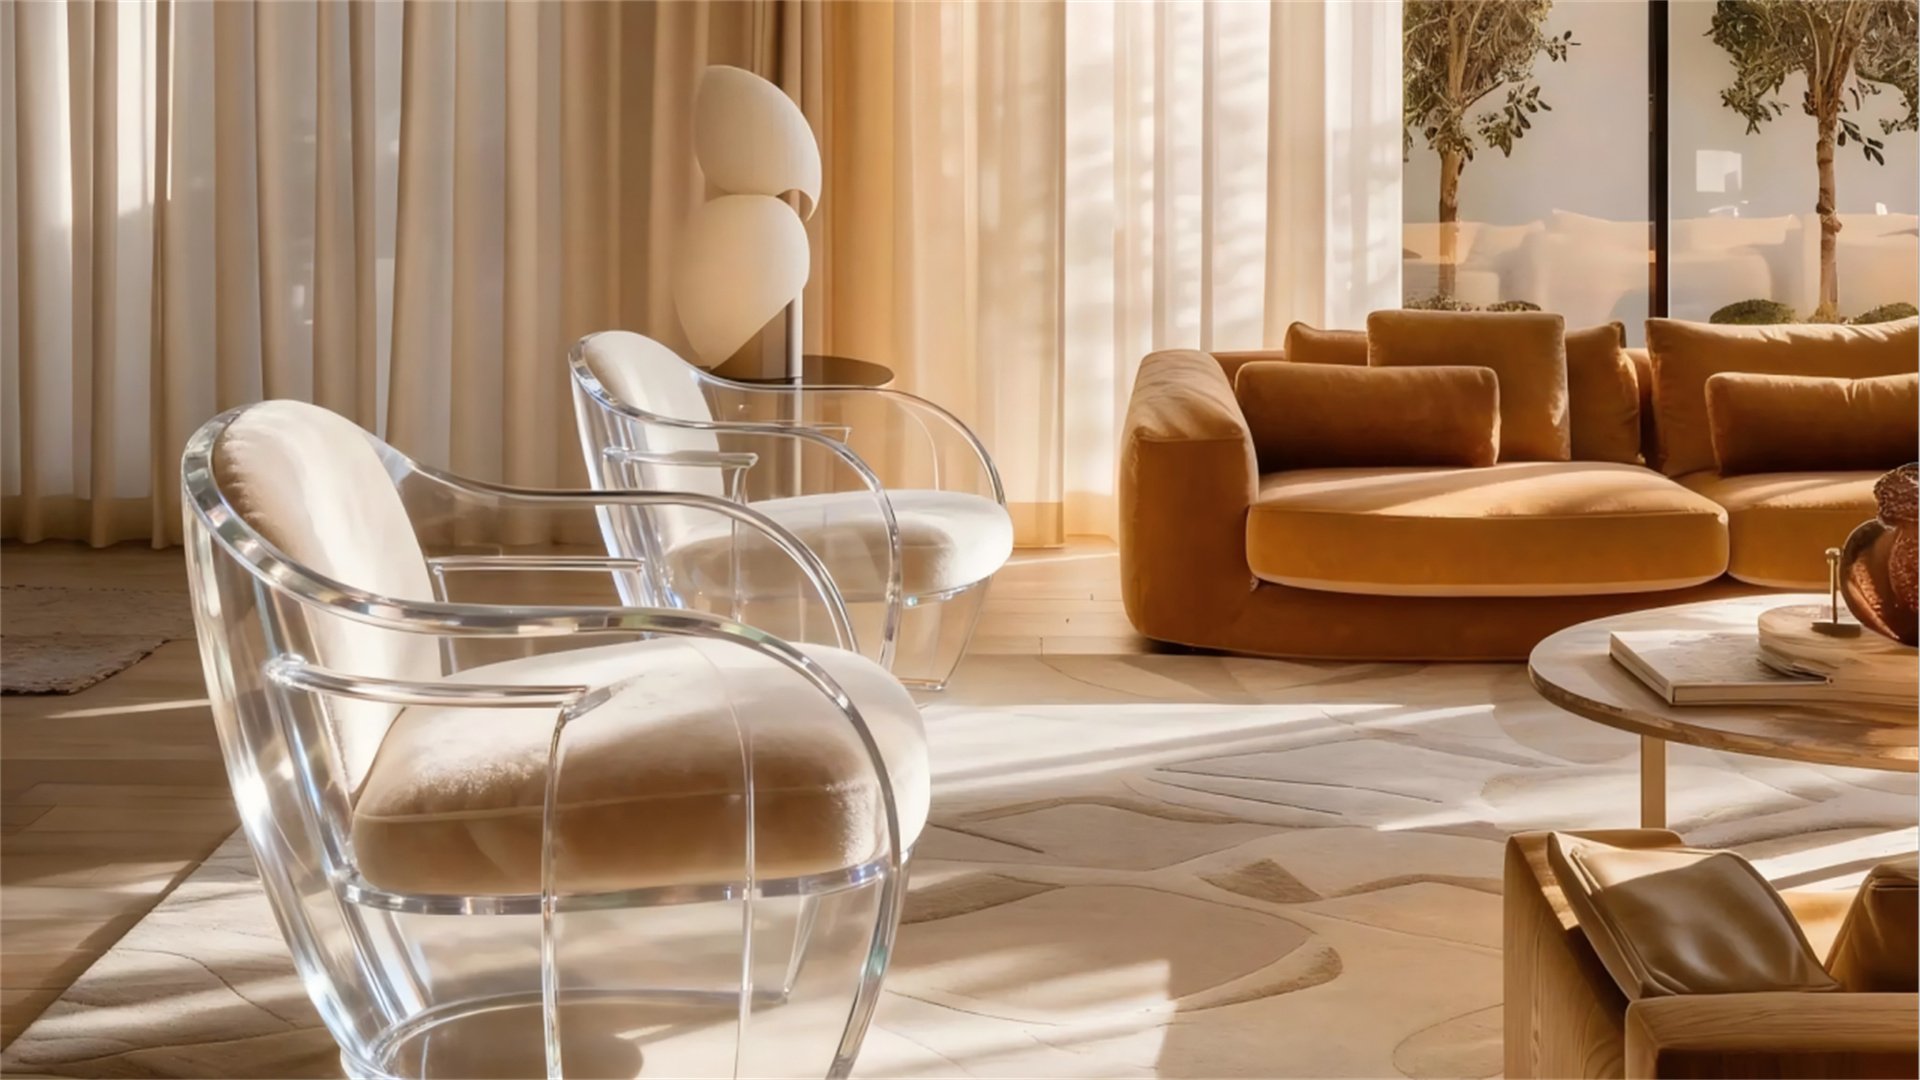
🔍 Method 8: Transparent and Glass Elements
Incorporating see-through materials like glass, acrylic, or lucite can make a space feel more open by allowing light to pass through and views to extend uninterrupted. This method involves DIY projects that add transparent furniture or decor, such as acrylic shelves, glass tabletops, or lucite chairs, which visually "disappear" into the room. Inspired by modern design trends on sites like Dwell, it leverages the lightweight appearance of these materials to reduce visual bulk. By crafting your own pieces—for example, making a coffee table from a glass pane and hairpin legs—you can achieve a high-end look on a budget. This approach is particularly effective in small living areas where solid furniture might block sightlines, as transparent elements maintain an airy, uncluttered feel while serving functional purposes.
Advantages
- Visual Lightness: Transparent materials don't obstruct views, making rooms feel more continuous and spacious, as they seem to take up less visual space than opaque items.
- Reflective Qualities: Glass and acrylic often reflect light, similar to mirrors, enhancing brightness and contributing to a larger appearance through added luminosity.
- Modern Aesthetic: These elements lend a sleek, contemporary look that can elevate a room's style, making it feel curated and intentional, which psychologically expands perception.
- DIY-Friendly: Many transparent materials can be cut and assembled with basic tools; for instance, acrylic sheets are available at hardware stores and can be used for shelves or dividers with simple brackets.
Disadvantages
- Fragility: Glass and acrylic are prone to scratches, cracks, or breaks, requiring careful handling and placement, especially in homes with children or pets, which might increase long-term costs.
- Higher Material Costs: While DIY reduces labor expenses, materials like tempered glass or thick acrylic can be more expensive than wood or metal, though sourcing from recycled windows or discount outlets can help.
- Maintenance Challenges: Transparent surfaces show fingerprints, dust, and smudges easily, necessitating frequent cleaning to maintain their invisible effect and aesthetic appeal.
- Limited Design Options: DIY projects with these materials might be constrained by available shapes and sizes, making customization harder compared to wood or fabric.
How to Implement
- Identify Opportunities: Look for furniture pieces that can be replaced with transparent versions, such as a bulky coffee table, opaque room dividers, or heavy shelves. Consider areas where sightlines are blocked, like between living and dining spaces.
- Source Materials Economically: Visit thrift stores for old glass tables or windows that can be repurposed. Buy acrylic sheets from hardware stores or online retailers, opting for thinner gauges for lightweight projects. Gather tools like glass cutters (if cutting yourself), drills for acrylic, and protective gear.
- Build DIY Projects: For a simple acrylic shelf, measure and cut the sheet to size using a scoring tool, then attach it to wall brackets. For a glass-top table, purchase a pre-cut glass pane and attach it to DIY legs made from pipes or wood. Follow safety precautions when handling sharp edges.
- Integrate into Decor: Place transparent items strategically to maximize their effect—for example, position a lucite chair in a corner to keep the view open, or use glass shelves on a wall to display items without adding visual weight. Pair with lighting to enhance reflections.
- Maintain for Clarity: Clean transparent surfaces regularly with appropriate cleaners, like vinegar solutions for glass or mild soap for acrylic, to prevent haze or streaks that could diminish the spacious illusion. Inspect for damage and repair or replace as needed.
📝 Conclusion
Visually enlarging small living areas on a budget is entirely achievable through thoughtful DIY approaches that blend creativity with practical design principles. By implementing methods such as strategic mirror placement, light color palettes, vertical storage, multipurpose furniture, layered lighting, minimalist decluttering, optical patterns, and transparent elements, you can transform a cramped space into an expansive and inviting home. Each method offers unique advantages, from cost savings to customizable solutions, while also presenting challen