10 Ways to Bring More Natural Light Into Your Home
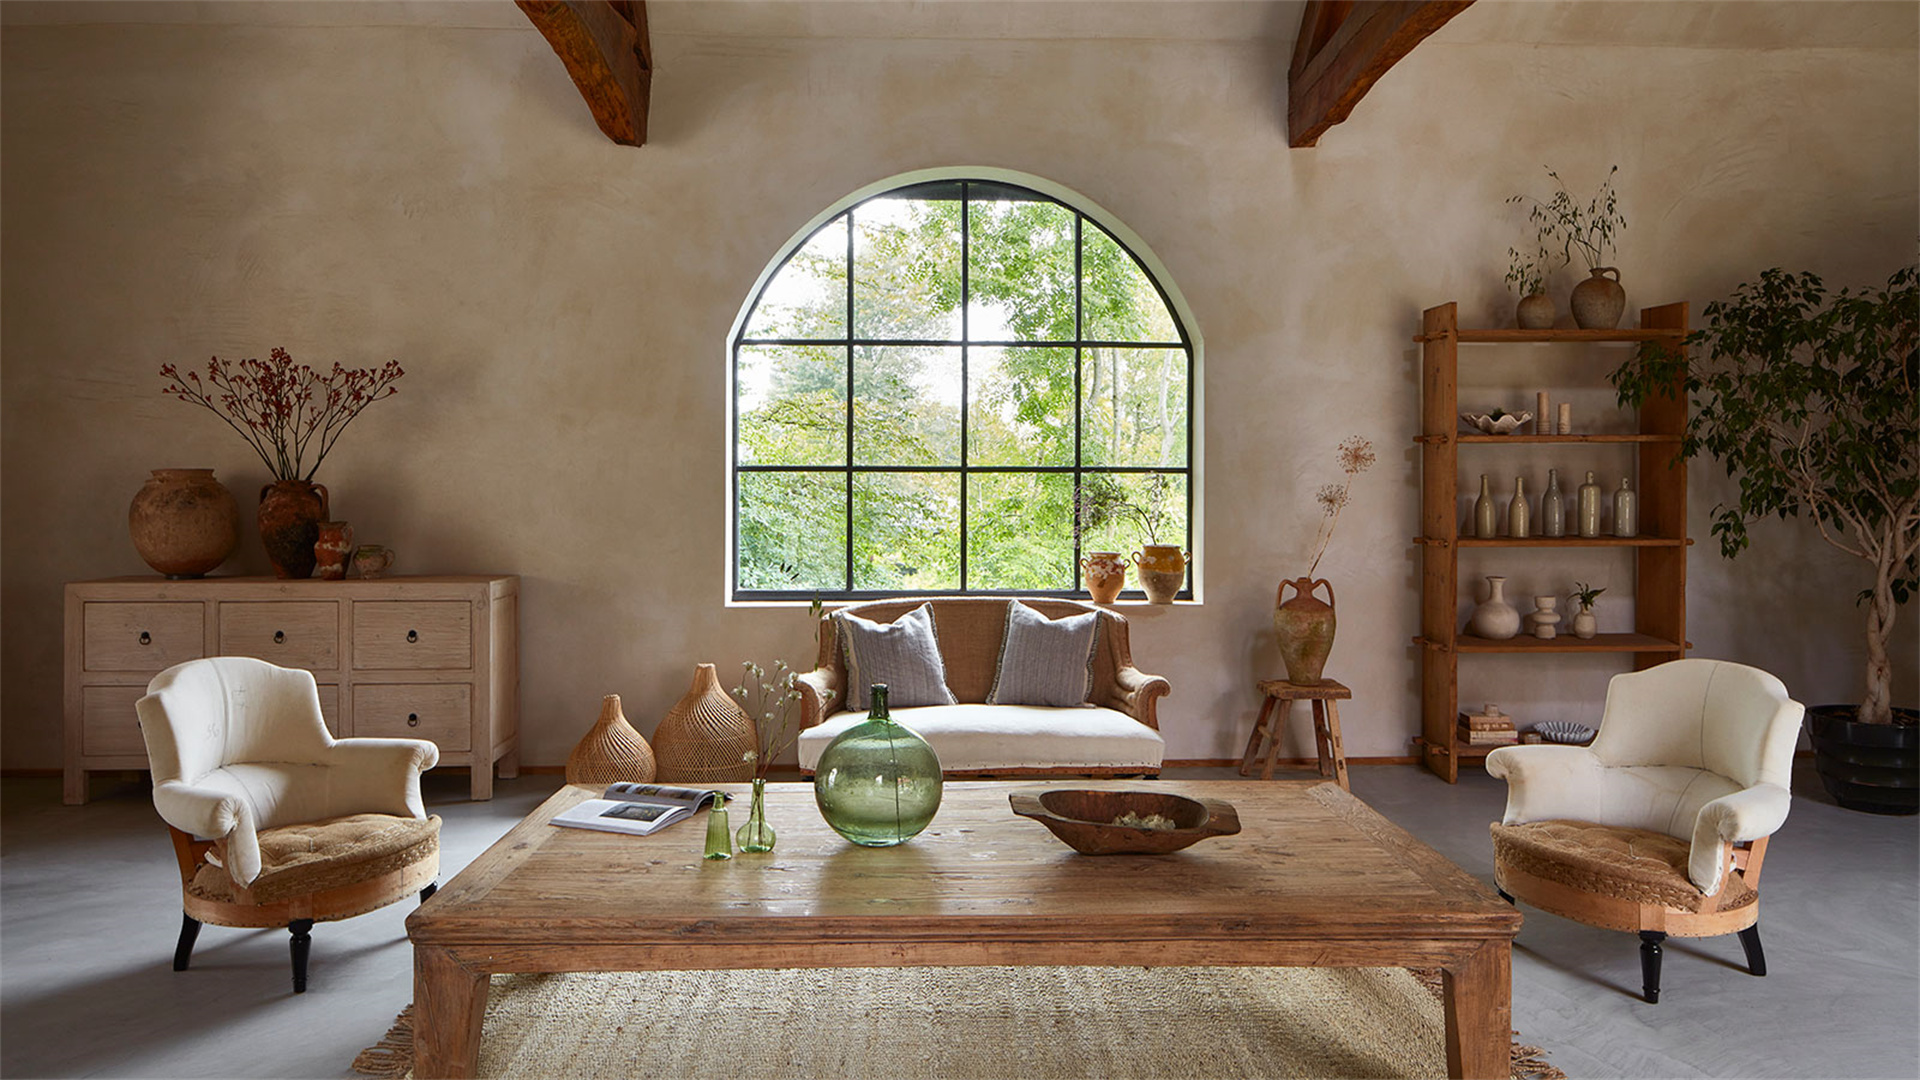
📕 Method 1: Install Larger Windows or Expand Existing Openings
Enlarging windows is a direct approach to increase natural light ingress, particularly in rooms with small or poorly placed windows. This method involves structural changes, so it's essential to consult professionals. Larger windows not only allow more sunlight but also offer better views and ventilation, making spaces feel more connected to the outdoors. However, it can be costly and may require permits. The key is to balance window size with insulation needs to avoid energy loss.
Advantages
- Significantly boosts daylight penetration, reducing reliance on artificial lighting during the day.
- Enhances visual appeal by creating focal points and improving architectural aesthetics.
- Improves indoor-outdoor connection, promoting a sense of openness and well-being.
- Can increase property value due to upgraded features and better natural lighting.
- Supports passive solar heating in colder climates, potentially lowering energy bills.
Disadvantages
- High upfront costs, including materials, labor, and potential engineering fees.
- May require building permits and compliance with local regulations, delaying the project.
- Risk of heat gain in summer or heat loss in winter if windows are not energy-efficient.
- Potential for privacy issues, especially in urban areas with close neighbors.
- Structural modifications could weaken walls if not properly reinforced, posing safety risks.
How to Implement
- Assess your home's structure: Hire an architect or contractor to evaluate load-bearing walls and identify feasible locations for larger windows, such as south-facing walls for maximum sunlight.
- Choose window types: Select energy-efficient options like double-glazed or Low-E windows to minimize thermal transfer. Consider styles such as casement, picture, or bay windows based on your design goals.
- Obtain necessary permits: Check local building codes and apply for permits to ensure compliance with safety and zoning laws. This may involve submitting plans and paying fees.
- Prepare the site: Clear the area around the window opening, protect furniture from dust, and set up temporary barriers if working during inclement weather.
- Execute the installation: A professional team will remove the existing window, reinforce the opening, install the new window frame, seal gaps with insulation, and finish with trim and paint. Expect the process to take several days to weeks, depending on complexity.
- Add finishing touches: Install window treatments like sheer curtains or blinds to control glare and privacy without blocking light. Regularly clean windows to maintain clarity and light transmission.
🌞 Method 2: Incorporate Skylights or Roof Windows
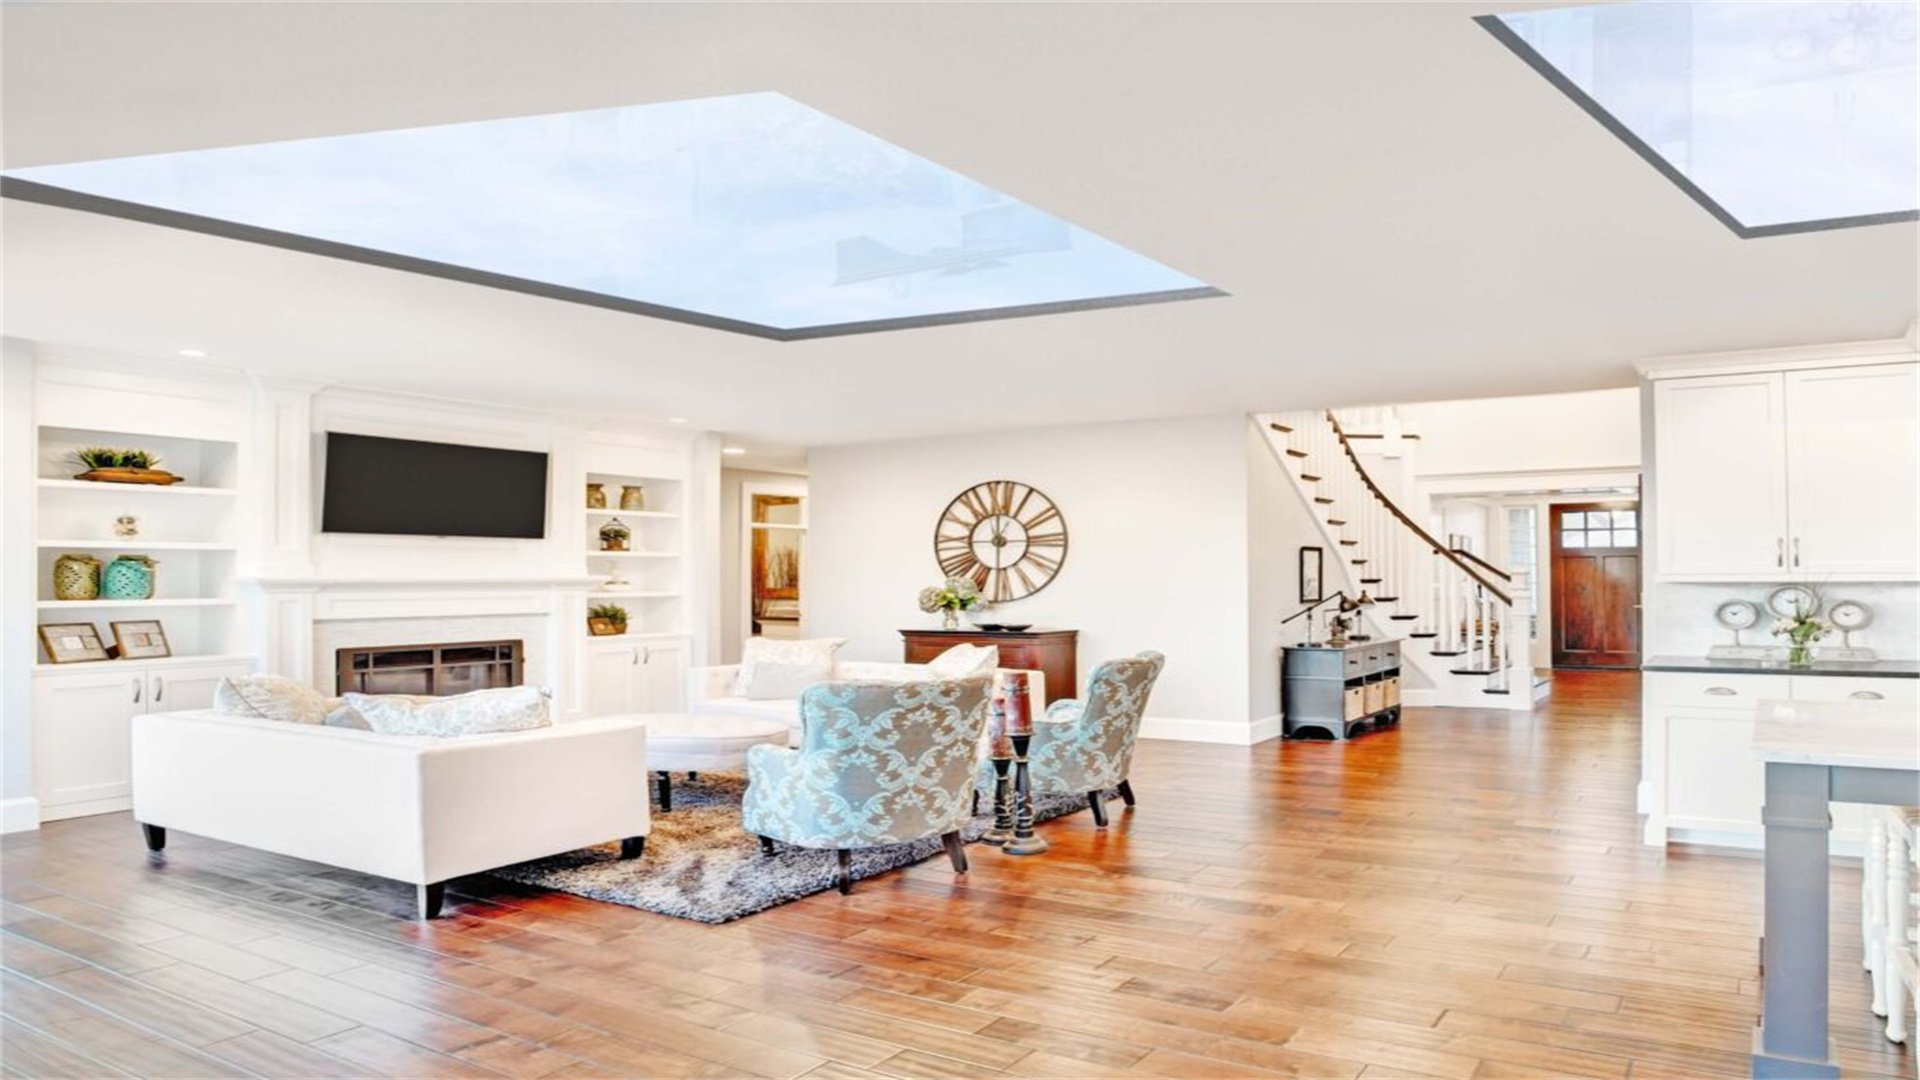
Skylights and roof windows are excellent for bringing natural light into areas with limited wall space, such as attics, hallways, or interior rooms. They capture overhead sunlight, which is often more intense and diffuse than side light. Modern skylights come with features like venting for airflow and shades for light control. While highly effective, they require careful installation to prevent leaks and ensure durability against weather elements.
Advantages
- Maximizes light in windowless spaces, transforming dark areas into bright, usable rooms.
- Provides even illumination throughout the day as the sun moves, reducing shadows.
- Can be combined with ventilation to improve air quality and reduce humidity.
- Adds a modern, architectural element to ceilings, enhancing interior design.
- Increases energy savings by reducing the need for electric lights during daytime hours.
Disadvantages
- Installation is invasive and costly, often requiring roof modifications and professional expertise.
- Risk of leaks if not properly sealed, leading to water damage and mold growth over time.
- Potential for overheating in summer if skylights lack UV protection or shading systems.
- May cause glare on screens or reflective surfaces, requiring additional adjustments.
- Limited placement options based on roof structure and orientation, which can affect light quality.
How to Implement
- Evaluate roof suitability: Inspect your roof's slope, material, and structural integrity to determine if it can support a skylight. South-facing roofs receive the most light, but east or west orientations can offer morning or afternoon sun.
- Select skylight type: Choose between fixed, vented, or tubular skylights based on your needs. Tubular skylights are smaller and easier to install in tight spaces, while larger models offer more light.
- Plan for placement: Work with a designer to position skylights to avoid direct sunlight on sensitive areas like beds or workspaces. Consider adding multiple units for balanced lighting.
- Hire a certified installer: Engage a roofing specialist to ensure proper flashing, sealing, and insulation. Check warranties and reviews to guarantee quality workmanship.
- Install shading and glazing: Opt for double-glazed glass with low-emissivity coatings to reduce heat transfer. Integrate motorized shades or blinds to adjust light levels and privacy as needed.
- Maintain regularly: Clean the skylight surface periodically to remove debris and dirt. Inspect seals annually for signs of wear and address any issues promptly to prevent leaks.
🧹 Method 3: Use Mirrors Strategically to Reflect Light
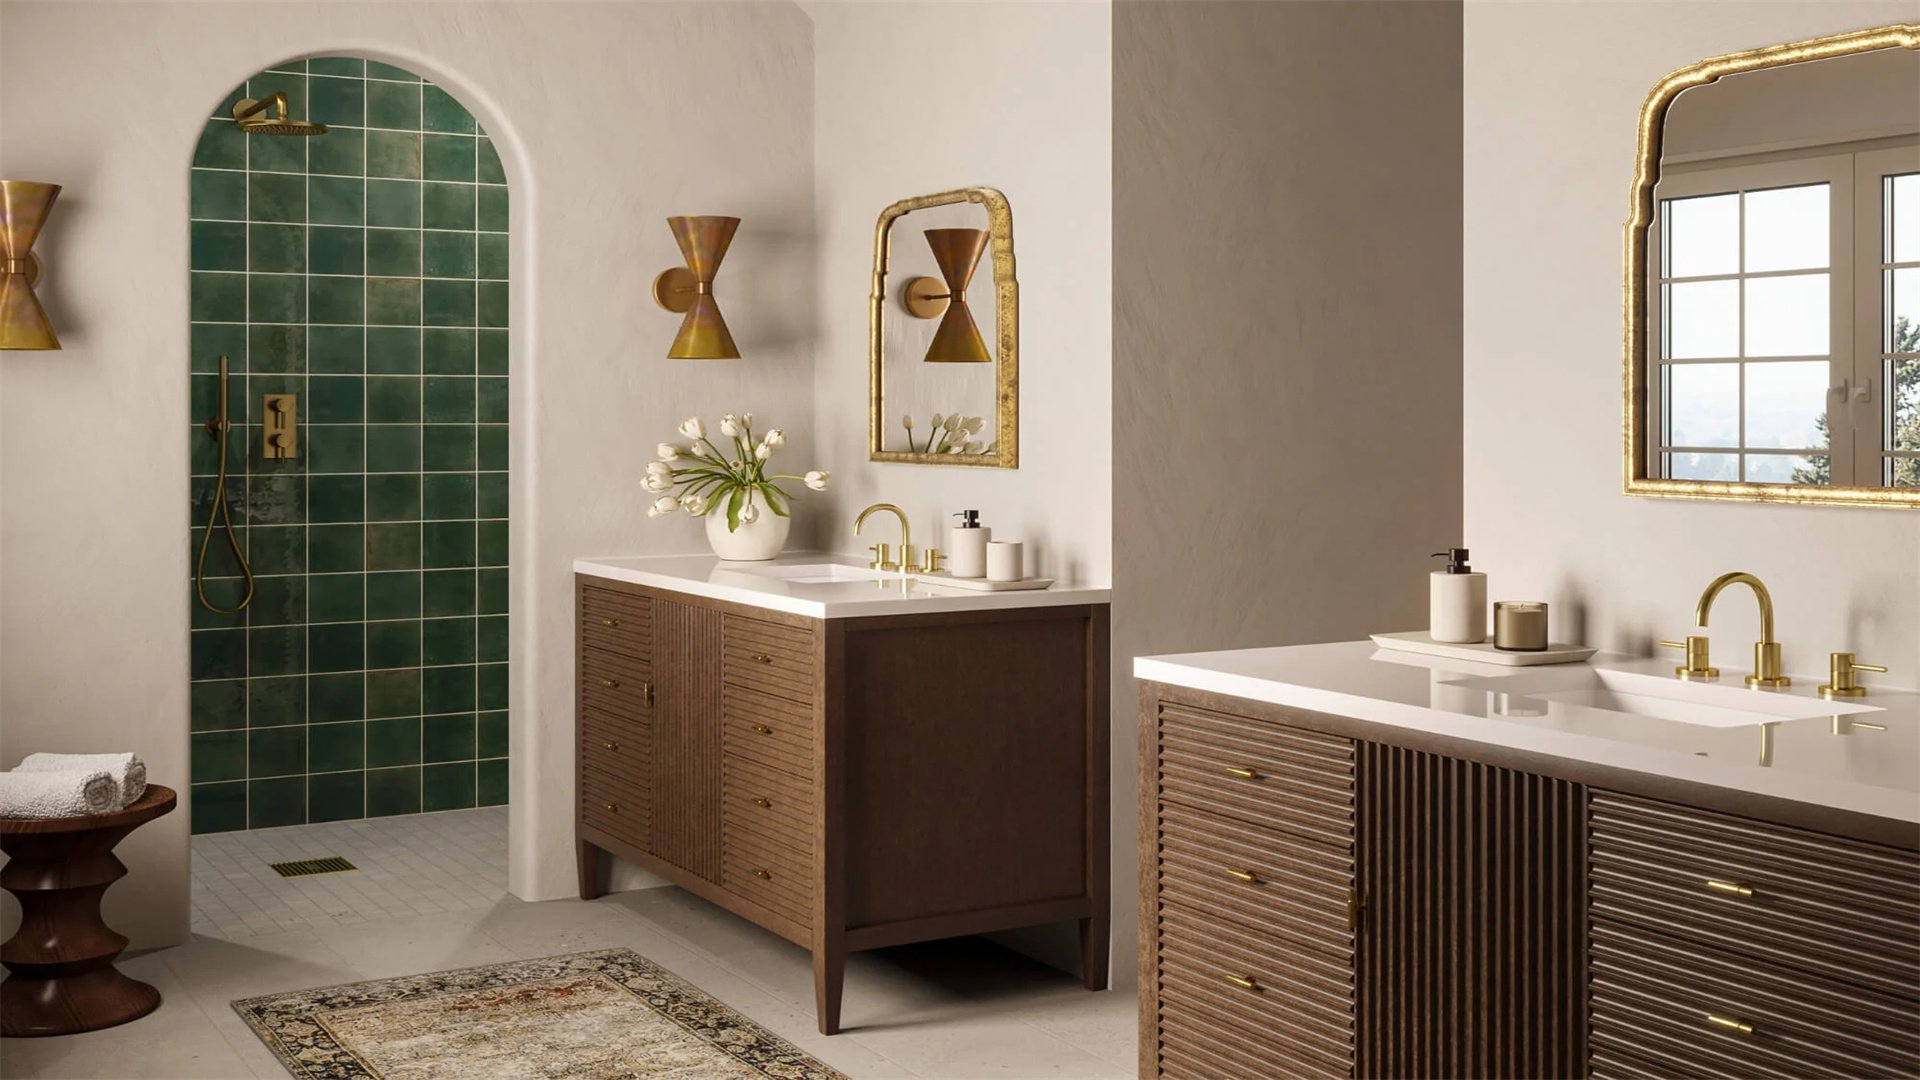
Mirrors are a simple yet powerful tool for amplifying natural light by reflecting it into darker corners. They work best when placed opposite windows or in pathways where light travels, creating an illusion of depth and brightness. This method is cost-effective and versatile, allowing for creative decor updates without structural changes. However, overuse can lead to glare or a disjointed aesthetic if not coordinated with room design.
Advantages
- Low-cost and easy to install, making it accessible for renters or those on a budget.
- Instantly brightens rooms by bouncing light around, especially in narrow or windowless areas.
- Enhances spatial perception, making small rooms feel larger and more open.
- Adds decorative appeal with various frame styles and shapes, complementing interior themes.
- Can be moved or repositioned easily, allowing for flexible lighting adjustments.
Disadvantages
- May cause unwanted glare if placed directly in line with sunlight, affecting comfort.
- Reflections can highlight clutter or imperfections, requiring a tidy environment.
- Large mirrors can be heavy and hazardous if not securely mounted, posing safety risks.
- Limited effectiveness in very dark rooms with minimal initial light sources.
- Can create a cold or sterile feel if overused, lacking the warmth of natural materials.
How to Implement
- Identify reflection points: Place mirrors on walls perpendicular to windows or across from them to catch and redirect sunlight. Avoid positions where mirrors face direct sun to prevent glare.
- Choose mirror sizes and shapes: Select large, floor-to-ceiling mirrors for maximal impact in living rooms, or use smaller, grouped mirrors in hallways. Consider arched or circular designs to soften reflections.
- Incorporate reflective frames: Use frames with metallic finishes like silver or gold to further enhance light bounce. Avoid dark, absorptive frames that may dampen the effect.
- Install securely: Mount mirrors with appropriate hardware, such as brackets or adhesive strips, ensuring they are level and stable. For heavy pieces, hire a professional to prevent accidents.
- Combine with other light sources: Pair mirrors with light-colored walls and sheer curtains to create a layered lighting effect. Test placements during different times of day to optimize reflections.
- Maintain cleanliness: Regularly clean mirror surfaces with glass cleaner to remove dust and smudges, ensuring maximum reflectivity and clarity over time.
🎨 Method 4: Opt for Light-Colored Paints and Finishes
Light colors, particularly whites, creams, and pastels, reflect more sunlight than dark hues, making rooms appear brighter and more expansive. This method involves repainting walls, ceilings, and trim to maximize light reflection. It's a relatively affordable update that can dramatically transform a space. However, it requires careful color selection to avoid a bland or sterile look, and multiple coats may be needed for coverage.
Advantages
- Highly effective at bouncing natural light, increasing overall brightness without additional fixtures.
- Creates a clean, airy ambiance that feels modern and inviting, suitable for various decor styles.
- Cost-effective compared to structural changes, with paint and supplies being widely available.
- Easy to DIY, allowing homeowners to personalize spaces with minimal professional help.
- Can be combined with accent colors to add depth while maintaining a light-enhancing base.
Disadvantages
- Light colors show dirt and scuffs more easily, requiring frequent touch-ups and cleaning.
- May feel impersonal or cold if not balanced with warm textures like wood or textiles.
- Reflective paints can sometimes cause glare, especially in rooms with direct sunlight exposure.
- Color choice is critical; off-whites can look dingy in certain lighting conditions, needing testing.
- Preparation work, such as priming and repairing walls, can be time-consuming and messy.
How to Implement
- Select reflective paints: Choose paints with high Light Reflectance Value (LRV), typically above 70, for walls and ceilings. Opt for satin or eggshell sheens that balance reflectivity with durability.
- Test colors in your space: Paint swatches on different walls and observe them at various times of day to see how natural light affects the hue. Consider factors like room orientation and existing furniture.
- Prepare surfaces: Clean walls thoroughly, fill holes and cracks with spackle, and apply a primer to ensure even coverage and adhesion. Use drop cloths to protect floors and furniture.
- Apply paint systematically: Start with ceilings, then walls, and finally trim. Use high-quality brushes and rollers for smooth application. Apply two coats for consistent color and light reflection.
- Incorporate accents: Add pops of color through accessories like pillows, art, or rugs to prevent monotony. Use glossy finishes on trim or doors to further reflect light.
- Maintain the finish: Dust walls regularly and touch up paint as needed to keep surfaces looking fresh and maximally reflective. Avoid harsh cleaners that could damage the paint.
🚪 Method 5: Install Glass Doors or Sliding Patio Doors
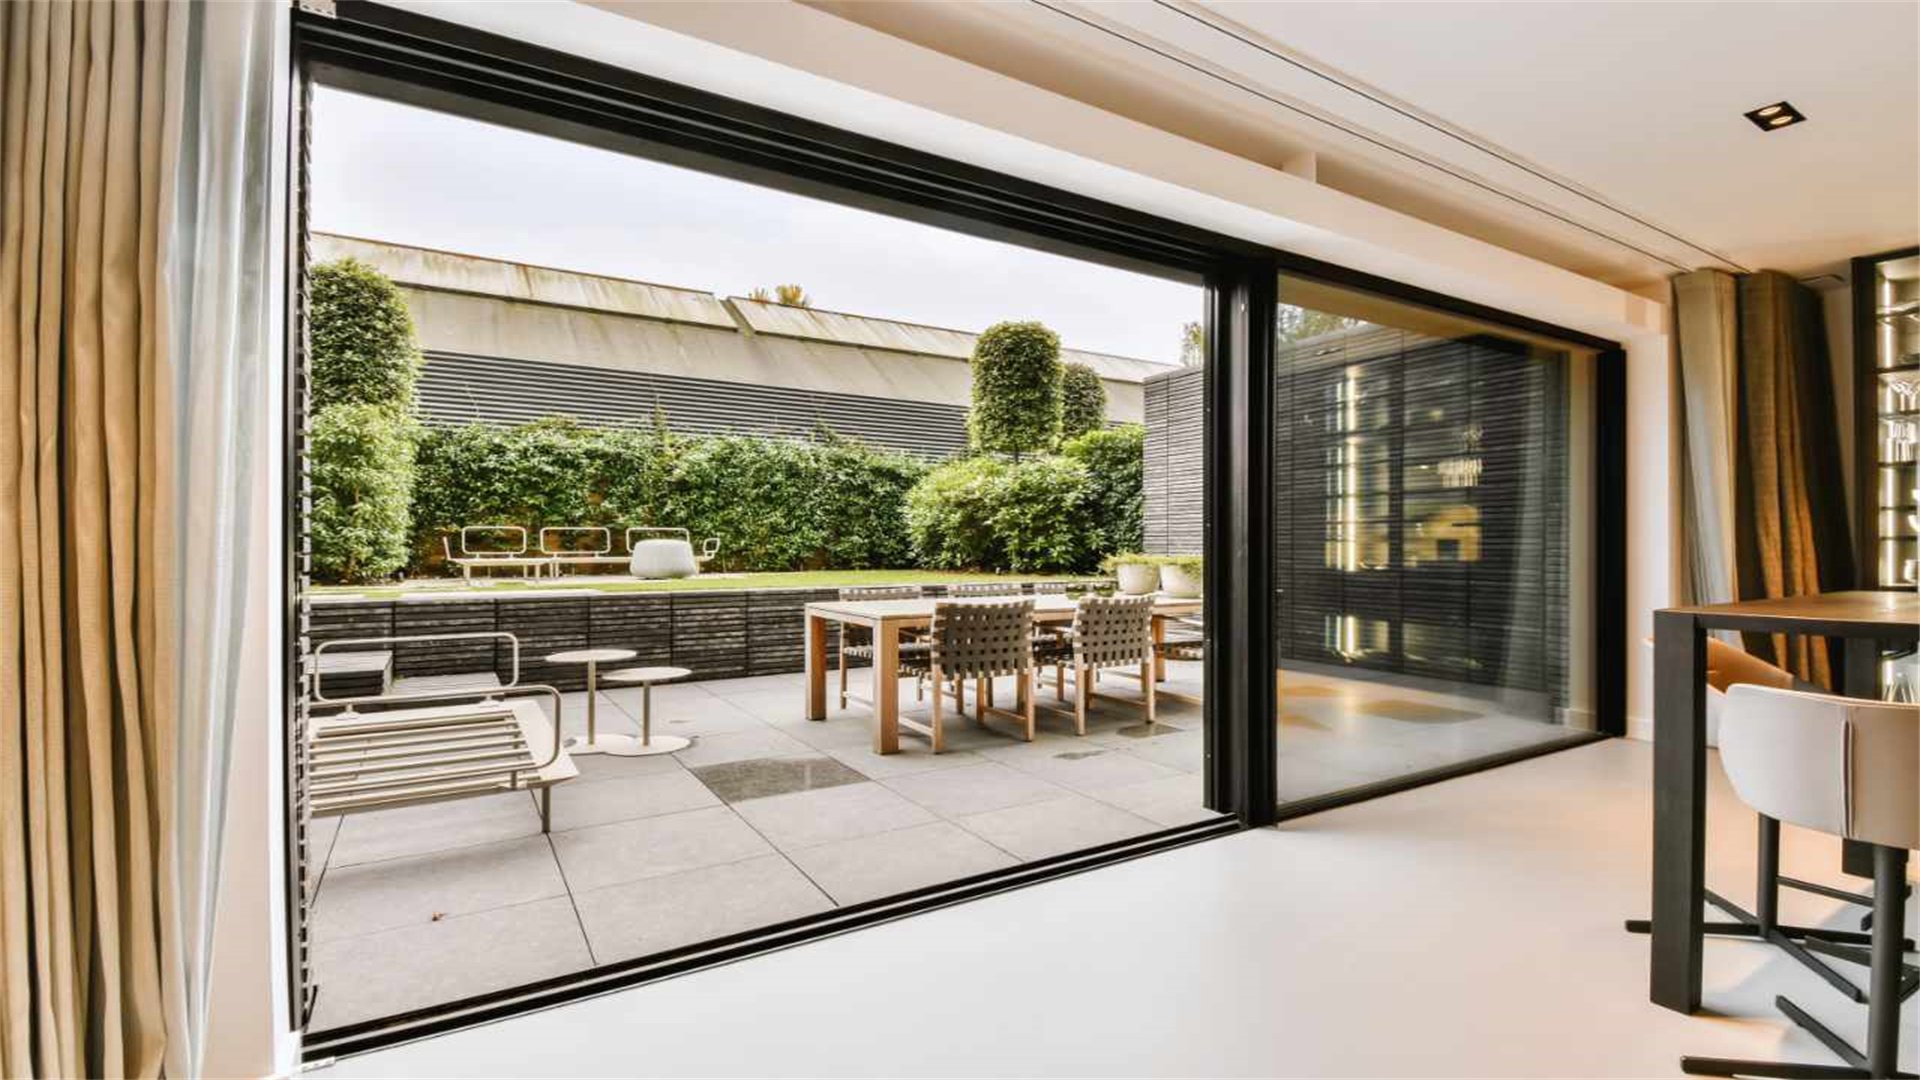
Replacing solid doors with glass versions, such as French doors or sliding patio doors, allows natural light to flow between rooms and from outdoors. This method is ideal for connecting living spaces to gardens or patios, enhancing both light and views. Glass doors come in various styles, including tempered or frosted options for privacy. While they increase brightness, they may require additional insulation and security measures.
Advantages
- Floods adjacent rooms with daylight, especially in entryways or kitchens near outdoor areas.
- Improves visual continuity, making interiors feel larger and more integrated with nature.
- Enhances accessibility and airflow when doors are opened, promoting indoor-outdoor living.
- Available in energy-efficient models with insulated glass to reduce heat transfer and noise.
- Adds resale value by modernizing home entrances and improving aesthetic appeal.
Disadvantages
- Higher cost than standard doors, including installation and potential framing adjustments.
- Privacy concerns, as clear glass can expose interiors to outsiders; solutions like curtains add complexity.
- Risk of breakage or damage from impacts, requiring safety glass and secure locking systems.
- Can lead to heat gain in summer or heat loss in winter if not properly sealed or shaded.
- Maintenance includes regular cleaning of glass surfaces and tracks to ensure smooth operation.
How to Implement
- Assess door locations: Identify exterior walls or interior partitions where glass doors can replace existing ones. Prioritize south-facing openings for maximum sunlight exposure.
- Choose door style: Select from options like sliding, folding, or pivot doors based on space constraints and design preferences. Consider frosted or textured glass for privacy in bathrooms or bedrooms.
- Ensure energy efficiency: Look for doors with double or triple glazing, Low-E coatings, and thermal breaks to minimize energy loss. Check for ENERGY STAR ratings in your climate zone.
- Hire professional installation: Engage a contractor to handle removal of old doors, framing adjustments, and secure fitting of new units. Ensure proper sealing and insulation around the frame.
- Add complementary features: Install retractable screens or shades to control light and privacy. Use weather stripping to prevent drafts and improve energy performance.
- Maintain functionality: Lubricate tracks and hinges periodically, clean glass with streak-free solutions, and inspect seals for wear to prolong door life and light transmission.
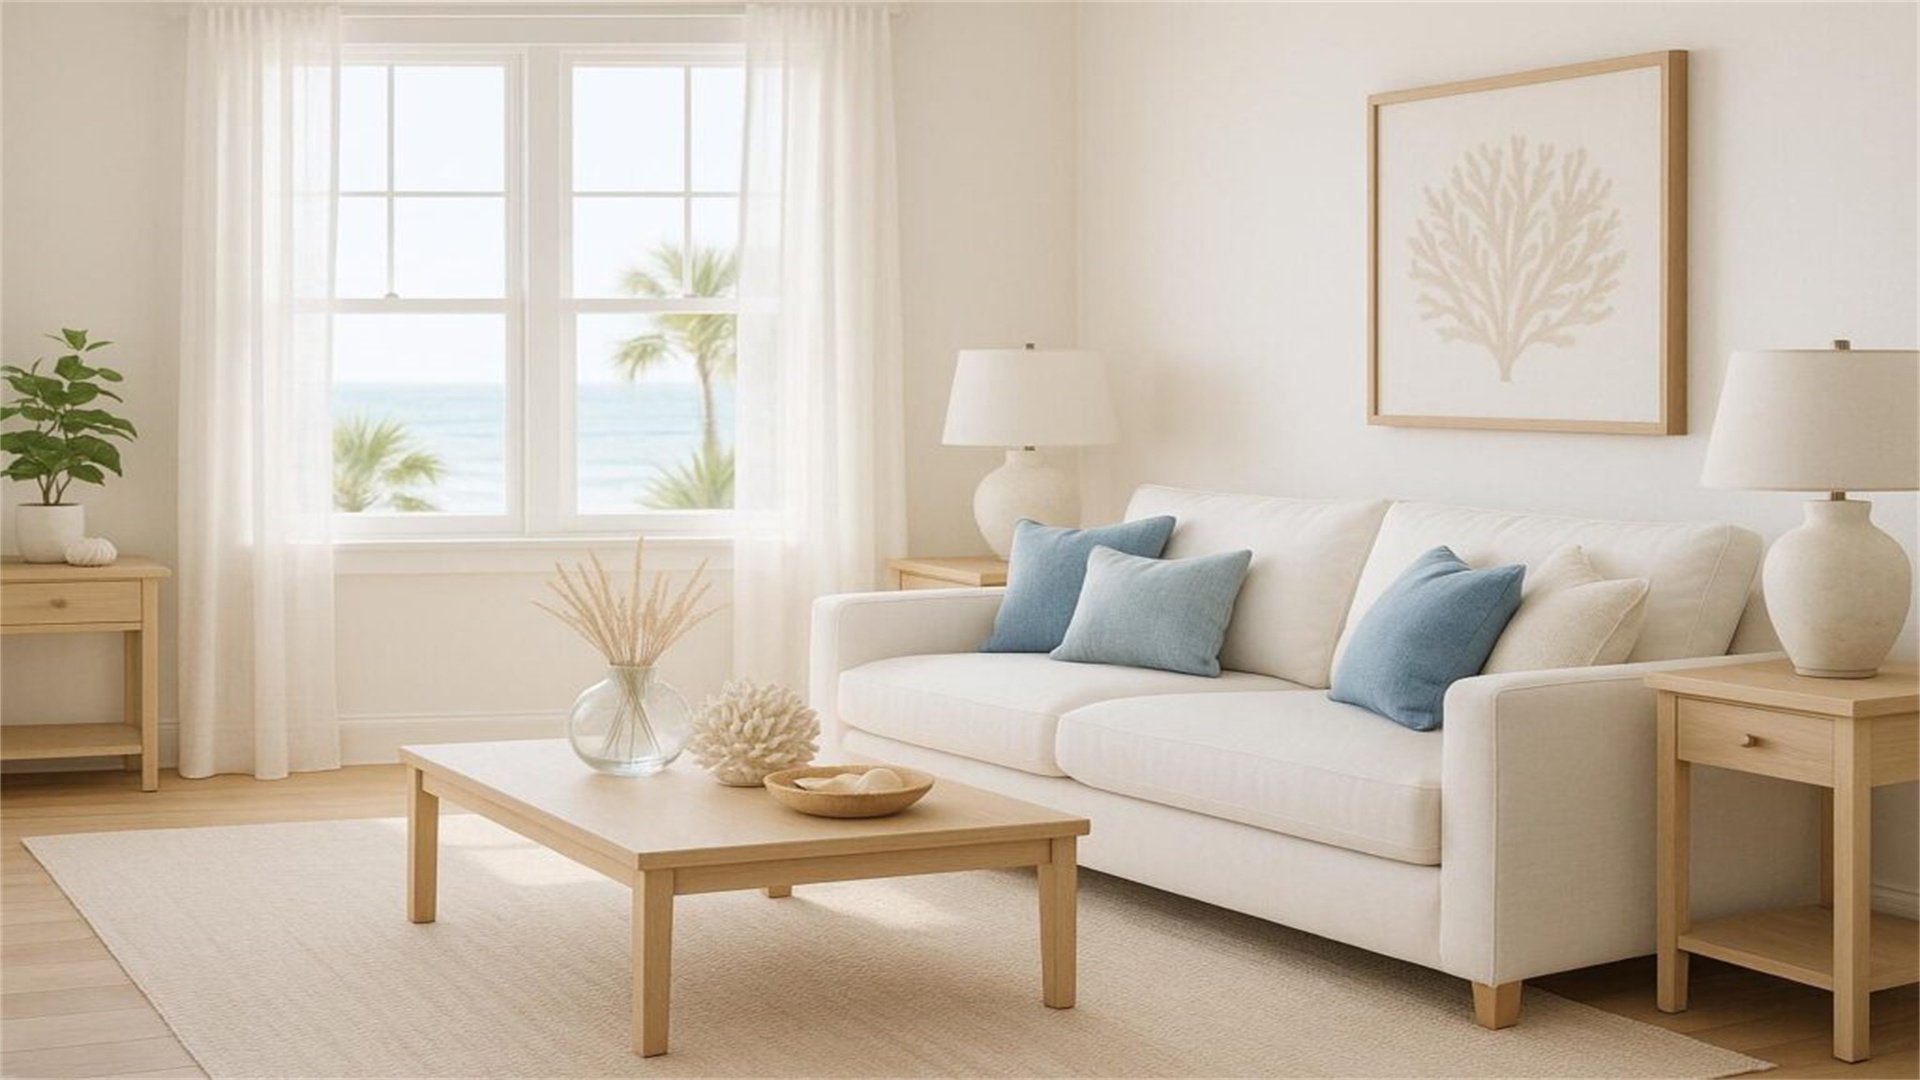
🌫️ Method 6: Use Translucent or Sheer Window Treatments
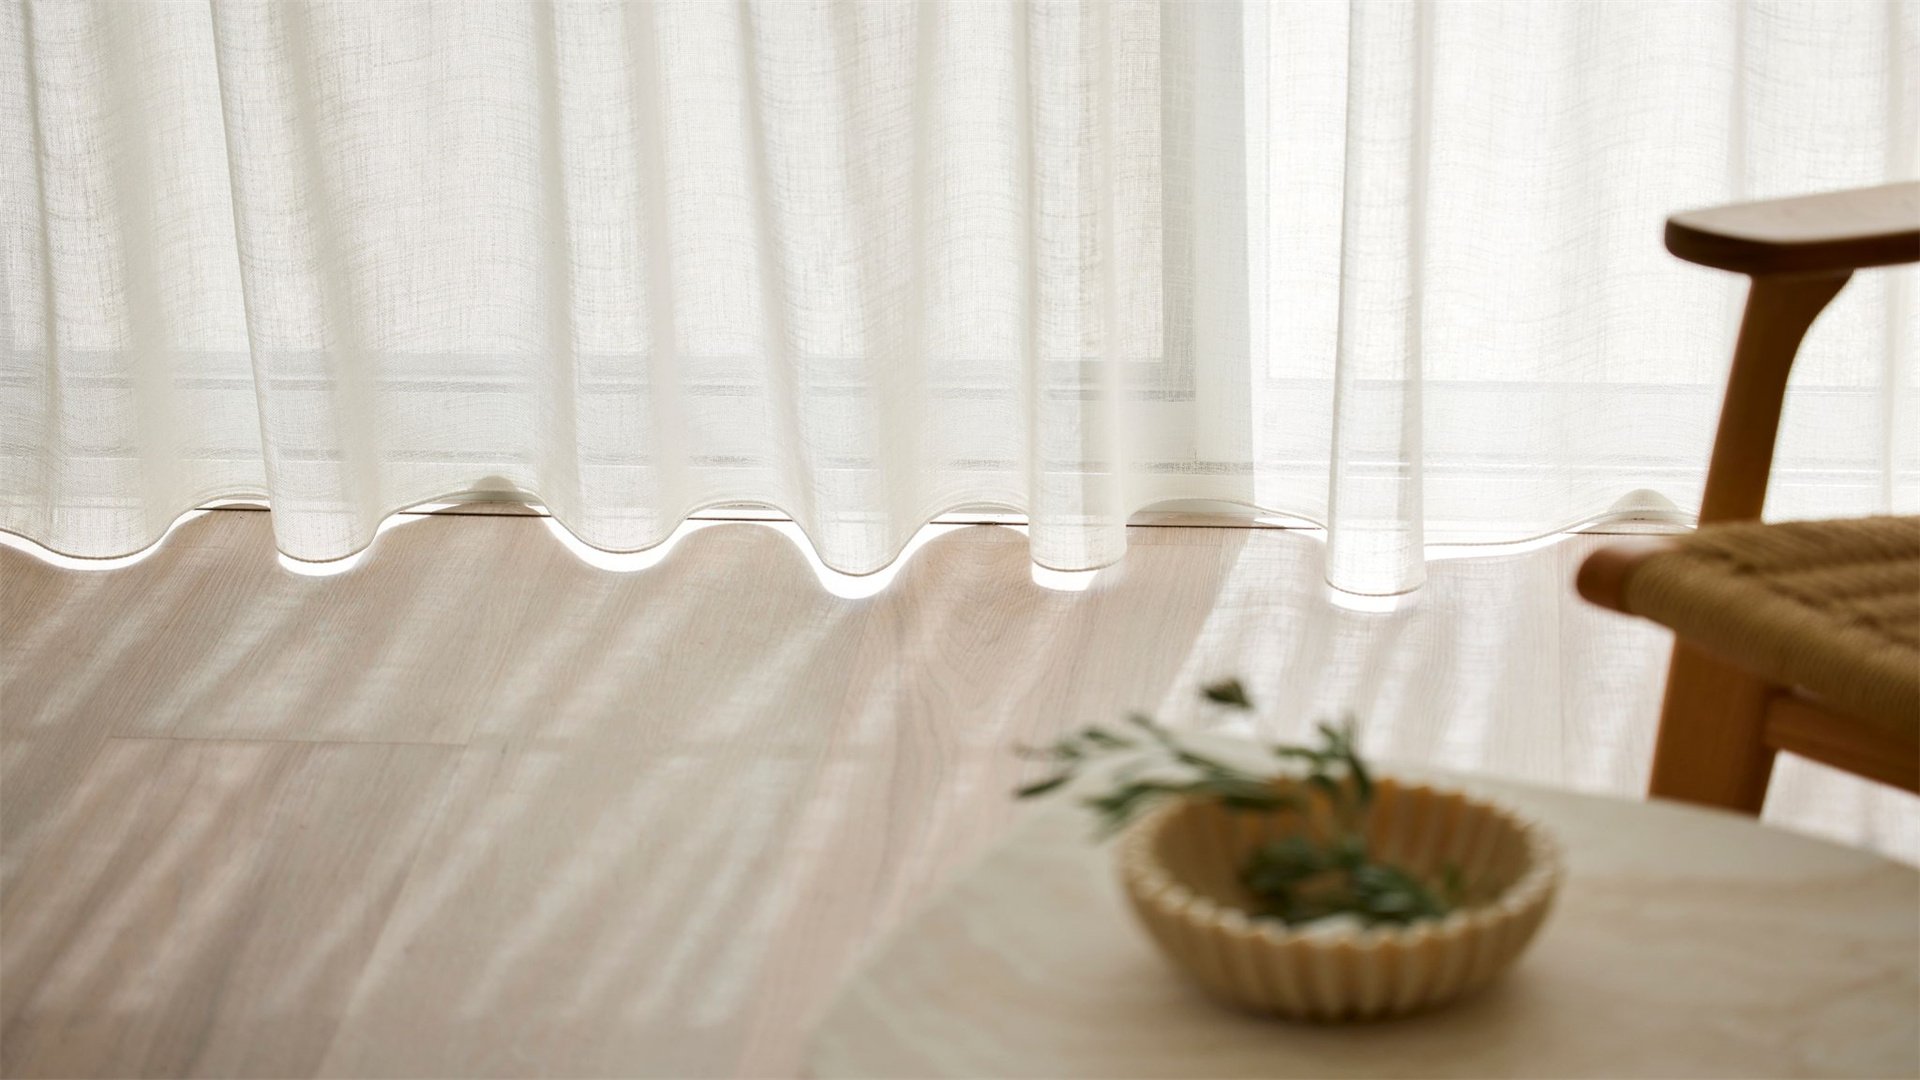
Heavy curtains or blinds can block natural light, so replacing them with translucent or sheer materials allows sunlight to filter through while maintaining privacy. This method is simple and reversible, making it suitable for rental properties or quick updates. Sheer fabrics diffuse light softly, reducing harsh shadows and creating a warm glow. However, they may offer less insulation and light control compared to blackout options.
Advantages
- Maximizes daylight entry without sacrificing privacy, as sheer fabrics obscure views from outside.
- Creates a soft, ethereal atmosphere by diffusing light, reducing glare on screens and surfaces.
- Cost-effective and easy to install, with ready-made options available in various colors and patterns.
- Allows for ventilation when windows are open, improving air circulation and indoor comfort.
- Can be layered with heavier drapes for versatility, providing light control day and night.
Disadvantages
- Offers limited insulation, potentially leading to heat loss in winter or heat gain in summer.
- May fade over time due to UV exposure, requiring replacement every few years.
- Sheer materials can collect dust and require frequent washing to maintain transparency.
- Not suitable for complete blackout needs, such as in bedrooms for light sleepers.
- Can appear too delicate or formal for some decor styles, needing careful coordination.
How to Implement
- Measure windows accurately: Use a tape measure to determine the width and length needed for treatments, allowing for fullness and overlap. Consider ceiling-mounted tracks for maximum light entry.
- Select appropriate fabrics: Choose sheer materials like voile, linen, or polyester blends that balance transparency with durability. Opt for light colors like white or beige to enhance reflectivity.
- Install hardware: Mount curtain rods or tracks above window frames to make windows appear larger and allow fabric to hang freely. Ensure brackets are secure to support weight.
- Hang treatments: Attach sheer curtains using hooks or rings, and adjust length to just above the floor for a clean look. For sliding windows, consider tension rods for easy removal.
- Layer for functionality: Combine sheers with heavier drapes or blinds on dual rods to adjust light levels throughout the day. Use tiebacks to pull curtains aside during peak sunlight hours.
- Maintain cleanliness: Machine-wash or hand-wash sheer curtains according to care labels to remove dust and stains. Iron on low heat if needed to restore smoothness and light diffusion.
💡 Method 7: Incorporate Light Tubes or Solar Tubes
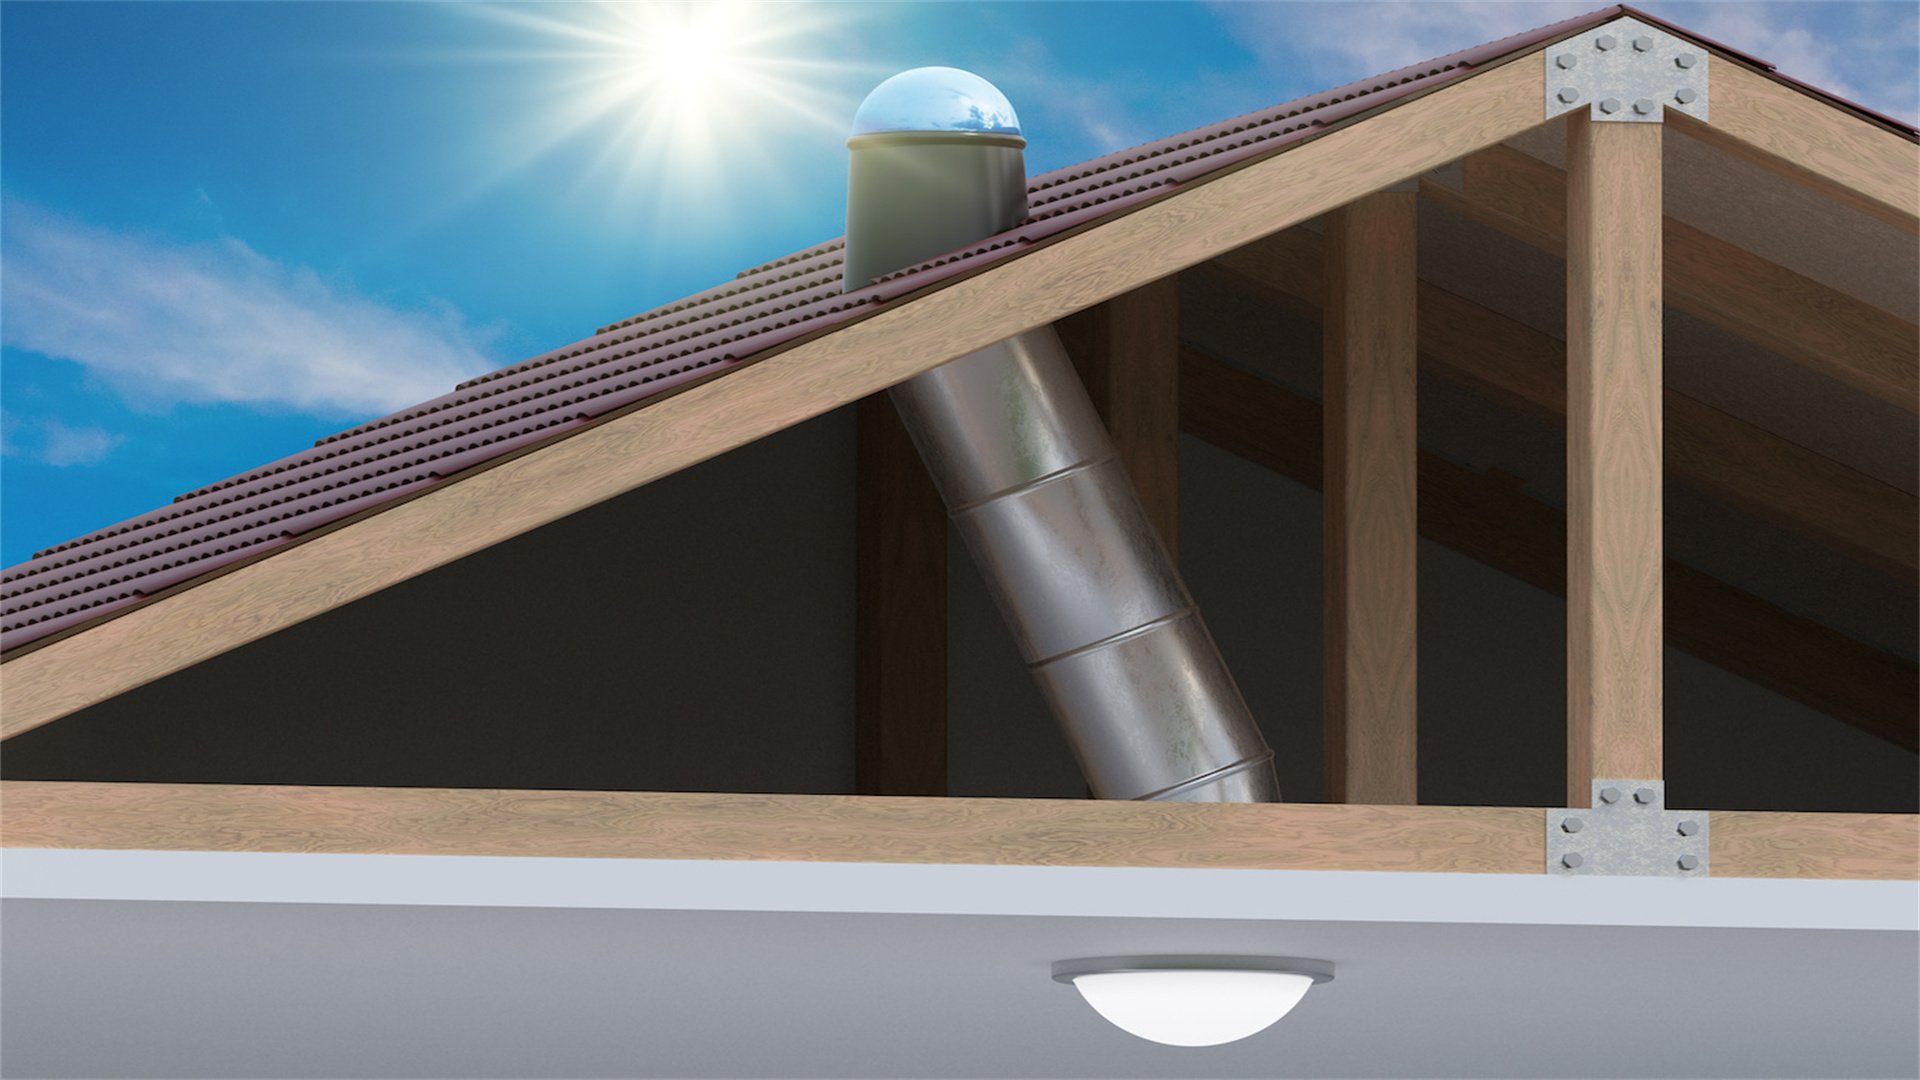
Light tubes, also known as solar tubes or sun tunnels, are cylindrical devices that channel sunlight from the roof into interior spaces via reflective tubing. They are ideal for windowless rooms like bathrooms, closets, or hallways where traditional skylights aren't feasible. This method is less invasive than skylights and often more affordable, but light output depends on tube diameter and roof conditions.
Advantages
- Brings natural light to dark, interior rooms without requiring extensive structural changes.
- Energy-efficient, as they use no electricity and can significantly reduce lighting costs.
- Compact design allows installation in tight spaces, such as between roof rafters or in small ceilings.
- Minimal heat transfer compared to windows, helping maintain stable indoor temperatures.
- Durable and low-maintenance, with sealed tubes that resist leaks and require occasional cleaning.
Disadvantages
- Limited to diffused light, which may not be as bright or direct as windows or skylights.
- Installation requires roof penetration, so professional help is needed to avoid leaks.
- Light output varies with weather and time of day, potentially inconsistent on cloudy days.
- Smaller tubes may not provide enough illumination for large rooms, requiring multiple units.
- Can be costly upfront, especially for larger diameters or complex installations.
How to Implement
- Evaluate room suitability: Identify areas with no external walls, such as bathrooms or corridors, where light tubes would be most beneficial. Measure ceiling height and available roof space above.
- Choose tube size and type: Select tube diameter based on room size; typically, 10-inch tubes suit small rooms, while 14-inch or larger are for bigger spaces. Opt for models with reflective interiors for maximum light capture.
- Plan the pathway: Work with an installer to map the route from roof to ceiling, avoiding obstructions like ducts or wiring. Ensure the roof section receives ample sunlight throughout the day.
- Install the system: A professional will cut holes in the roof and ceiling, install the tube with flashing and seals, and attach the diffuser inside the room. This process usually takes a day.
- Optimize light diffusion: Use diffusers with prismatic lenses to spread light evenly and reduce hotspots. Consider adding optional LED kits for nighttime illumination.
- Maintain performance: Clean the exterior dome periodically to remove debris, and inspect seals annually for leaks. Replace diffusers if they become yellowed or damaged over time.
🛋️ Method 8: Rearrange Furniture to Unblock Light Paths
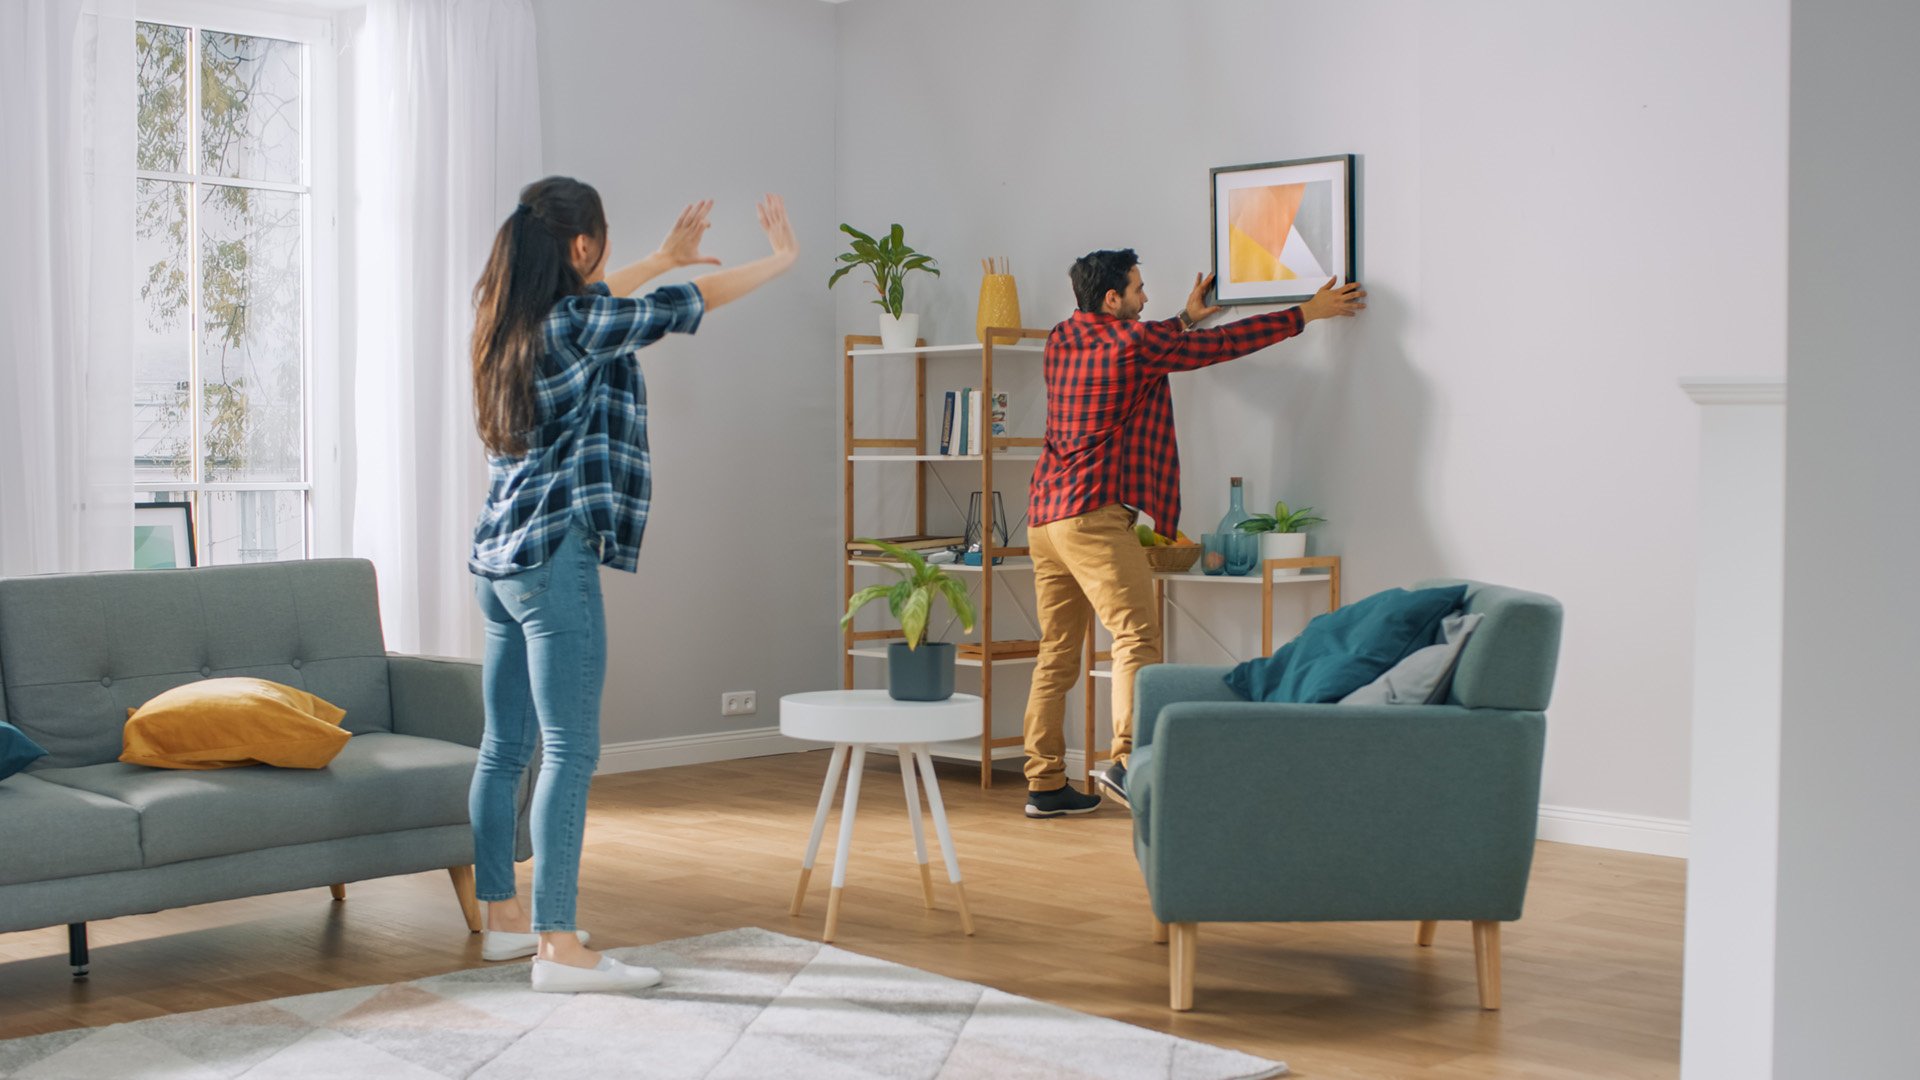
Furniture placement can obstruct natural light, so reorganizing layouts to keep windows clear allows sunlight to penetrate deeper into rooms. This method involves assessing current arrangements and moving bulky items away from windows or using lower-profile pieces. It's a no-cost solution that can instantly brighten a space, but it may require compromising on preferred layouts or storage needs.
Advantages
- Cost-free and reversible, allowing for experimentation without financial investment.
- Improves light distribution by removing barriers, making rooms feel more open and airy.
- Enhances traffic flow and functionality, as clear paths align with natural light streams.
- Can be done quickly, offering immediate results with minimal effort or tools.
- Encourages a minimalist aesthetic, reducing clutter and focusing on light as a design element.
Disadvantages
- May disrupt existing decor harmony or seating arrangements, requiring adjustments to room flow.
- Large furniture pieces might not fit elsewhere, leading to storage dilemmas or replacement costs.
- Limited impact in rooms with small windows or poor orientation, where light is inherently scarce.
- Can expose worn flooring or walls near windows, necessitating repairs or updates.
- Seasonal changes may require re-rearrangement to adapt to shifting sun angles.
How to Implement
- Analyze light sources: Identify all windows and doors in the room, noting the direction and intensity of sunlight at different times. Use a compass or sun-tracking app for accuracy.
- Clear window areas: Move sofas, bookshelves, or other tall furniture away from windows to create a buffer zone of at least 2-3 feet. Opt for low-backed chairs or benches near windows.
- Opt for light-transmitting furniture: Choose pieces with open designs, such as glass tables or leggy chairs, that allow light to pass through. Avoid solid, opaque items in central pathways.
- Create reflective pathways: Position light-colored rugs or reflective surfaces like metallic accents along light paths to bounce sunlight further into the room.
- Test and adjust: Live with the new arrangement for a few days, observing how light moves throughout the day. Shift items as needed to optimize brightness and functionality.
- Integrate storage solutions: Use under-window storage like built-in benches or low cabinets to keep areas clear while maintaining utility. Consider multi-functional furniture to save space.
🌟 Method 9: Add Reflective Flooring or Surfaces
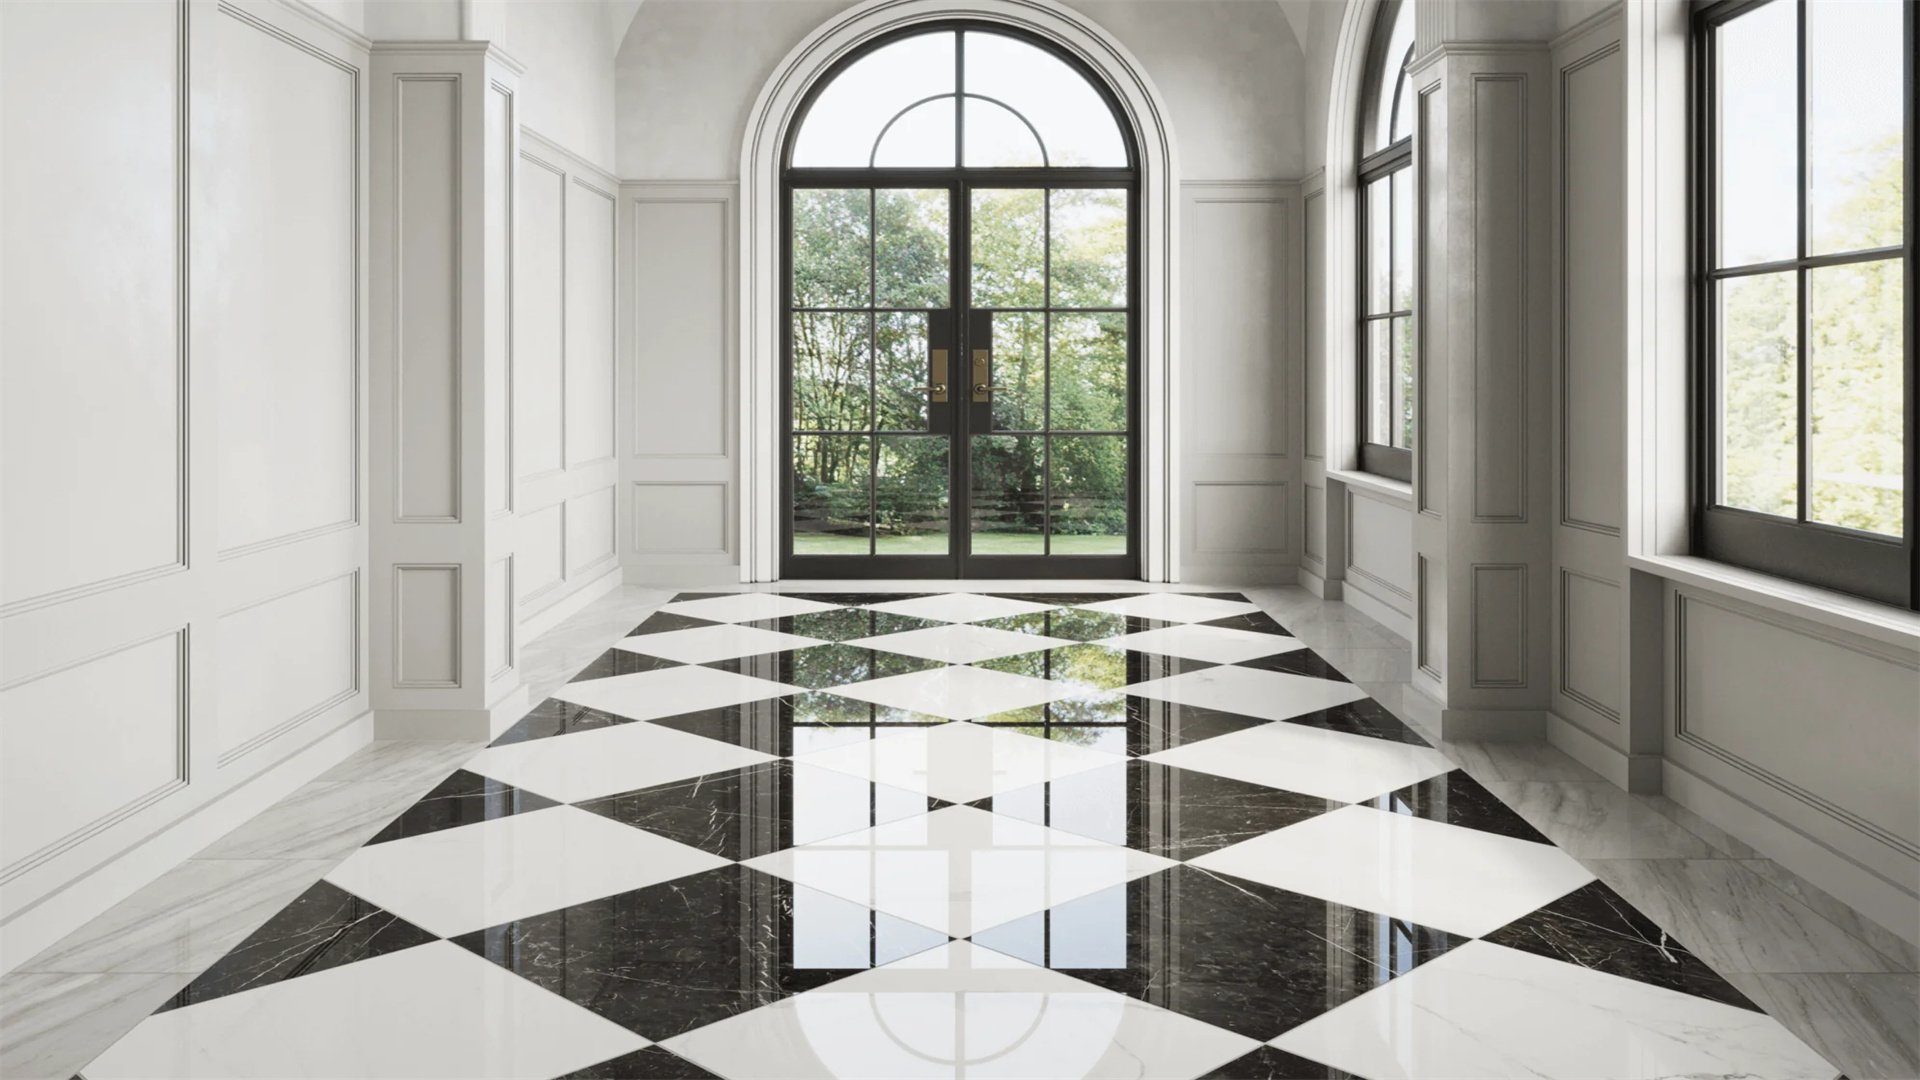
Floors and surfaces with reflective properties, such as polished hardwood, tile, or glossy finishes, can bounce natural light upward, illuminating ceilings and walls. This method involves updating flooring materials or adding rugs with sheen to enhance light distribution. It's particularly effective in rooms with large windows, but may require professional installation and can be slippery or high-maintenance.
Advantages
- Amplifies light from windows by reflecting it vertically, reducing shadows in room corners.
- Creates a luxe, modern look that elevates interior design, often increasing home value.
- Durable and easy to clean in many cases, especially with materials like porcelain tile or sealed concrete.
- Works well in conjunction with other methods, such as light-colored walls or mirrors, for cumulative effect.
- Can make small spaces appear larger by enhancing brightness and visual depth.
Disadvantages
- Reflective floors can show scratches, dust, and footprints easily, requiring frequent upkeep.
- May be slippery when wet, posing safety risks, especially in kitchens or bathrooms.
- Costly to install, with materials like polished stone or high-gloss hardwood being premium options.
- Can create glare if too shiny, causing discomfort or interfering with screen visibility.
- Not suitable for all decor styles; overly reflective surfaces might feel cold or impersonal.
How to Implement
- Assess existing flooring: Determine if current floors can be refinished to a higher sheen or if replacement is needed. Consider subfloor conditions and budget constraints.
- Choose reflective materials: Opt for options like glossy porcelain tile, polished concrete, or engineered hardwood with a lacquered finish. For a softer look, use large-format light-colored tiles with minimal grout lines.
- Prepare the subfloor: Ensure it is level, clean, and dry before installation. Hire professionals for tasks like sanding hardwood or laying tile to achieve a smooth, reflective surface.
- Install with light in mind: Position flooring planks or tiles perpendicular to windows to maximize light reflection. Use light-colored grout or seamless installations to avoid visual breaks.
- Add complementary elements: Place area rugs with reflective threads or metallic accents to enhance bounce without covering entire floors. Use furniture with glossy finishes to continue the theme.
- Maintain reflectivity: Sweep or vacuum regularly to remove debris, and clean with appropriate products to avoid dulling surfaces. Recoat polished floors every few years to restore shine.
🌿 Method 10: Utilize Outdoor Elements like Light Wells or Courtyards
Incorporating outdoor features such as light wells, courtyards, or atriums can channel natural light into lower levels or central areas of a home. This method involves architectural design or landscaping to create open spaces that capture and direct sunlight indoors. It's most effective in new builds or major renovations, offering dramatic lighting effects but at a high cost and complexity.
Advantages
- Brings daylight to basement or ground-floor rooms that typically lack direct window access.
- Creates a unique architectural focal point, enhancing both interior and exterior aesthetics.
- Improves ventilation and indoor air quality when combined with operable windows or vents.
- Adds usable outdoor space, such as a courtyard for relaxation, increasing living area.
- Can significantly boost property value due to the premium nature of such features.
Disadvantages
- Extremely costly and time-consuming, often requiring architectural plans and construction permits.
- May reduce indoor square footage if interior walls are removed to accommodate the feature.
- Risk of water infiltration or drainage issues, necessitating careful engineering and waterproofing.
- Limited to homes with available land or specific layouts, not feasible for all properties.
- Maintenance includes cleaning outdoor areas and managing plants or debris in light wells.
How to Implement
- Consult with professionals: Engage an architect or designer to assess your home's potential for light wells or courtyards. Consider factors like soil conditions, drainage, and local building codes.
- Design the feature: Plan the size and location—for example, a central atrium for multi-story homes or a side courtyard for ranch-style houses. Incorporate reflective surfaces like white walls or water features to amplify light.
- Obtain permits and approvals: Submit detailed plans to local authorities for review, addressing any zoning or environmental concerns. This process can take months, so factor it into timelines.
- Execute construction: Hire a contractor to excavate if needed, install structural supports, and integrate waterproof membranes. Use materials like glass walls or skylights to enclose the space while allowing light in.
- Enhance with landscaping: Plant light-colored or reflective vegetation, such as white flowers or silver foliage, to bounce additional light indoors. Avoid tall plants that could block sunlight.
- Maintain the system: Regularly clean glass surfaces, clear drains to prevent water buildup, and trim plants to ensure uninterrupted light flow. Inspect seals and structures annually for wear.
Conclusion
Incorporating more natural light into your home is a multifaceted endeavor that can transform living spaces into brighter, healthier environments. From simple updates like using mirrors and light-colored paints to more involved projects such as installing skylights or glass doors, each method offers unique benefits and challenges. By carefully assessing your home's layout, budget, and aesthetic goals, you can combine these strategies to maximize daylight ingress. Remember, natural light not only reduces energy costs but also enhances well-being, making it a worthwhile investment. Start with one or two methods, observe the changes, and gradually implement others to create a seamlessly lit home that feels open, inviting, and connected to the outdoors. For further inspiration, explore international home design websites that showcase innovative lighting solutions tailored to diverse climates and architectures.