Thrifty DIY Solutions to Create Hidden Storage in Limited Living Areas
In today's urban environments, living spaces are often compact, making storage a significant challenge. Clutter can quickly accumulate, reducing functionality and aesthetic appeal. However, with creativity and a thrifty mindset, DIY solutions can transform limited areas into organized havens with hidden storage. This article explores practical, budget-friendly DIY projects that maximize space without compromising style. By leveraging common materials and simple techniques, you can create concealed storage that blends seamlessly into your home. We'll delve into various methods, their advantages and disadvantages, and step-by-step implementation guides. Whether you're in a studio apartment, a small house, or just looking to optimize space, these ideas will inspire you to rethink every nook and cranny. Let's embark on a journey to unlock hidden potential in your living area through clever, cost-effective DIY solutions.
One of the most overlooked spaces in a bedroom is the area under the bed. With a few DIY tweaks, you can convert this void into a valuable storage zone. This solution is ideal for storing seasonal clothing, bedding, or infrequently used items, keeping them out of sight yet accessible. The key is to design systems that are easy to use and integrate with your bed frame. Below, we break down the methods, pros and cons, and implementation steps.

🎆Solution 1: Methods for Under-Bed Storage
There are several approaches to creating under-bed storage, depending on your bed type and budget:
- Custom Drawers: Build custom drawers to fit under the bed frame for a seamless look.
- Rolling Bins: Use rolling bins or containers for easy access and mobility.
- Lift-Up Platforms: Install lift-up platforms to create a large hidden compartment.
- Repurposed Materials: For a thrifty option, repurpose old furniture, wood pallets, or cardboard boxes.
Consider height clearance and accessibility when choosing a method. For instance, if your bed is low, shallow containers might work better than deep drawers. Measuring the space accurately is crucial to ensure a snug fit and smooth operation.
Advantages and Disadvantages
Advantages:
- Maximizes vertical dead space, reducing clutter in closets and shelves.
- Discreet, as items are hidden from view, contributing to a cleaner room aesthetic.
- DIY projects can be customized to fit exact dimensions and personal style.
- Cost-effective; using recycled materials like cardboard boxes can keep expenses under $20.
- Enhances organization, making it easier to categorize and retrieve items.
Disadvantages:
- Accessing storage might require bending or kneeling, inconvenient for some users.
- Dust and allergens can accumulate if not sealed properly.
- In humid climates, moisture might be an issue, necessitating airtight containers.
- DIY projects require time and basic tools, which might be a barrier for beginners.
- Overloading storage can strain bed frames or make sliding mechanisms difficult to use.
How to Implement Under-Bed Storage
Here’s a step-by-step guide to building simple under-bed drawers using plywood and casters:
- Measure the Space: Determine the dimensions under your bed, including height, width, and depth. Subtract a few inches for clearance, aiming for drawers that slide smoothly. For example, if the space is 30 inches wide, make drawers 28 inches wide.
- Gather Materials: You'll need plywood sheets (¼-inch for sides, ½-inch for bottom), casters, wood glue, screws, a saw, drill, and sandpaper. Opt for affordable materials from hardware stores or repurpose old shelves. Total cost can be around $30-$50.
- Cut the Wood: Cut plywood into pieces for the drawer sides, front, back, and bottom. Assemble using wood glue and screws, ensuring corners are square. Sand edges to prevent splinters.
- Attach Casters: Screw casters to the bottom of the drawer, preferably swivel ones for easy maneuvering. Test the drawer under the bed to ensure it slides without obstruction.
- Add Handles or Labels: Install simple handles or use fabric pulls for easy access. Label drawers by category (e.g., winter clothes, extra blankets) to maintain organization.
For a quicker fix, use plastic bins with lids from dollar stores. Measure the under-bed height, purchase bins that fit, and add wheels if desired. This approach costs under $10 and takes minutes to set up. Remember to clean the area regularly to prevent dust buildup.
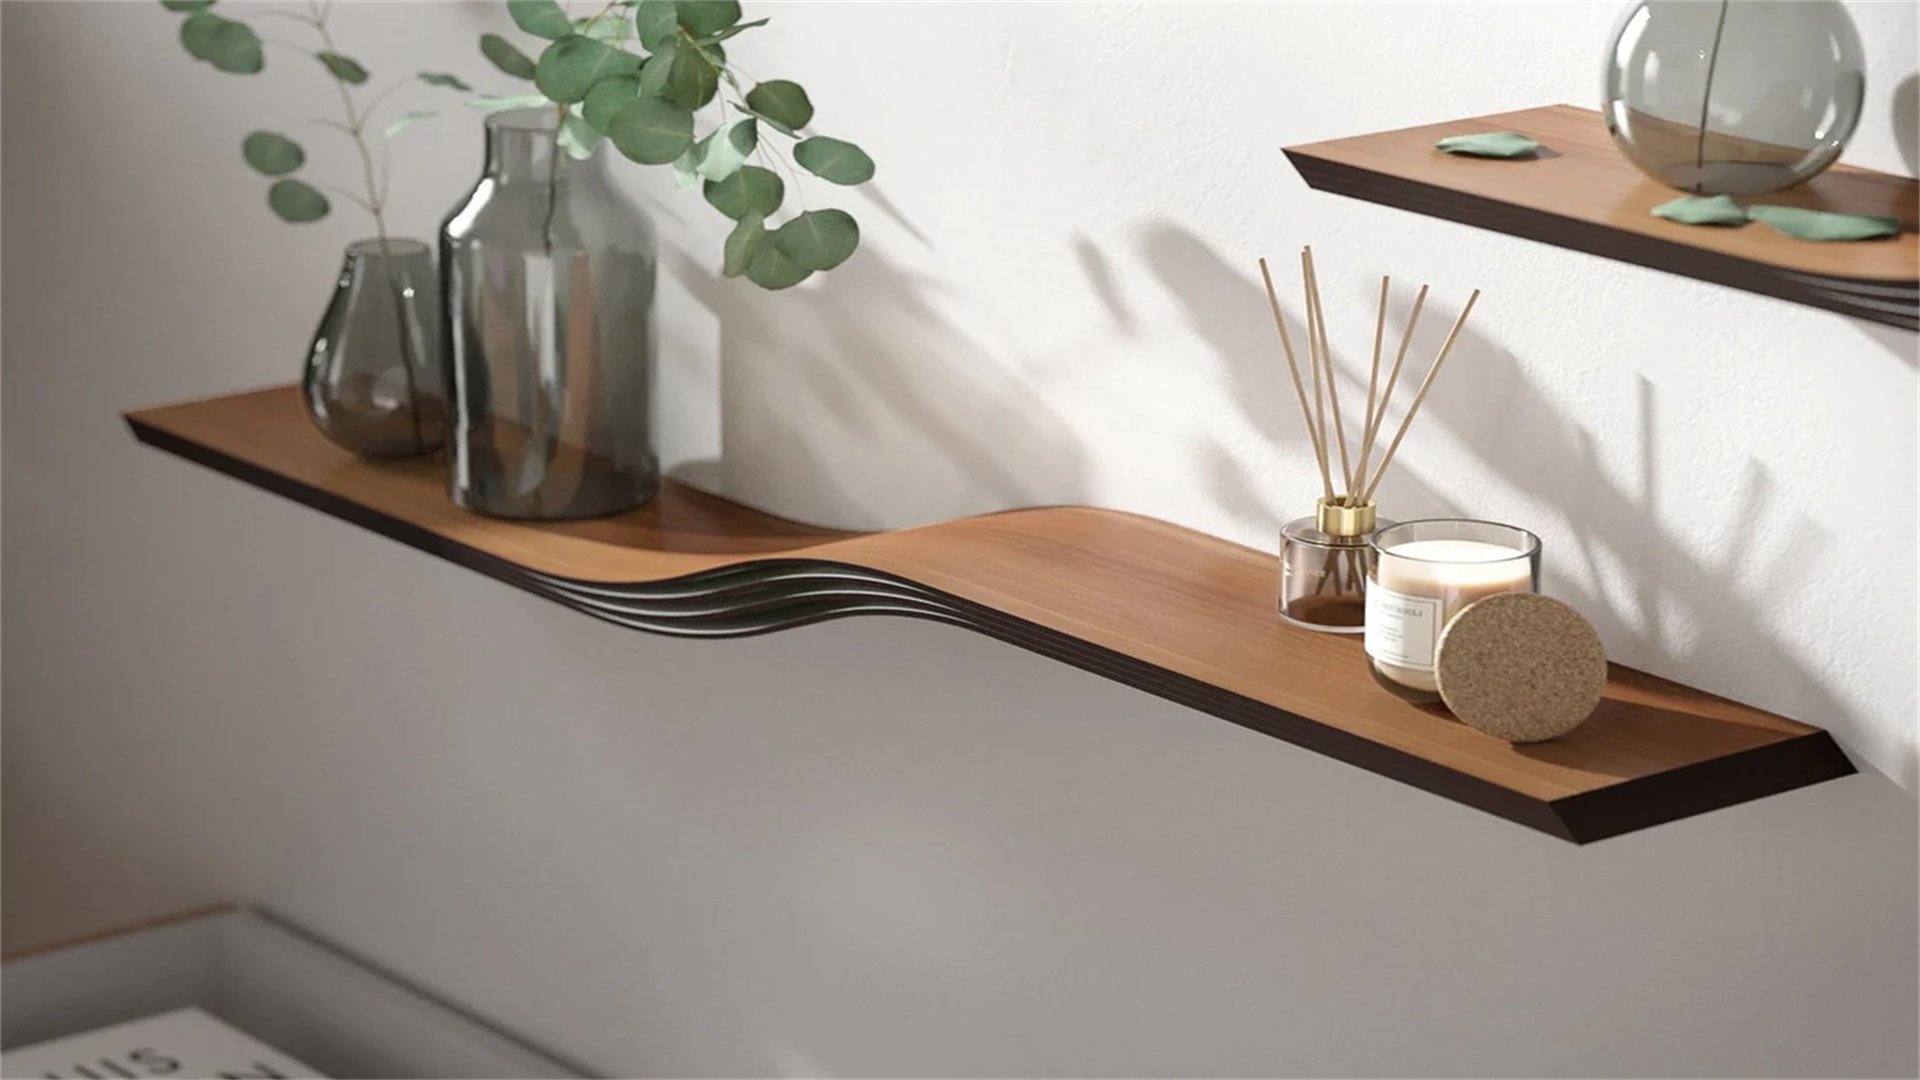
📚 Solution 2: Wall-Mounted Hidden Shelves
Walls offer vast untapped potential for storage, especially in small living areas. By installing hidden shelves, you can store books, decor, or daily essentials without occupying floor space. These shelves can be disguised as art, mirrors, or blend into the wall color, creating a seamless look. This solution is perfect for renters or homeowners seeking flexible, non-permanent options. Below, we explore various wall-mounted hidden storage ideas, their benefits and drawbacks, and detailed implementation.
Methods for Wall-Mounted Hidden Shelves
Hidden shelves can take many forms:
- Floating Shelves with Concealed Compartments: Build shelves with hidden cavities behind or beneath.
- Shelves Behind Paintings: Use lightweight paintings or frames that swing open to reveal storage.
- Recessed Niches: Cut into drywall to create built-in shelves that flush with the wall.
- Repurposed Materials: Use reclaimed wood, old cabinets, or reinforced cardboard for thrifty options.
Consider wall type (drywall, plaster, brick) for installation. Lightweight items are best to avoid structural issues. Plan the layout to integrate with room decor.
Advantages and Disadvantages
Advantages:
- Frees up floor space, making rooms feel larger and less cluttered.
- Highly customizable in size, shape, and finish.
- DIY allows for creative designs, like shelves that pivot or fold down.
- Cost can be minimal, using scrap wood or inexpensive brackets.
- Improves accessibility, placing items at eye level for easy reach.
- Keeps hazards off the floor, enhancing safety for children or pets.
Disadvantages:
- Installation requires drilling into walls, which might not be feasible for renters.
- Weight capacity is limited; heavy items could cause sagging or detachment.
- DIY errors might lead to uneven surfaces or visible seams.
- Hidden compartments might be forgotten, leading to disorganization over time.
- Maintenance involves dusting and occasional tightening of fixtures.
How to Implement Wall-Mounted Hidden Shelves
Follow these steps to create a basic hidden shelf behind a painting:
- Choose a Location: Select a wall area with studs for support, using a stud finder. Mark the spot where the shelf and painting will hang. Ensure it's at a convenient height, typically 60-65 inches from the floor.
- Build the Shelf: Cut a piece of wood to desired dimensions (e.g., 24x12 inches). Sand and paint it to match the wall. Attach L-brackets to the bottom for support, or build a simple box frame with a back panel.
- Install the Shelf: Drill holes into the wall at marked stud points. Secure the shelf with screws, ensuring it's level using a spirit level. For added stealth, extend the shelf slightly so the painting can hang in front, covering it.
- Attach the Painting: Use a lightweight painting or frame with a deep back. Hang it on a hook above the shelf, allowing it to swing open like a door. Add small magnets or latches to keep it closed securely.
- Organize Items: Place small items like keys, remotes, or documents on the shelf. Test the painting's swing to ensure easy access without obstructing walkways.
For a more advanced project, create recessed shelves by cutting into drywall (if permitted). This involves framing a niche, installing shelves inside, and patching edges. Cost ranges from $50-$100 for materials like drywall, wood, and joint compound. Always check for wiring or pipes before cutting into walls.
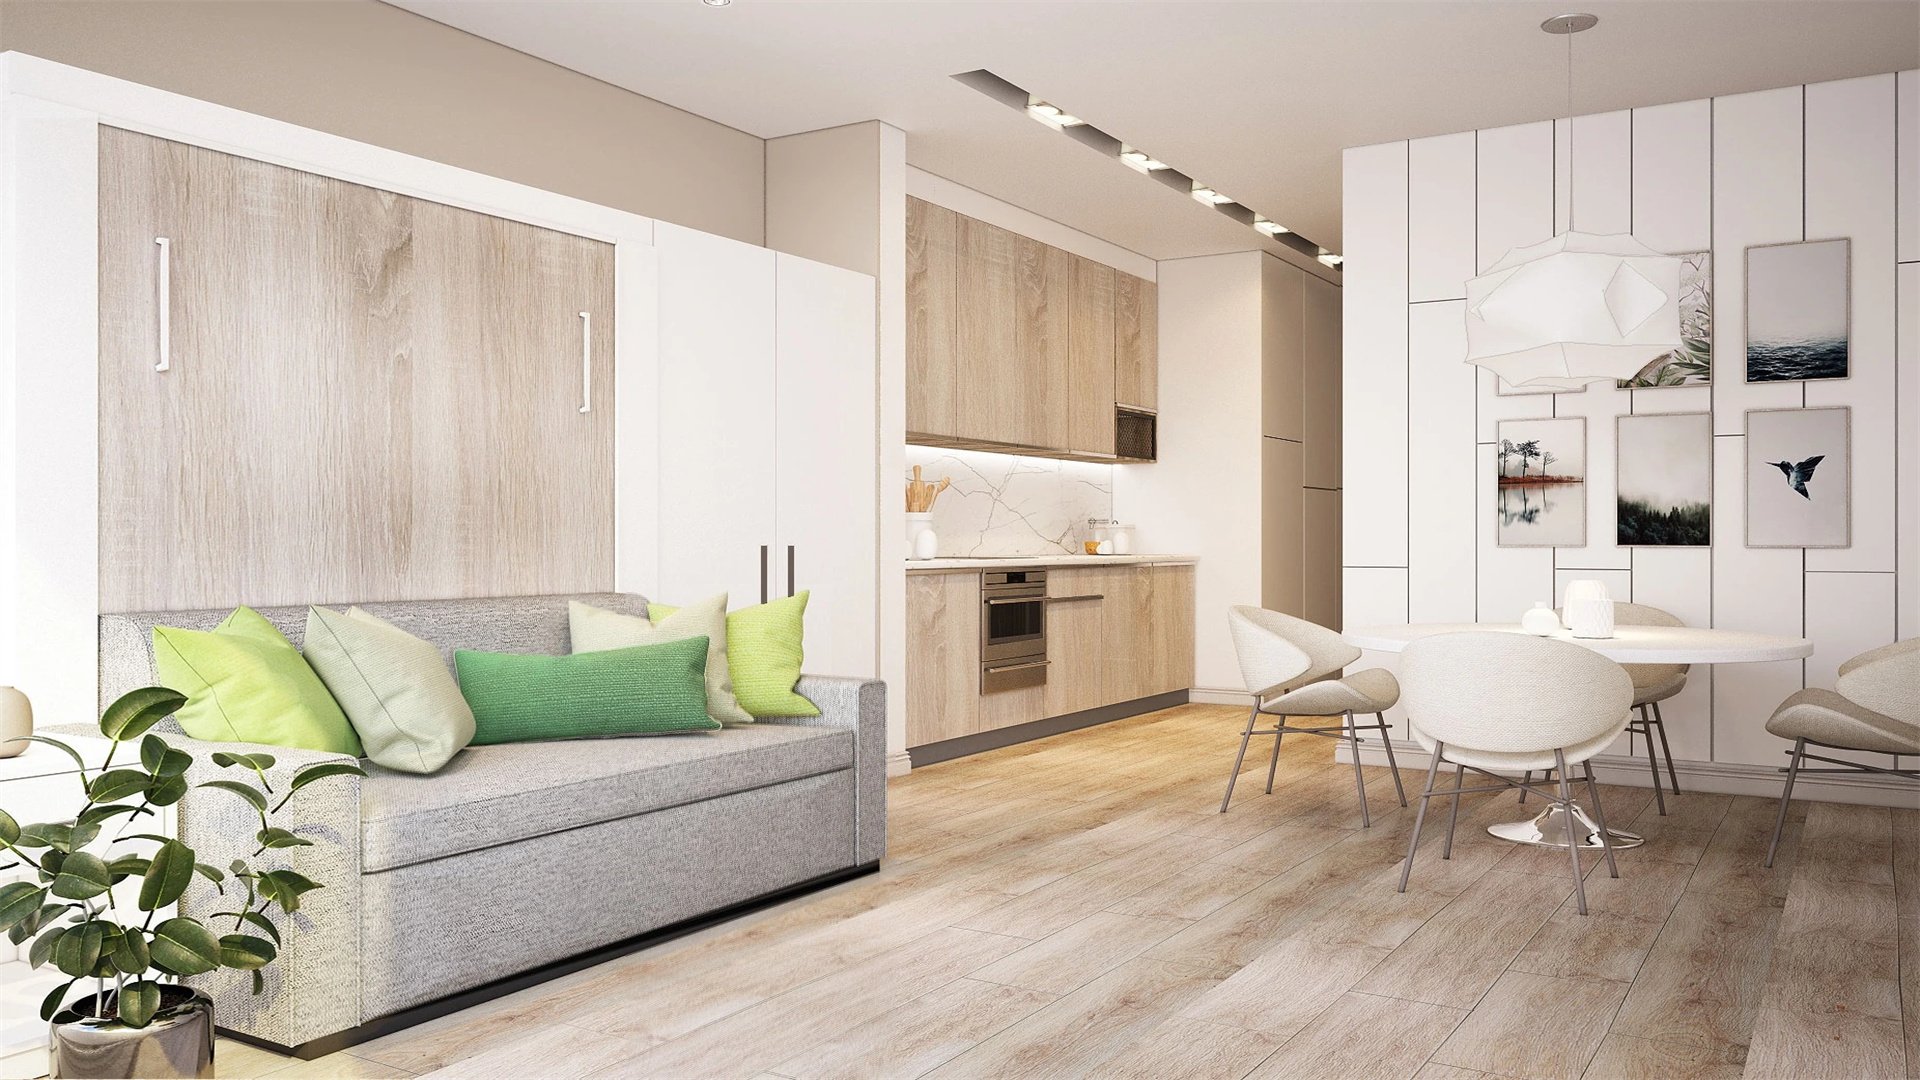
🛋️ Solution 3: Multi-Functional Furniture DIY
Furniture that serves dual purposes is a game-changer for small spaces. By building or modifying pieces to include hidden storage, you can save space and reduce clutter. Examples include ottomans with lift-up tops, beds with built-in drawers, or coffee tables with hidden compartments. This solution combines functionality with style, allowing you to customize pieces to fit your décor. We'll examine popular multi-functional furniture projects, their pros and cons, and how to achieve them on a budget.
Methods for Multi-Functional Furniture
DIY multi-functional furniture often involves:
- Repurposing Existing Items: Transform old trunks into coffee tables or bookshelves into fold-down desks.
- Building from Scratch: Use materials like pallet wood, crates, or second-hand furniture for custom pieces.
- Incorporating Hidden Compartments: Add storage to seating, sleeping, or dining furniture via lift-up lids or pull-out drawers.
- Modular Designs: Create stackable cubes that form seats or shelves for flexibility.
Consider primary use and storage needs. Tools like saws, drills, and hinges are essential for assembly.
Advantages and Disadvantages
Advantages:
- Maximizes utility per square foot, making living areas more efficient.
- Reduces the need for multiple furniture pieces, saving money long-term.
- DIY allows for personalization in size, color, and features.
- Hidden storage keeps items organized and out of sight, enhancing aesthetics.
- Repurposing materials reduces waste, benefiting the environment.
- Encourages creativity to design pieces matching exact needs.
Disadvantages:
- Requires intermediate DIY skills and time, daunting for novices.
- Weight and stability issues if not constructed properly, posing safety hazards.
- Materials might cost more than expected, especially new wood or hardware.
- Large pieces can be difficult to move or rearrange.
- Hidden compartments might have limited capacity, requiring regular decluttering.
How to Implement a Storage Ottoman
Here's a guide to creating a simple storage ottoman from a cardboard box or wooden crate:
- Select a Base: Choose a sturdy cardboard box or wooden crate of desired size (e.g., 18x18 inches). For durability, opt for wood or reinforce cardboard with tape. Thrift stores often have cheap crates for repurposing.
- Add a Lid: Cut a piece of plywood or thick cardboard to fit the top. Attach it with hinges on one side, allowing it to lift open. For a cushioned top, glue foam padding and cover with fabric using a staple gun.
- Enhance Storage: Line the inside with fabric or paint to protect items. Consider adding dividers for organization. For cardboard, seal edges with duct tape to prevent tearing.
- Finish the Exterior: Paint or stain the exterior to match your décor. Add decorative elements like legs or wheels for mobility. Ensure the lid closes securely, using magnets or a latch if needed.
- Use and Maintain: Place blankets, magazines, or toys inside. Regularly check hinges and structure for wear. Vacuum the interior to keep it clean.
For a more advanced project, build a bed frame with built-in drawers. This involves constructing a platform bed from plywood and adding drawer slides on the sides. Cost can range from $100-$200 for lumber and hardware. Measure mattress size and allow enough clearance for drawers to open smoothly.
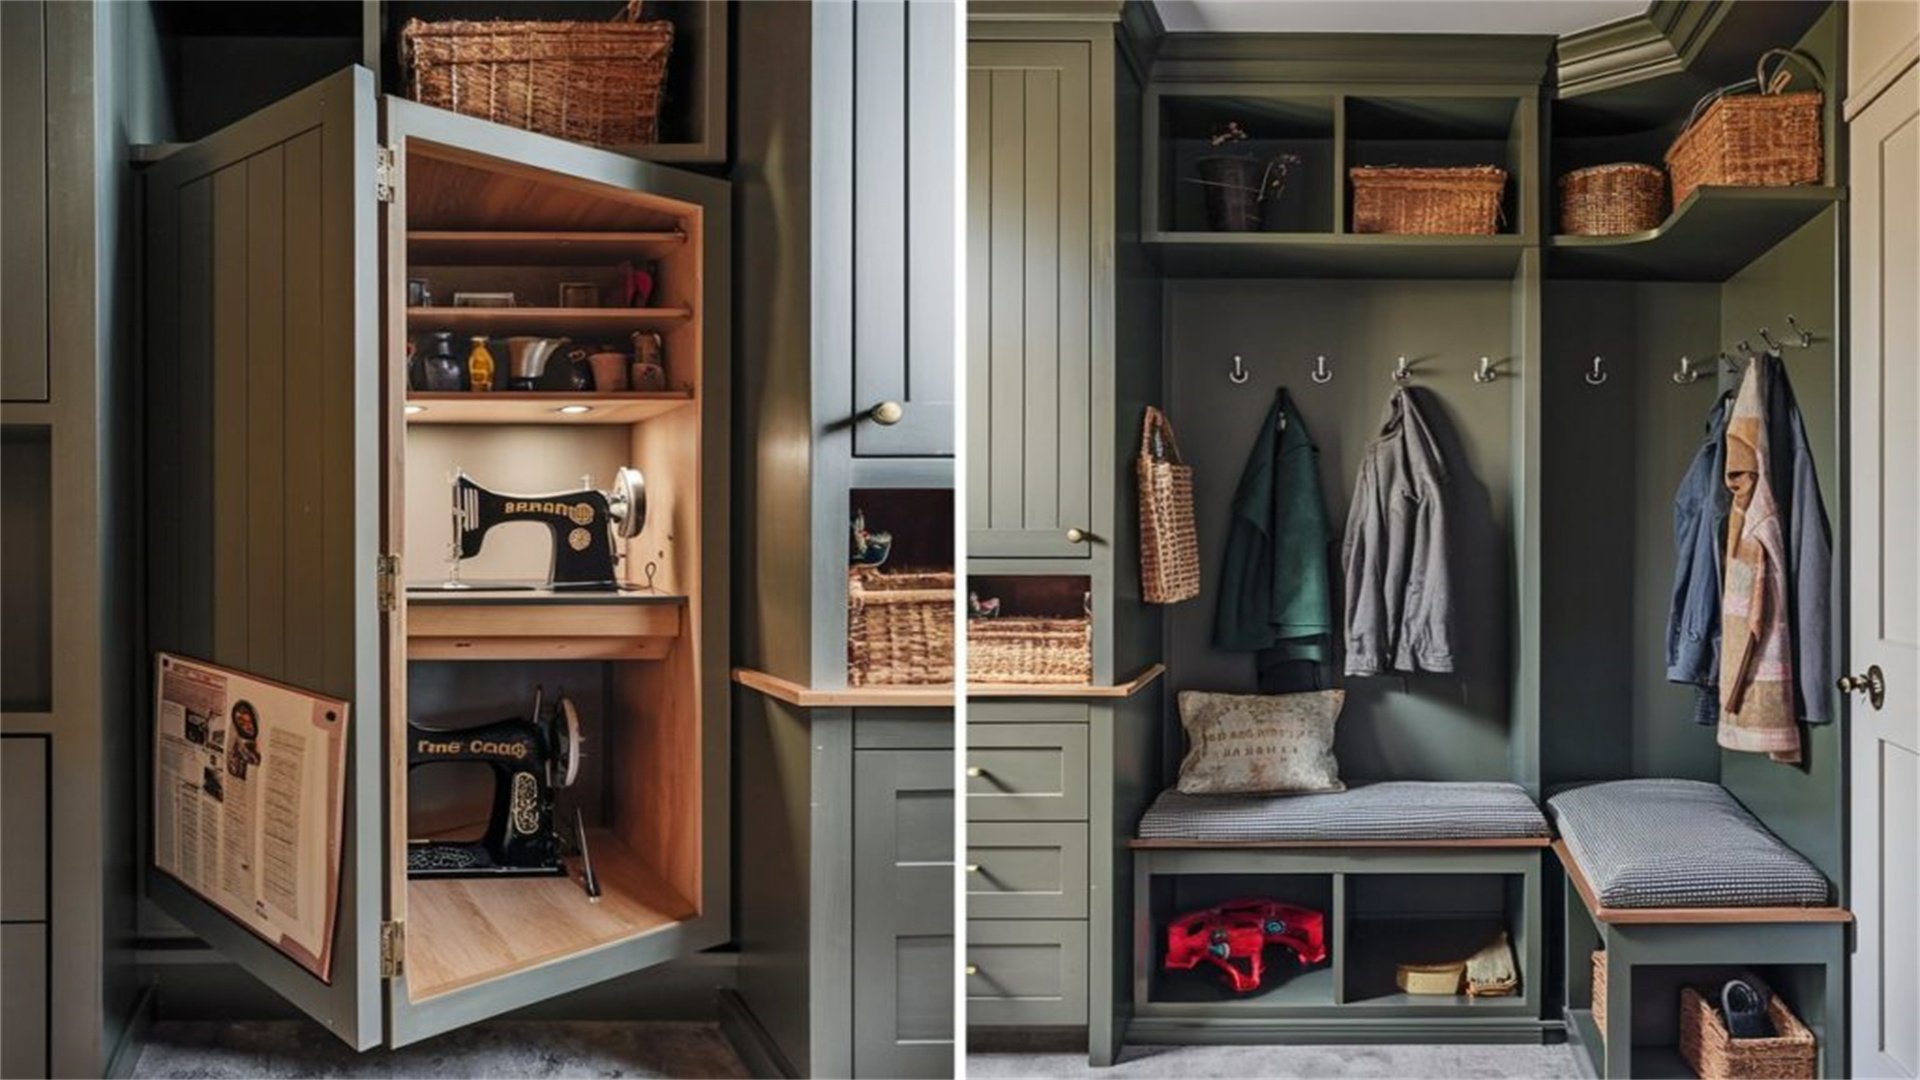
⬆️ Solution 4: Vertical Storage with Hidden Compartments
In limited living areas, going vertical is a smart strategy to utilize height rather than floor space. By creating hidden storage within vertical structures like tall cabinets, shelves, or even doors, you can store items without encroaching on living zones. This solution is particularly effective in kitchens, bathrooms, or entryways where wall space is abundant. We'll discuss methods to build vertical hidden storage, weigh its advantages and disadvantages, and provide step-by-step instructions for DIY projects.
Methods for Vertical Hidden Storage
Vertical hidden storage can include:
- Floor-to-Ceiling Cabinets: Build tall cabinets with secret compartments or false backs.
- Shelves Behind Sliding Panels: Install sliding doors or panels to conceal shelves.
- Storage Integrated into Stair Risers: Use stair steps for pull-out drawers or cubbies.
- Repurposed Materials: Use PVC pipes, fabric pockets, or old ladders for thrifty options.
Consider accessibility; high storage might require step stools. Design with symmetry and color matching to blend in.
Advantages and Disadvantages
Advantages:
- Uses often-wasted upper wall areas, significantly increasing capacity.
- Keeps floors clear, improving traffic flow and safety.
- Hidden compartments maintain a tidy appearance, reducing visual clutter.
- DIY projects can be scaled to fit exact room dimensions.
- Low cost if using recycled items like old bookshelves or shutters.
- Encourages organization by categorizing items by height (e.g., rarely used items on top).
Disadvantages:
- Accessing high storage can be challenging for children or individuals with mobility issues.
- Installation might require ladders or professional help for tall structures.
- Weight distribution is critical; overloading can cause tipping or wall damage.
- DIY projects may lack polish if not finished properly, detracting from aesthetics.
- Can make rooms feel cramped if overdone, so balance is key.
- Maintenance involves dusting high surfaces and securing fixtures periodically.
How to Implement a Tall Cabinet with Hidden Compartments
Follow these steps to build a basic tall cabinet from plywood with hidden shelves behind a false back:
- Design the Cabinet: Decide on dimensions, such as 80 inches tall, 24 inches wide, and 12 inches deep. Plan for a false back panel that conceals a shallow compartment (e.g., 2 inches deep) for documents or valuables.
- Cut and Assemble: Cut plywood into pieces for sides, top, bottom, doors, and shelves. Assemble the main frame using wood glue and screws. Add fixed shelves at intervals, leaving space for the hidden compartment at the back.
- Create the False Back: Cut a thin plywood panel slightly smaller than the interior back. Attach it with hinges at the top, allowing it to swing open. Ensure it sits flush with the cabinet interior when closed. Paint it to match the interior for camouflage.
- Install Doors and Hardware: Hang doors on the front, using hinges and handles. Add a magnetic catch to keep the false back closed discreetly. For extra secrecy, use a hidden latch or lock on the false back.
- Finish and Organize: Sand and paint the cabinet to blend with your room. Place everyday items on visible shelves and use the hidden compartment for sensitive or infrequently accessed items. Test the false back for smooth operation.
For a simpler project, attach fabric pockets to the back of a door for storage. Use heavy-duty fabric and sew or glue pockets of varying sizes. Hang it over the door with a rod or hooks. This costs under $10 and takes an hour to make, ideal for storing shoes, toiletries, or office supplies.
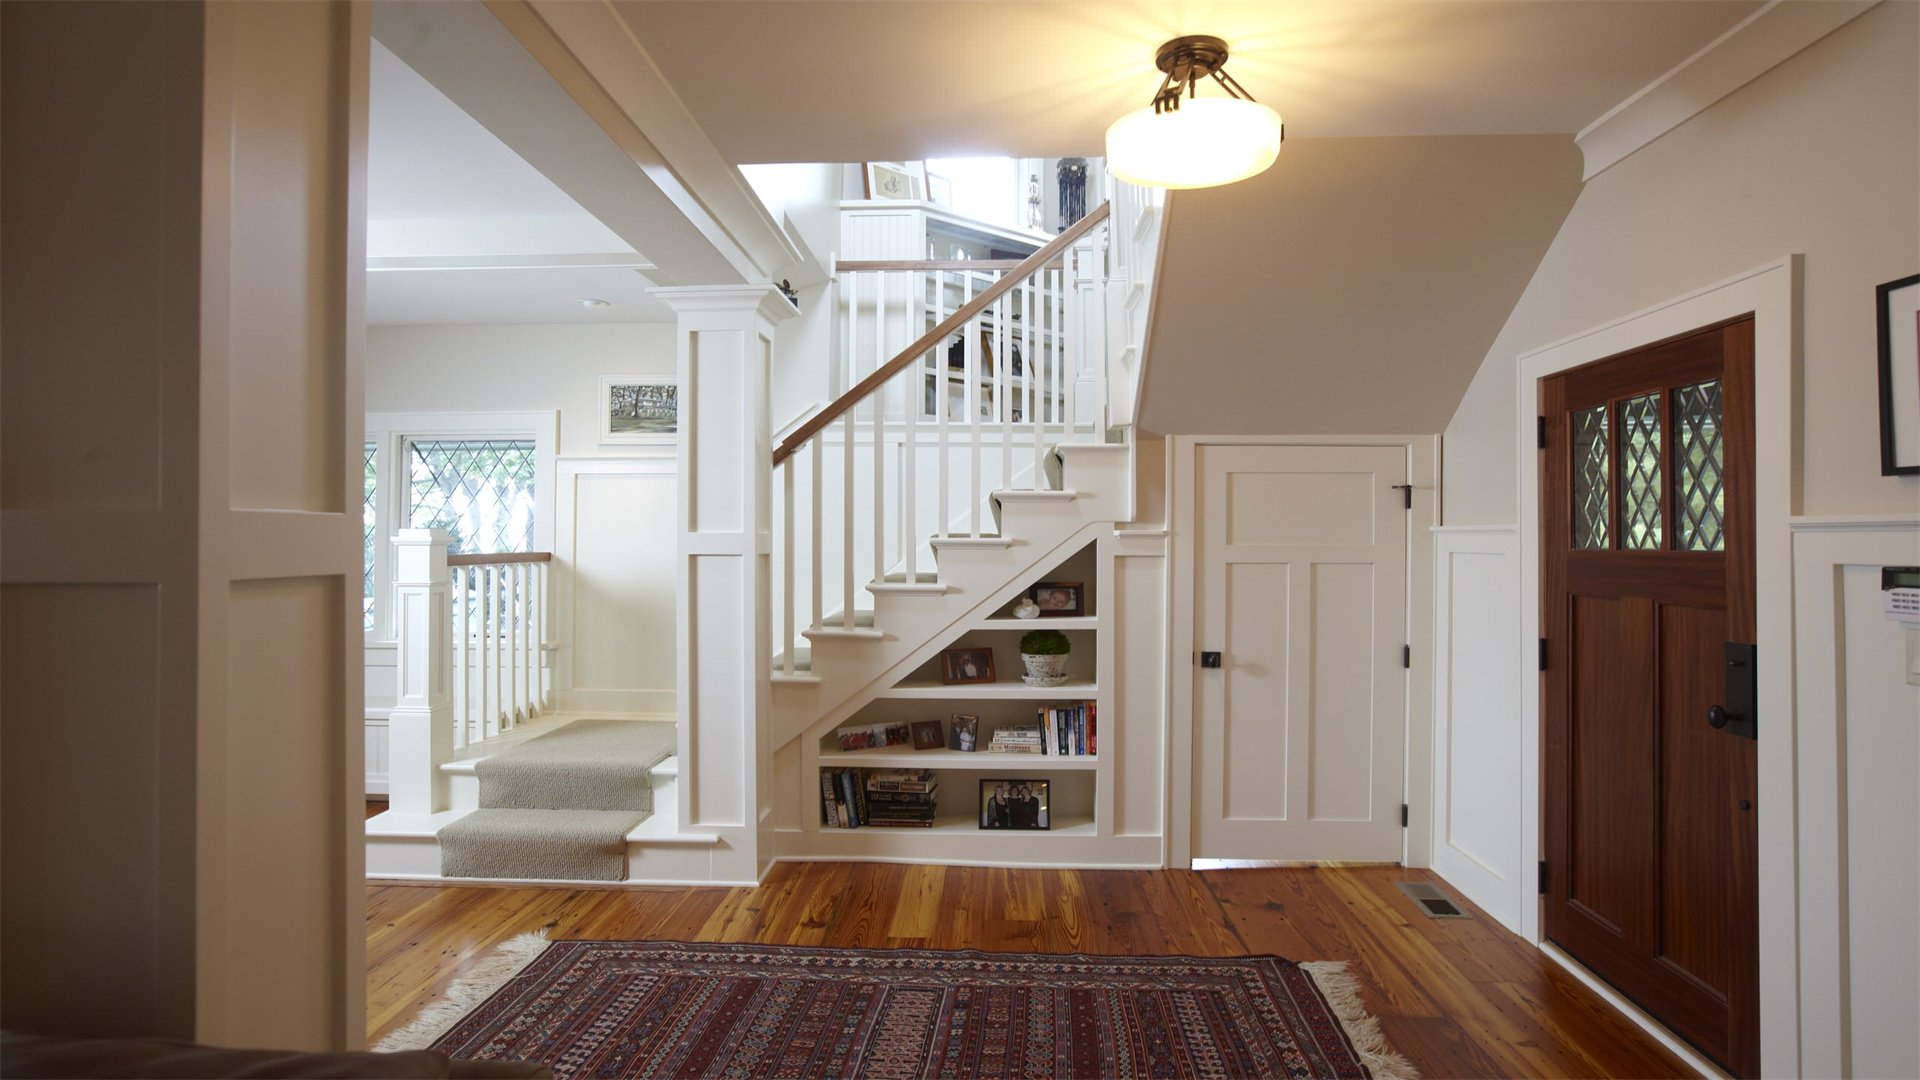
🔍 Solution 5: Hidden Storage in Unused Spaces
Every home has underutilized spaces that can be transformed into hidden storage with a bit of creativity. These include areas under stairs, inside window seats, above doors, or even within baseboards. By targeting these niches, you can add storage without altering the room's footprint. This solution is perfect for maximizing odd corners and irregular layouts common in small dwellings. We'll explore various unused spaces, discuss methods to convert them, and outline the benefits and challenges, along with DIY implementation guides.
Methods for Utilizing Unused Spaces
Identify overlooked areas through a thorough walkthrough:
- Under Stairs: Convert into pull-out drawers, a mini-closet, or shelving units.
- Window Seats: Build lift-up benches with storage inside for linens or books.
- Above Doors: Install shallow shelves for books or decor items.
- Baseboards: Modify to include narrow drawers for small items like keys or cables.
- Repurposed Materials: Use scrap wood, old drawers, or cardboard templates for thrifty builds.
Consider space function; for example, under-stair storage might suit bulky items like luggage. Measure carefully for custom fits.
Advantages and Disadvantages
Advantages:
- Taps into otherwise wasted space, boosting storage without sacrificing living area.
- Highly discreet, as storage blends into existing structures.
- Low-cost DIY, using materials on hand or from thrift stores.
- Encourages innovative thinking, turning limitations into opportunities.
- Enhances room features, like making a window seat more functional.
- Reduces clutter in main areas, promoting a sense of order.
Disadvantages:
- Some spaces might be difficult to access or modify, especially in rented properties.
- DIY work in tight areas can be physically challenging and time-consuming.
- Limitations on storage size or weight capacity.
- If not sealed properly, hidden compartments could attract pests or moisture.
- Over-customizing might reduce resale value if modifications are too niche.
- Maintenance requires checking for dust and ensuring mechanisms work smoothly.
How to Implement Under-Stair Storage
Here’s a step-by-step guide to creating pull-out drawers under a staircase:
- Assess the Space: Measure the triangular or irregular area under the stairs. Note any obstructions like pipes or wiring. Plan drawer sizes to fit the shape, possibly using sliding or rolling mechanisms.
- Build Drawer Frames: Construct drawer boxes from plywood, custom-cut to fit the space. For irregular shapes, create templates with cardboard first. Use sturdy slides or casters for movement.
- Install Slides: Attach drawer slides to the stair structure or a built-in frame. Ensure they are level and can support the drawer weight. Test each drawer for smooth extension and retraction.
- Add Front Panels: Cut front panels from plywood or MDF to cover drawer fronts. Paint or finish them to match the surrounding walls or stairs, making them invisible when closed.
- Organize and Secure: Fill drawers with items like shoes, tools, or holiday decorations. Add labels or dividers for easy access. Install locks if storing valuable items, and check periodically for wear on slides.
For a window seat, build a bench with a hinged top. Use plywood for the frame and cushion the top with foam and fabric. Inside, add bins or shelves. Cost can be $50-$100 for materials. Ensure the hinge mechanism is strong enough for frequent use.