10 Simple DIY Garden Fencing Ideas
Creating a garden fence is not just about defining boundaries; it's an opportunity to enhance your outdoor space's aesthetics, privacy, and functionality. DIY garden fencing allows you to customize designs to suit your style, budget, and needs, while adding a personal touch to your landscape. In this comprehensive guide, we explore 10 simple DIY garden fencing ideas that are easy to implement, cost-effective, and inspired by popular trends from international websites. Each idea includes detailed explanations, advantages and disadvantages, and step-by-step implementation guides. Whether you're a beginner or an experienced DIY enthusiast, these projects will help you build a beautiful and practical garden fence. Let's dive in!
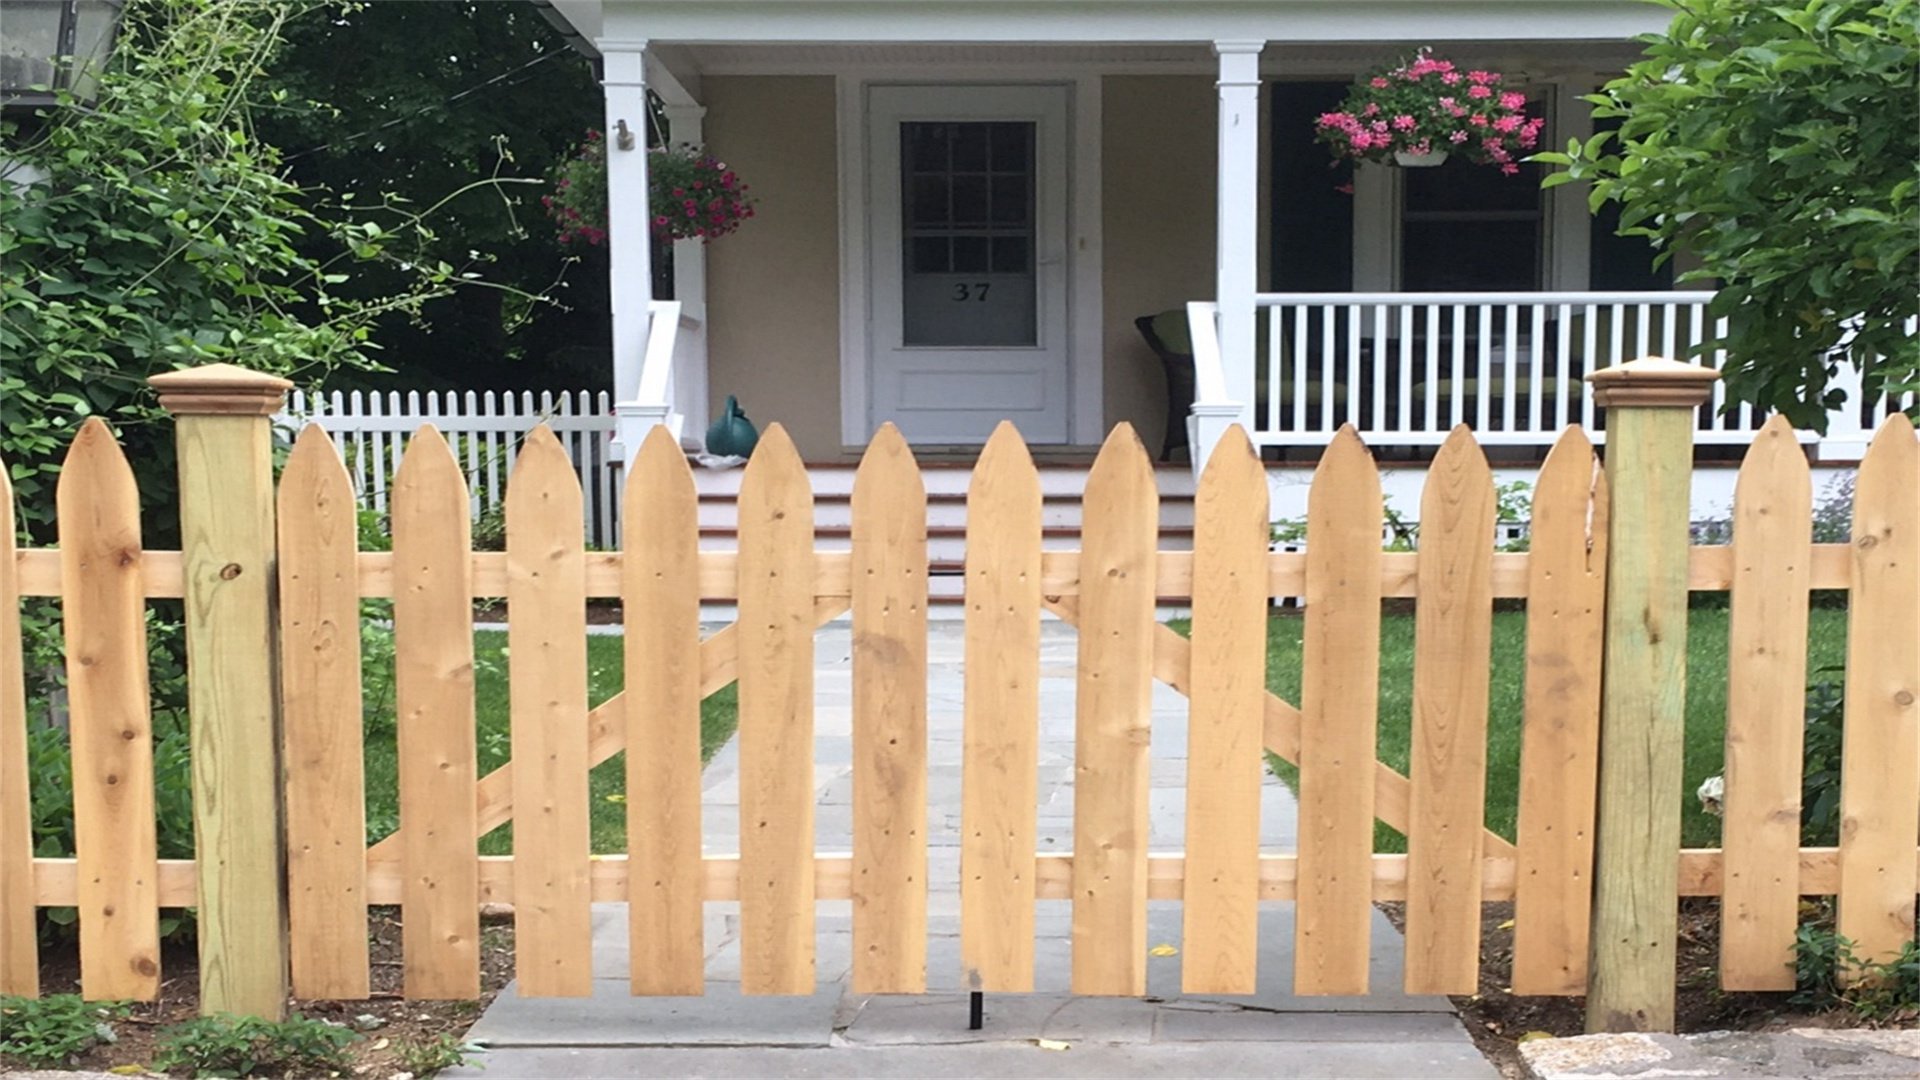
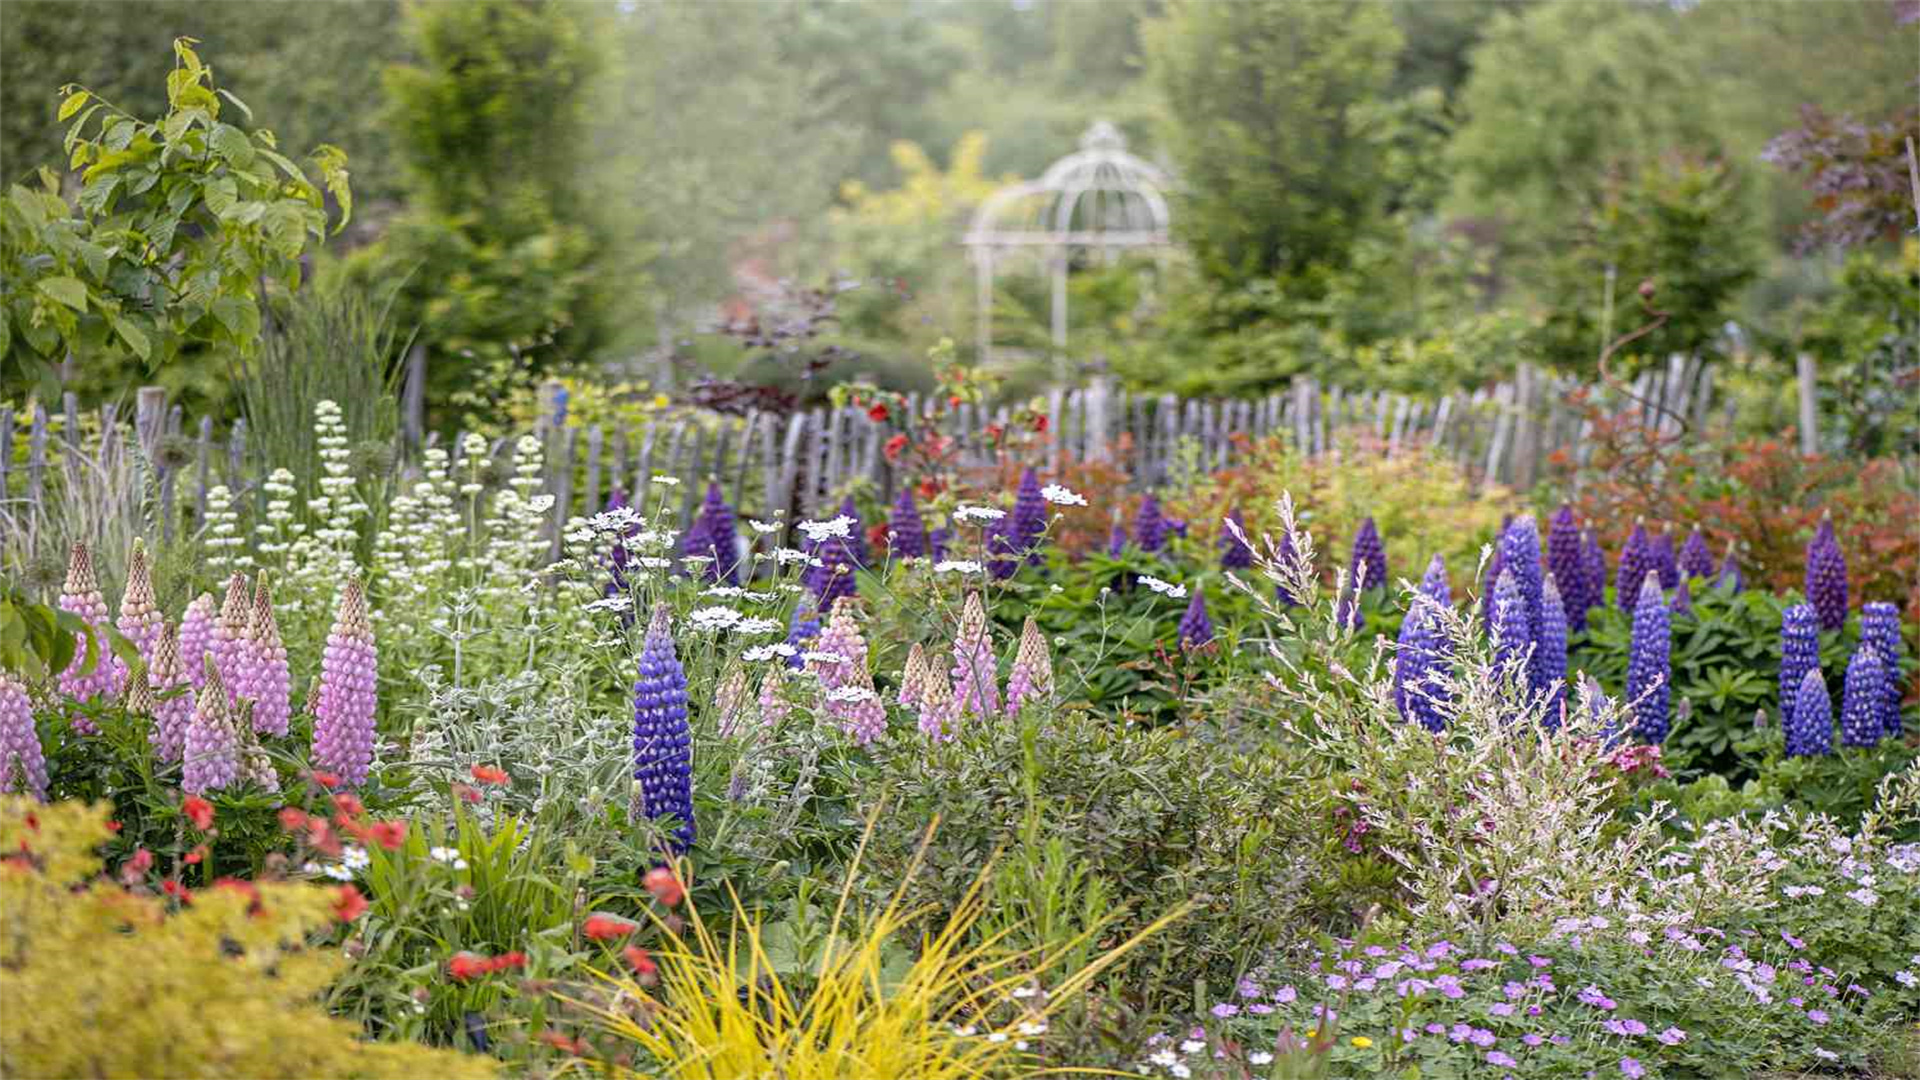
🚪 Wooden Picket Fence
The wooden picket fence is a classic choice that adds charm and curb appeal to any garden. It consists of vertical boards (pickets) attached to horizontal rails, typically made from treated wood to withstand outdoor conditions. This fence is ideal for front yards or decorative borders, offering a timeless look that can be painted or stained to match your home's exterior.
Advantages and Disadvantages
Advantages:
- Wooden picket fences are highly customizable, allowing you to adjust height, spacing, and design.
- They are relatively easy to build with basic tools, and materials are widely available at hardware stores.
- They provide a subtle barrier without completely blocking views, making them perfect for social gardens.
Disadvantages:
- Wood requires regular maintenance, such as sealing or painting, to prevent rot, insect damage, or weathering.
- It may not be the best option for high-security needs, as it can be easily climbed or broken.
- Cost can vary depending on wood quality, with premium hardwoods being more expensive.
How to Implement
- Plan and Measure: Determine the fence line and calculate the length, height, and number of pickets needed. Mark post locations every 6-8 feet for stability.
- Gather Materials: Purchase pressure-treated wood posts, rails, pickets, concrete mix, nails, and tools like a post-hole digger, saw, and level.
- Install Posts: Dig holes for posts (about 2 feet deep), set posts in concrete, and allow to cure for 24-48 hours. Ensure posts are level and aligned.
- Attach Rails: Secure horizontal rails between posts using galvanized screws or nails, typically one rail at the top and one near the bottom.
- Install Pickets: Nail or screw pickets to the rails, spacing them evenly (e.g., 2-3 inches apart). Use a spacer board for consistency.
- Finish the Fence: Sand rough edges, apply a wood preservative, and paint or stain as desired. Regular inspections will help maintain longevity.
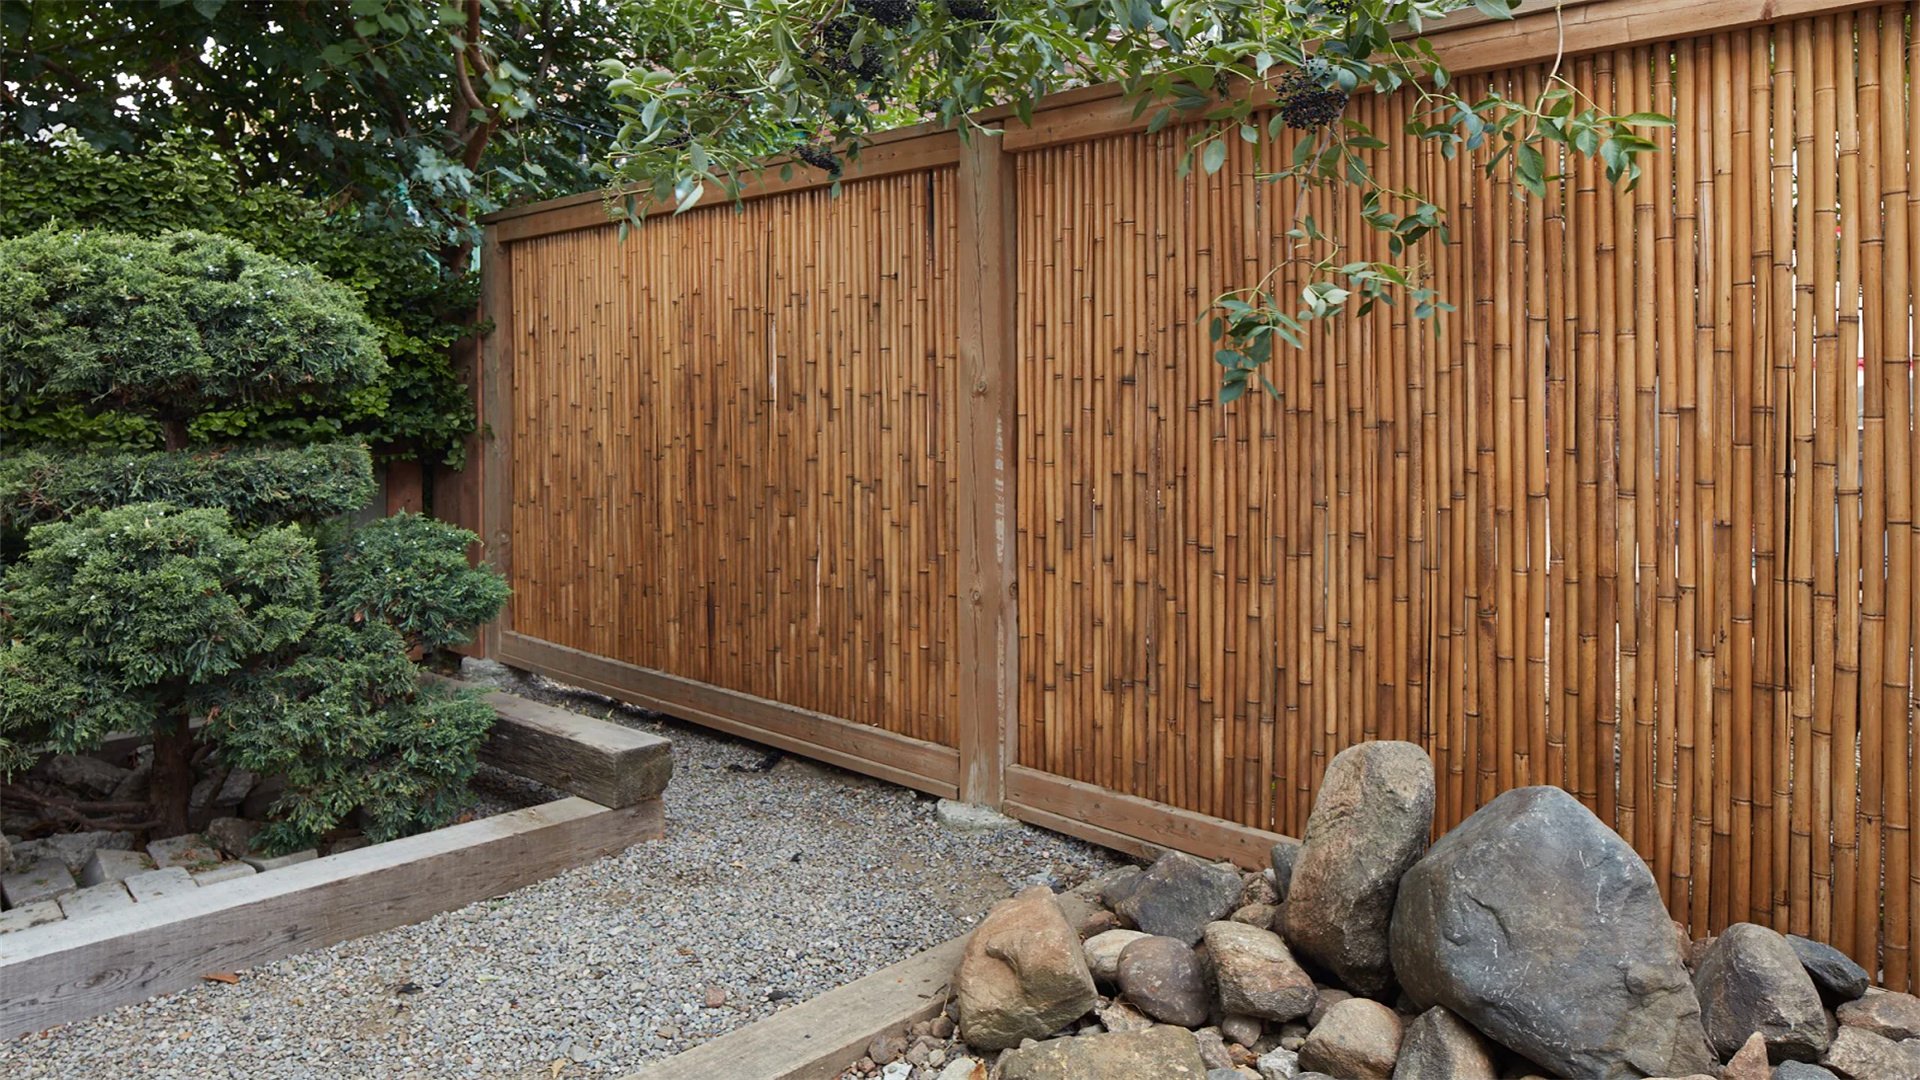
🎋 Bamboo Fence
Bamboo fencing offers an eco-friendly and exotic touch to gardens, inspired by Asian-inspired designs. It involves using bamboo poles or rolls to create a natural barrier that blends seamlessly with outdoor environments. This lightweight option is perfect for creating privacy screens or decorative accents in small spaces.
Advantages and Disadvantages
Advantages:
- Bamboo is a sustainable material that grows quickly, making it an environmentally conscious choice.
- It is durable, resistant to pests, and requires minimal maintenance.
- Bamboo fences are easy to install, often coming in pre-made rolls that can be attached to existing structures.
Disadvantages:
- Bamboo can degrade over time if not treated, especially in wet climates.
- It may not provide as much security as solid fences, and the natural color can fade with sun exposure.
- Additionally, sourcing high-quality bamboo might be challenging in some regions.
How to Implement
- Choose Bamboo Type: Select between bamboo poles (for a custom look) or bamboo rolls (for quick installation). Consider treated bamboo for longevity.
- Prepare the Area: Clear the fence line of debris and mark where supports will go. For rolls, you may need wooden posts or a frame to attach the bamboo.
- Install Support Structure: Set wooden posts or stakes at intervals, securing them with concrete if necessary. For a freestanding fence, create a simple frame using 2x4 lumber.
- Attach Bamboo: For rolls, unroll bamboo along the frame and secure with zip ties, wire, or staples. For poles, drill holes and thread them onto wires or attach individually with screws.
- Seal and Protect: Apply a bamboo sealant to prevent moisture damage and UV fading. Trim any excess material for a neat finish.
- Add Decorative Elements: Enhance the fence with climbing plants or lights to complement the natural aesthetic.
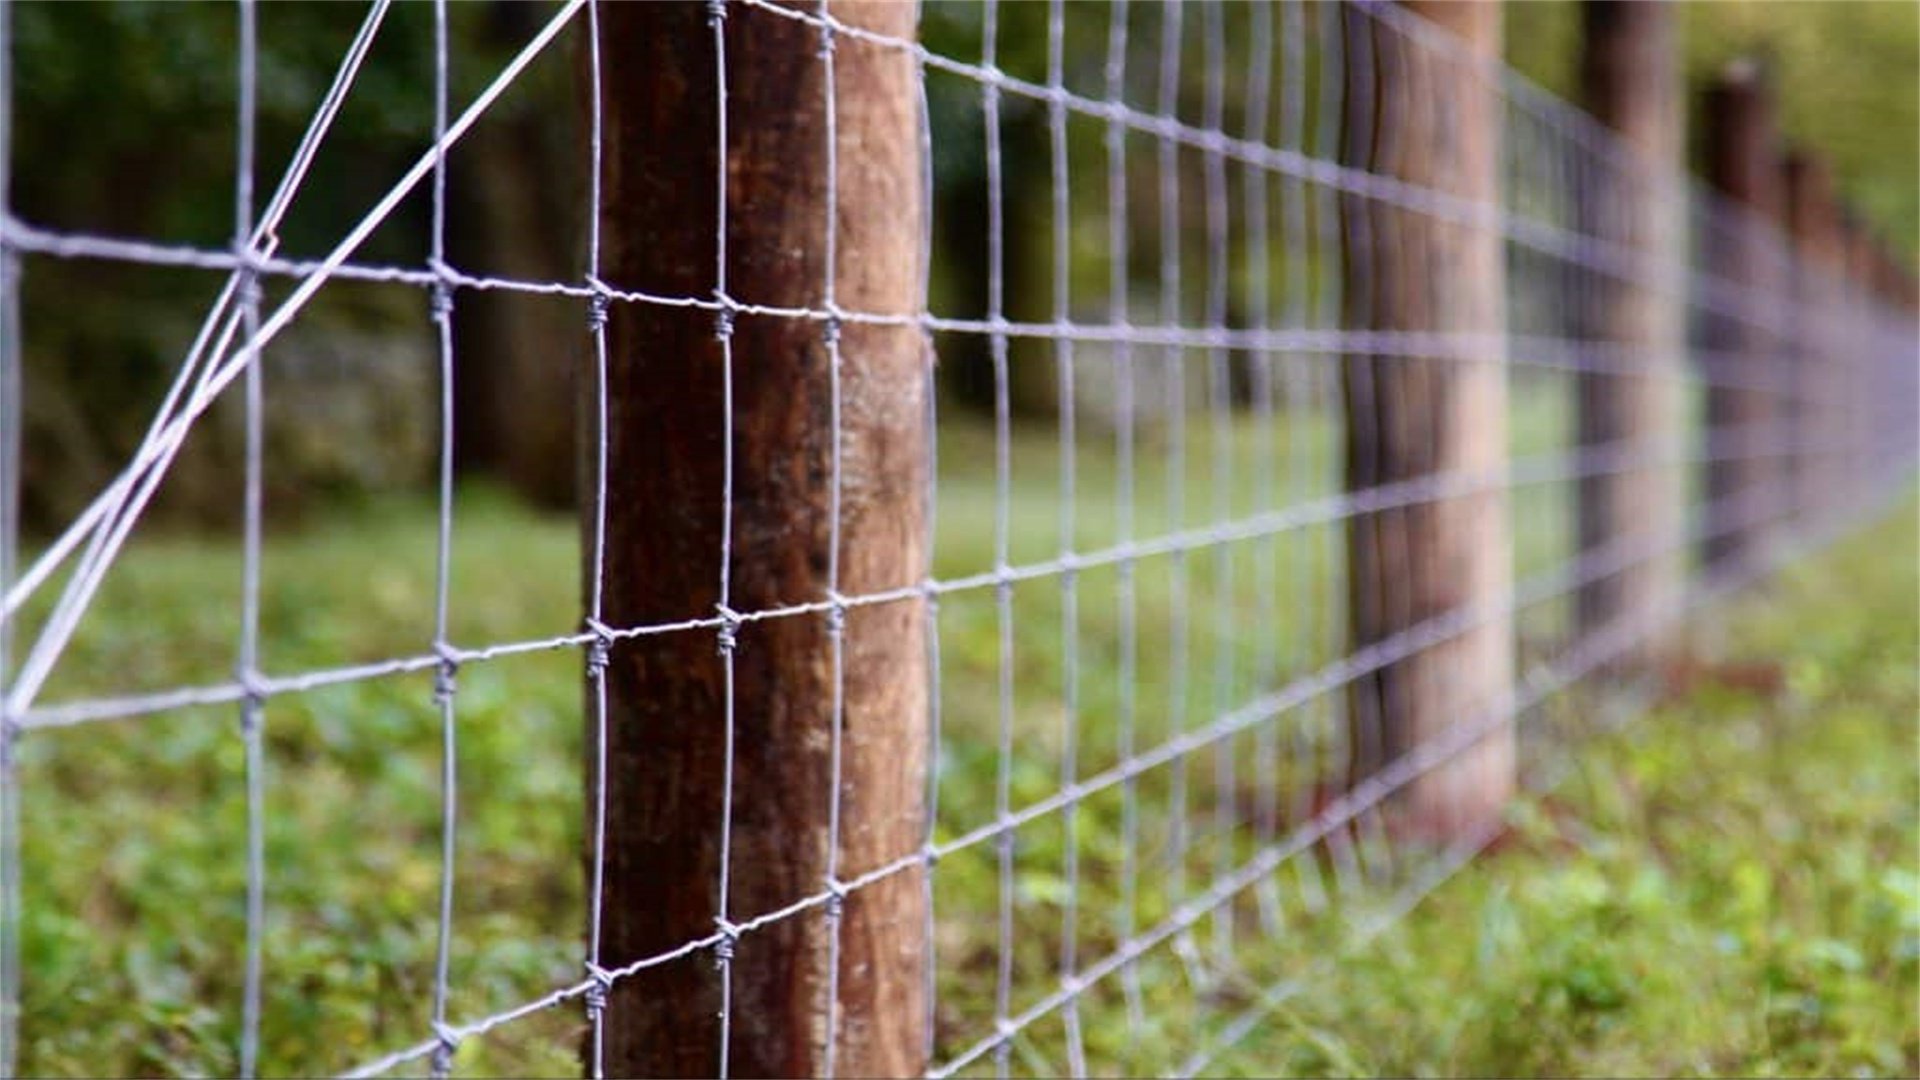
🔗 Wire Mesh Fence
Wire mesh fencing is a practical and versatile option for gardens, often used to keep pests out while allowing visibility and airflow. It consists of galvanized or coated wire grids attached to posts, making it ideal for vegetable gardens or pet enclosures. This fence is highly functional and can be dressed up with vines or paint.
Advantages and Disadvantages
Advantages:
- Wire mesh is affordable, easy to install, and provides excellent protection against small animals.
- It allows light and air to pass through, promoting plant health.
- The material is low-maintenance and can last for years with proper coating.
Disadvantages:
- It offers little privacy and may not be aesthetically pleasing on its own.
- Sharp edges can pose safety risks, and installation requires careful handling to avoid injury.
- Over time, rust can occur if the coating wears off.
How to Implement
- Select Mesh and Posts: Choose wire mesh with appropriate gauge and hole size (e.g., chicken wire for small pests). Get metal T-posts or wooden posts for support.
- Lay Out the Fence Line: Measure and mark the perimeter, ensuring corners are square. Drive posts into the ground at regular intervals (every 8-10 feet).
- Unroll and Attach Mesh: Unroll the wire mesh along the posts, starting at one corner. Use fence staples or zip ties to secure the mesh to wooden posts, or metal clips for T-posts.
- Handle Corners and Gates: For corners, overlap mesh and secure tightly. Install a gate by attaching mesh to a hinged frame made from lumber or metal.
- Secure the Bottom: Bury the bottom edge of the mesh a few inches underground to prevent animals from digging under, or use landscape staples.
- Finishing Touches: Trim excess mesh, smooth sharp edges, and consider painting the mesh black or green for a subtle look. Add climbing plants to soften the appearance.
♻️ Recycled Material Fence
A recycled material fence is an innovative and eco-friendly way to repurpose items like pallets, bottles, or old doors into a unique garden barrier. This DIY project encourages creativity and reduces waste, resulting in a fence that tells a story and stands out in any yard. It's perfect for those on a tight budget or looking for a rustic vibe.
Advantages and Disadvantages
Advantages:
- Using recycled materials is cost-effective and environmentally sustainable.
- It allows for endless customization, as you can mix and match items for a eclectic design.
- This fence often requires minimal tools and skills, making it accessible for beginners.
Disadvantages:
- Durability can be an issue if materials are not weather-resistant.
- It may take time to collect enough materials, and the fence might not provide uniform privacy or security.
- Some recycled items, like pallets, may contain chemicals that require treatment.
How to Implement
- Source Materials: Collect recycled items such as wooden pallets, plastic bottles, metal scraps, or old windows. Ensure they are clean and safe for outdoor use.
- Design Your Fence: Sketch a plan based on available materials. For pallets, disassemble them or use whole units. Arrange items to create a cohesive look.
- Build a Support Frame: Construct a basic frame using sturdy posts or existing structures. For pallets, attach them directly to posts with screws.
- Assemble the Fence: Secure materials to the frame using nails, screws, or wire. For bottles, drill holes and string them on rods or embed them in mortar.
- Reinforce and Seal: Add cross-braces for stability if needed. Apply sealants or paints to protect wood or metal from elements.
- Personalize: Decorate with paint, mosaics, or planters to enhance the artistic appeal. Regularly check for wear and tear.
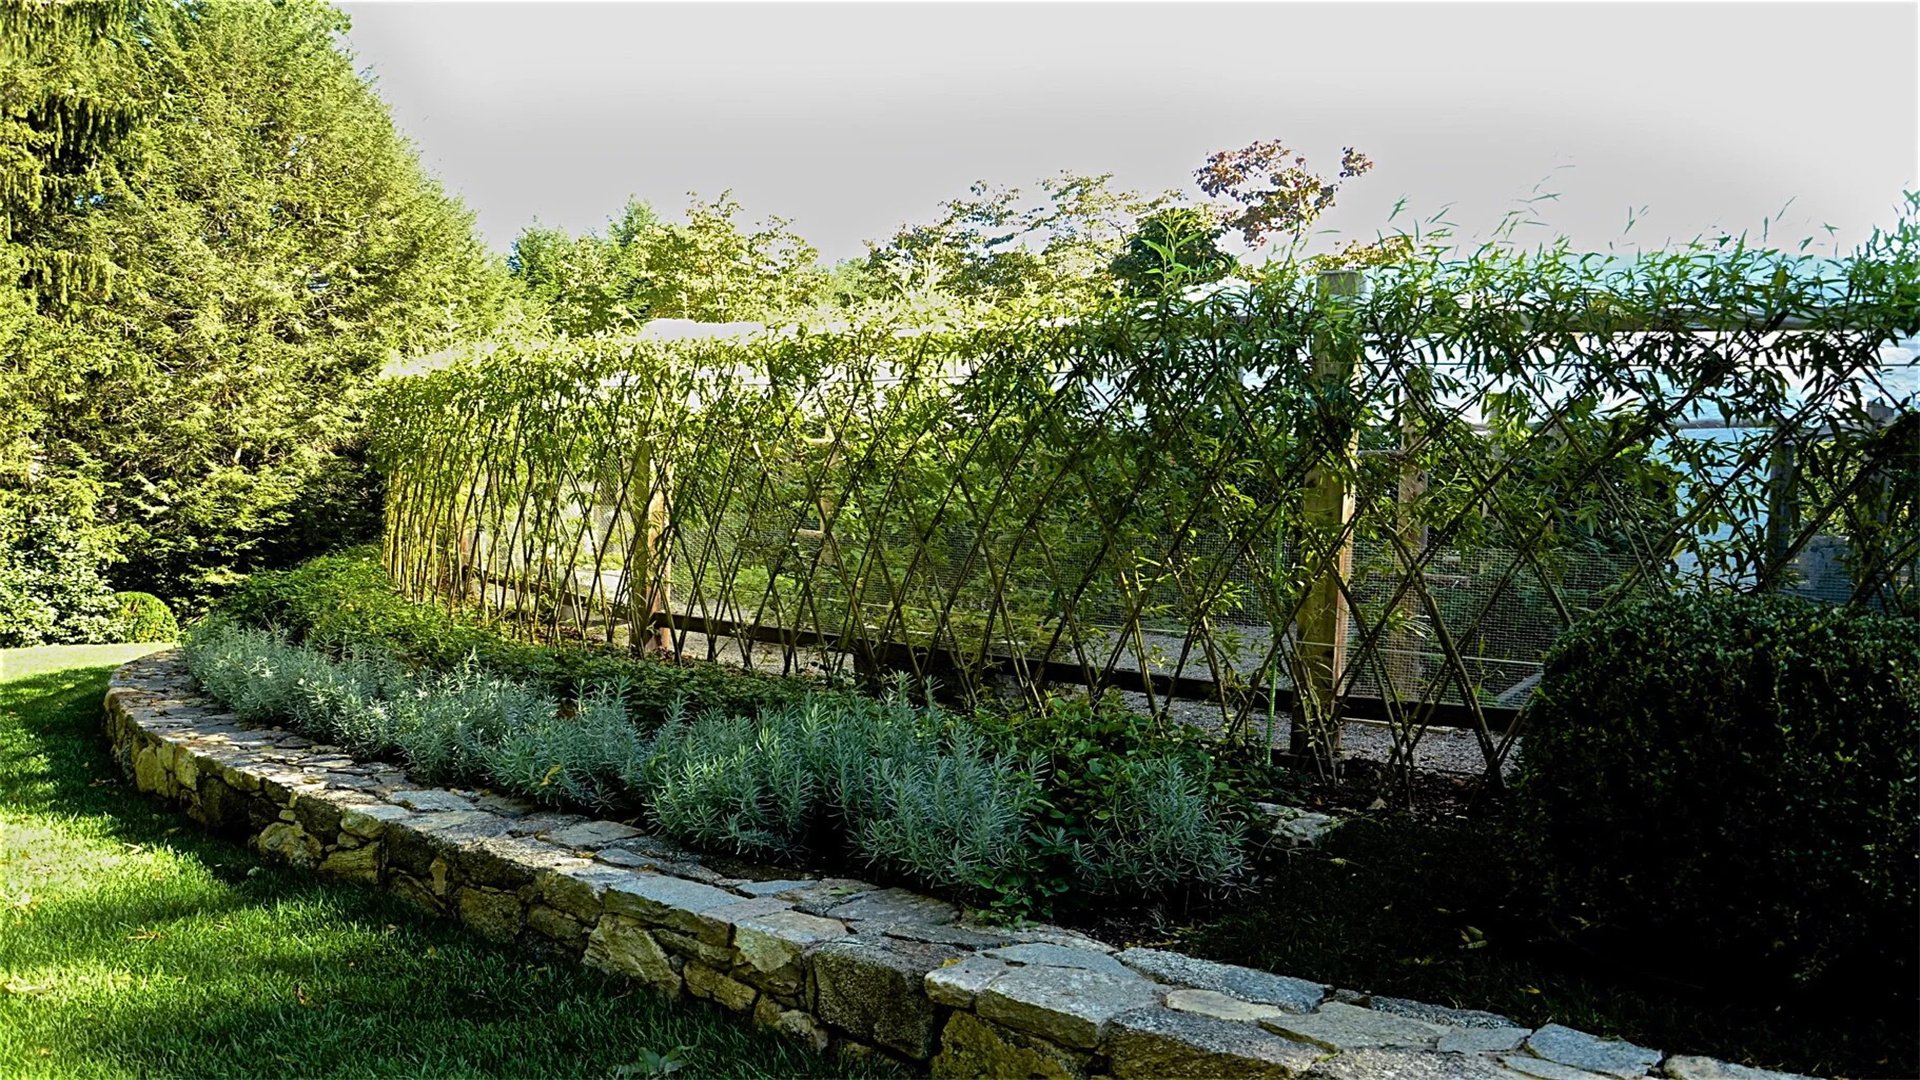
🌿 Living Fence (Hedge or Shrub Barrier)
A living fence uses plants like shrubs, bushes, or trees to form a natural boundary around your garden. This eco-friendly option provides privacy, noise reduction, and habitat for wildlife, while adding greenery and beauty. Common choices include boxwood, privet, or bamboo for a dense hedge that can be trimmed into shapes.
Advantages and Disadvantages
Advantages:
- Living fences improve air quality, reduce carbon footprint, and require no manufacturing.
- They offer year-round interest with seasonal changes and can increase property value.
- Maintenance is mostly pruning and watering, which is simpler than building structures.
Disadvantages:
- It takes time for plants to grow and fill in, so instant privacy isn't achieved.
- Regular upkeep is needed to control growth and prevent overrun.
- Some plants may attract pests or require specific soil conditions, and initial planting can be labor-intensive.
How to Implement
- Choose Suitable Plants: Select fast-growing, dense shrubs or trees suited to your climate and soil. Consider evergreen varieties for year-round coverage.
- Plan the Layout: Mark the fence line with string or stakes, spacing plants according to their mature size (typically 1-3 feet apart). Ensure the area gets adequate sunlight.
- Prepare the Soil: Till the soil and add compost or fertilizer to promote healthy growth. Dig holes twice as wide as the root balls.
- Plant the Hedge: Place plants in holes, backfill with soil, and water thoroughly. Mulch around the base to retain moisture and suppress weeds.
- Train and Prune: As plants grow, trim them to desired height and shape using shears. For formal hedges, use a guide string for straight lines.
- Maintain Regularly: Water during dry spells, fertilize annually, and monitor for diseases. Over time, the hedge will thicken and provide a solid barrier.
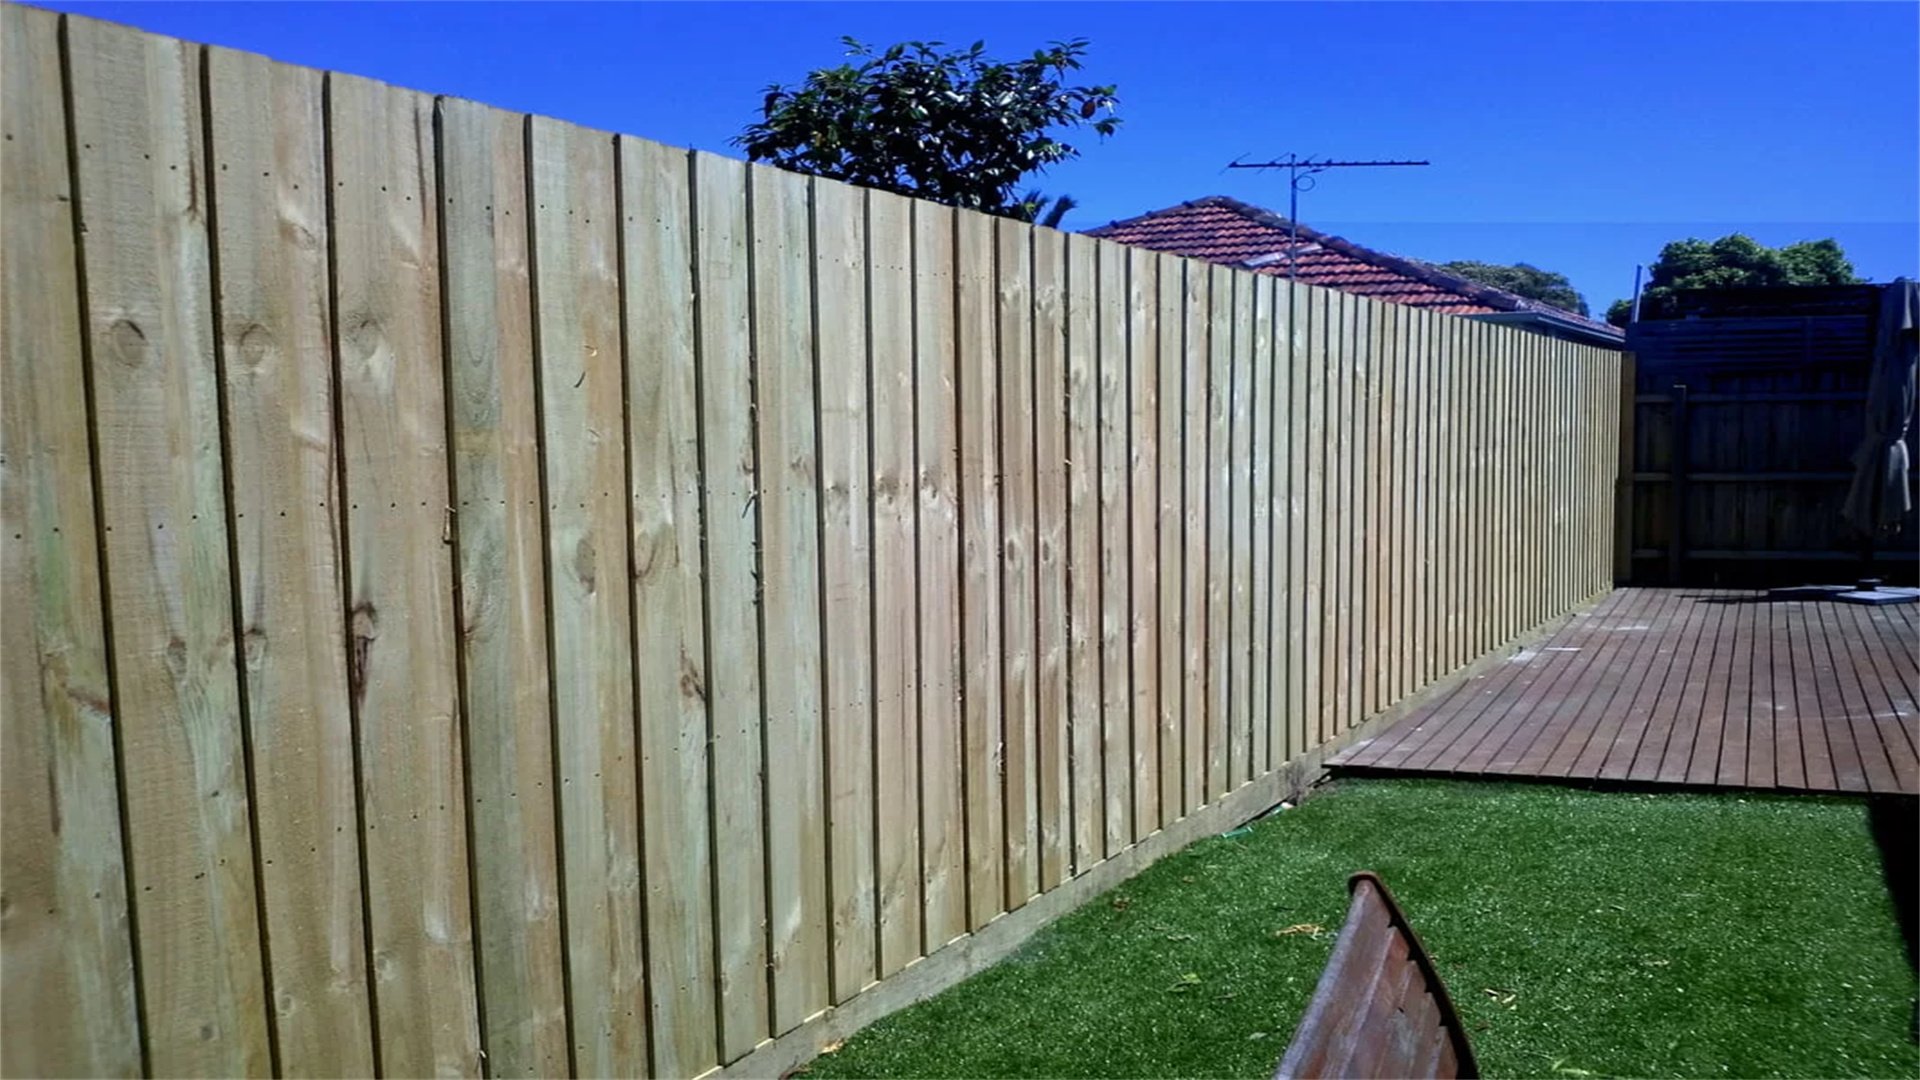
🧵 Paling Fence (Board-on-Board Design)
A paling fence, also known as a board-on-board fence, features overlapping vertical boards that create a solid privacy screen with a slight gap for airflow. This design is popular for backyards and pools, offering a clean, modern look while blocking views effectively. It's typically made from wood or composite materials.
Advantages and Disadvantages
Advantages:
- Paling fences provide excellent privacy and wind protection due to their solid construction.
- The overlapping design adds strength and visual interest, and they can be painted or stained in various colors.
- They are more durable than simple picket fences.
Disadvantages:
- Installation is more complex and time-consuming, requiring precise measurements.
- Materials can be costly, especially for high-quality wood or composites.
- The fence may block too much light if not planned carefully, affecting nearby plants.
How to Implement
- Gather Materials: Purchase pressure-treated boards (e.g., 1x6 inches), posts, rails, concrete, and galvanized screws. A saw, level, and drill are essential tools.
- Set Posts: Dig post holes along the fence line, spacing them 6-8 feet apart. Set posts in concrete, ensuring they are plumb and aligned. Allow concrete to cure.
- Install Rails: Attach horizontal rails between posts, typically two or three rails depending on fence height. Use metal brackets for extra support.
- Attach Boards: Start at one end and nail or screw vertical boards to the rails, overlapping each board by about 1 inch. Use spacers to maintain consistent gaps.
- Check for Level: Regularly check that boards are vertical and level as you work. Trim boards at the top if a uniform height is desired.
- Finish and Protect: Sand any rough spots, apply a wood sealant, and add a cap rail for a polished look. Inspect annually for repairs.
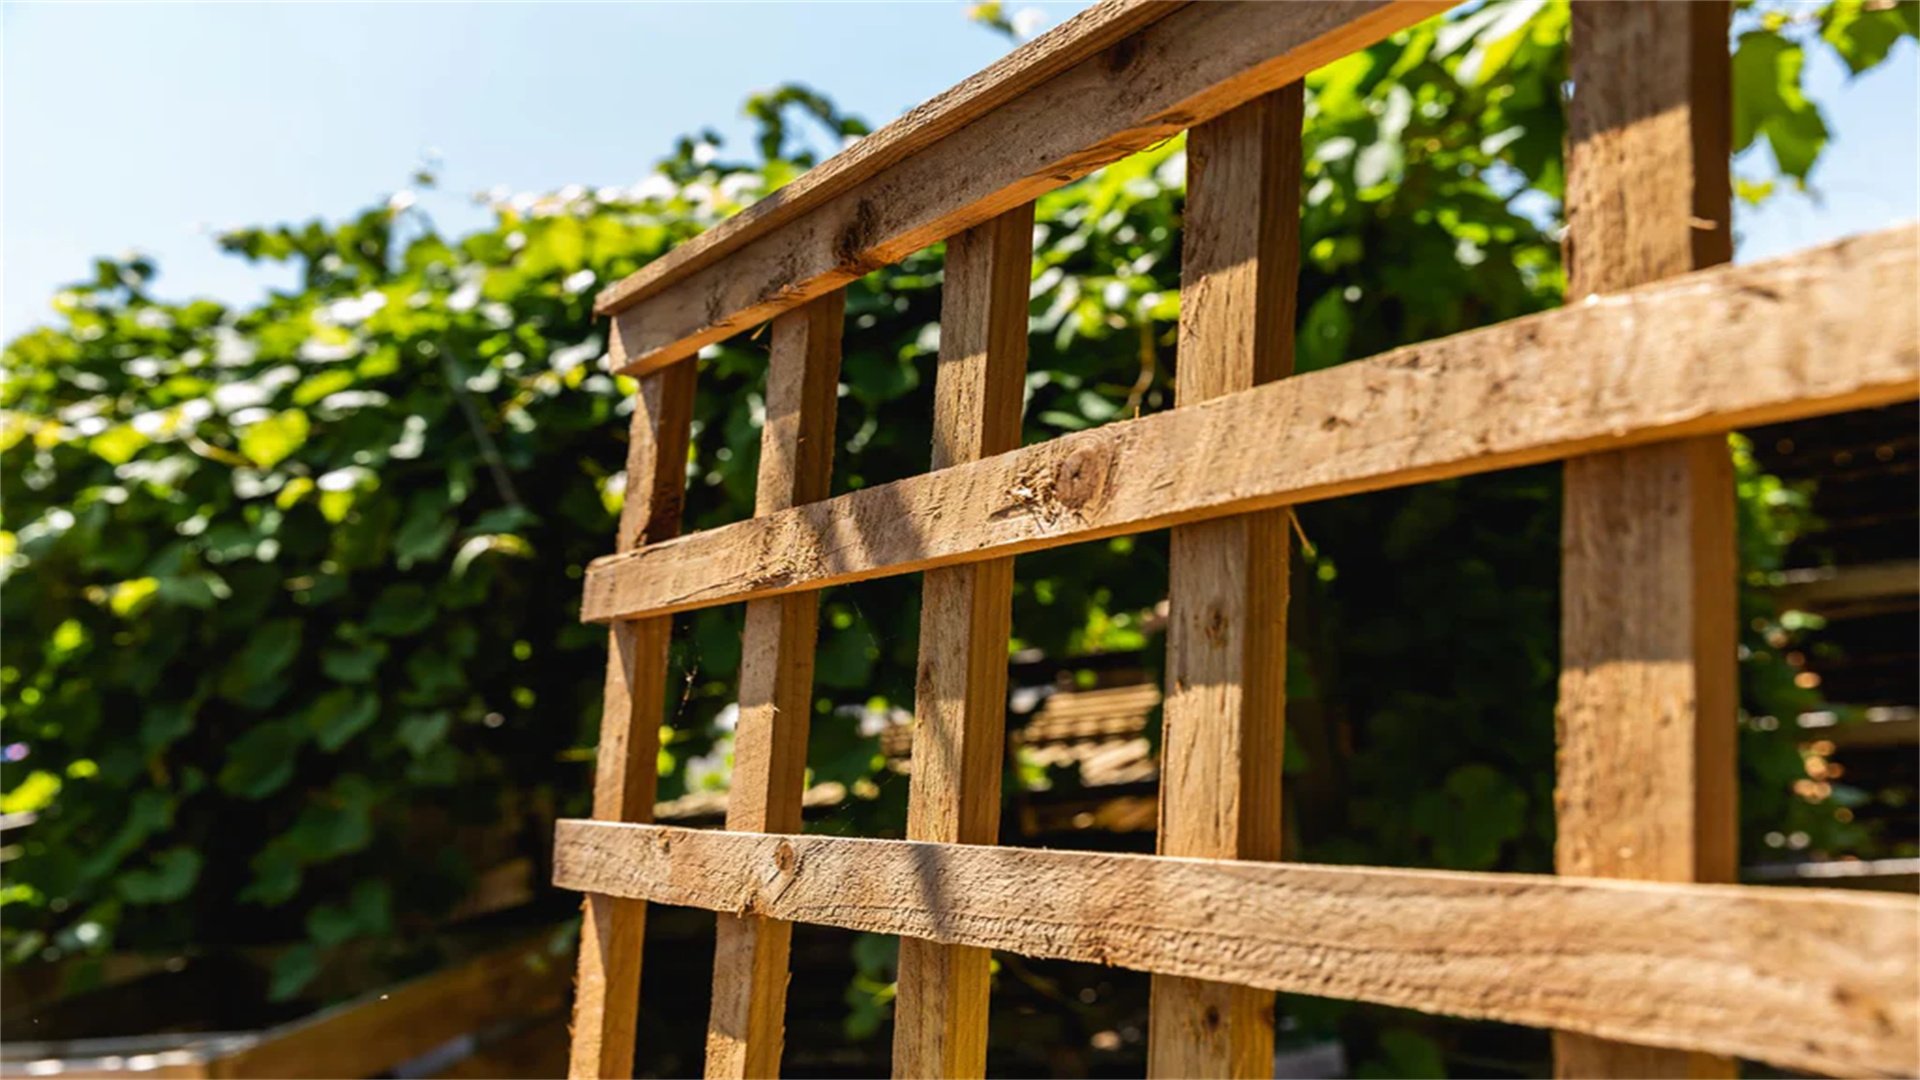
🌼 Trellis Fence
A trellis fence combines structural support with gardening potential, featuring an open lattice design that allows climbing plants to grow and cover it. Made from wood, metal, or vinyl, this fence adds vertical interest to gardens and can serve as a partition or decorative element. It's ideal for small spaces or as an accent alongside solid fences.
Advantages and Disadvantages
Advantages:
- Trellis fences are lightweight and easy to install, often available in pre-made panels.
- They support plant growth, enhancing biodiversity and beauty.
- The open design allows light and air circulation, making them perfect for vegetable or flower gardens.
Disadvantages:
- They offer limited privacy until plants fill in, and may not be sturdy enough for security.
- Wooden trellises require maintenance to prevent rot, and plants need ongoing care.
- In windy areas, the structure might need reinforcement.
How to Implement
- Choose Trellis Type: Decide between DIY lattice panels or purchasing pre-made ones. Wood is common for a rustic look, while metal offers durability.
- Prepare the Site: Clear the area and mark post locations. For freestanding trellises, set posts in concrete. For wall-mounted versions, ensure the surface is sturdy.
- Install Posts and Frame: Set wooden or metal posts, then attach a frame if using panels. Secure panels to posts with screws or brackets.
- Add Climbing Plants: Plant vines like ivy, roses, or beans at the base of the trellis. Train them to climb by gently tying stems to the lattice.
- Reinforce if Needed: For taller trellises, add cross-supports or anchor them to existing structures to prevent tipping.
- Maintain Regularly: Prune plants to control growth and prevent damage to the trellis. Treat wood with sealant and check for loose connections.
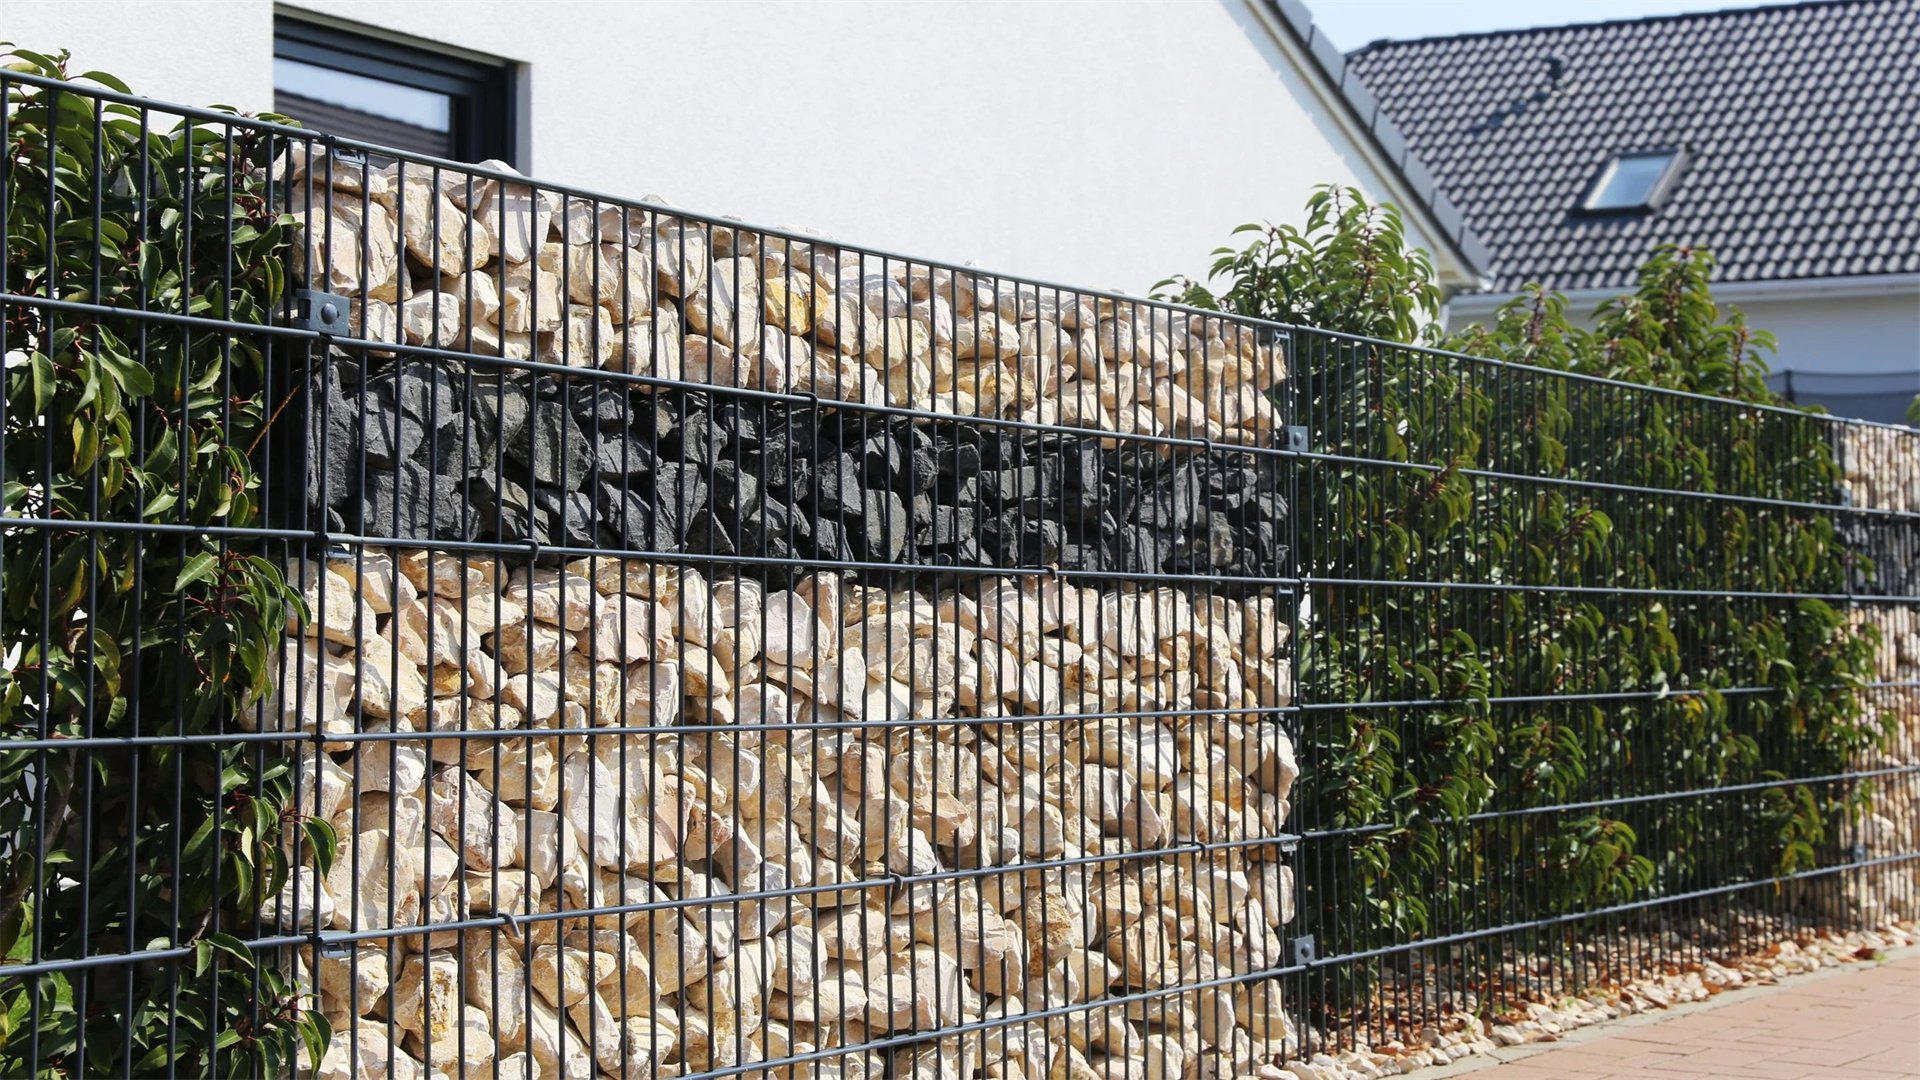
🧶 Gabion Fence (Stone Cage Design)
A gabion fence uses wire cages filled with stones, rocks, or recycled concrete to create a sturdy, industrial-style barrier. Originating from engineering projects, this design has become popular in modern gardens for its durability and unique texture. It provides excellent noise reduction and can double as a retaining wall or planter.
Advantages and Disadvantages
Advantages:
- Gabion fences are extremely durable and require almost no maintenance.
- They allow drainage and airflow, reducing hydrostatic pressure.
- The materials are often inexpensive, especially if using locally sourced stones, and the fence can be built to any height or shape.
Disadvantages:
- Installation is labor-intensive due to the weight of materials.
- It may not suit all garden styles, appearing too industrial for some.
- The wire cages can rust over time if not galvanized, and filling them requires careful stacking to avoid bulging.
How to Implement
- Source Materials: Purchase gabion cages (wire mesh boxes) or make your own using heavy-duty wire. Gather stones, ensuring they are larger than the mesh holes to prevent falling out.
- Prepare the Foundation: Dig a shallow trench along the fence line and compact the soil. For stability, pour a concrete footing or use gravel base.
- Assemble Cages: Place gabion cages end-to-end, securing them together with wire ties or clips. Ensure they are level and aligned.
- Fill with Stones: Carefully fill cages with stones, packing them tightly to minimize movement. Use a mix of sizes for a natural look, and avoid overfilling.
- Close and Secure: Once filled, attach the cage lids with wire ties. For multi-layer gabions, stack cages securely, staggering joints for strength.
- Finishing Touches: Trim any sharp wire edges. Consider planting succulents or vines in the crevices for a softer appearance. Inspect periodically for rust or damage.
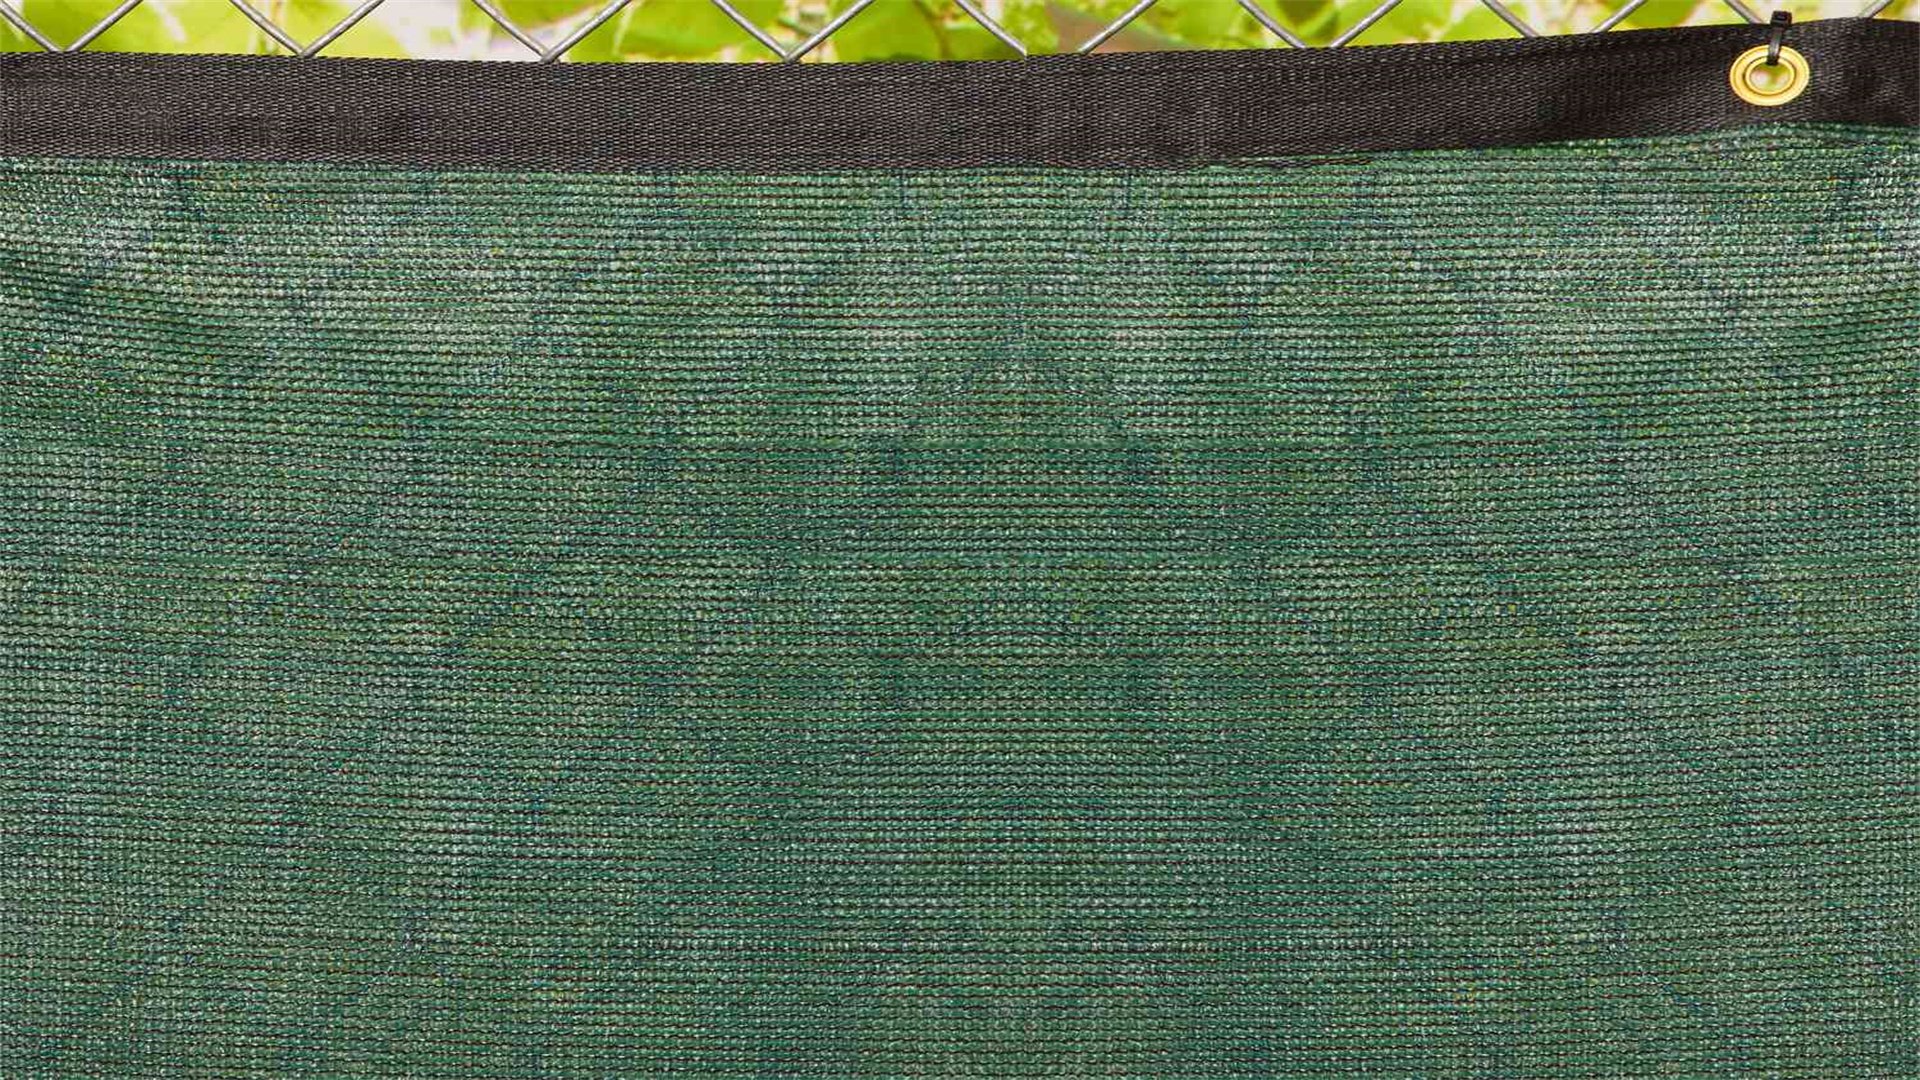
🎪 Fabric or Canvas Fence
A fabric or canvas fence is a temporary or semi-permanent solution that uses durable textiles stretched between posts to create a colorful, flexible barrier. This idea is inspired by outdoor markets and festivals, offering an easy way to add privacy or shade to gardens. It's perfect for renters or those seeking a quick, affordable option.
Advantages and Disadvantages
Advantages:
- Fabric fences are quick to install and remove, making them ideal for seasonal use.
- They come in various colors and patterns, allowing for easy customization.
- Lightweight and portable, they can be used to partition spaces or block wind without permanent structures.
Disadvantages:
- They are not as durable as solid fences and can fade or tear in harsh weather.
- Fabric may not provide complete privacy if thin, and it requires regular cleaning to prevent mold.
- In windy areas, secure anchoring is essential to prevent damage.
How to Implement
- Choose Fabric: Select outdoor-rated fabric like canvas, polyester, or shade cloth that is UV-resistant and waterproof. Measure the area to determine yardage.
- Set Up Support Posts: Install wooden or metal posts at corners and intervals. For a temporary fence, use stakes or existing structures like fences or trees.
- Attach Fabric: Stretch fabric between posts, securing it with grommets and zip ties, or by sewing a sleeve and sliding it onto a wire or pole. Ensure fabric is taut to avoid sagging.
- Reinforce Edges: Hem edges or use binding tape to prevent fraying. Add weights or sandbags at the bottom for stability in wind.
- Add Features: Incorporate ties or clips to adjust tension. For versatility, create removable panels that can be swapped out seasonally.
- Maintain and Store: Clean fabric with mild soap and water, and allow to dry fully before storing. During storms, take down the fence to prevent damage.
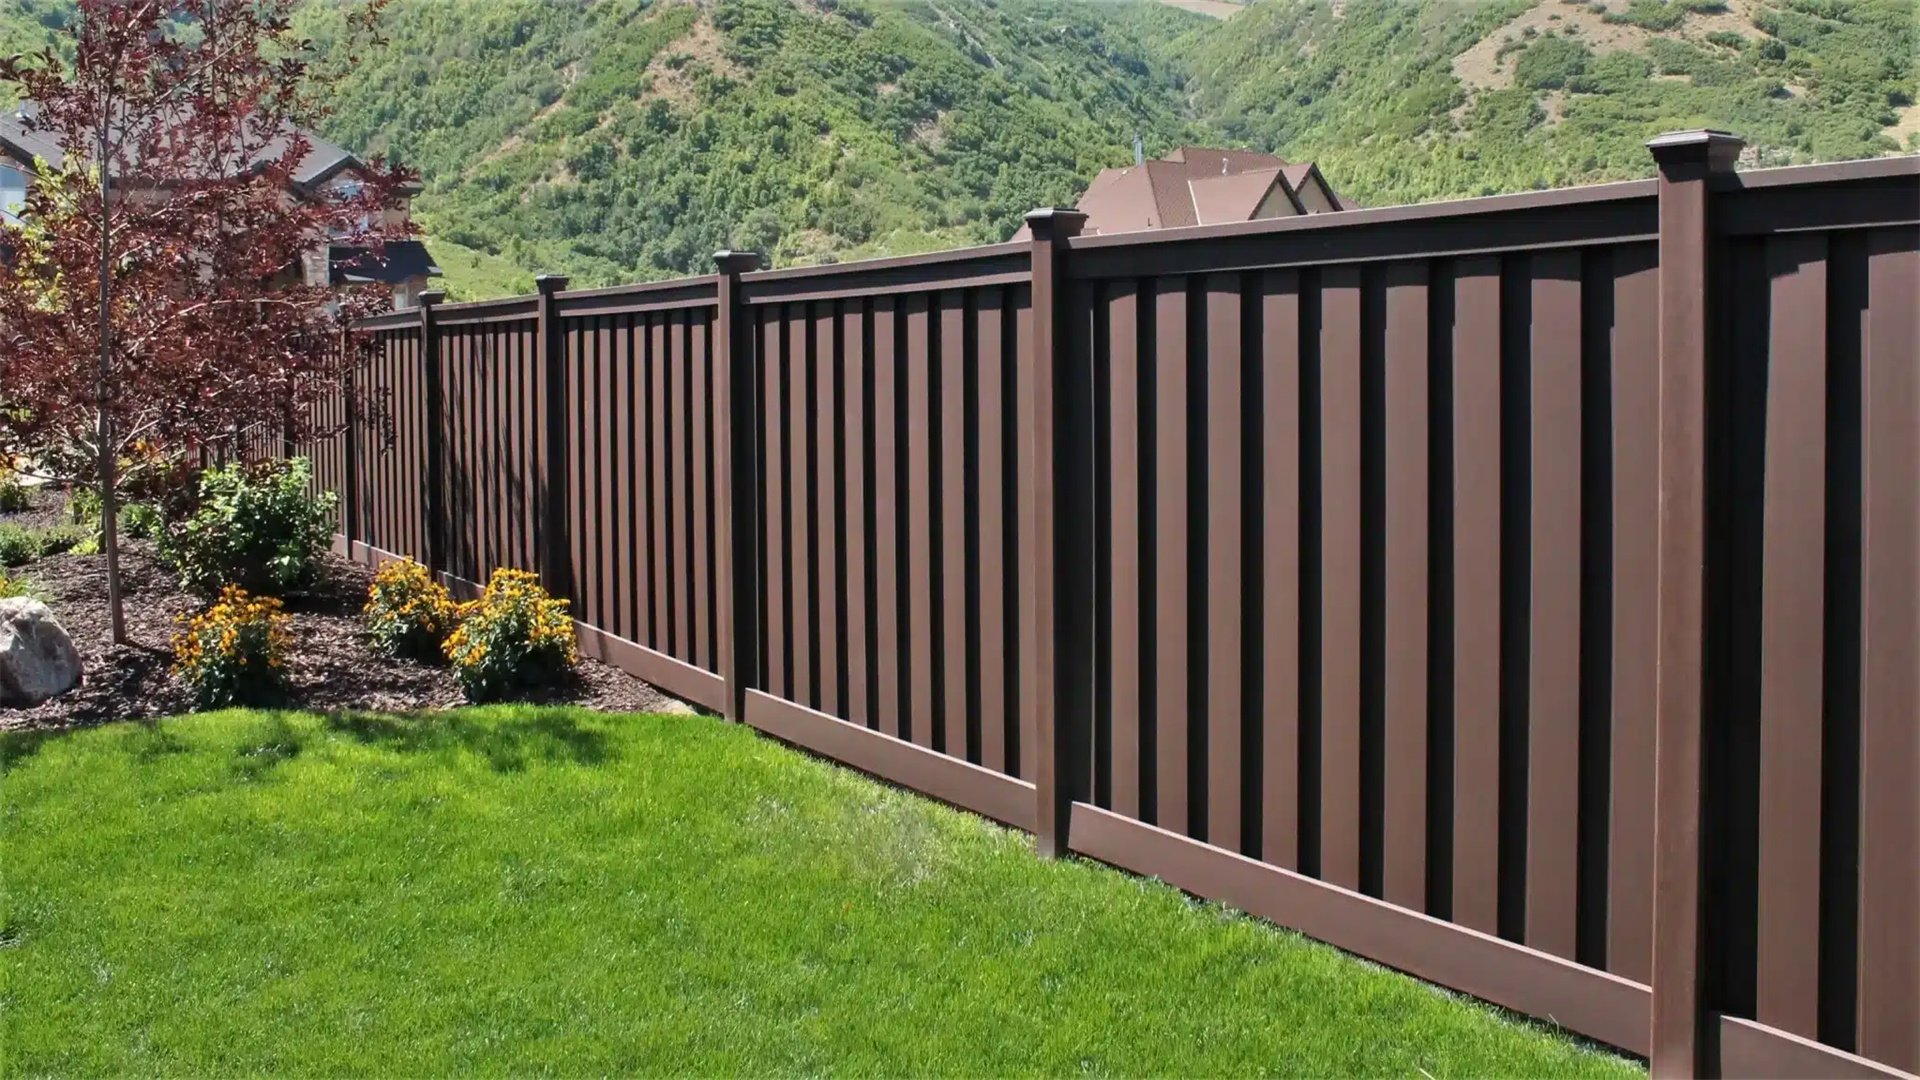
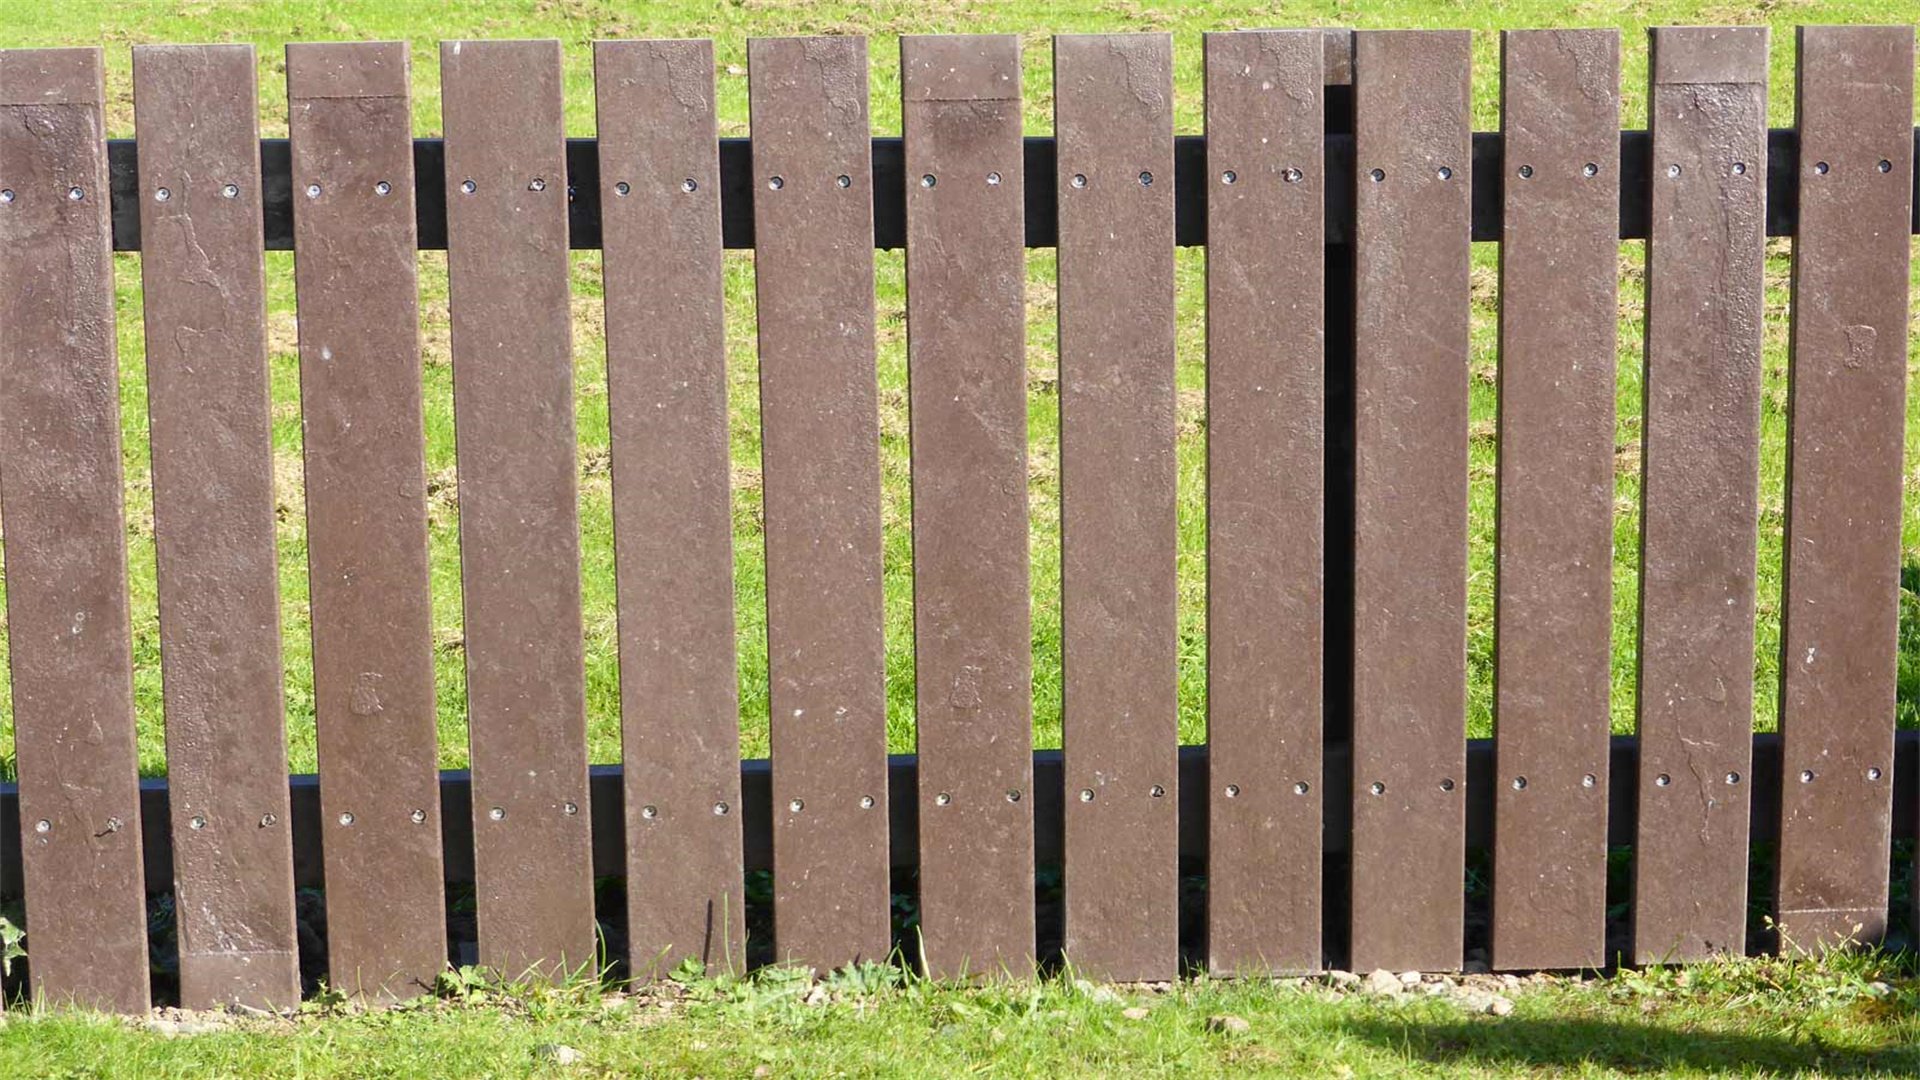
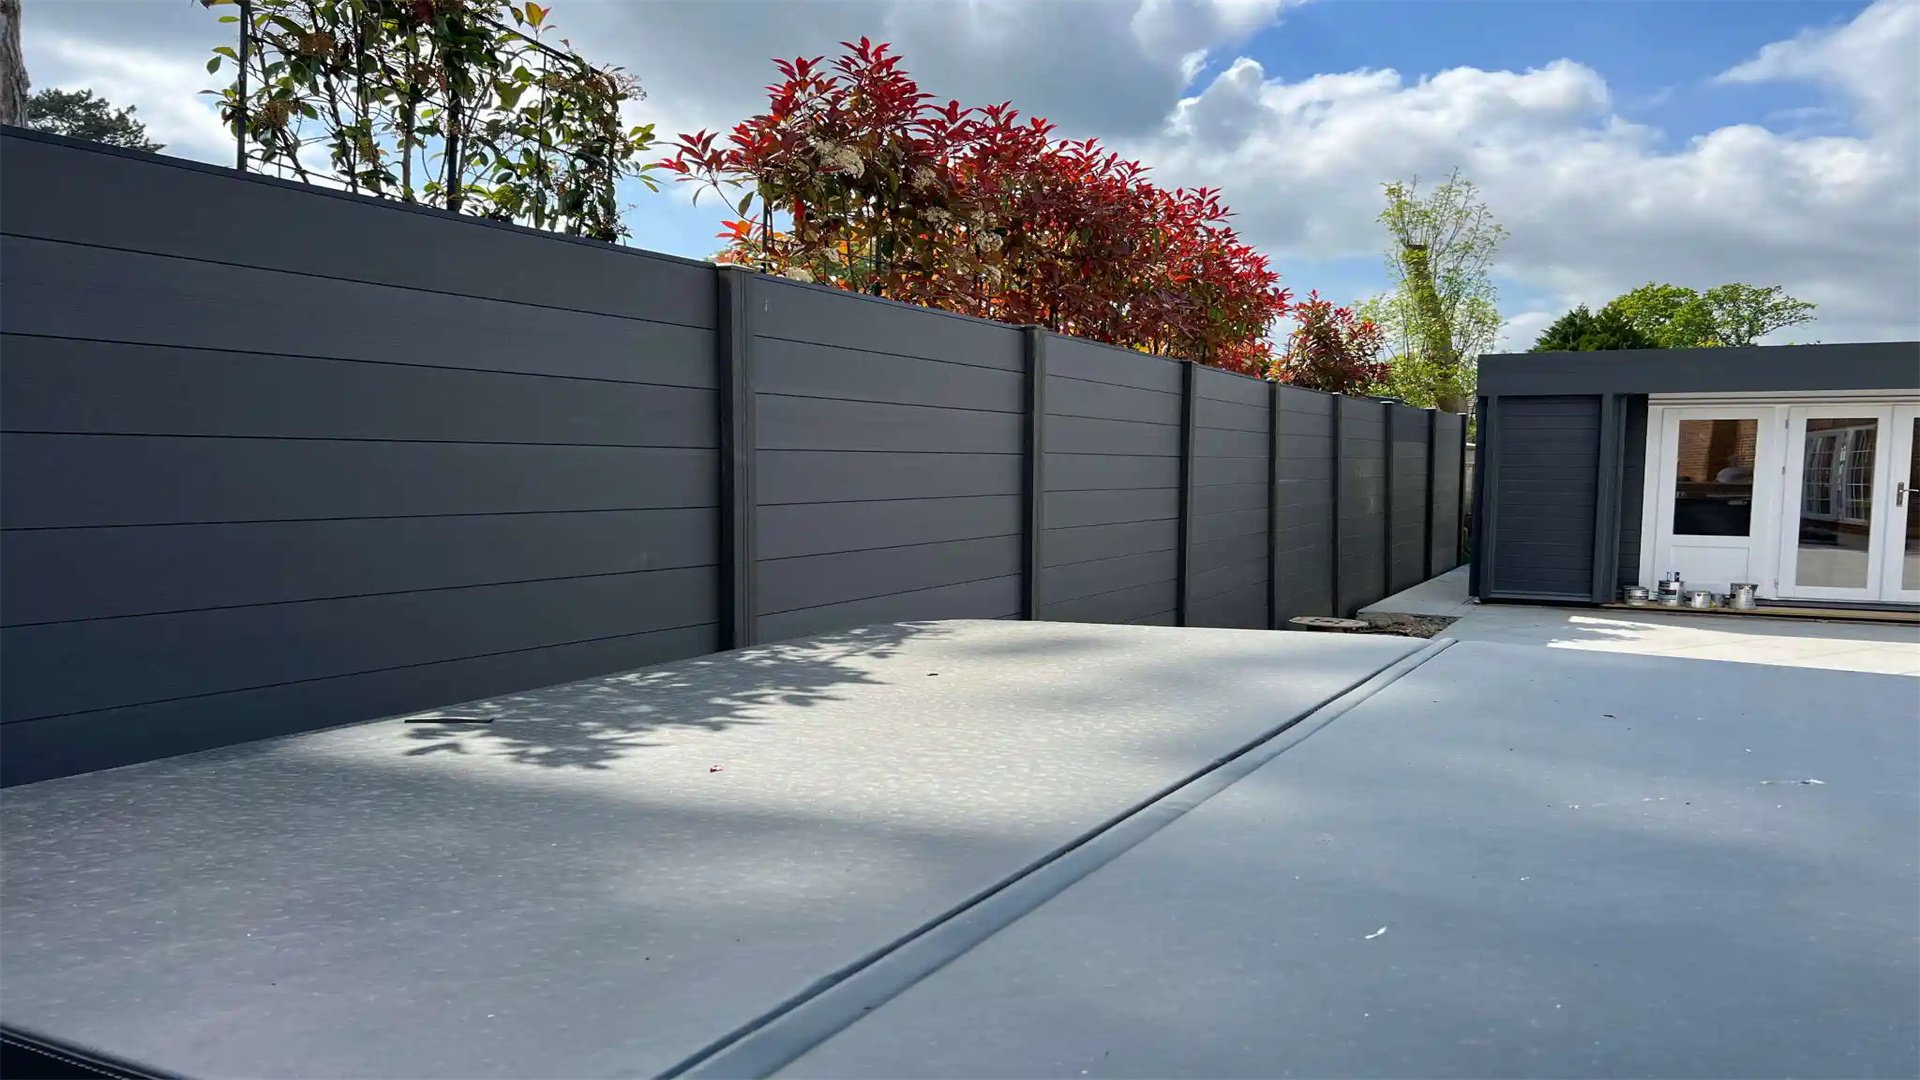
🔩 Composite Fence (Modern Material Mix)
A composite fence combines wood fibers and plastic to create a low-maintenance, eco-friendly alternative to traditional wood. It mimics the look of wood but resists rot, insects, and fading, making it a long-lasting option for modern gardens. Available in panels or boards, it's easy to assemble and often comes with hidden fasteners for a clean finish.
Advantages and Disadvantages
Advantages:
- Composite fencing requires minimal upkeep—no painting or sealing needed.
- It is highly durable, weather-resistant, and often made from recycled materials.
- The uniform appearance and variety of colors make it suitable for contemporary designs.
Disadvantages:
- Initial cost is higher than wood or other DIY options.
- It can be heavier and more challenging to cut without proper tools.
- Some composites may expand or contract with temperature changes, requiring precise installation.
How to Implement
- Select Composite Products: Purchase composite fence panels, boards, or rails from home improvement stores. Choose a style that matches your garden, such as wood-grain textures.
- Plan the Layout: Measure the fence line and calculate materials. Composite systems often include specific post and rail components for easy assembly.
- Install Posts: Dig holes and set posts in concrete, following manufacturer spacing guidelines. Use composite posts or metal ones designed for composite fencing.
- Attach Rails and Panels: Secure horizontal rails to posts, then slide composite panels into place or screw them in. Many systems use hidden clips for a seamless look.
- Ensure Proper Alignment: Check levels frequently and leave small gaps between panels for expansion. Trim panels with a fine-tooth saw if needed.
- Finish and Clean: Wipe down the fence with water to remove debris. No sealing is required, but occasional cleaning with composite cleaner will maintain appearance.
DIY garden fencing offers endless possibilities to enhance your outdoor space with creativity and practicality. From classic wooden picket fences to innovative gabion designs, each of these 10 simple ideas provides unique benefits tailored to different needs, budgets, and skill levels. By considering advantages and disadvantages, and following step-by-step implementation guides, you can successfully build a fence that adds privacy, beauty, and function to your garden. Remember to choose materials suited to your climate, prioritize safety during construction, and maintain your fence regularly for longevity. Whether you opt for a natural living hedge or a modern composite barrier, the joy of DIY lies in personalizing your project to reflect your style. Start planning today and transform your garden into a secluded oasis or a vibrant social hub with these fencing ideas!