10 Simple Cooking Techniques Every Home Chef Should Master
Welcome to your culinary journey! Mastering fundamental cooking techniques is the key to transforming simple ingredients into extraordinary meals. Whether you're a novice or an experienced home chef, these 10 essential methods will elevate your skills, boost your confidence in the kitchen, and help you create delicious, restaurant-quality dishes at home. Inspired by popular international cooking websites like Bon Appétit, BBC Good Food, and Serious Eats, this guide delves deep into each technique with detailed explanations, specific recipes, and pro tips. Get ready to explore sautéing, roasting, braising, and more—each presented in a recipe-style format with expandable ingredient lists and step-by-step instructions. Let's dive in!
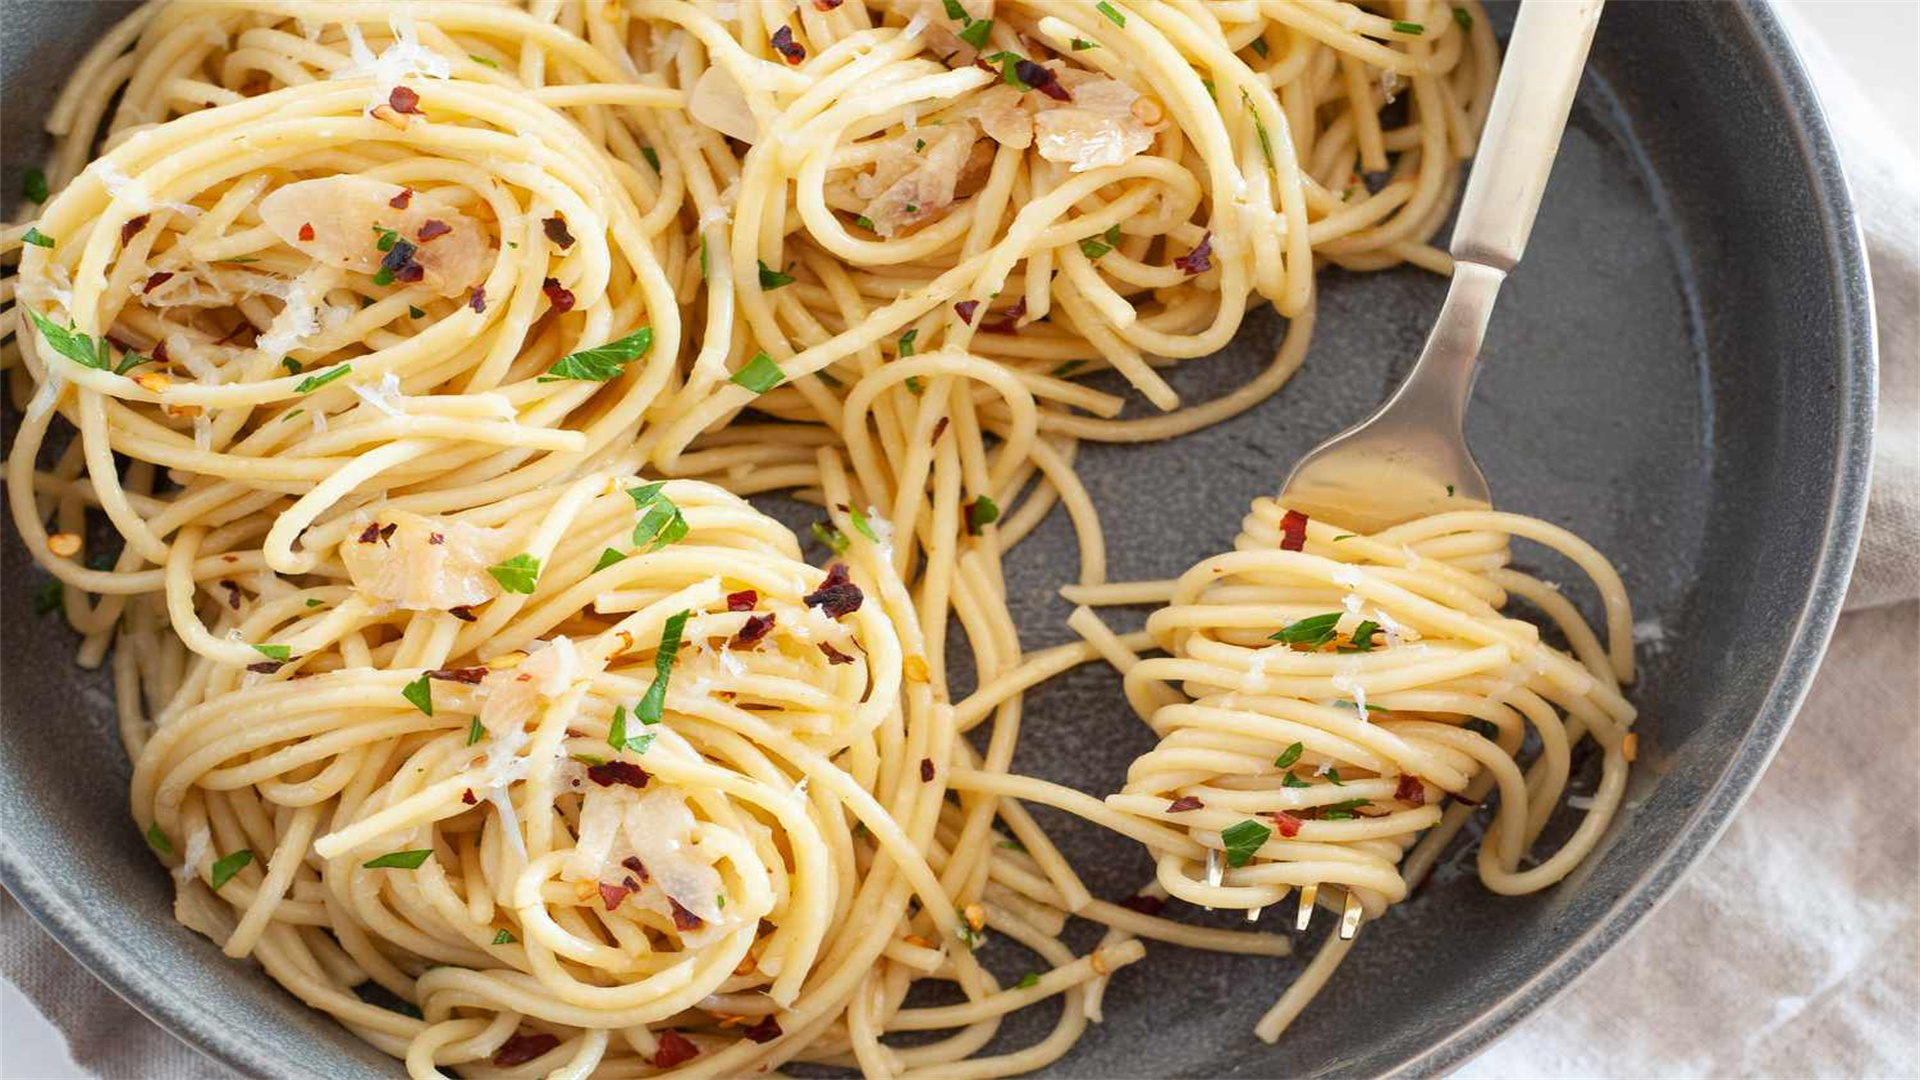
🍳 1. Sautéing: The Art of Quick Cooking
Description
Sautéing involves cooking food quickly in a small amount of oil or fat over high heat, resulting in a delicious browned exterior and tender interior. It's perfect for vegetables, meats, and seafood, and forms the base for many sauces. This technique requires constant motion to prevent burning and ensure even cooking.
Advantages and Disadvantages
Advantages:
- Locks in flavors and textures, making it ideal for weeknight dinners.
- Versatile method that can be adapted to countless dishes, from stir-fries to pasta toppings.
Disadvantages:
- Requires constant attention to prevent burning.
- Can lead to uneven cooking if the pan is overcrowded.
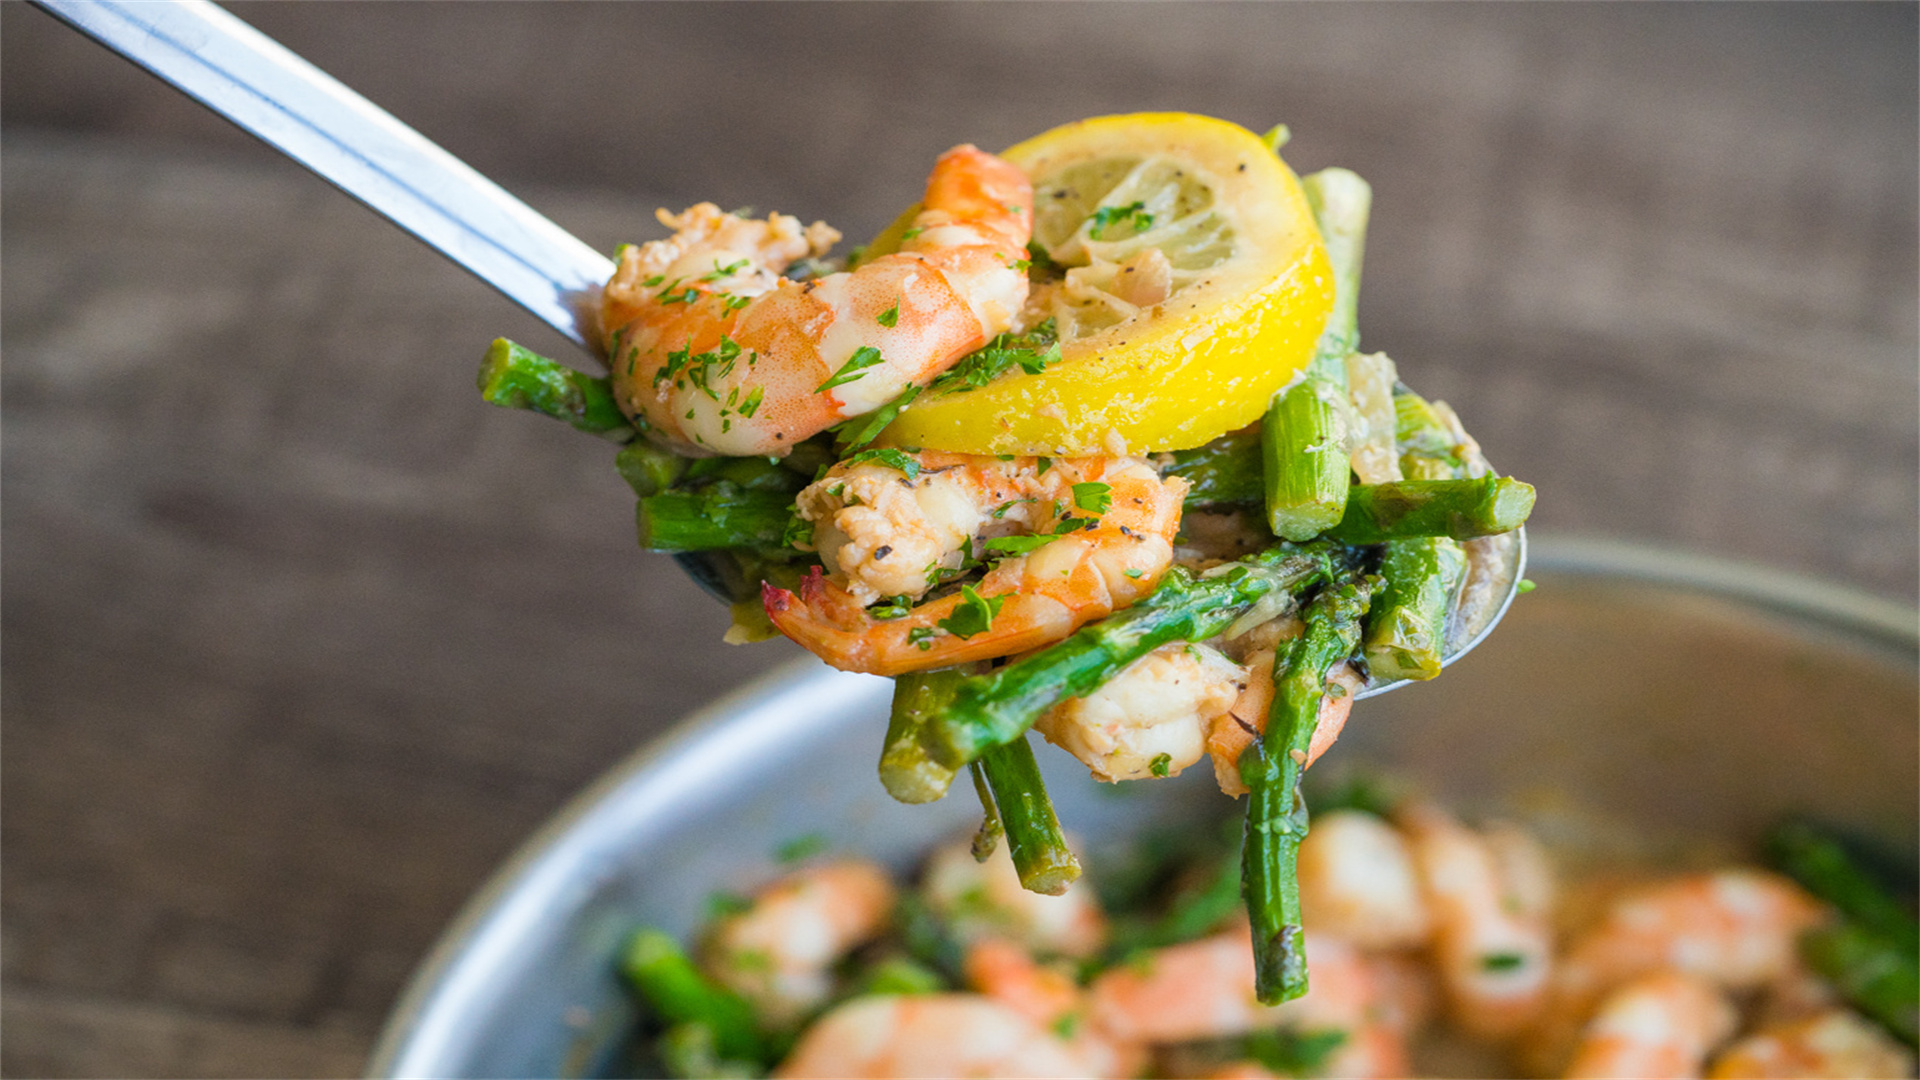
Example Recipe: Sautéed Garlic Butter Shrimp with Asparagus
Ingredients:
- 1 pound (450g) large raw shrimp, peeled and deveined
- 1 bunch asparagus, trimmed and cut into 2-inch pieces
- 4 cloves garlic, minced
- 3 tablespoons unsalted butter
- 2 tablespoons olive oil
- 1 lemon, juiced and zested
- Salt and freshly ground black pepper to taste
- 2 tablespoons chopped fresh parsley
- Optional: 1/4 teaspoon red pepper flakes for heat
Steps:
- Pat the shrimp dry with paper towels and season with salt and pepper.
- Heat a large skillet or sauté pan over medium-high heat. Add olive oil and 1 tablespoon butter.
- Add asparagus and sauté for 3-4 minutes until crisp-tender. Remove and set aside.
- In the same pan, add remaining butter. Add shrimp in a single layer and cook for 1-2 minutes per side until pink and opaque.
- Add garlic and red pepper flakes (if using), sauté for 30 seconds until fragrant.
- Return asparagus to the pan, add lemon juice and zest, and toss to combine.
- Garnish with parsley and serve immediately over rice or pasta.
Tips and Common Mistakes
- Use a pan with enough surface area to avoid overcrowding; cook in batches if necessary.
- Ensure ingredients are dry to prevent steaming instead of sautéing.
- Don't skip the preheating step—a hot pan is crucial for a good sear.
Expand Your Skills
Expand your sautéing skills by experimenting with different fats like ghee or avocado oil, and try variations with chicken breast, mushrooms, or bell peppers. Practice makes perfect, so start with this recipe and adjust heat levels based on your stove.
🍖 2. Roasting: Unleashing Deep Flavors
Description
Roasting uses dry heat in an oven to cook food, often at high temperatures, which caramelizes surfaces and concentrates flavors. It's ideal for meats, vegetables, and even fruits, producing crispy exteriors and moist interiors. This technique enhances natural sweetness and adds complexity to dishes.
Advantages and Disadvantages
Advantages:
- Hands-off method that yields impressive results, perfect for Sunday dinners or meal prep.
- Cornerstone of comfort food, from roasted chicken to root vegetables.
Disadvantages:
- Requires longer cooking times compared to some methods.
- Can dry out food if not monitored properly.
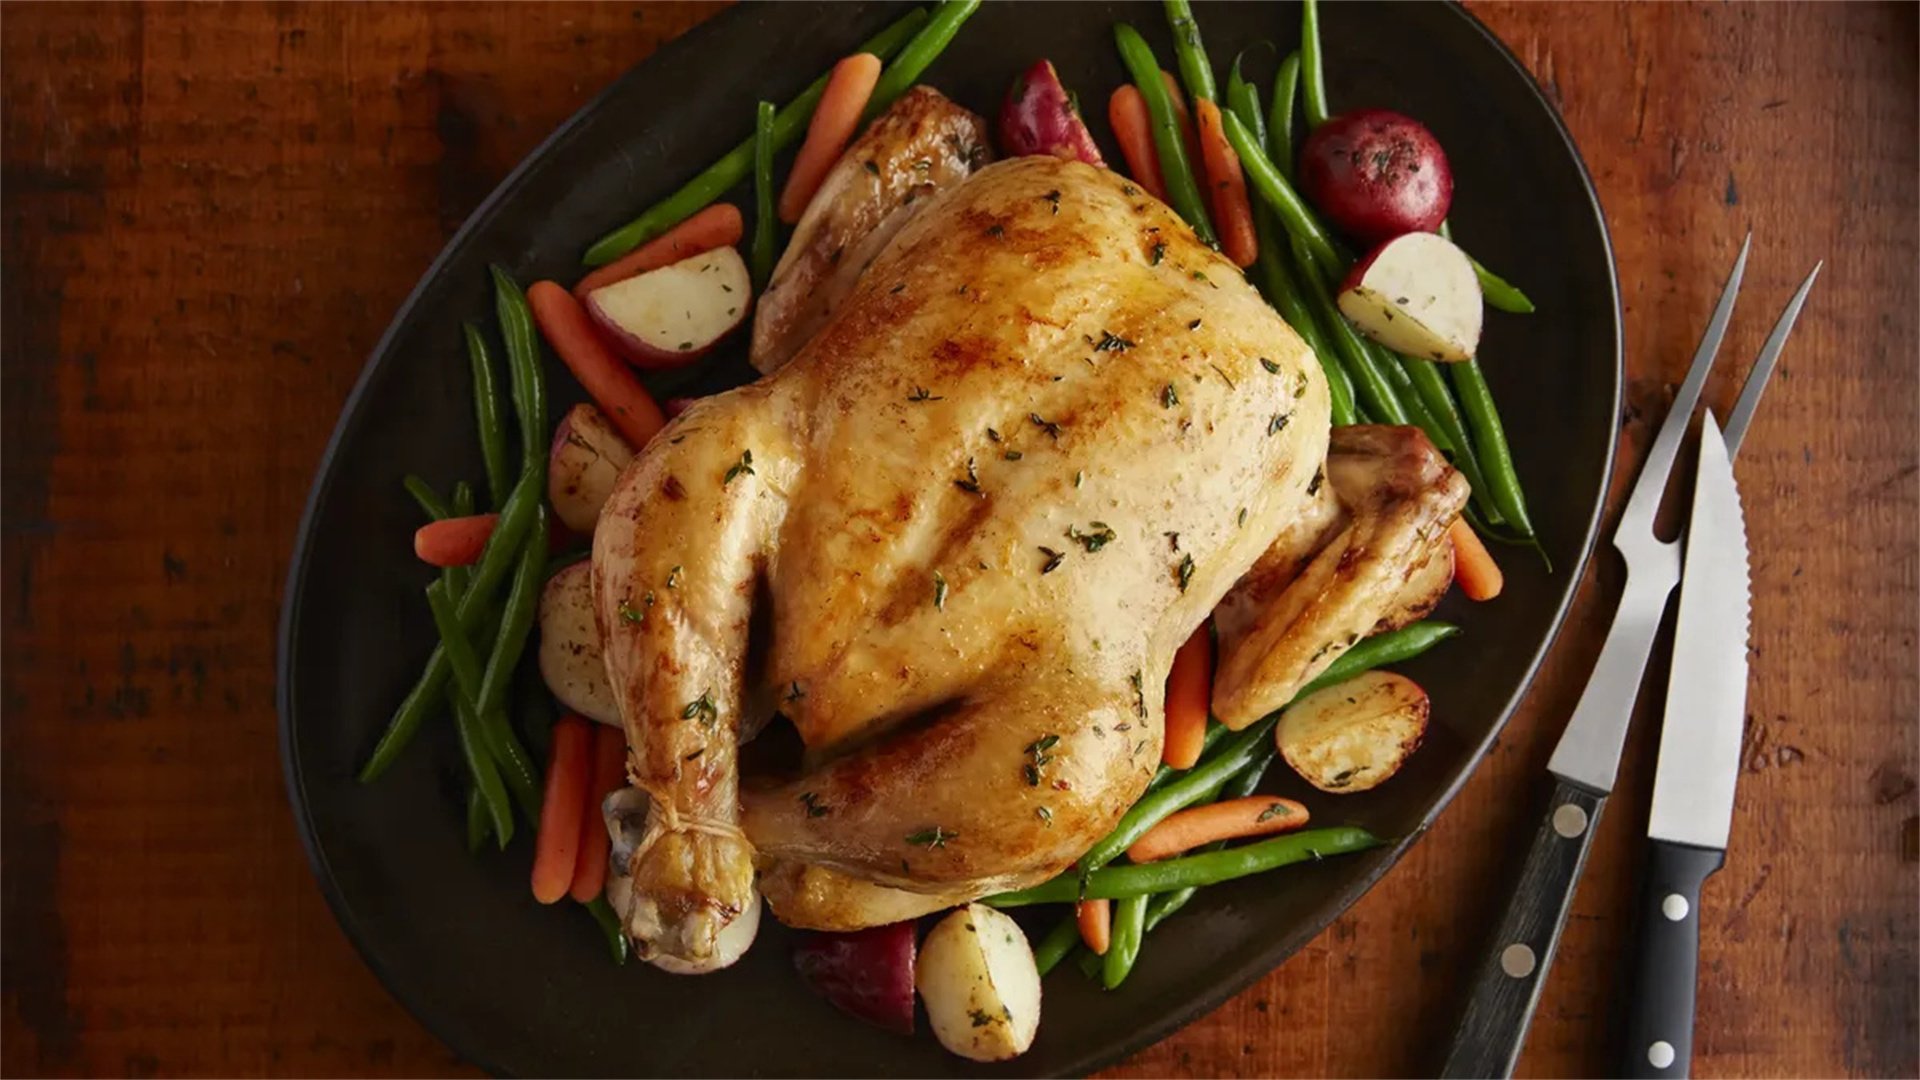
Example Recipe: Herb-Crusted Roasted Chicken with Root Vegetables
Ingredients:
- 1 whole chicken (4-5 pounds or 1.8-2.3kg), patted dry
- 4 carrots, peeled and chopped into large chunks
- 3 parsnips, peeled and chopped
- 1 large onion, cut into wedges
- 4 tablespoons olive oil, divided
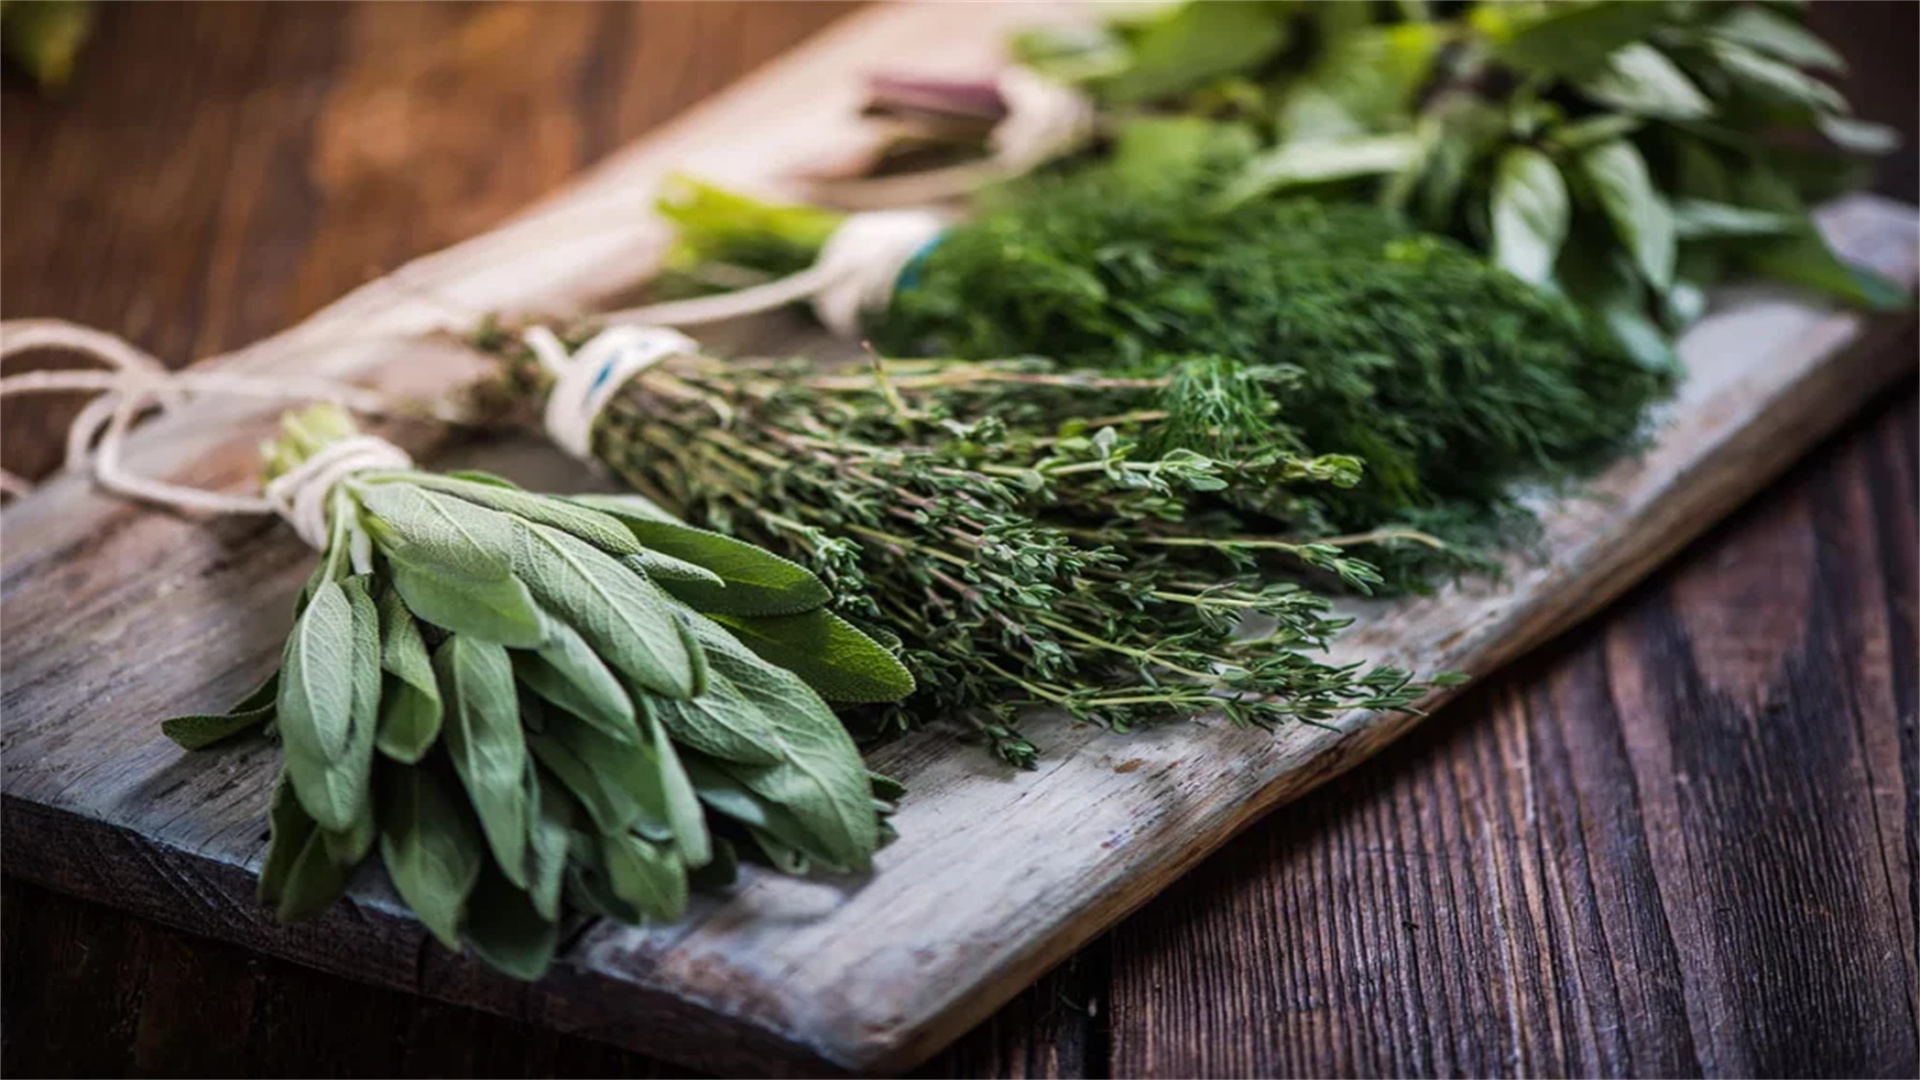
- 3 tablespoons fresh rosemary, thyme, and sage, chopped
- 5 cloves garlic, minced
- Salt and black pepper to taste
- 1 lemon, halved
- 1 cup chicken broth for basting
Steps:
- Preheat oven to 425°F (220°C). Season chicken cavity with salt and pepper, and place lemon halves inside.
- In a bowl, mix herbs, garlic, 2 tablespoons olive oil, salt, and pepper. Rub mixture under and over the chicken skin.
- Toss vegetables with remaining olive oil, salt, and pepper in a roasting pan. Place chicken on top.
- Roast for 1 to 1.5 hours, basting with broth every 20 minutes, until internal temperature reaches 165°F (74°C).
- Let chicken rest for 15 minutes before carving. Serve with roasted vegetables.
Tips and Common Mistakes
- Use a meat thermometer to ensure doneness without overcooking.
- Don't overcrowd the pan; space allows for even browning.
- Let meat rest after roasting to retain juices.
Expand Your Skills
Experiment with roasting times for different vegetables: Brussels sprouts roast well at 400°F (200°C) for 25 minutes, while potatoes may need 45 minutes. Try adding spices like paprika or cumin for a twist. Roasting can also be used for nuts and seeds to enhance their flavor in salads.
🍲 3. Braising: Transforming Tough Cuts into Tender Delights
Description
Braising involves searing food at high heat, then simmering it slowly in liquid at low heat. This combination of dry and moist heat breaks down connective tissues in tough cuts of meat, resulting in fork-tender dishes. It's perfect for beef chuck, pork shoulder, and legumes.
Advantages and Disadvantages
Advantages:
- Forgiving technique that develops rich, complex flavors over time.
- Ideal for batch cooking and cozy meals, with dishes like stews and pot roasts.
Disadvantages:
- Time-consuming process, often requiring several hours.
- Can result in overcooked meat if not monitored.

Example Recipe: Classic Beef Bourguignon
Ingredients:
- 3 pounds (1.4kg) beef chuck, cut into 2-inch cubes
- 6 slices bacon, chopped
- 2 cups red wine (such as Pinot Noir)
- 2 cups beef broth
- 1 pound mushrooms, sliced
- 20 pearl onions, peeled
- 4 carrots, chopped
- 4 cloves garlic, minced
- 3 tablespoons tomato paste
- 2 tablespoons all-purpose flour
- Fresh thyme and bay leaves
- Salt and pepper to taste
- 3 tablespoons olive oil
Steps:
- Pat beef dry and season with salt and pepper. In a Dutch oven, cook bacon over medium heat until crispy; remove and set aside.
- Sear beef in batches in bacon fat and olive oil until browned on all sides. Remove and set aside.
- In the same pot, sauté carrots, onions, and mushrooms until softened. Add garlic and tomato paste, cook for 1 minute.
- Sprinkle flour over vegetables, stir to coat. Gradually add wine and broth, scraping up browned bits.
- Return beef and bacon to pot; add herbs. Bring to a simmer, then cover and transfer to a 325°F (160°C) oven for 2.5-3 hours until beef is tender.
- Skim off excess fat and adjust seasoning. Serve with mashed potatoes or crusty bread.
Tips and Common Mistakes
- Sear meat properly to develop fond (browned bits) for deeper flavor.
- Use a heavy-bottomed pot like a Dutch oven for even heat distribution.
- Don't boil the liquid; keep it at a gentle simmer to avoid toughening the meat.
Expand Your Skills
Braising isn't limited to meat—try it with cabbage, fennel, or chickpeas for vegetarian options. Adjust cooking times based on the ingredient: lamb shanks may need 3 hours, while chicken thighs braise in 45 minutes. This technique is excellent for meal prep, as flavors improve overnight.
🔥 4. Grilling: Harnessing Open Flame for Smoky Goodness
Description
Grilling cooks food over direct or indirect heat from a fire, often outdoors, imparting a smoky char and distinctive grill marks. It's suitable for meats, vegetables, and even fruits, and can be done on gas, charcoal, or indoor grill pans.
Advantages and Disadvantages
Advantages:
- Adds unique flavor profiles and is a social cooking method perfect for gatherings.
- Fast and healthy, as excess fat drips away from the food.
Disadvantages:
- Requires outdoor equipment or proper ventilation for indoor grilling.
- Can lead to uneven cooking if heat is not managed well.
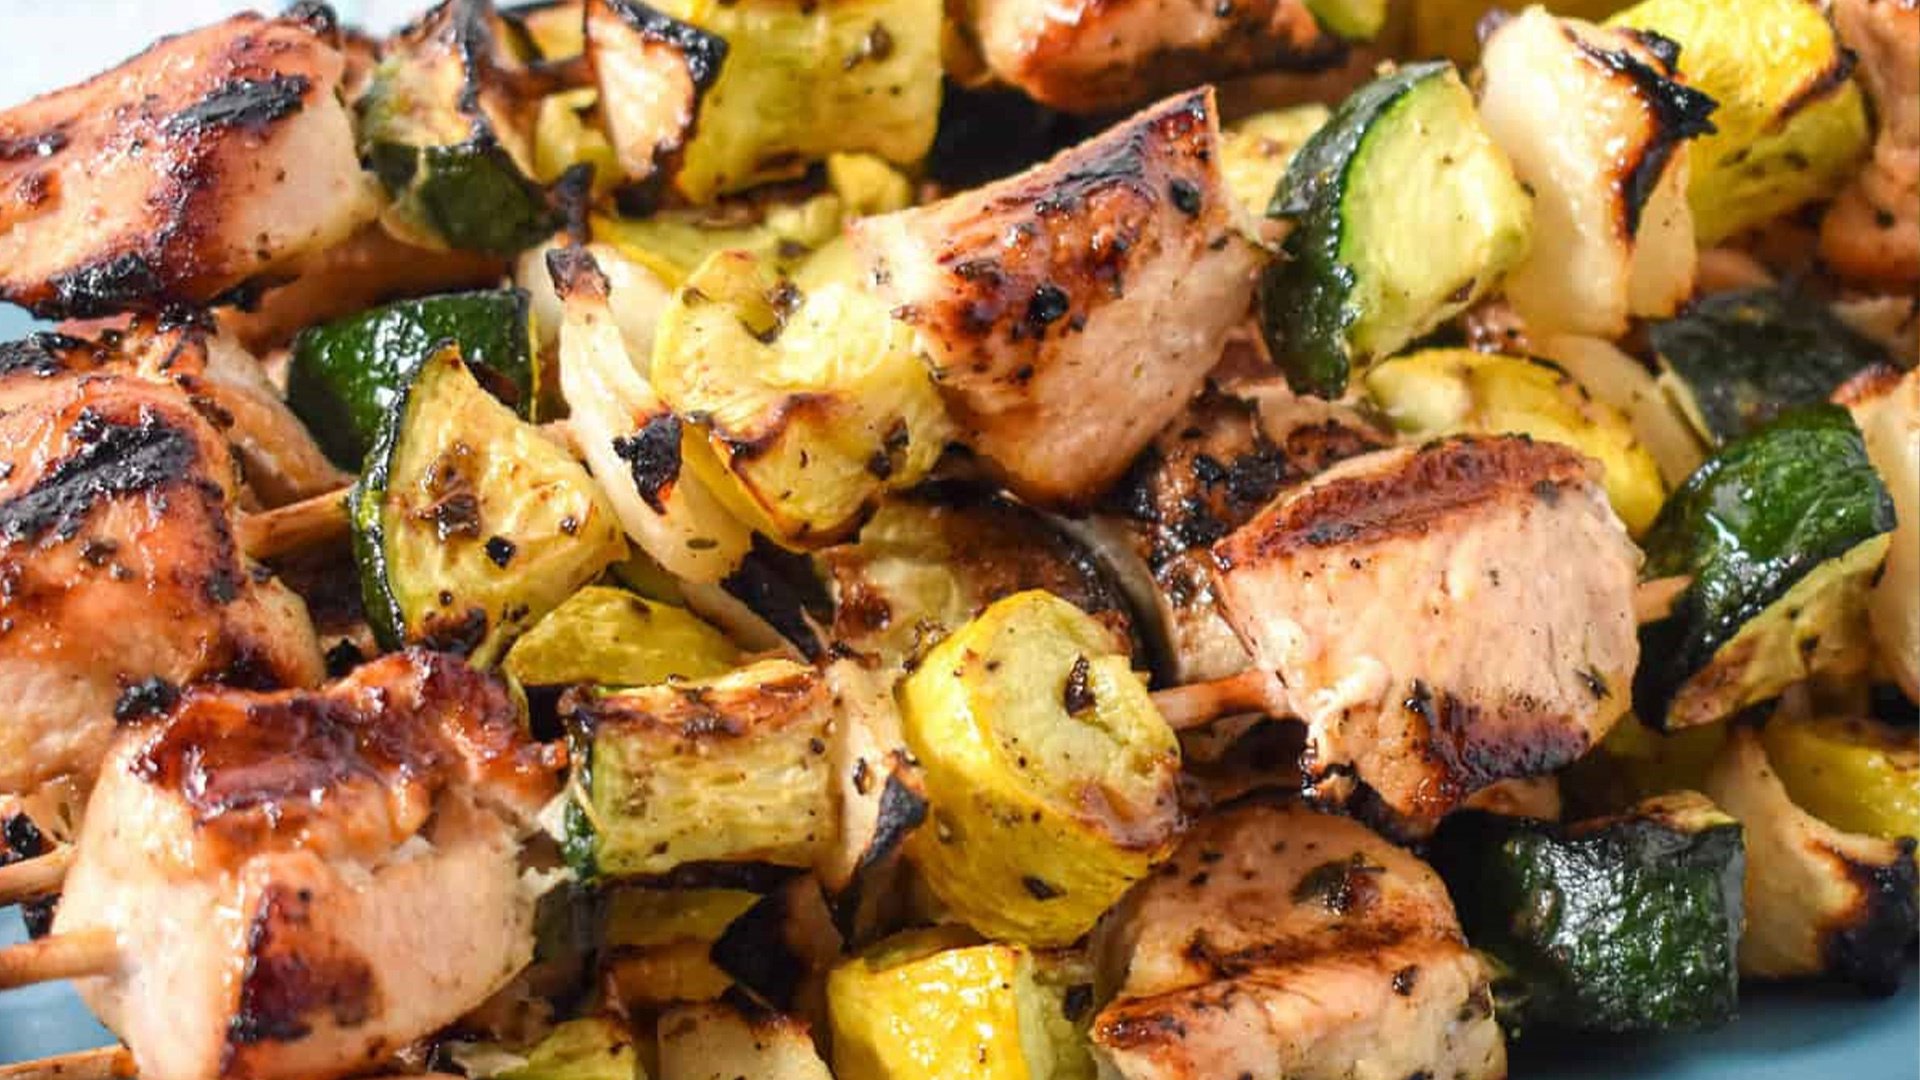
Example Recipe: Grilled Lemon-Herb Chicken Skewers with Zucchini
Ingredients:
- 2 pounds (900g) boneless, skinless chicken thighs, cut into 1-inch pieces
- 3 zucchinis, sliced into rounds
- 1/4 cup olive oil
- 3 lemons, juiced and zested
- 4 cloves garlic, minced
- 2 tablespoons fresh oregano, chopped
- 1 tablespoon fresh rosemary, chopped
- Salt and black pepper to taste
- Wooden or metal skewers (if wooden, soak in water for 30 minutes)
Steps:
- In a bowl, whisk olive oil, lemon juice and zest, garlic, herbs, salt, and pepper. Reserve 2 tablespoons for basting.
- Marinate chicken in the mixture for at least 30 minutes, or up to 4 hours in the refrigerator.
- Thread chicken and zucchini alternately onto skewers.
- Preheat grill to medium-high heat (about 400°F or 200°C). Oil grates to prevent sticking.
- Grill skewers for 10-12 minutes, turning occasionally and basting with reserved marinade, until chicken reaches 165°F (74°C).
- Serve with a side of quinoa or salad.
Tips and Common Mistakes
- Clean and oil grates before grilling to avoid sticking and flare-ups.
- Don't press down on food with a spatula, as it squeezes out juices.
- Use a two-zone fire (hot and cool sides) for better control over cooking.
Expand Your Skills
Expand your grilling repertoire with items like corn on the cob, peaches for desserts, or whole fish. Experiment with marinades using yogurt for tenderness or soy sauce for umami. For indoor cooking, a grill pan can mimic outdoor results—just ensure proper ventilation.
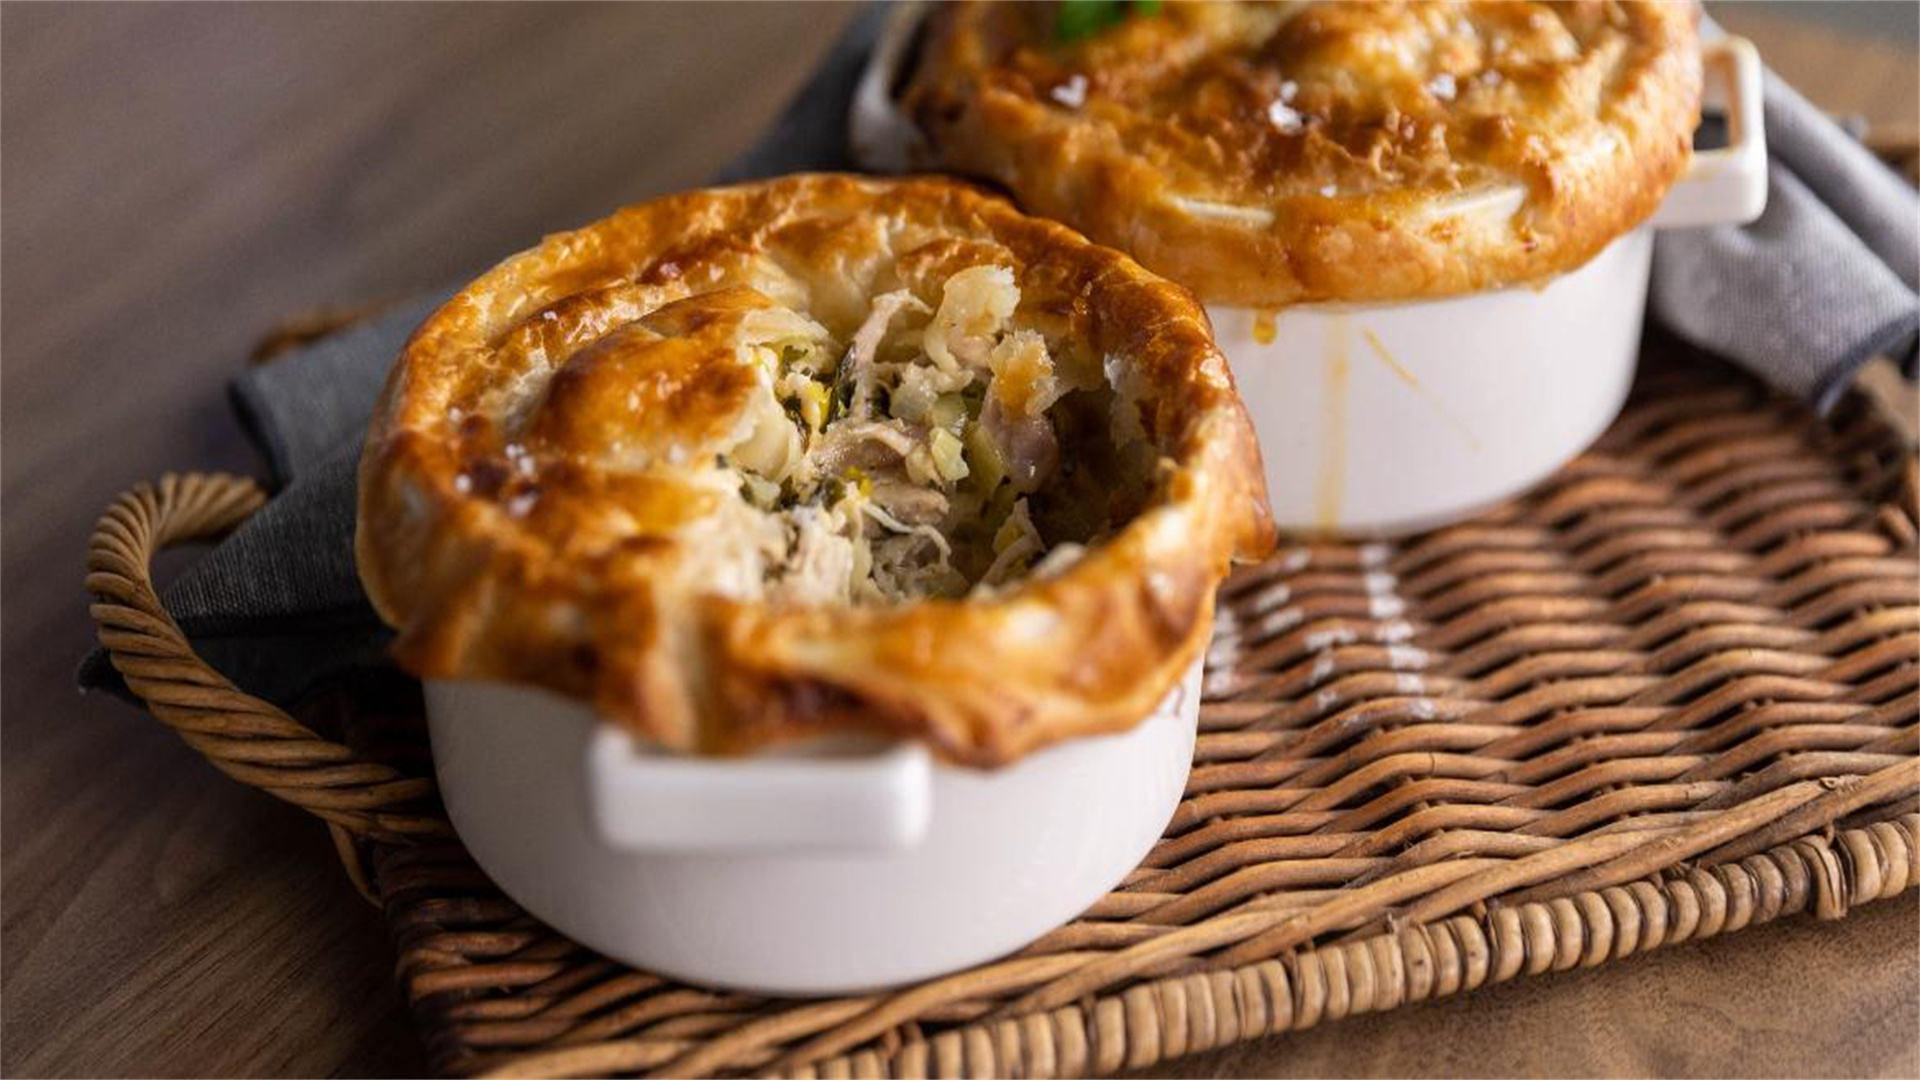
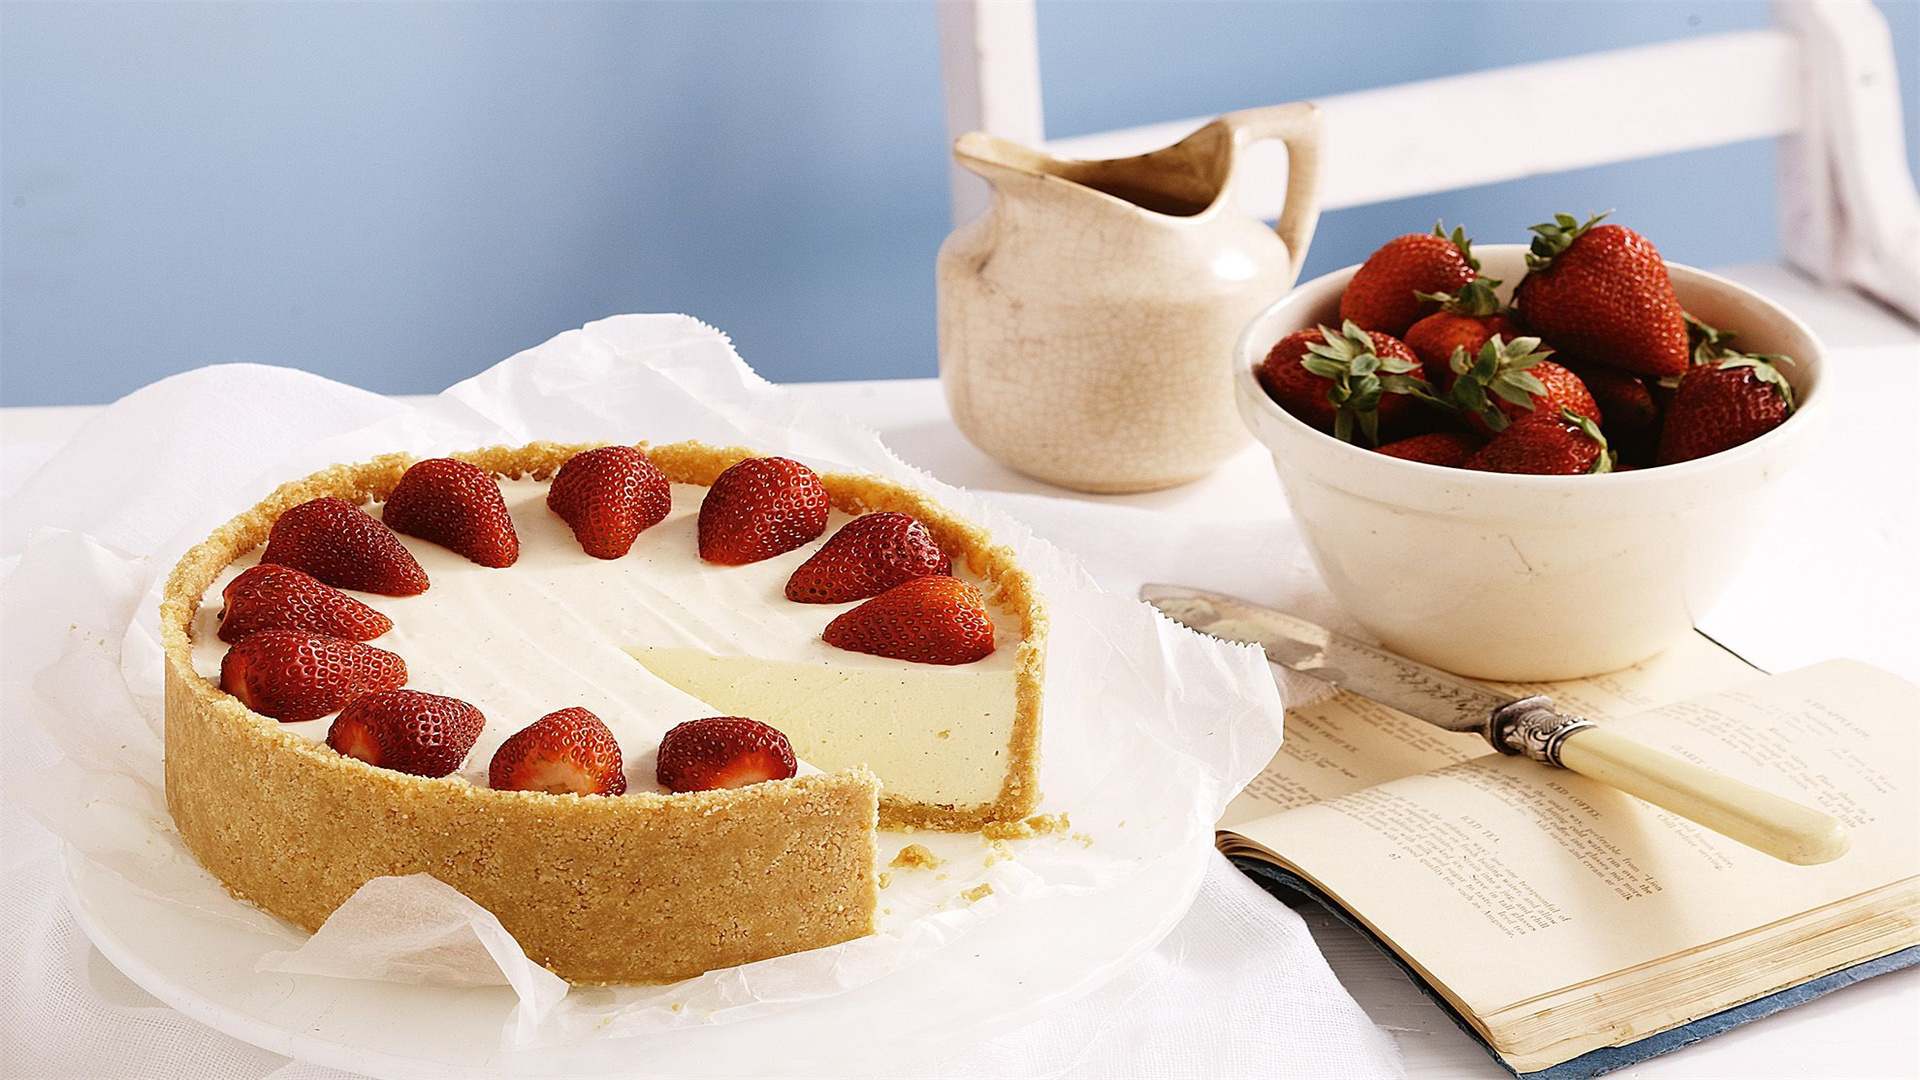
🍞 5. Baking: The Science of Precision and Patience
Description
Baking uses dry heat in an oven to cook food, often with precise measurements and chemical reactions (like leavening). It's essential for bread, pastries, casseroles, and more, requiring attention to temperature and timing for consistent results.
Advantages and Disadvantages
Advantages:
- Foundational technique for homemade treats and savory dishes.
- Teaches discipline and understanding of ingredients, from flour types to yeast activity.
Disadvantages:
- Requires precise measurements and can be less forgiving than other methods.
- Longer preparation and baking times for some items.
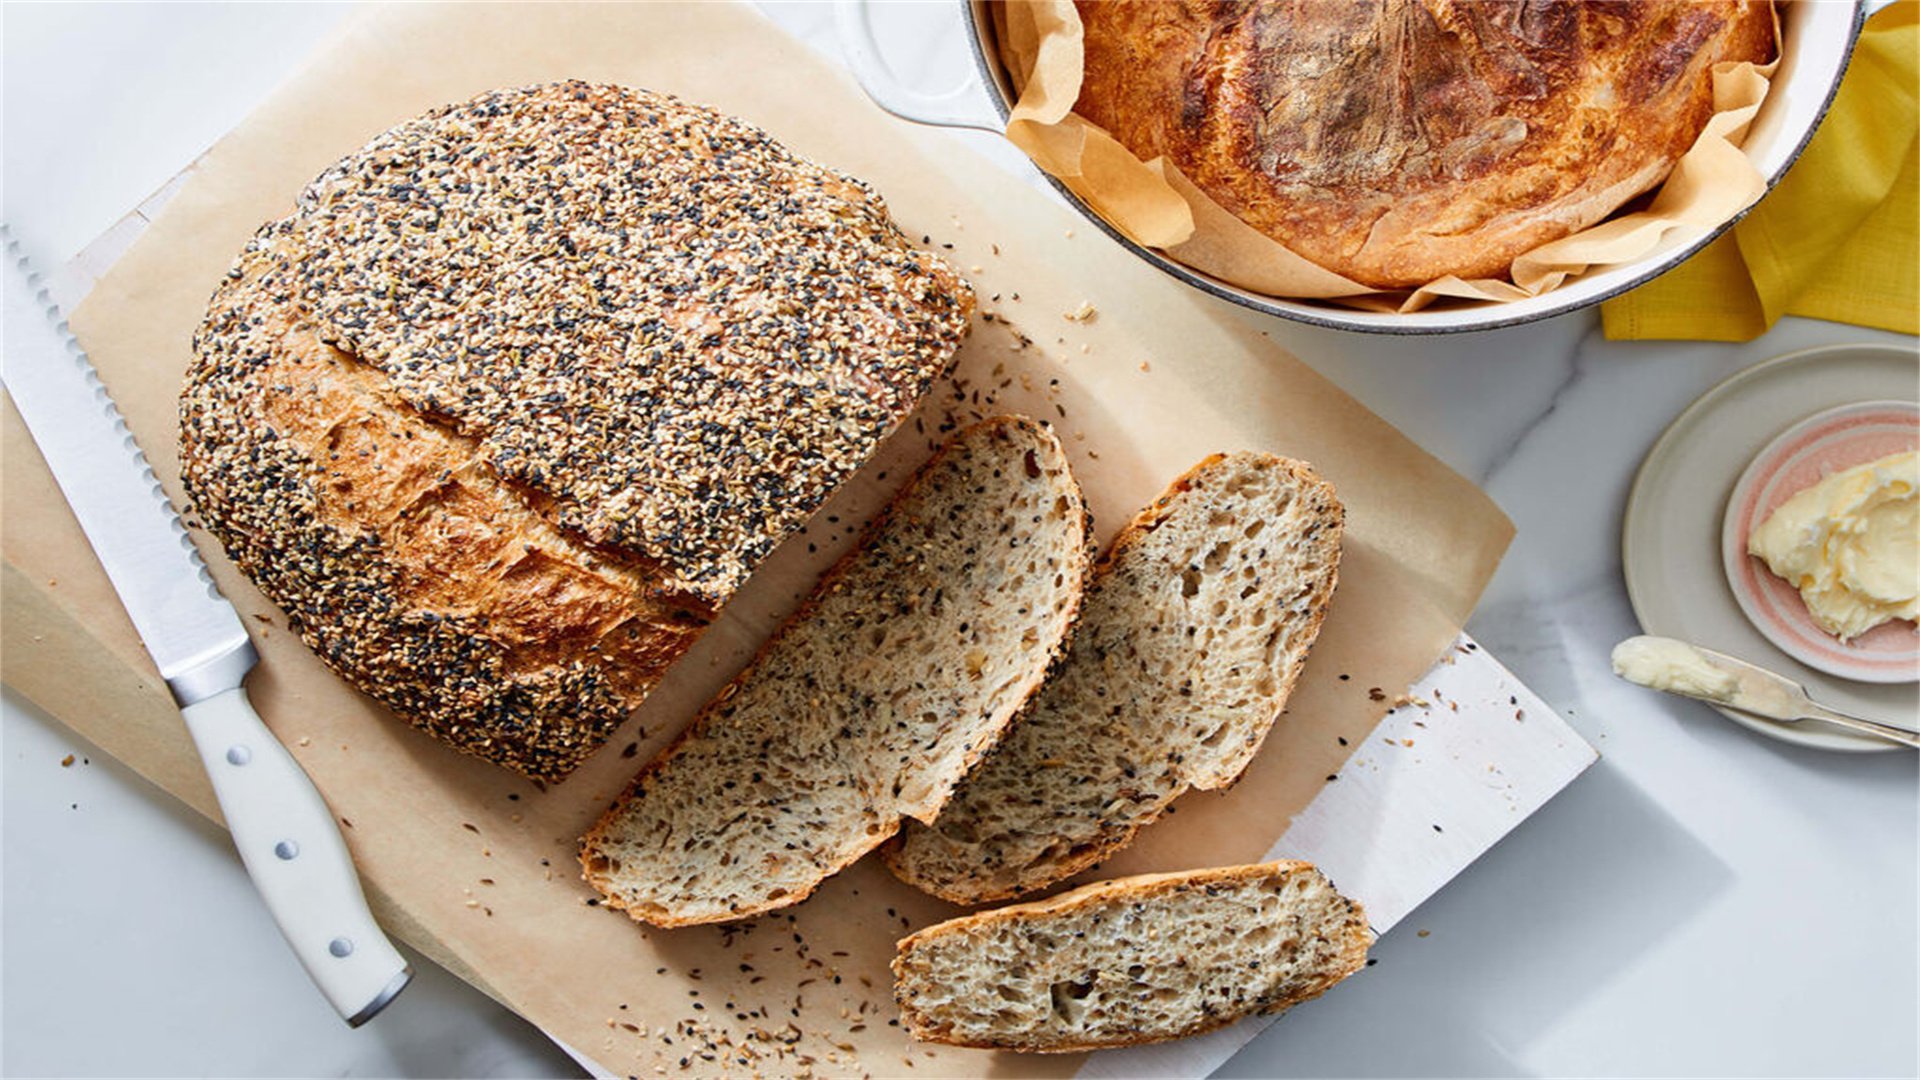
Example Recipe: Rustic No-Knead Bread
Ingredients:
- 4 cups (500g) all-purpose flour
- 2 teaspoons salt
- 1/2 teaspoon active dry yeast
- 2 cups (480ml) warm water (about 100°F or 38°C)
- Optional: 1 tablespoon honey or olive oil for flavor
- Cornmeal or extra flour for dusting
Steps:
- In a large bowl, mix flour, salt, and yeast. Gradually add water, stirring until a shaggy dough forms. Cover with plastic wrap.
- Let dough rise at room temperature for 12-18 hours until doubled in size and bubbly.
- Preheat oven to 450°F (230°C). Place a Dutch oven with lid inside to heat for 30 minutes.
- Turn dough onto a floured surface, shape into a ball, and dust with cornmeal.
- Carefully transfer dough to the hot Dutch oven, cover, and bake for 30 minutes.
- Remove lid and bake for 15-20 more minutes until crust is golden brown and internal temperature reaches 210°F (99°C).
- Cool on a wire rack before slicing.
Tips and Common Mistakes
- Measure ingredients by weight for accuracy, especially in baking.
- Don't open the oven door frequently, as temperature fluctuations can affect rise.
- Use room-temperature ingredients like eggs and butter for even mixing.
Expand Your Skills
Baking extends beyond bread—try techniques like blind-baking pie crusts, making soufflés, or crafting laminated dough for croissants. Practice with simple recipes like muffins or roasted vegetables before advancing to complex desserts. Understanding oven hot spots can also improve your results.
🍃 6. Steaming: Preserving Nutrients and Delicate Textures
Description
Steaming cooks food using vapor from boiling water, without submerging it in liquid. This gentle method retains nutrients, colors, and natural flavors, making it ideal for vegetables, fish, dumplings, and grains like rice.
Advantages and Disadvantages
Advantages:
- Healthy, low-fat cooking technique that maintains food integrity.
- Quick and versatile, suitable for everyday meals and special diets.
Disadvantages:
- Can lack the browning or caramelization of other methods.
- Requires specific equipment like a steamer basket.
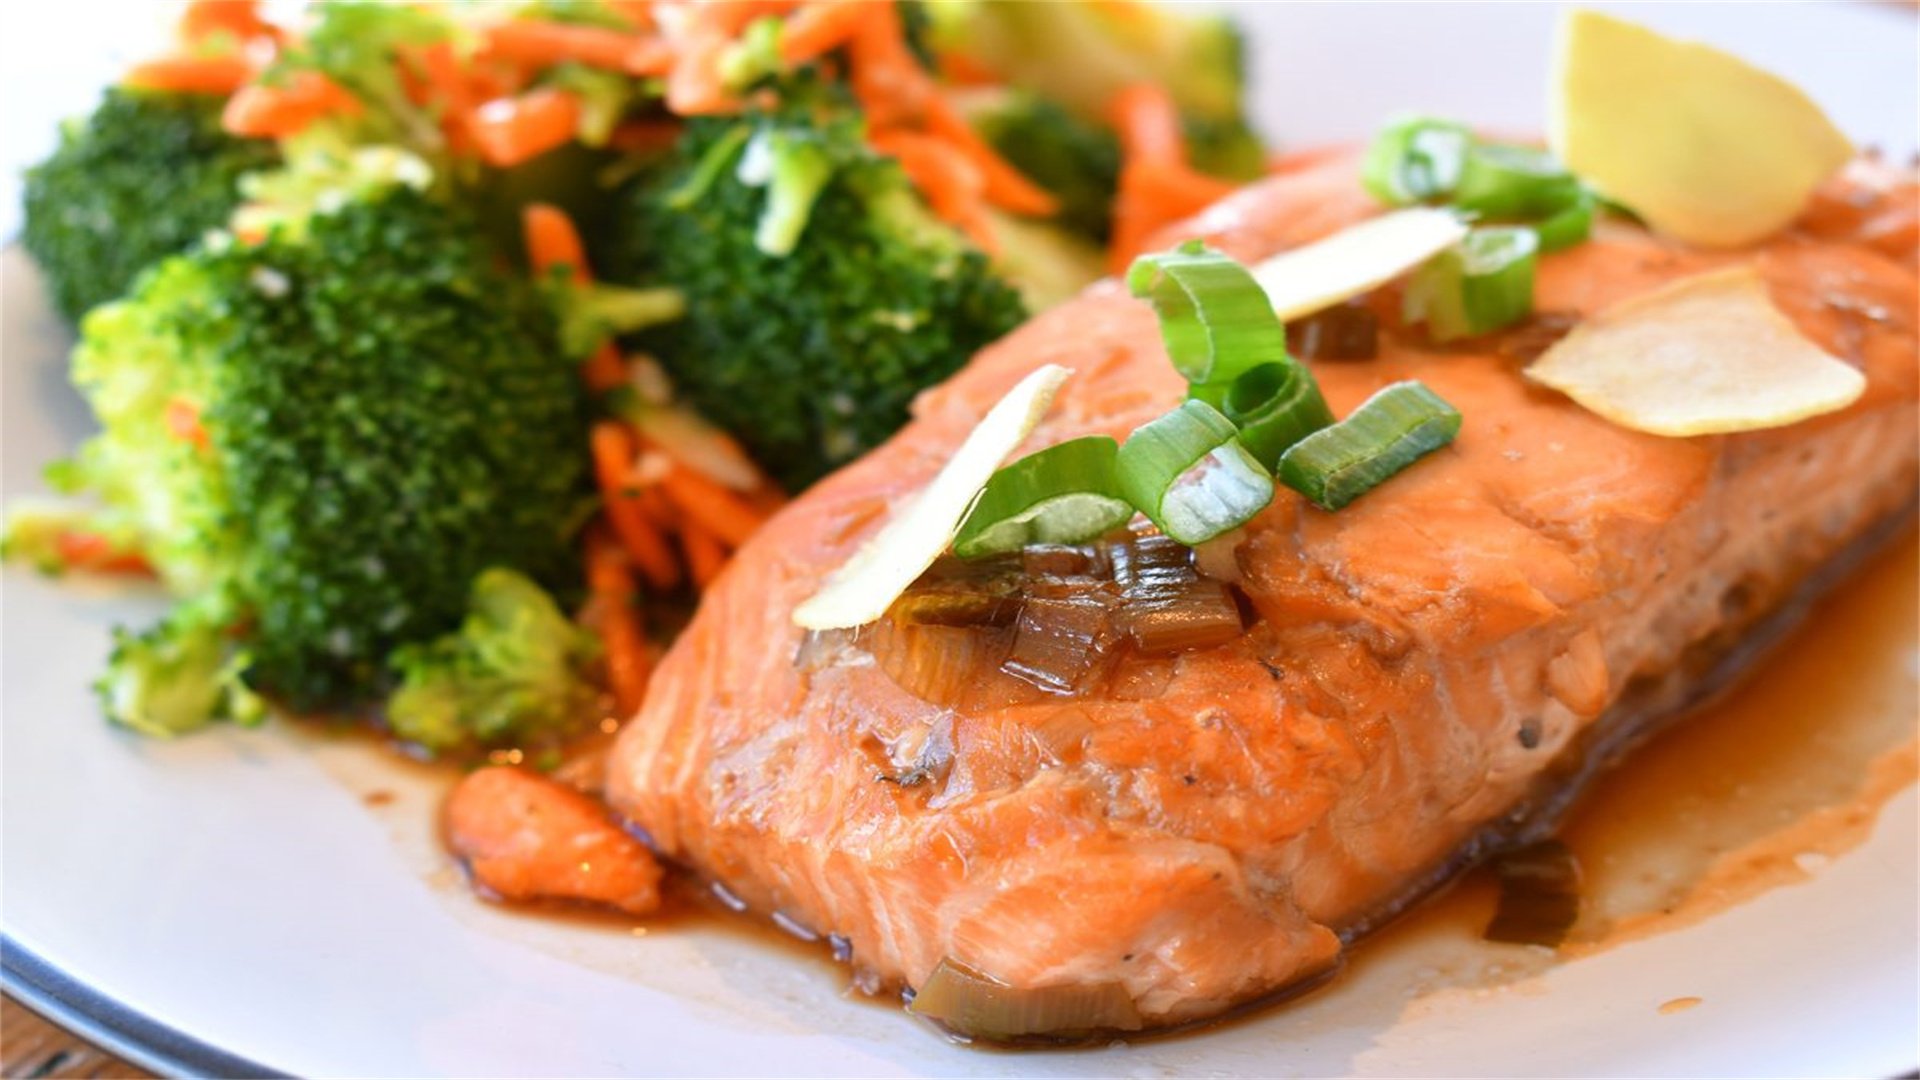
Example Recipe: Steamed Salmon with Ginger-Scallion Sauce
Ingredients:
- 4 salmon fillets (6 ounces or 170g each), skin-on or skinless
- 1 bunch scallions, thinly sliced
- 3-inch piece ginger, julienned
- 1/4 cup soy sauce
- 2 tablespoons sesame oil
- 1 tablespoon rice vinegar
- 1 teaspoon sugar
- Lemon wedges for serving
- Salt and white pepper to taste
Steps:
- Season salmon with salt and white pepper. Place in a heatproof dish that fits inside a steamer basket.
- Bring water to a boil in a steamer pot or wok. Place dish with salmon in the steamer, cover, and steam for 8-10 minutes until salmon flakes easily.
- Meanwhile, mix scallions, ginger, soy sauce, sesame oil, rice vinegar, and sugar in a small bowl.
- Once salmon is cooked, drizzle sauce over it and serve with lemon wedges and steamed bok choy or rice.
Tips and Common Mistakes
- Ensure water doesn't touch the food; use a rack or elevated steamer basket.
- Don't oversteam, as it can make food mushy—check doneness frequently.
- Add aromatics like lemongrass or star anise to the water for infused flavors.
Expand Your Skills
Steaming can be adapted for desserts like puddings or for reheating leftovers without drying them out. Invest in a bamboo steamer for traditional results or use a microwave with a covered dish. Try steaming vegetables like broccoli or carrots for crisp-tender sides in just 5-7 minutes.
🥚 7. Poaching: Gentle Cooking for Tender Results
Description
Poaching involves simmering food in liquid at a low temperature (160-180°F or 71-82°C), just below boiling. It's perfect for delicate proteins like eggs, fish, and chicken, as well as fruits, producing moist and tender outcomes without added fat.
Advantages and Disadvantages
Advantages:
- Subtle technique that highlights natural flavors and is often used in healthy cooking.
- Forgiving and hard to overcook if monitored closely.
Disadvantages:
- Requires careful temperature control to avoid breaking delicate items.
- Can be time-consuming for larger batches.

Example Recipe: Perfectly Poached Eggs with Avocado Toast
Ingredients:
- 4 large fresh eggs
- 2 tablespoons white vinegar
- Salt and black pepper to taste
- 2 ripe avocados, mashed
- 4 slices sourdough bread, toasted
- Optional toppings: red pepper flakes, microgreens, or smoked salmon
Steps:
- Fill a deep skillet with 3 inches of water. Add vinegar and bring to a gentle simmer over medium heat.
- Crack each egg into a small cup or ramekin. Stir water to create a vortex, then gently slide eggs into the center.
- Poach for 3-4 minutes until whites are set but yolks remain runny. Remove with a slotted spoon and drain on paper towels.
- Spread mashed avocado on toast, top with poached eggs, and season with salt, pepper, and optional toppings.
Tips and Common Mistakes
- Use fresh eggs for better shape retention, as older eggs have thinner whites.
- Keep water at a bare simmer; boiling can break the eggs apart.
- Poach in batches to avoid overcrowding and temperature drops.
Expand Your Skills
Poaching isn't limited to eggs—try it for chicken breast in broth for salads, or pears in wine for desserts. Experiment with poaching liquids like court-bouillon for fish or spiced syrup for fruits. This technique is excellent for meal prep, as poached items store well in the refrigerator.
🥬 8. Blanching: Locking in Color and Texture
Description
Blanching involves briefly boiling food, then plunging it into ice water to stop cooking. This technique sets colors, loosens skins (like for tomatoes), and partially cooks vegetables for later use in salads, stir-fries, or freezing.
Advantages and Disadvantages
Advantages:
- Preserves nutrients, enhances vibrancy, and prepares ingredients for further cooking.
- Key step in meal prep and preserving seasonal produce.
Disadvantages:
- Requires an ice bath, which can be cumbersome.
- Can lead to nutrient loss if overblanched.
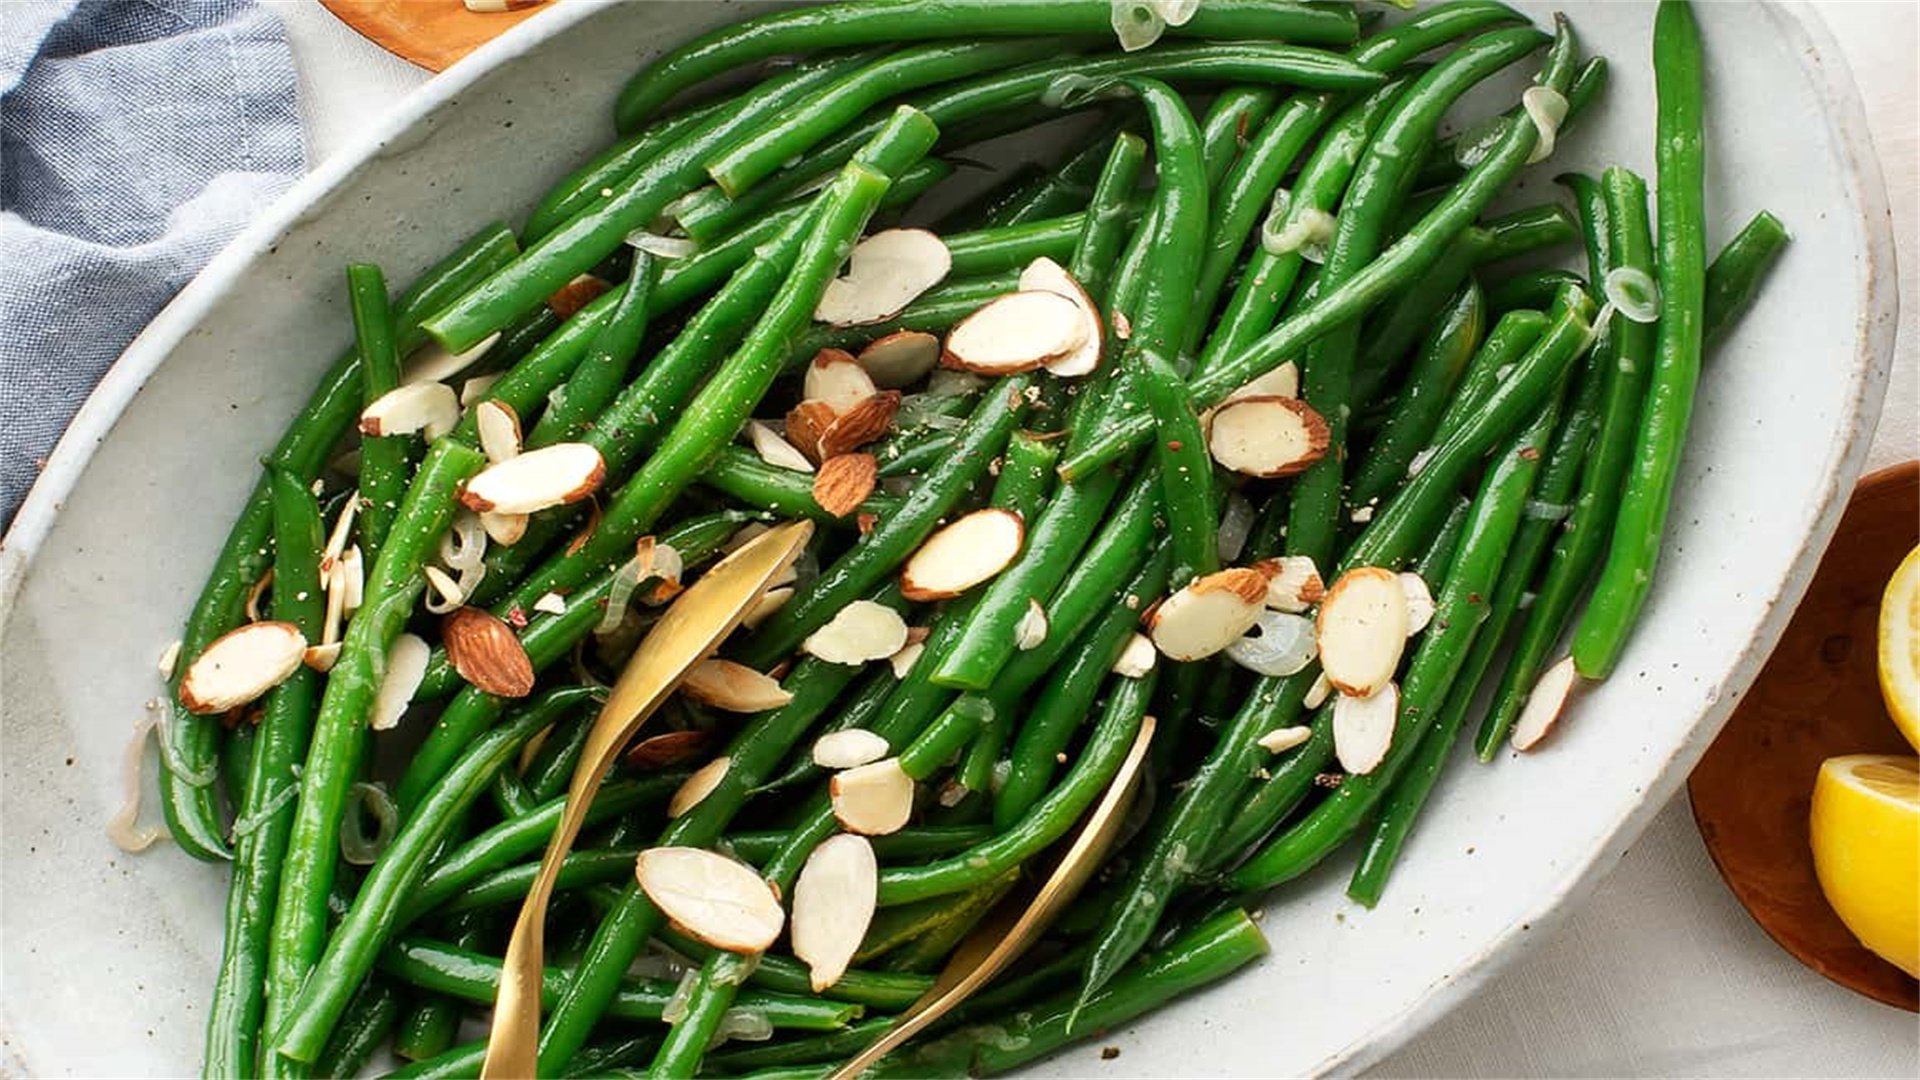
Example Recipe: Blanched Green Beans with Almonds and Lemon
Ingredients:
- 1 pound (450g) green beans, trimmed
- 1/4 cup sliced almonds
- 2 tablespoons olive oil
- 1 lemon, zested and juiced
- 2 cloves garlic, minced
- Salt and black pepper to taste
- Ice bath: large bowl of ice water
Steps:
- Bring a large pot of salted water to a rolling boil.
- Add green beans and blanch for 2-3 minutes until bright green and tender-crisp.
- Immediately transfer beans to ice bath to cool completely, then drain and pat dry.
- In a skillet, toast almonds over medium heat until golden. Add olive oil and garlic, sauté for 30 seconds.
- Toss blanched beans with almond mixture, lemon zest, and juice. Season and serve warm or cold.
Tips and Common Mistakes
- Use plenty of water to maintain boil when adding food.
- Don't skip the ice bath, as it halts cooking and preserves texture.
- Blanch in small batches to ensure even cooking.
Expand Your Skills
Blanching is versatile: use it for broccoli before freezing, peaches for easy peeling, or spinach for dips. Time adjustments are crucial—leafy greens blanch in 30 seconds, while carrots may need 2 minutes. Incorporate blanched vegetables into pasta dishes or grain bowls for added crunch.
🥣 9. Emulsifying: Creating Smooth, Stable Sauces and Dressings
Description
Emulsifying combines two immiscible liquids, like oil and vinegar, into a stable mixture using an emulsifier (e.g., egg yolk, mustard). This technique is essential for mayonnaise, vinaigrettes, and sauces like hollandaise, adding richness and body to dishes.
Advantages and Disadvantages
Advantages:
- Allows you to craft homemade sauces that are far superior to store-bought versions.
- Enhances salads, sandwiches, and elegant entrees.
Disadvantages:
- Can be tricky to master, with risk of breaking the emulsion.
- Requires precise technique and patience.
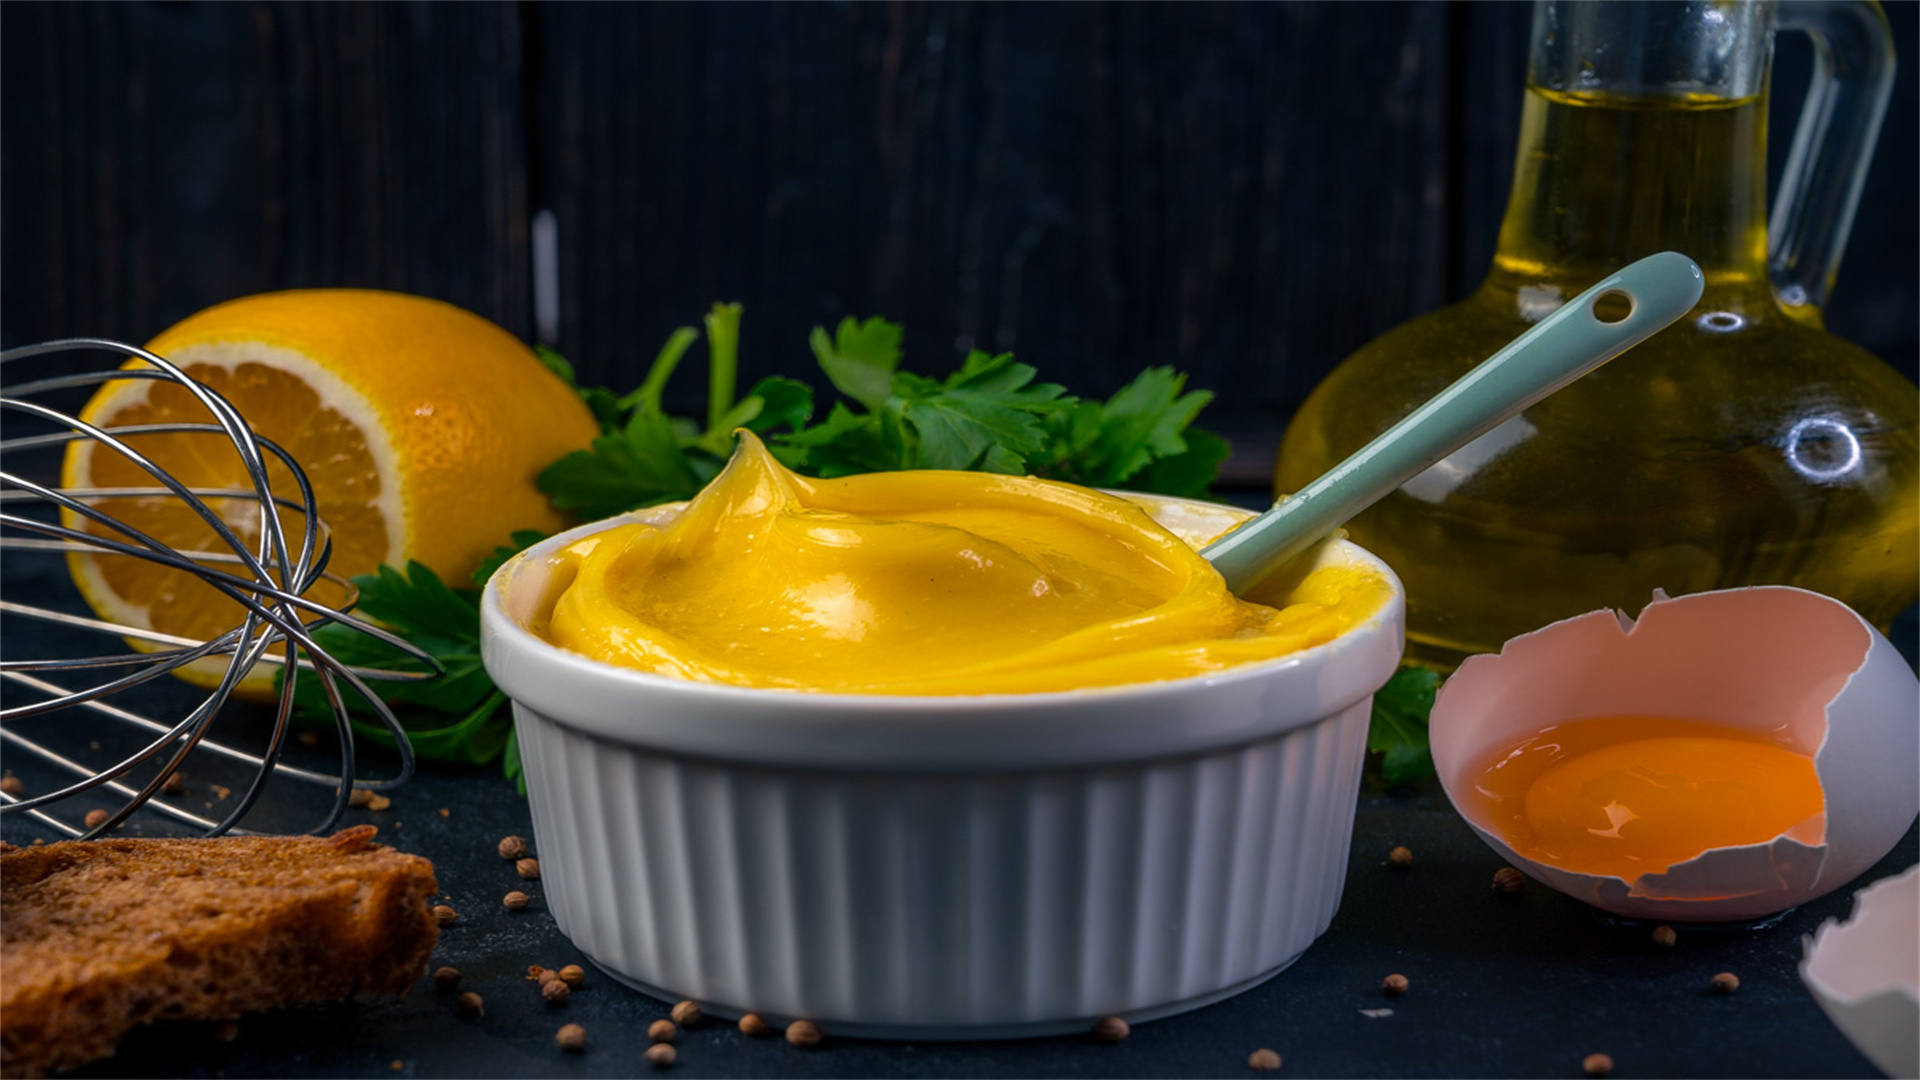
Example Recipe: Classic Homemade Mayonnaise
Ingredients:
- 1 large egg yolk, at room temperature
- 1 teaspoon Dijon mustard
- 1 cup neutral oil (like canola or grapeseed), divided
- 1 tablespoon lemon juice or white vinegar
- Salt and white pepper to taste
- Optional: 1 clove garlic, minced for aioli
Steps:
- In a medium bowl, whisk egg yolk and mustard until smooth.
- Very slowly drizzle in a few drops of oil while whisking constantly to start the emulsion.
- Gradually add remaining oil in a thin stream, whisking vigorously until thick and creamy.
- Whisk in lemon juice, salt, pepper, and garlic (if using). Adjust consistency with water if too thick.
- Store in an airtight container in the refrigerator for up to one week.
Tips and Common Mistakes
- Use room-temperature ingredients to prevent breaking.
- Add oil slowly at first to establish the emulsion; rushing can cause separation.
- If the emulsion breaks, start with a new yolk and slowly whisk in the broken mixture.
Expand Your Skills
Expand emulsifying to vinaigrettes with a 3:1 oil-to-vinegar ratio, or try béarnaise sauce with tarragon. Practice with immersion blenders for easier results. Emulsified sauces can be flavored with herbs, spices, or citrus zest—experiment to find your favorites.
🔪 10. Knife Skills: The Foundation of Efficient Cooking
Description
Knife skills encompass proper techniques for chopping, dicing, mincing, and slicing ingredients safely and uniformly. Mastering these cuts improves cooking times, presentation, and even cooking, making them essential for every recipe.
Advantages and Disadvantages
Advantages:
- Saves time, reduces waste, and enhances safety in the kitchen.
- First step toward professional-level cooking at home.
Disadvantages:
- Requires practice and can be intimidating for beginners.
- Risk of injury if not done properly.
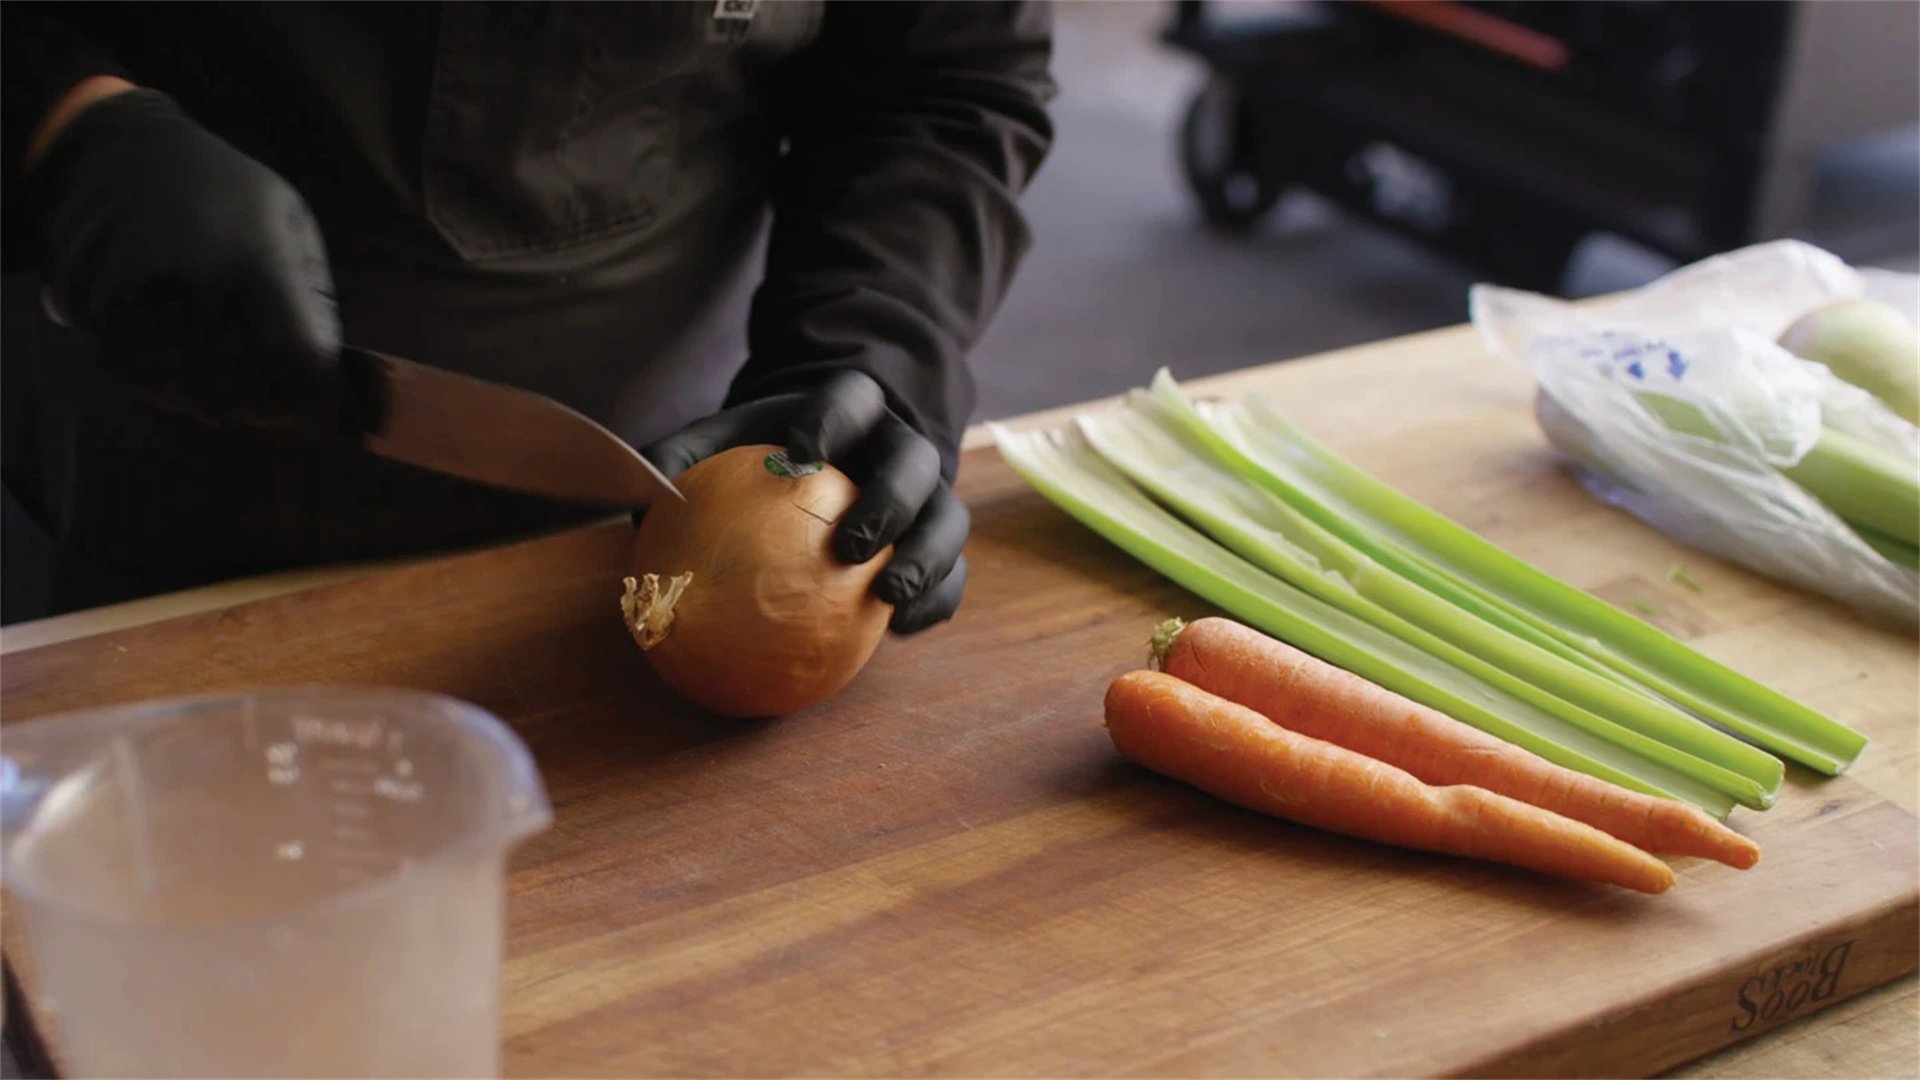
Example Recipe: Practice with a Classic Mirepoix
Ingredients:
- 2 carrots
- 2 celery stalks
- 1 large onion
- 2 tablespoons olive oil
- Salt and pepper to taste
- Herbs like thyme or bay leaves (optional)
Steps for Knife Cuts:
- Peel carrots and cut into small dice: slice into planks, then batons, then cubes.
- Trim celery and dice similarly, ensuring uniform size for even cooking.
- Peel onion and dice: halve, make horizontal and vertical cuts, then slice across.
- Heat oil in a pan over medium heat. Add mirepoix and sauté until softened, about 10 minutes. Use as a base for soups, stews, or sauces.
Tips and Common Mistakes
- Keep knives sharp; a dull blade is more dangerous and inefficient.
- Use the claw grip to protect fingers while guiding food.
- Practice consistency—uniform cuts ensure even cooking and professional results.
Expand Your Skills
Invest time in learning cuts like julienne for stir-fries, chiffonade for herbs, or brunoise for fine garnishes. Watch online tutorials from chefs like Jacques Pépin for guidance. Start with soft vegetables like cucumbers before moving to harder items like squash. Good knife skills will speed up every recipe you tackle.
Conclusion: Practice Makes Perfect
Mastering these 10 simple cooking techniques—sautéing, roasting, braising, grilling, baking, steaming, poaching, blanching, emulsifying, and knife skills—will transform you into a confident home chef. Each method opens doors to countless recipes and culinary creativity. Remember, cooking is both an art and a science; don't be afraid to experiment with ingredients and adjust techniques to suit your taste. Start with one technique per week, follow the detailed recipes provided, and soon you'll be impressing family and friends with your kitchen prowess. Happy cooking!
For further inspiration, explore international cooking websites or take online classes. The journey to culinary mastery is ongoing, but with these fundamentals, you're well on your way. Share your creations and tips with fellow home chefs—community makes cooking even more rewarding.