9 Quick DIY Upgrades That Make Your Home Feel Warm and Charming
In an era where our homes have become multifunctional sanctuaries—serving as offices, schools, and retreats—the desire to create spaces that exude warmth and charm has never been more pronounced. A cozy, inviting home not only enhances our daily comfort but also boosts mental well-being, fostering a sense of security and happiness. Fortunately, you don't need a professional decorator or a hefty budget to achieve this; with a bit of creativity and some do-it-yourself spirit, you can implement quick upgrades that transform cold, sterile rooms into welcoming havens. This comprehensive guide explores nine DIY projects, each designed to infuse your home with personality and coziness in a matter of hours or days. Drawing inspiration from popular international home improvement websites like Apartment Therapy, HGTV, and Real Homes, we'll delve into practical, step-by-step approaches that cater to various skill levels and styles. Whether you're looking to refresh a single room or overhaul your entire living space, these upgrades focus on tangible, specific actions—avoiding vague suggestions like "use paint" or "layer textiles" without context. By the end, you'll have a toolkit of ideas to craft a home that feels authentically yours, brimming with warmth and charm. Let's embark on this transformative journey, starting with an overview of why these elements matter and then diving into each upgrade in detail.
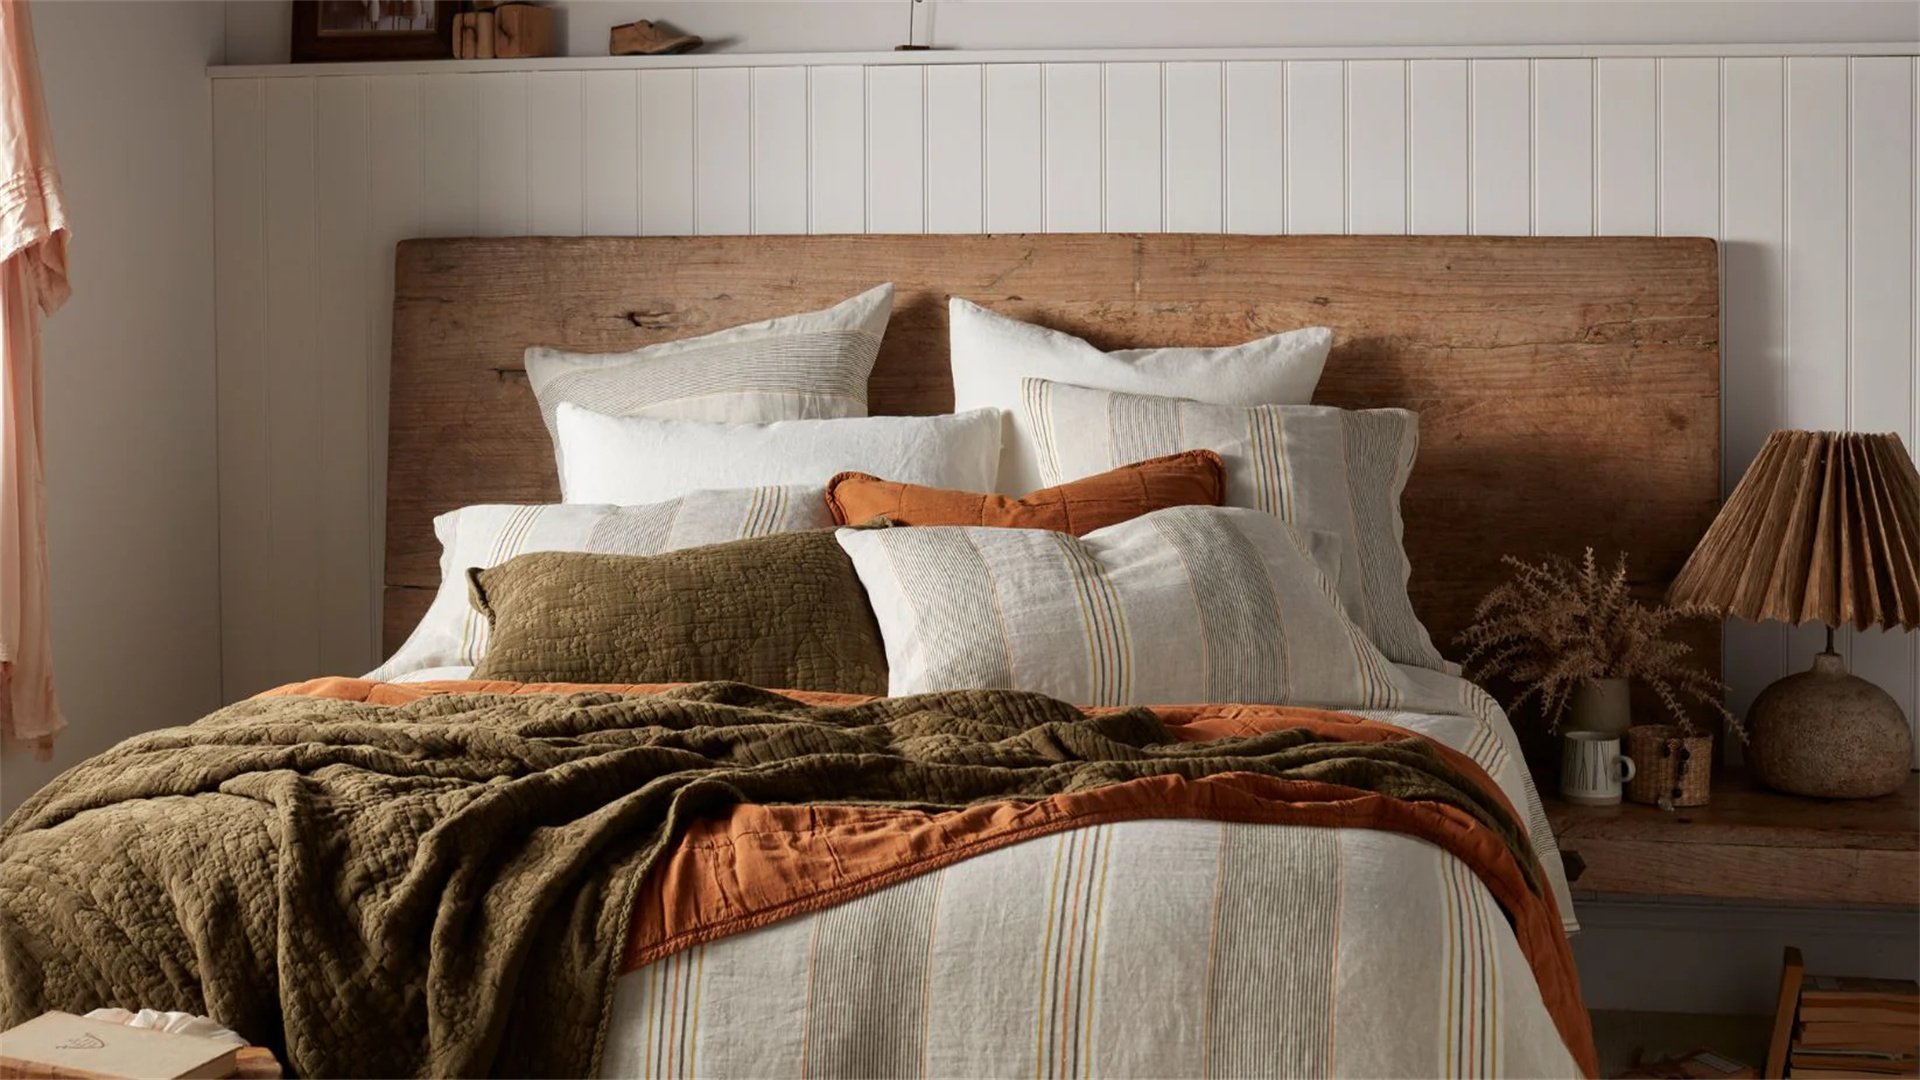
🛋️ Upgrade 1: Layer Textiles with Throw Pillows and Blankets
Textiles are the unsung heroes of home decor, offering an instant injection of warmth, texture, and color. By strategically layering throw pillows and blankets, you can soften hard surfaces, define seating areas, and create a visually rich environment that invites relaxation. This upgrade is ideal for living rooms, bedrooms, or even reading nooks, and it requires minimal tools—just a keen eye for design. According to trends from Scandinavian and Bohemian-inspired websites, the key lies in mixing patterns, materials, and scales to achieve a curated yet effortless look. Below, we break down how to execute this upgrade effectively, along with its pros and cons.
How to Implement
- Select a Cohesive Color Palette: Begin by assessing your existing room colors. Choose a base of neutral tones like beige, gray, or white to anchor the space, then introduce accent colors through pillows and blankets. For a warm feel, opt for earthy hues such as terracotta, olive green, or mustard yellow; for charm, consider pastels like blush pink or soft blue. Reference color wheels from design blogs to ensure harmony.
- Mix Textures and Materials: Combine at least three different textures to add depth. Examples include a chunky knit blanket, smooth velvet pillows, a faux fur throw, and linen cushion covers. This variety stimulates the senses and prevents the space from feeling flat. Visit sites like Wayfair or IKEA for affordable options that mimic high-end materials.
- Arrange Thoughtfully: Drape blankets casually over sofas, armchairs, or bed footboards—avoid overly neat folds for a lived-in vibe. For pillows, use a mix of sizes (e.g., standard, lumbar, square) and arrange them in odd numbers (like three or five) on couches. Layer patterns by pairing large-scale prints with small-scale ones, and always include solid colors to balance the look.
- Incorporate Personal Touches: Add handmade elements, such as crocheted blankets or embroidered pillows, to infuse charm. You can also DIY pillow covers using fabric from old clothes or thrift stores, following online tutorials from platforms like YouTube or Pinterest.
- Seasonal Rotation: Keep your decor fresh by swapping textiles seasonally. In winter, use heavier wools and darker colors; in summer, switch to lightweight cottons and bright hues. Store off-season items in vacuum bags to save space.
Advantages and Disadvantages
Advantages:
- This upgrade is highly affordable, with pillows and blankets often costing under $50 each.
- It's reversible and non-permanent, making it perfect for renters or those who like frequent changes.
- Textiles also improve acoustics by absorbing sound, and they provide physical comfort, encouraging relaxation.
- From a design perspective, they offer endless customization, allowing you to reflect your personality quickly.
Disadvantages:
- Overloading can lead to clutter, making rooms feel smaller or messy.
- Textiles require maintenance, including regular washing to prevent dust and allergens.
- Cheap materials may wear out quickly, so investing in quality pieces is advisable.
- Additionally, if not coordinated well, patterns can clash, resulting in a chaotic aesthetic.
Pro Tips for Success
- Use pillow inserts that are slightly larger than the covers for a plump, luxurious appearance.
- Drape blankets asymmetrically for a casual, inviting look—for example, let one end pool on the floor.
- Incorporate textiles with tassels, pom-poms, or fringe for added charm and movement.
- Consider the room's lighting; in dim areas, choose light-colored textiles to brighten the space.
- Blend old and new pieces to create a layered history, such as pairing a vintage quilt with modern geometric pillows.

💡 Upgrade 2: Install Warm and Dimmable Lighting
Lighting is a transformative element that can make or break a home's ambiance. Harsh, cool-toned lights often feel sterile, while warm, dimmable options create a cozy, intimate atmosphere reminiscent of candlelight. This upgrade focuses on replacing fixtures, adding layers of light, and incorporating smart controls to adjust brightness according to mood. Inspired by European home sites that emphasize hygge (the Danish concept of coziness), we'll explore practical ways to achieve a charming glow without rewiring your entire house.
How to Implement
- Assess Existing Lighting: Start by evaluating your current setup. Identify areas with overhead fluorescents or cool LED bulbs and note where additional light sources are needed. Use a light meter app to measure brightness levels, aiming for 2700K to 3000K color temperature for warmth.
- Layer Light Sources: Implement a three-tiered approach: ambient (general lighting), task (focused light for activities), and accent (highlighting decor). For ambient light, replace ceiling fixtures with warm LED panels or pendant lights. Add task lighting with table lamps on nightstands or desks, and use accent lighting like string lights or wall sconces to illuminate artwork or shelves.
- Install Dimmers and Smart Bulbs: Replace standard switches with dimmer switches for overhead lights—a DIY project that requires basic electrical knowledge (always turn off power at the breaker). Alternatively, use smart bulbs from brands like Philips Hue or LIFX, which allow dimming and color changes via smartphone apps. Pair with voice assistants like Alexa for hands-free control.
- Incorporate Candles and Lanterns: For instant charm, place candles in clusters on mantels, tables, or windowsills. Use LED candles for safety if needed. Hang lanterns with warm bulbs outdoors or in entryways to create a welcoming glow.
- Focus on Key Areas: Prioritize rooms where warmth is most desired, such as living rooms, dining areas, and bedrooms. In the living room, install a floor lamp with a adjustable arm to direct light; in the bedroom, use bedside lamps with fabric shades to diffuse light softly.
Advantages and Disadvantages
Advantages:
- Warm lighting reduces eye strain and promotes relaxation by mimicking natural sunset hues.
- Dimmers and smart bulbs enhance energy efficiency, allowing you to lower electricity usage.
- This upgrade also increases home value, as modern lighting is a sought-after feature.
- It's highly customizable, enabling you to set scenes for different occasions, like movie nights or dinner parties.
Disadvantages:
- Initial costs can be high if purchasing multiple smart bulbs or fixtures.
- Installation may require professional help for complex wiring, adding to expenses.
- Over-lighting can negate the cozy effect, so balance is crucial.
- Some smart bulbs rely on Wi-Fi, which may pose connectivity issues.
Pro Tips for Success
- Choose bulbs labeled "soft white" or "warm white" for a consistent glow throughout the house.
- Use lampshades made of linen, paper, or fabric to soften light and reduce glare.
- Place mirrors opposite light sources to reflect and amplify warmth in dark corners.
- Experiment with colored smart bulbs for festive occasions, but stick to warm tones for daily use.
- Consider installing timer switches for outdoor lights to automatically create a charming curb appeal at dusk.
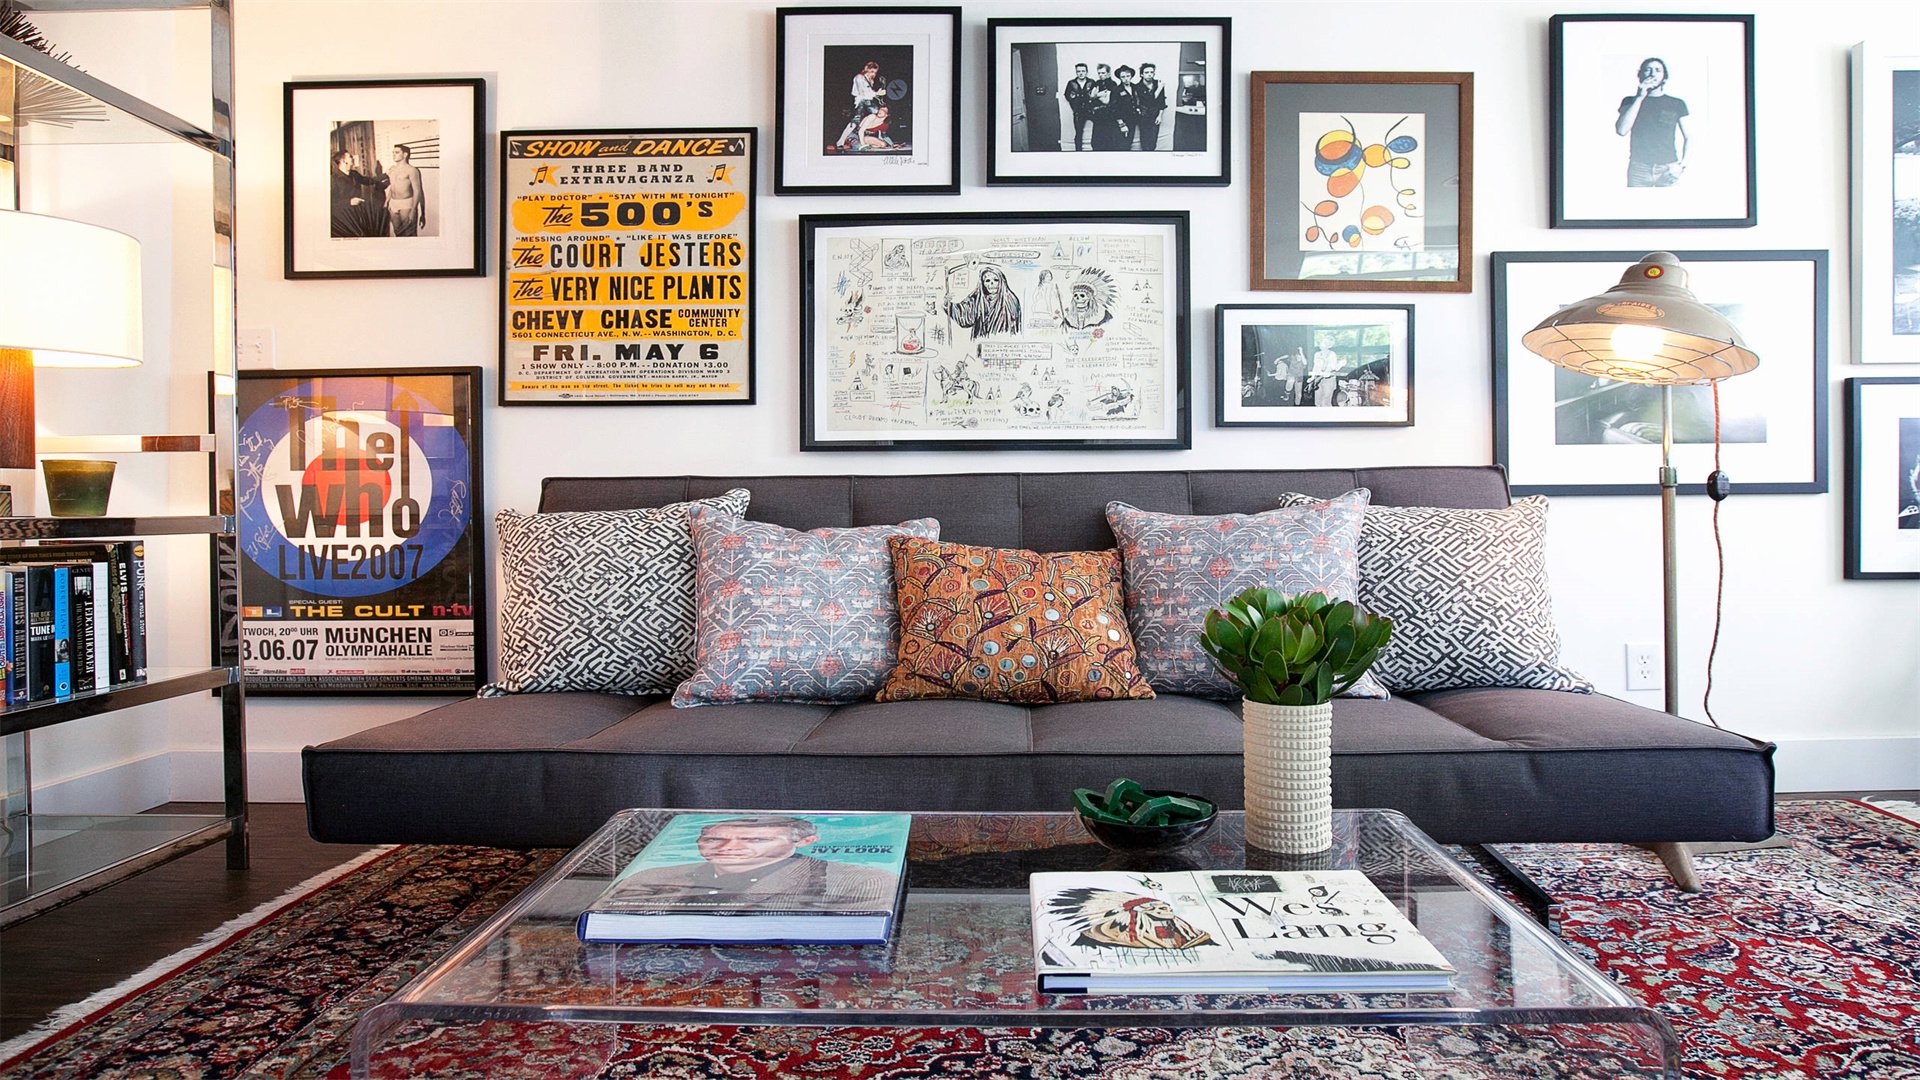
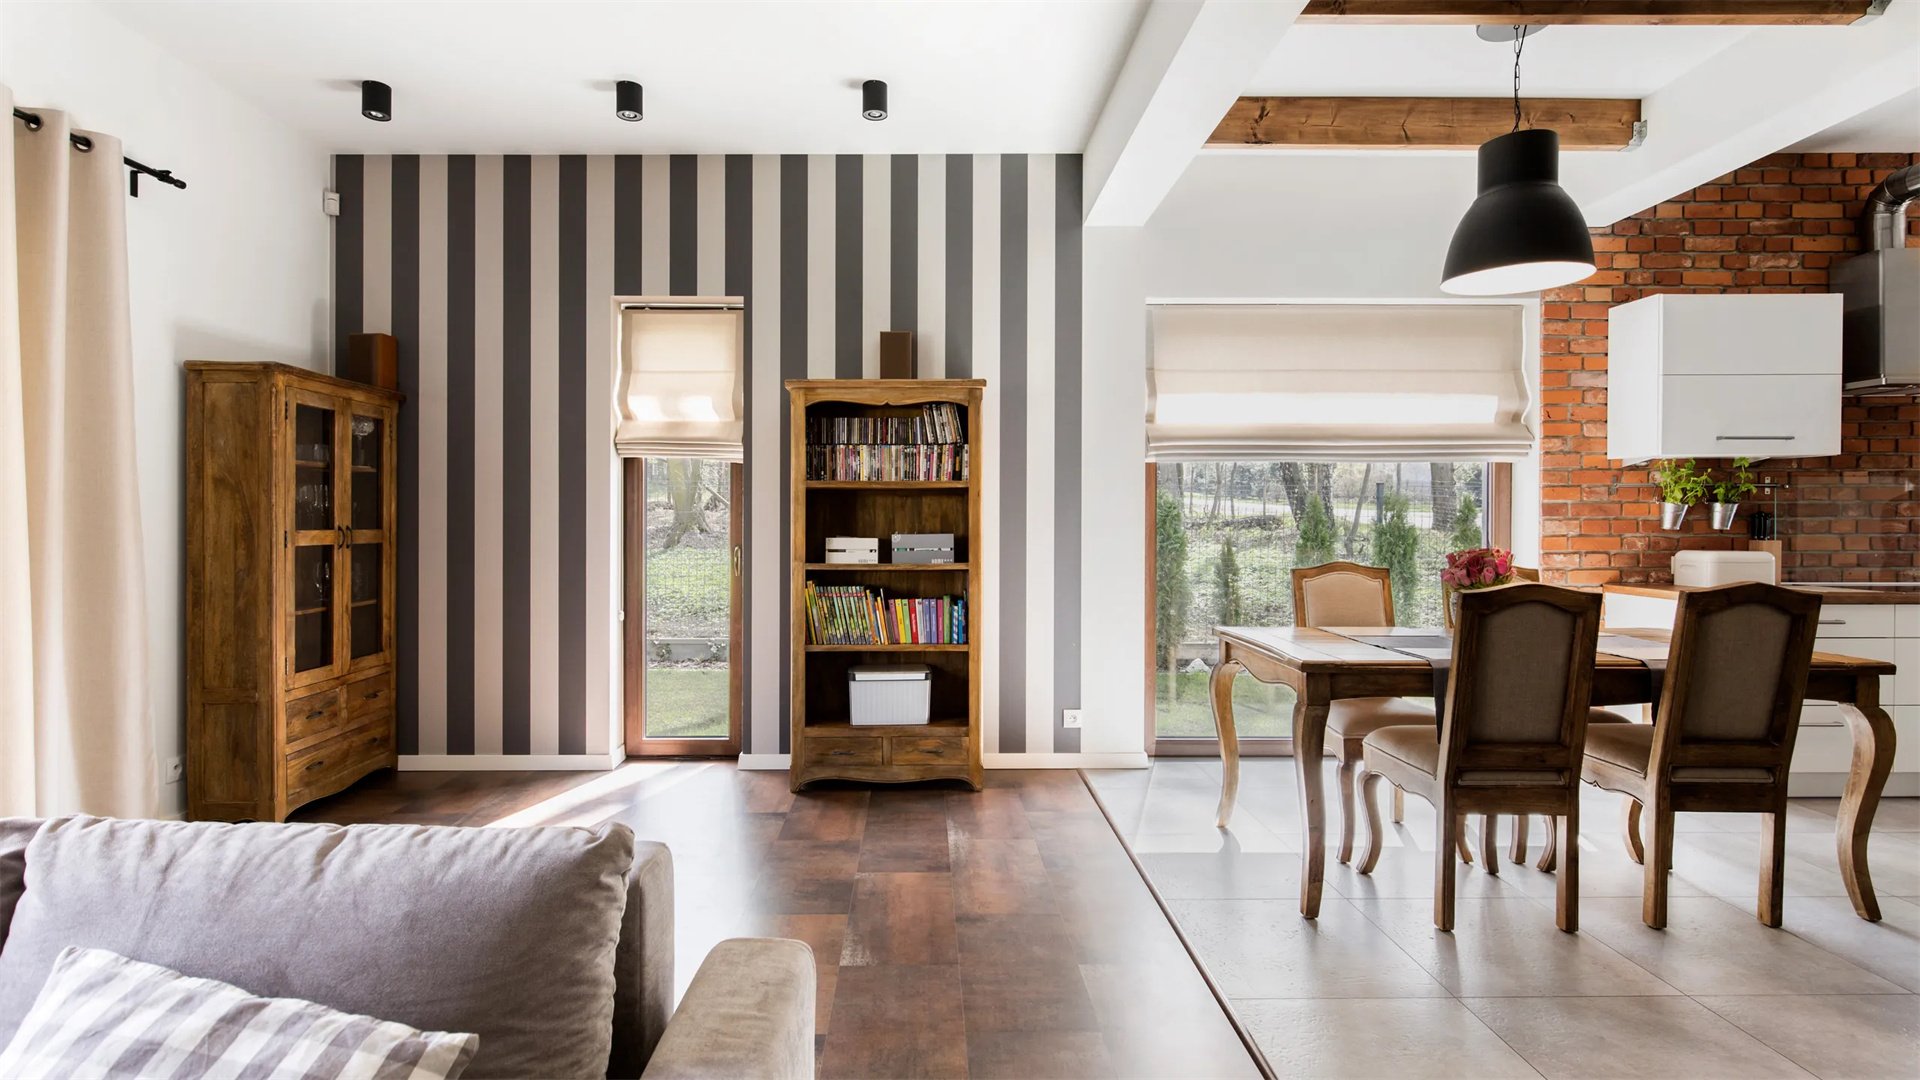
🖼️ Upgrade 3: Create a Personal Gallery Wall
A gallery wall is a curated collection of art, photos, and objects that tells your story, adding depth and character to any room. Unlike generic store-bought prints, a DIY gallery wall feels intimate and charming, transforming blank walls into focal points. This upgrade encourages creativity, as you can mix frames, sizes, and mediums to reflect your journey. Drawing from design blogs like Design*Sponge, we'll guide you through creating a cohesive display that exudes warmth through personal memories and artistic expression.
How to Implement
- Plan Your Layout: Measure your wall space and decide on a shape—common options include grid, salon-style (eclectic mix), or symmetrical arrangements. Use paper templates cut to the size of each frame to arrange on the floor before hanging. Take a photo for reference. Online tools like Canva or gallery wall planners can help visualize the layout.
- Select and Curate Pieces: Gather a variety of items: family photos, vintage posters, children's artwork, mirrors, woven tapestries, or even small shelves with trinkets. Aim for a mix of horizontal and vertical orientations. Ensure a unifying element, such as a common color scheme (e.g., black-and-white photos with gold frames) or theme (e.g., travel memories).
- Prepare and Frame: Invest in quality frames from thrift stores or online retailers; spray-paint mismatched frames in a uniform color for cohesion. Matting photos can add sophistication. For a budget-friendly option, create DIY art using watercolors, pressed flowers, or digital prints from websites like Etsy.
- Hang with Precision: Start by hanging the largest or central piece first, typically at eye level (57-60 inches from the floor). Use a level and measuring tape to ensure alignment. For heavy items, employ wall anchors or picture-hanging hooks. Space frames 2-3 inches apart for a balanced look. Work outward from the center, following your planned layout. Use removable adhesive strips for renters to avoid wall damage. For a dynamic feel, incorporate 3D elements like floating shelves or hanging plants.
- Add Lighting and Accents: Install picture lights or directional spotlights above the gallery to highlight pieces at night. Place a console table or bench below the wall to ground the display, adorned with a vase or books for added charm.
Advantages and Disadvantages
Advantages:
- A gallery wall personalizes your space, making it feel lived-in and unique.
- It's a conversation starter and can evoke positive emotions through memories.
- This upgrade is relatively inexpensive, especially if using existing photos or DIY art.
- It also covers large wall areas efficiently, eliminating stark emptiness.
Disadvantages:
- The process can be time-consuming, requiring careful planning and hanging.
- If not balanced, the wall may look cluttered or chaotic.
- Frames and printing costs can add up, and changing the layout later may leave holes in the wall.
- It may not appeal to those preferring minimalist decor.
Pro Tips for Success
- Use a mix of frame sizes and styles—try incorporating round frames or shadow boxes for variety.
- Incorporate negative space by leaving gaps between pieces to prevent overwhelm.
- Update the gallery seasonally by swapping out photos or adding holiday-themed art.
- For a cohesive look, choose a limited palette of 2-3 frame colors (e.g., black, white, and wood).
- Hang items at varying heights to create movement, but keep the overall shape contained within an imaginary rectangle or oval.
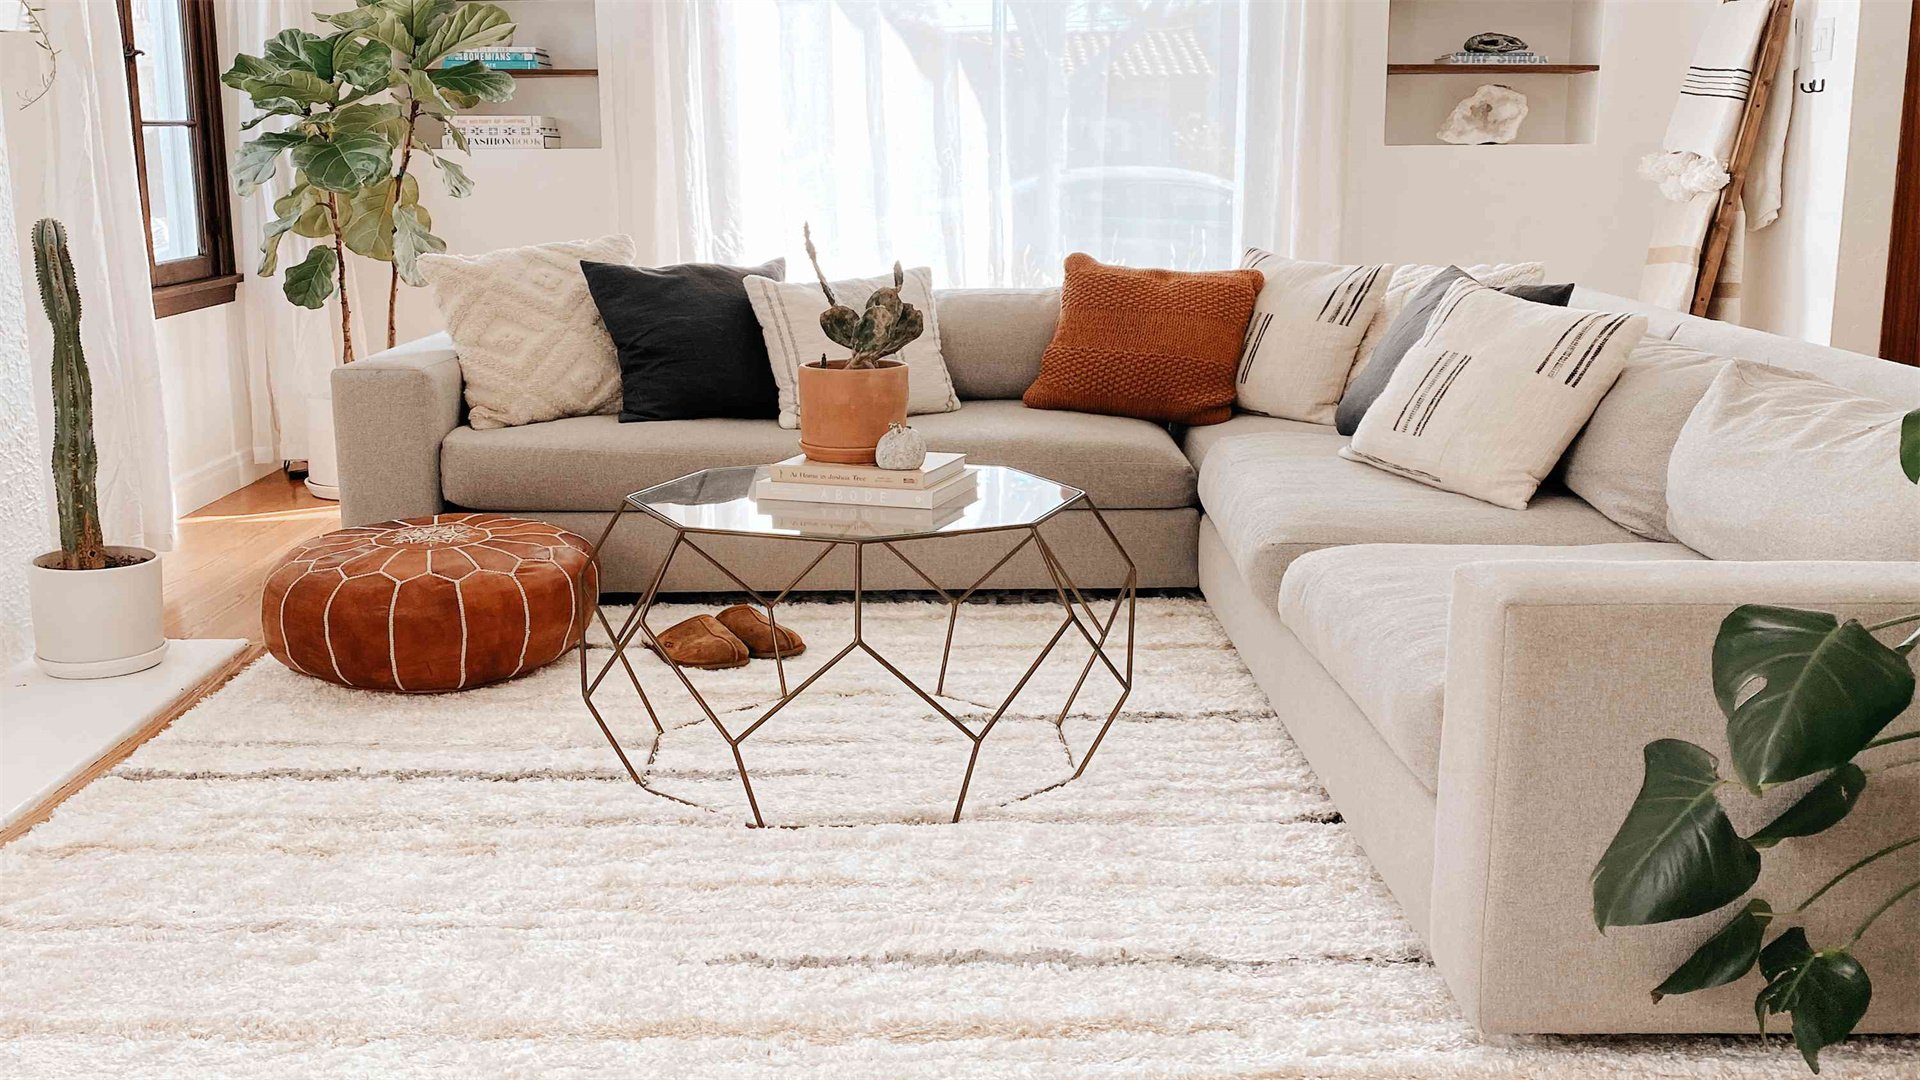
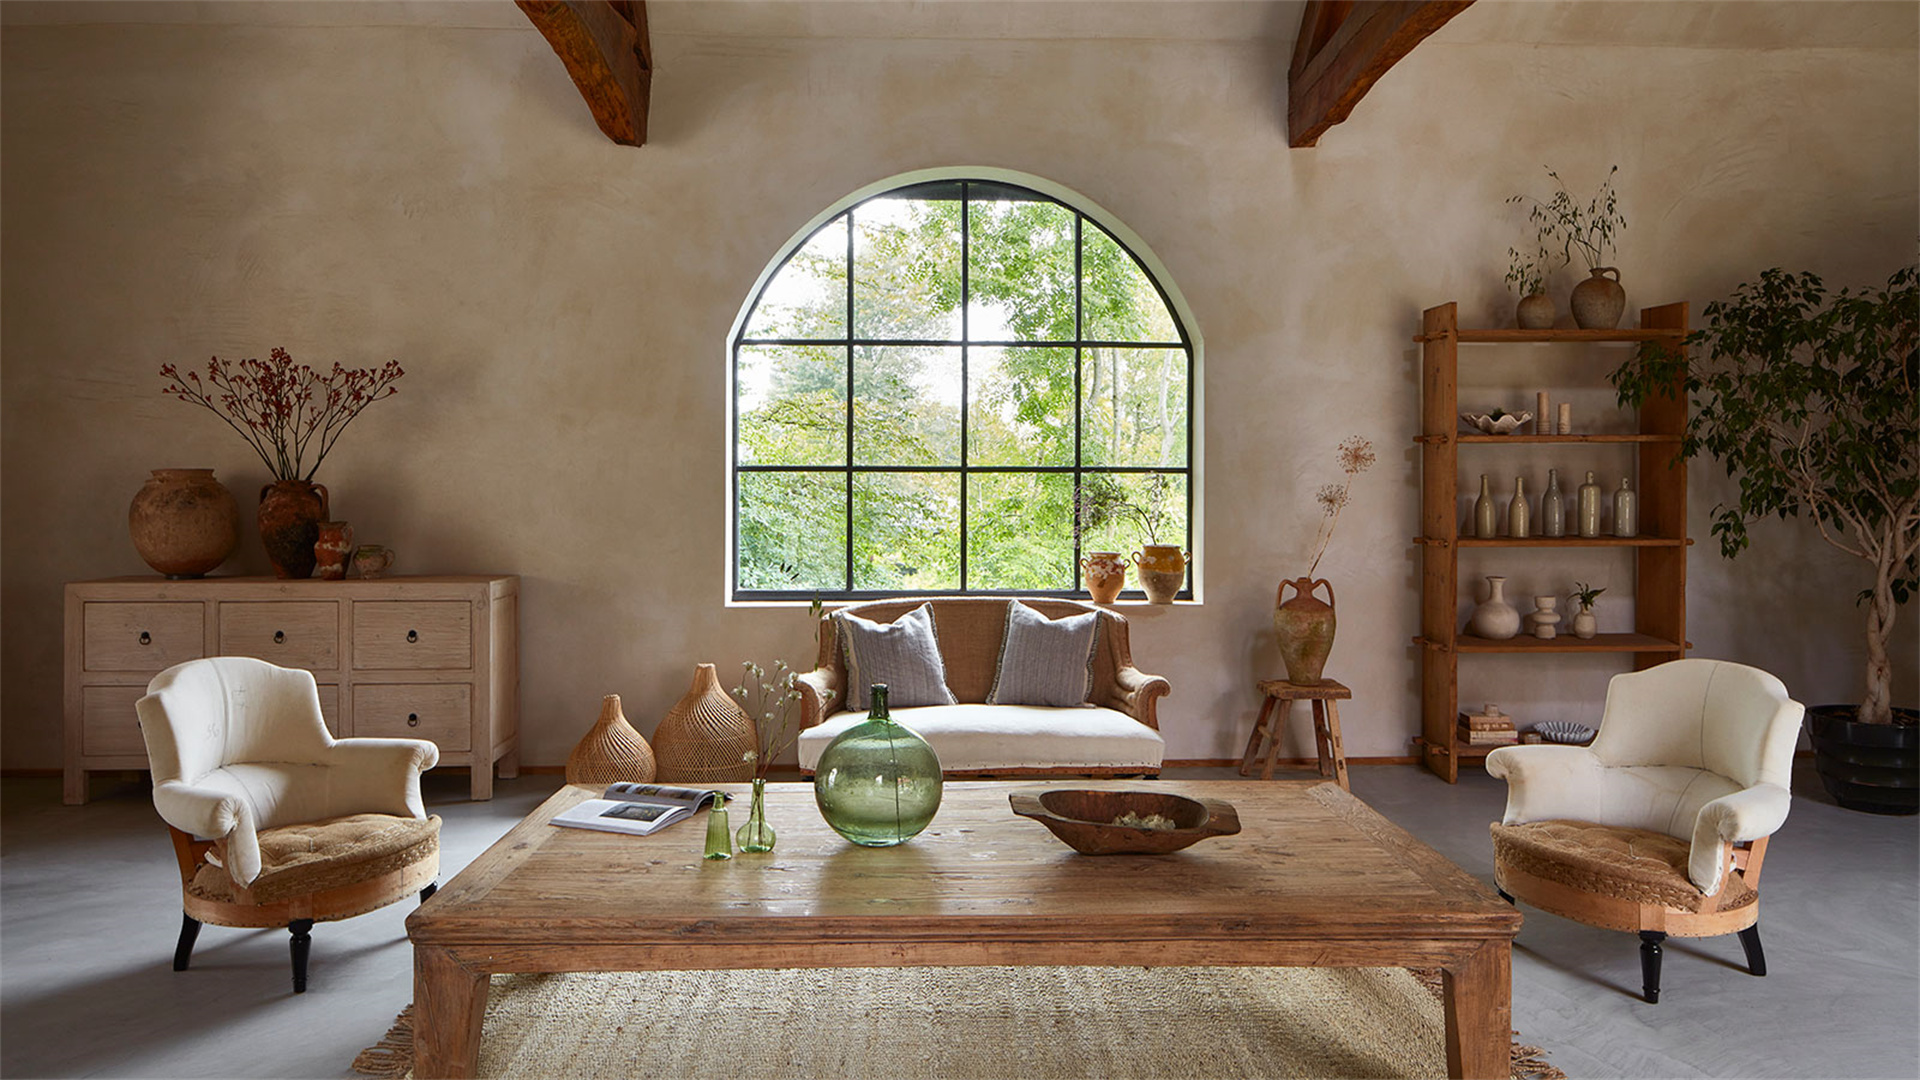
🧶 Upgrade 4: Define Spaces with Area Rugs
Area rugs are powerful tools for anchoring furniture, adding warmth underfoot, and injecting pattern into a room. They define zones in open-plan spaces, making large areas feel cozier and more organized. A well-chosen rug can tie together color schemes and textures, elevating the overall charm. Inspired by Middle Eastern and Scandinavian design principles, this upgrade focuses on selecting and placing rugs to create inviting, functional areas. We'll cover materials, sizes, and DIY customization ideas for a personalized touch.
How to Implement
- Choose the Right Size and Shape: Measure your room and furniture arrangement. For living rooms, ensure the rug is large enough to fit all front legs of sofas and chairs—common sizes are 8x10 or 9x12 feet. In bedrooms, place a rug under the lower two-thirds of the bed, extending outward. Round rugs work well in dining areas or entryways to soften angles.
- Select Material and Pile: Consider lifestyle and comfort. Wool rugs are durable and warm, ideal for high-traffic areas; jute or sisal offer natural texture but can be rough. For softness, choose synthetic blends or cotton. Low-pile rugs are easier to clean, while high-pile adds luxury but may trap dirt. Visit sites like Ruggable for washable options.
- Incorporate Pattern and Color: Use rugs to introduce patterns that complement existing decor. For warmth, opt for rich colors like burgundy, navy, or earthy tones; for charm, consider floral, geometric, or tribal designs. If your room has neutral walls, a bold rug can serve as a focal point. Layer multiple rugs for a bohemian vibe—e.g., a large jute rug with a smaller kilim on top.
- Place and Secure: Position the rug according to your layout, using furniture to hold it in place. For safety, add a non-slip pad underneath, especially on hardwood floors. This prevents slipping and extends the rug's life. DIY pads can be made from rubber shelf liner cut to size.
- DIY Customization: Personalize a plain rug with fabric paint or dye. Create stencils for patterns or use tape to make geometric designs. Another idea is to sew together smaller rugs or remnants for a patchwork effect, following online tutorials from craft blogs.
Advantages and Disadvantages
Advantages:
- Rugs add insulation, reducing noise and retaining heat in colder months.
- They protect floors from scratches and wear.
- Visually, they unify furniture groupings and make spaces feel more intimate.
- This upgrade is versatile, as rugs can be moved or rotated for a fresh look.
Disadvantages:
- High-quality rugs can be expensive, and cheap ones may shed or fade.
- Maintenance includes regular vacuuming and professional cleaning for stains.
- Allergies can be exacerbated if rugs trap dust mites.
- In humid climates, mold may develop without proper care.
Pro Tips for Success
- When in doubt, go larger—a small rug can make a room feel disjointed.
- Use natural fiber rugs in low-moisture areas to prevent mold; synthetic ones are better for kitchens or bathrooms.
- Rotate rugs every six months to ensure even wear from sunlight and foot traffic.
- Pair rugs with textured furniture, like a leather sofa on a plush rug, for contrast.
- For a cohesive look, pick up a color from the rug and repeat it in pillows or artwork elsewhere in the room.
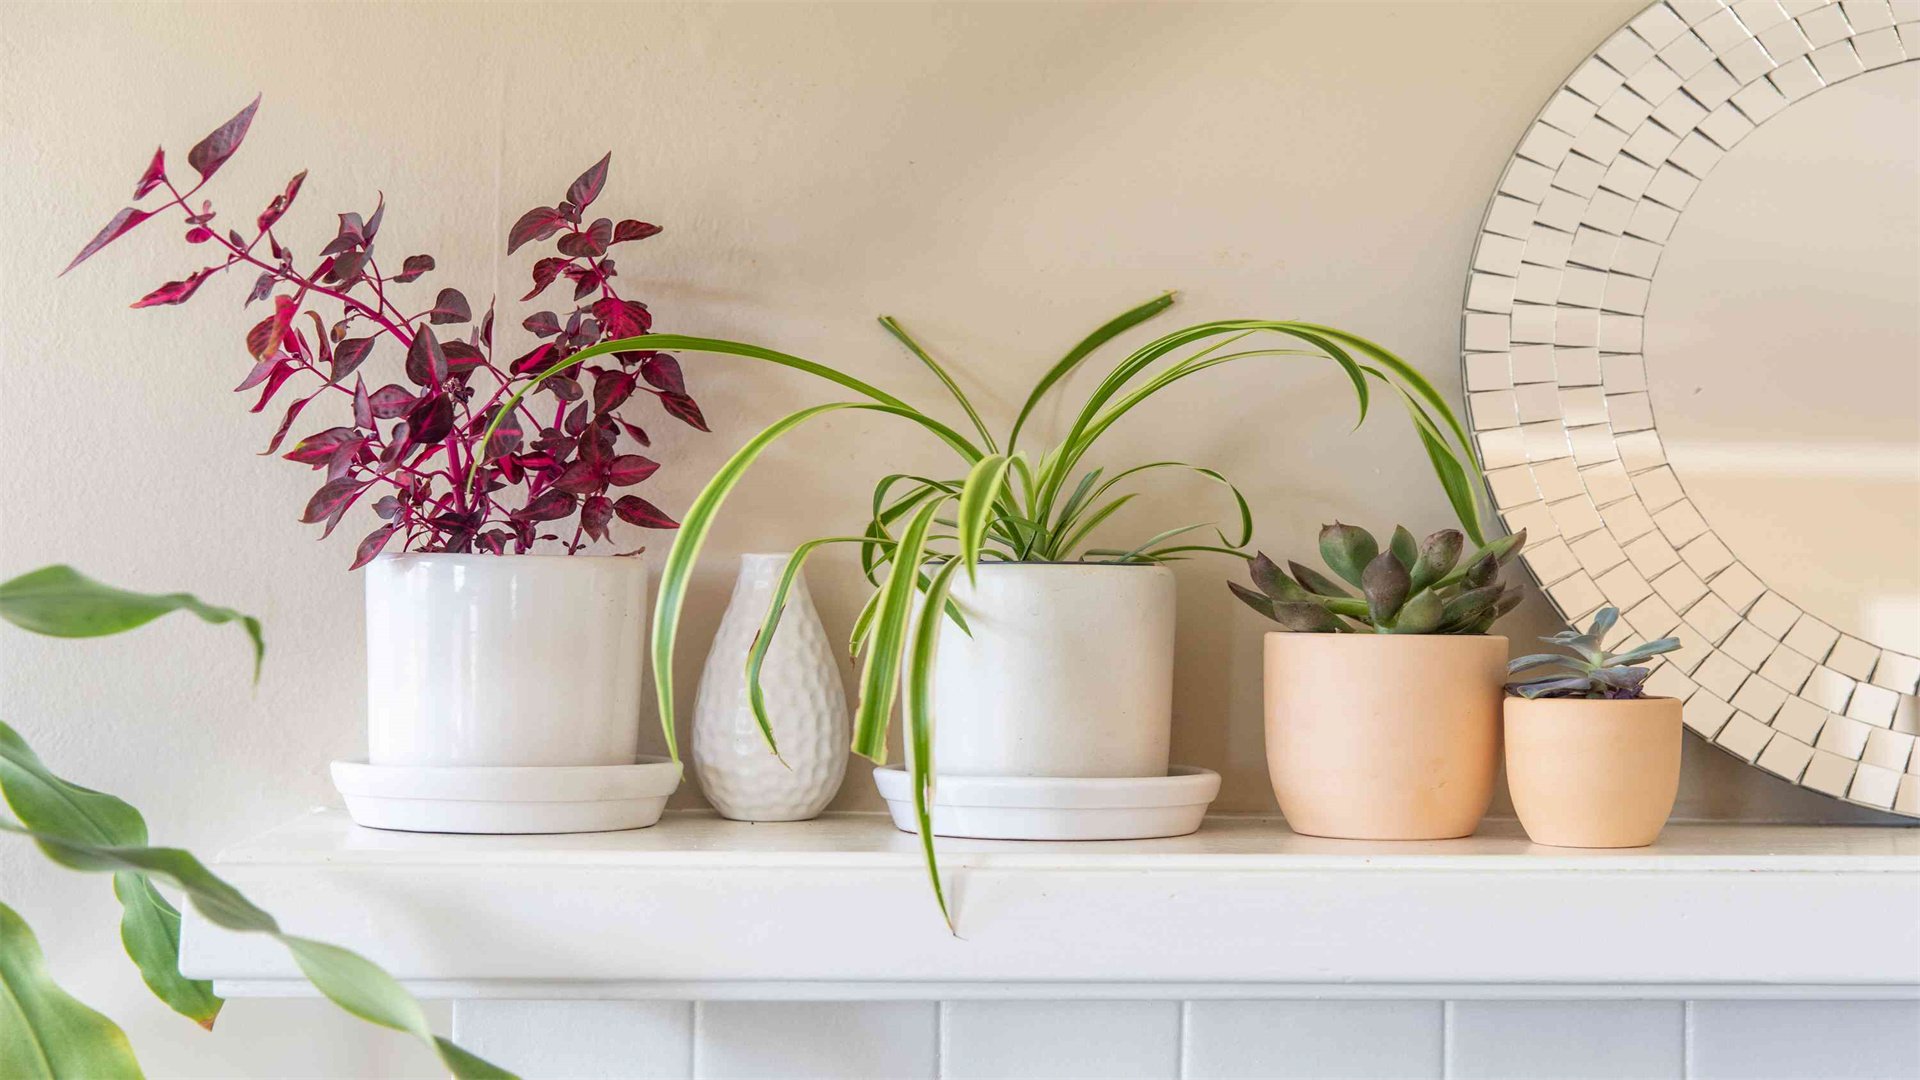
🌿 Upgrade 5: Bring Nature Indoors with Plants and Flowers
Incorporating greenery and blooms is a timeless way to breathe life into your home, creating a serene, charming atmosphere. Plants purify air, reduce stress, and add organic shapes that soften architectural lines. This upgrade ranges from low-maintenance succulents to statement fiddle-leaf figs, adaptable to any space. Drawing from biophilic design trends popular on websites like The Sill or Gardening Know-How, we'll explore how to select, arrange, and care for plants to maximize warmth and visual appeal.
How to Implement
- Assess Light and Space: Evaluate your home's natural light. South-facing windows suit sun-loving plants like cacti; north-facing areas work for low-light varieties such as pothos or snake plants. Measure spaces for plant placement—consider shelves, hanging planters, or floor corners. Use apps like Planta to identify light levels and care needs.
- Choose Plants for Warmth and Charm: Select species that evoke coziness: ferns with lush fronds, trailing ivy for cascading effects, or aromatic herbs like lavender in kitchens. For charm, add flowering plants like orchids or African violets. Mix heights and textures; for example, pair a tall monstera with a busy prayer plant.
- Pot and Display Creatively: Use decorative pots that complement your decor—terracotta for rustic warmth, ceramic for modern charm. DIY pots by painting plain containers or macramé hangers. Group plants in clusters of three or five for impact, placing them on windowsills, mantels, or plant stands. Incorporate vertical gardens with wall-mounted planters for small spaces.
- Care and Maintenance: Establish a watering schedule based on plant needs, using self-watering pots for convenience. Fertilize during growing seasons and prune dead leaves regularly. Combat pests with natural remedies like neem oil. For cut flowers, change vase water every two days and trim stems to prolong freshness.
- Add Seasonal Touches: Rotate plants with the seasons—poinsettias in winter, sunflowers in summer. For extra charm, display dried flowers or foraged branches in vases. Create terrariums or dish gardens for miniature landscapes.
Advantages and Disadvantages
Advantages:
- Plants improve air quality by filtering toxins and increasing humidity.
- They boost mood and productivity, making homes feel alive and welcoming.
- This upgrade is cost-effective, as many plants are inexpensive and propagate easily.
- It's also highly customizable, allowing for endless arrangements.
Disadvantages:
- Some plants require significant care, which may be daunting for beginners.
- Overwatering or poor light can lead to plant death, requiring replacements.
- Pets may chew toxic plants, necessitating pet-safe selections.
- Allergies to pollen or mold in soil can be an issue.
Pro Tips for Success
- Start with hardy plants like succulents or spider plants to build confidence.
- Use pebble trays under pots to increase humidity for tropical plants.
- Place plants in bathrooms for added moisture from showers, benefiting ferns or air plants.
- Incorporate plant stands at varying heights to create visual interest and maximize light exposure.
- Pair plants with warm lighting—grow lights can enhance growth and add a cozy glow at night.
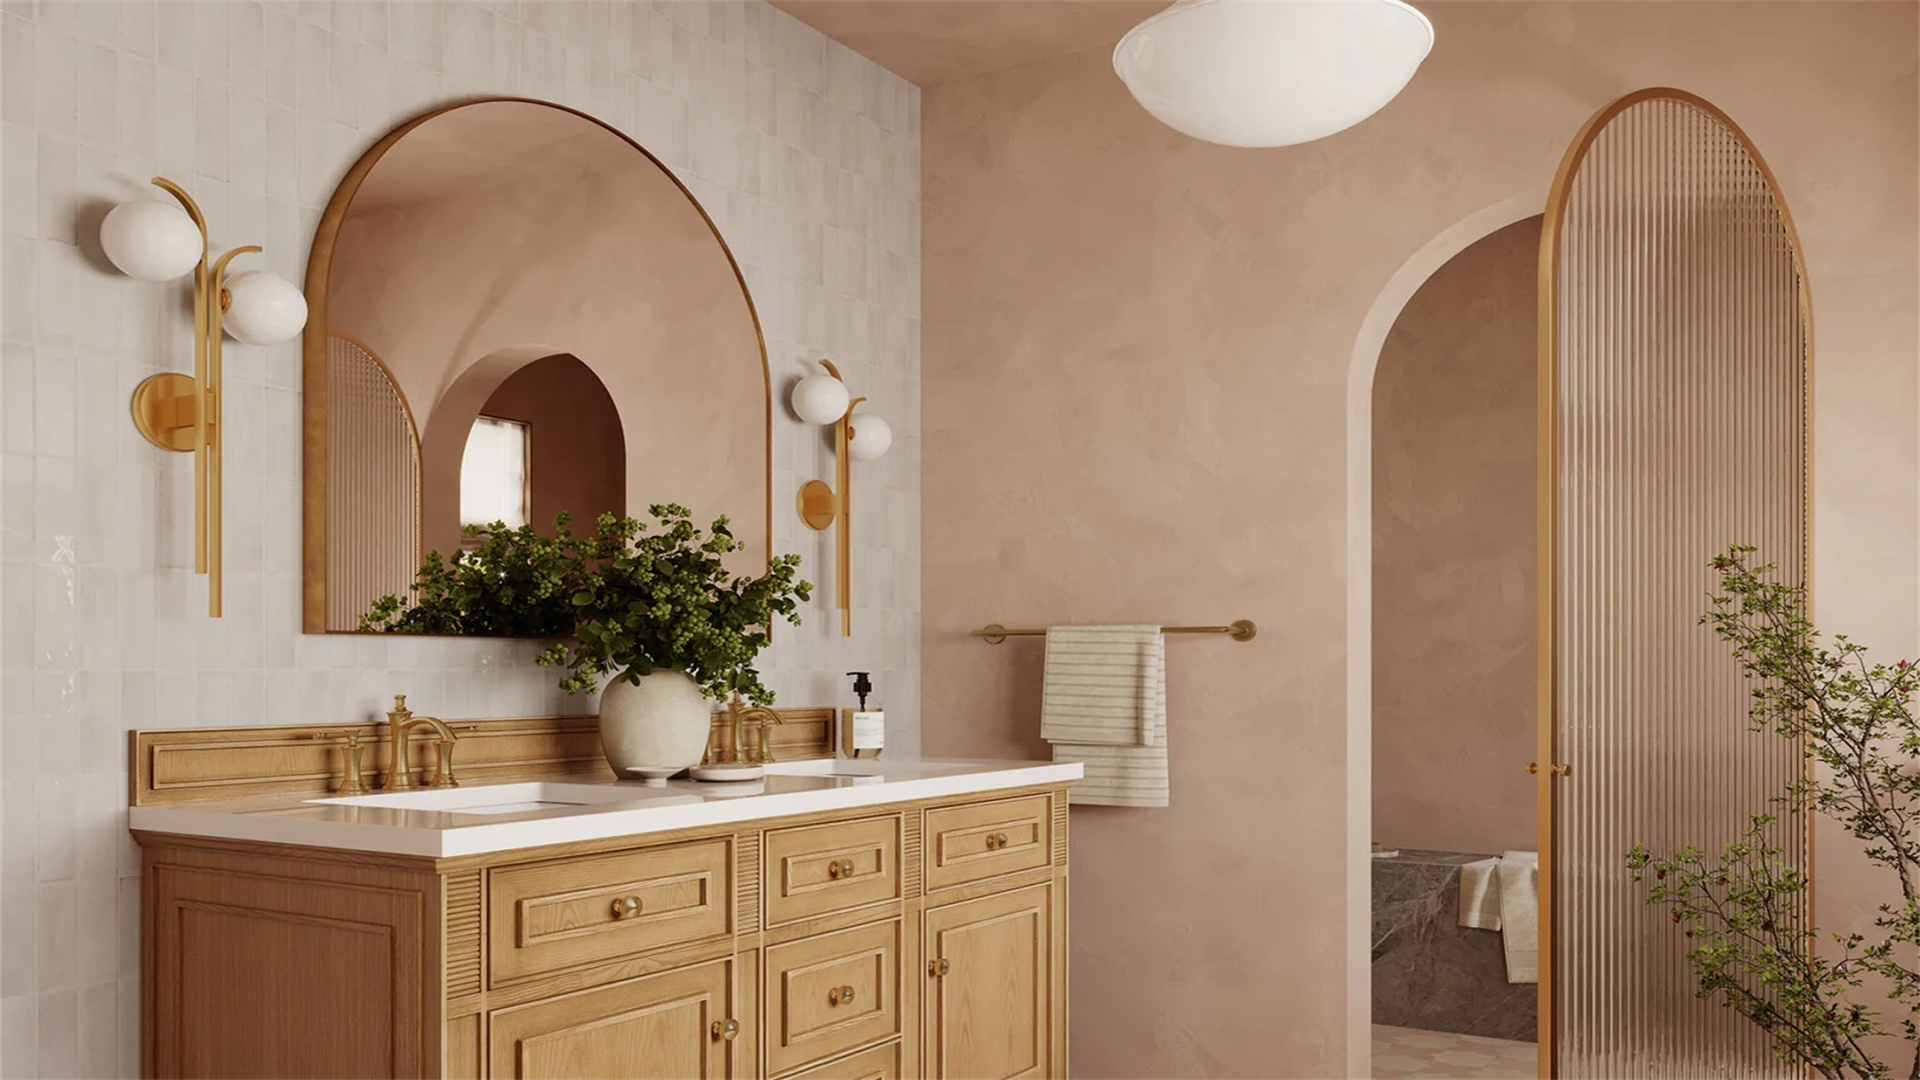
🎨 Upgrade 6: Paint an Accent Wall for Dramatic Effect
An accent wall is a focal point that adds depth, color, and personality to a room without the commitment of painting all four walls. This DIY upgrade can make spaces feel cozier by drawing the eye and creating visual boundaries. Whether you choose a bold hue, a subtle texture, or a creative pattern, an accent wall infuses charm through artistic expression. Inspired by design platforms like Sherwin-Williams or Benjamin Moore, we'll guide you through selecting colors, techniques, and finishes that evoke warmth and character.
How to Implement
- Select the Wall and Color: Choose a wall that naturally draws attention, such as behind a bed, sofa, or fireplace. For warmth, opt for rich colors like deep blue, emerald green, or burnt orange; for charm, consider soft pastels like peach or sage. Use color samples to test in different lights before committing. Online tools like ColorSnap can help visualize options.
- Prepare the Surface: Clean the wall with soap and water, repair any holes with spackle, and sand smooth. Apply painter's tape to trim, ceilings, and adjacent walls for clean edges. Use drop cloths to protect floors. Prime the wall if painting over dark colors or new drywall.
- Paint with Technique: Use high-quality brushes and rollers for even coverage. Start by cutting in edges with a brush, then roll paint in a W pattern to avoid streaks. Apply two coats, allowing drying time between. For texture, consider techniques like sponging, rag-rolling, or stenciling geometric patterns. Metallic paints or matte finishes can add subtle charm.
- Explore Alternative Treatments: Instead of paint, use wallpaper on the accent wall—peel-and-stick options are DIY-friendly. Wood paneling or shiplap can add rustic warmth; install using adhesive or nails. Another idea is to create a mural with painter's tape designs or freehand art.
- Accessorize the Wall: Enhance the accent wall with decor that complements the color. Hang a large mirror to reflect light, or place floating shelves with books and plants. Ensure surrounding furniture doesn't compete; neutral pieces work best to let the wall shine.
Advantages and Disadvantages
Advantages:
- An accent wall is relatively quick and affordable, often costing under $100 for supplies.
- It transforms a room's dynamics, making it feel cozier and more defined.
- This upgrade is reversible—paint can be covered easily, and removable wallpaper offers flexibility for renters.
Disadvantages:
- Choosing the wrong color can overwhelm a space or clash with existing decor.
- Preparation is labor-intensive, and uneven application may require redoing.
- If not done neatly, edges can look messy.
- Some techniques, like wood paneling, may require advanced skills.
Pro Tips for Success
- Use a color wheel to select complementary accents—for example, a blue accent wall with orange throw pillows.
- Paint the ceiling or trim in a coordinating color for a cohesive look.
- For small rooms, choose lighter accent colors to avoid closing in the space.
- Experiment with textured paint additives like sand or glitter for a unique tactile element.
- Incorporate LED strip lights along the accent wall's edges for a warm, ambient glow at night.
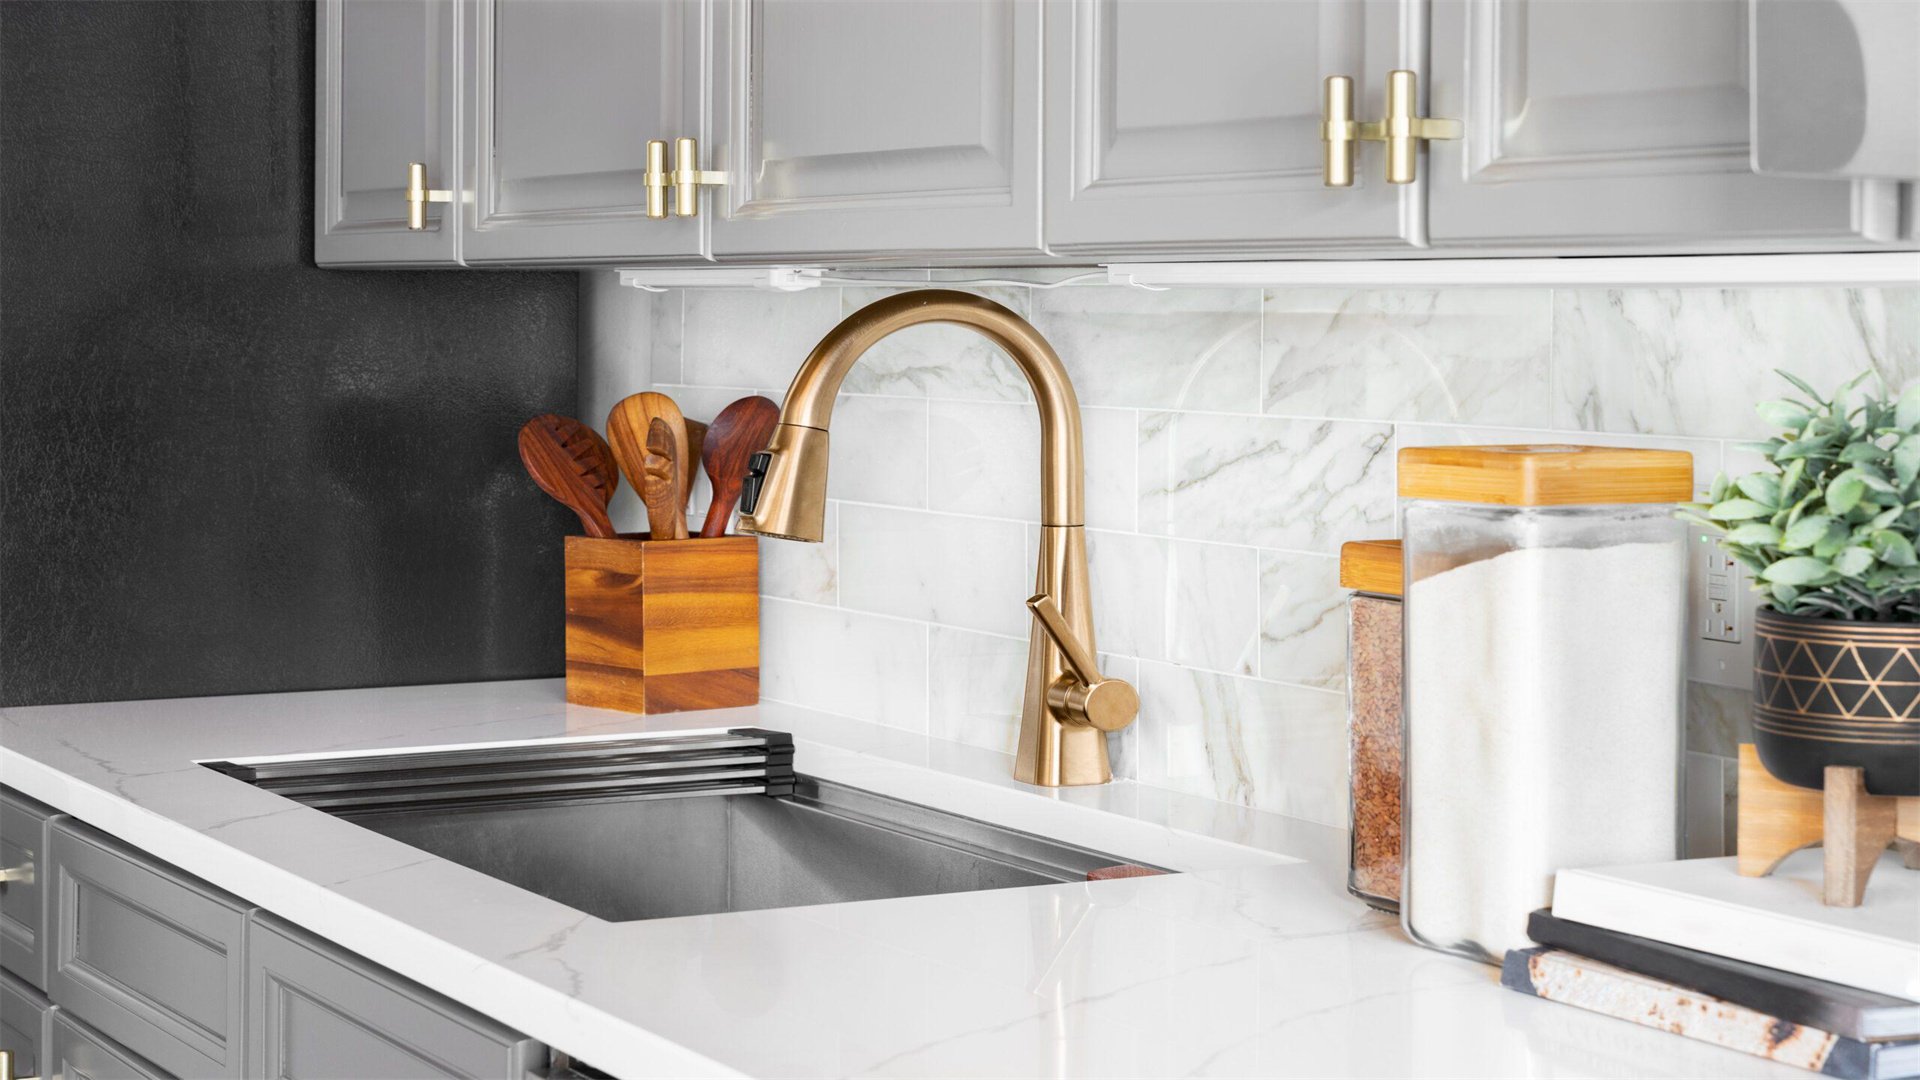
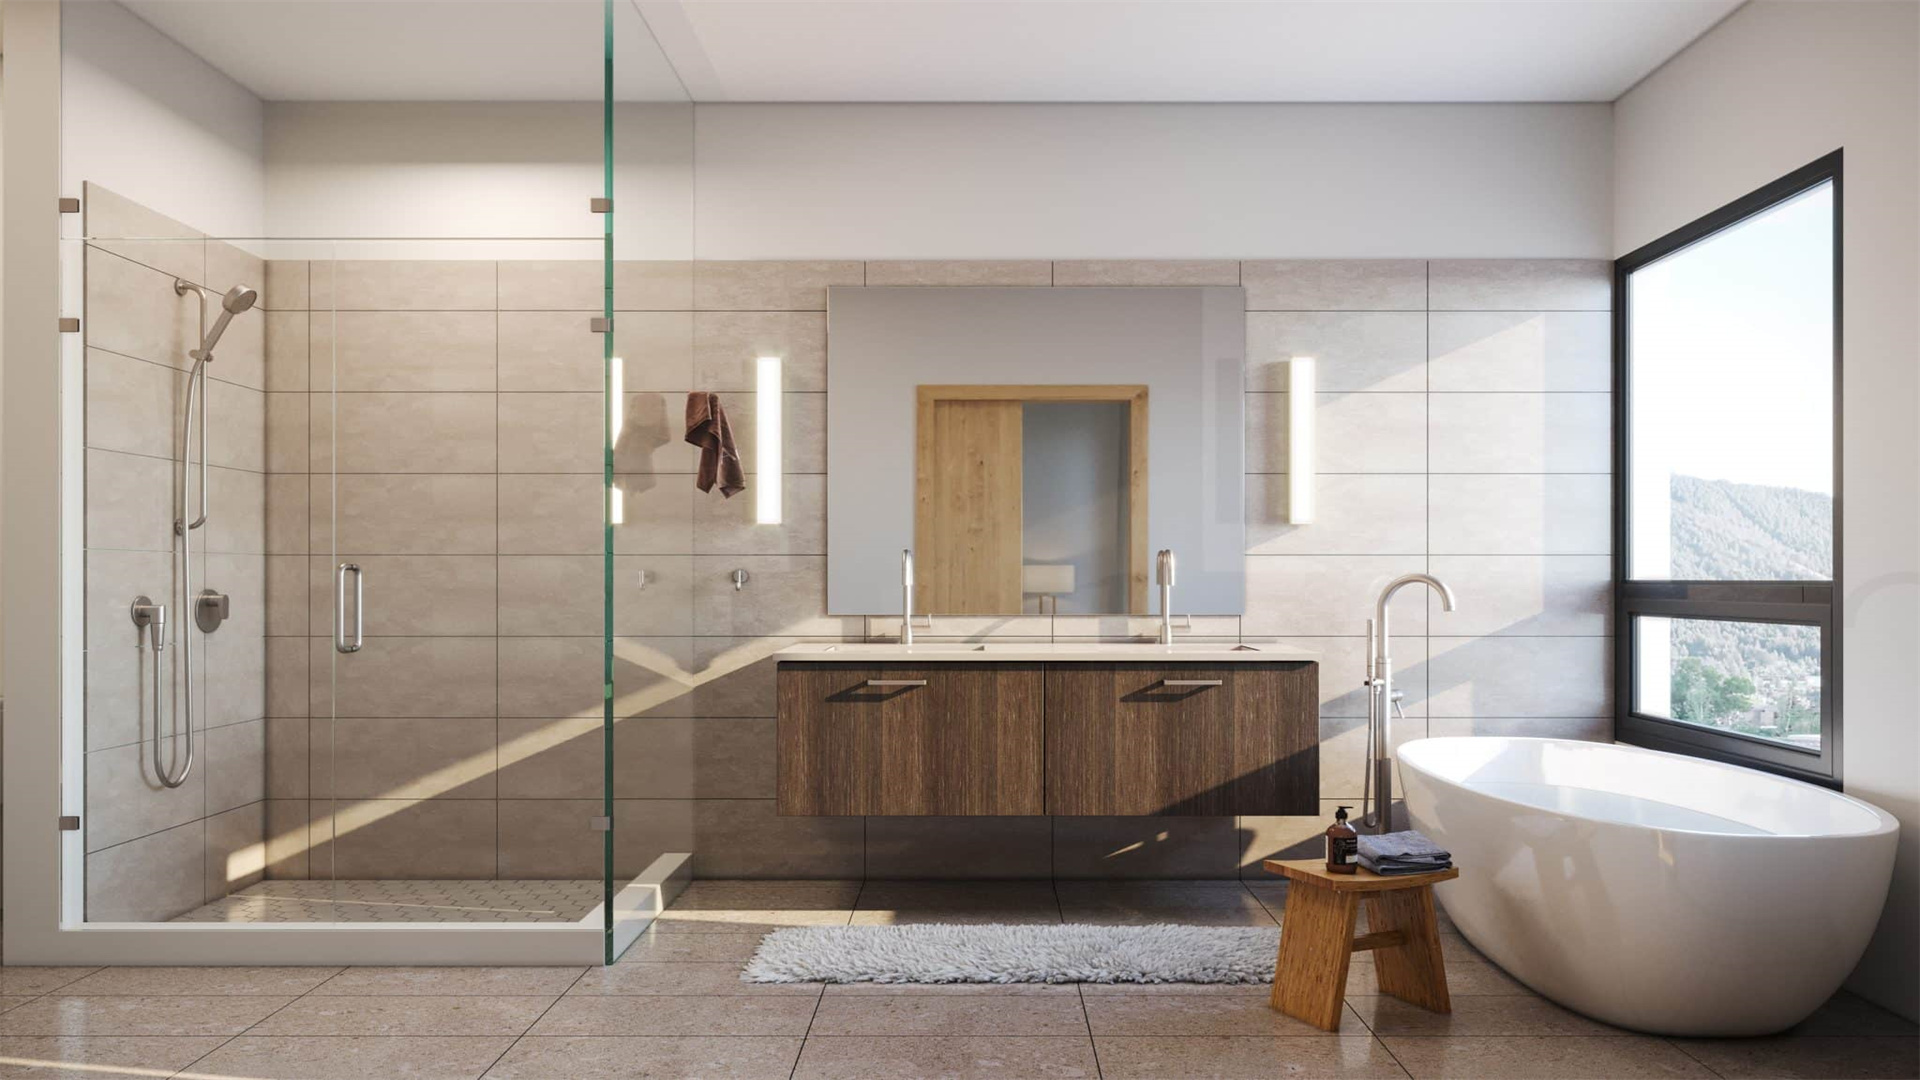
🔧 Upgrade 7: Update Hardware for a Fresh Look
Hardware—such as cabinet knobs, drawer pulls, door handles, and light switch plates—might seem minor, but updating these details can dramatically refresh a room's aesthetic. This DIY upgrade is quick, inexpensive, and adds charm through finishes and shapes that reflect your style. By swapping out outdated hardware, you can modernize kitchens, bathrooms, and furniture without a full renovation. Inspired by home improvement sites like This Old House, we'll cover selection, installation, and creative customization tips.
How to Implement
- Assess and Plan: Inventory existing hardware, noting sizes and hole spacings. Decide on a cohesive finish: brass or gold for warmth, black matte for modern charm, or ceramic for vintage appeal. Browse inspiration on Pinterest or Houzz to match your room's theme. Measure to ensure new hardware fits existing holes to avoid drilling.
- Select New Hardware: Choose knobs and pulls that ergonomically suit their use—e.g., pulls for heavy drawers, knobs for doors. Mix styles for interest, but keep finishes consistent. Consider materials: metal for durability, glass or wood for texture. Shop at hardware stores, online retailers, or thrift stores for unique pieces.
- Remove Old Hardware: Use a screwdriver or drill to unscrew existing hardware. Keep screws if reusable; fill any unwanted holes with wood filler if changing sizes. Clean surfaces to remove dirt or grease before installing new pieces.
- Install New Hardware: Align new hardware with existing holes, using provided screws. For new holes, mark with a template and drill carefully. Ensure all pieces are level and tightened securely. For doors, install handles at a comfortable height (typically 36 inches from floor).
- DIY Customization: Personalize plain hardware with spray paint in metallic colors, or add decals for patterns. Create custom knobs using polymer clay, molding shapes and baking them. Another idea is to wrap knobs with leather or rope for a rustic touch.
Advantages and Disadvantages
Advantages:
- This upgrade is cost-effective, with hardware often priced under $5 per piece.
- It's a quick project, taking only a few hours, and requires basic tools.
- Updated hardware increases perceived home value and modernizes outdated spaces.
- It's also reversible, allowing easy changes if tastes evolve.
Disadvantages:
- If hole sizes don't match, drilling new holes can damage surfaces, especially on vintage furniture.
- Cheap hardware may tarnish or break over time.
- Installation can be fiddly, with small screws that are easy to drop.
- Over-customizing may reduce functionality.
Pro Tips for Success
- Use a hardware template or jig to ensure consistent spacing when drilling new holes.
- Keep old hardware for future use or donate to reuse centers.
- Match hardware finishes to other metal elements in the room, like faucets or light fixtures, for cohesion.
- For a cohesive look, update all hardware in a room simultaneously, including hinges and outlet covers.
- Consider smart hardware, like touchless faucet handles, for added modern charm.
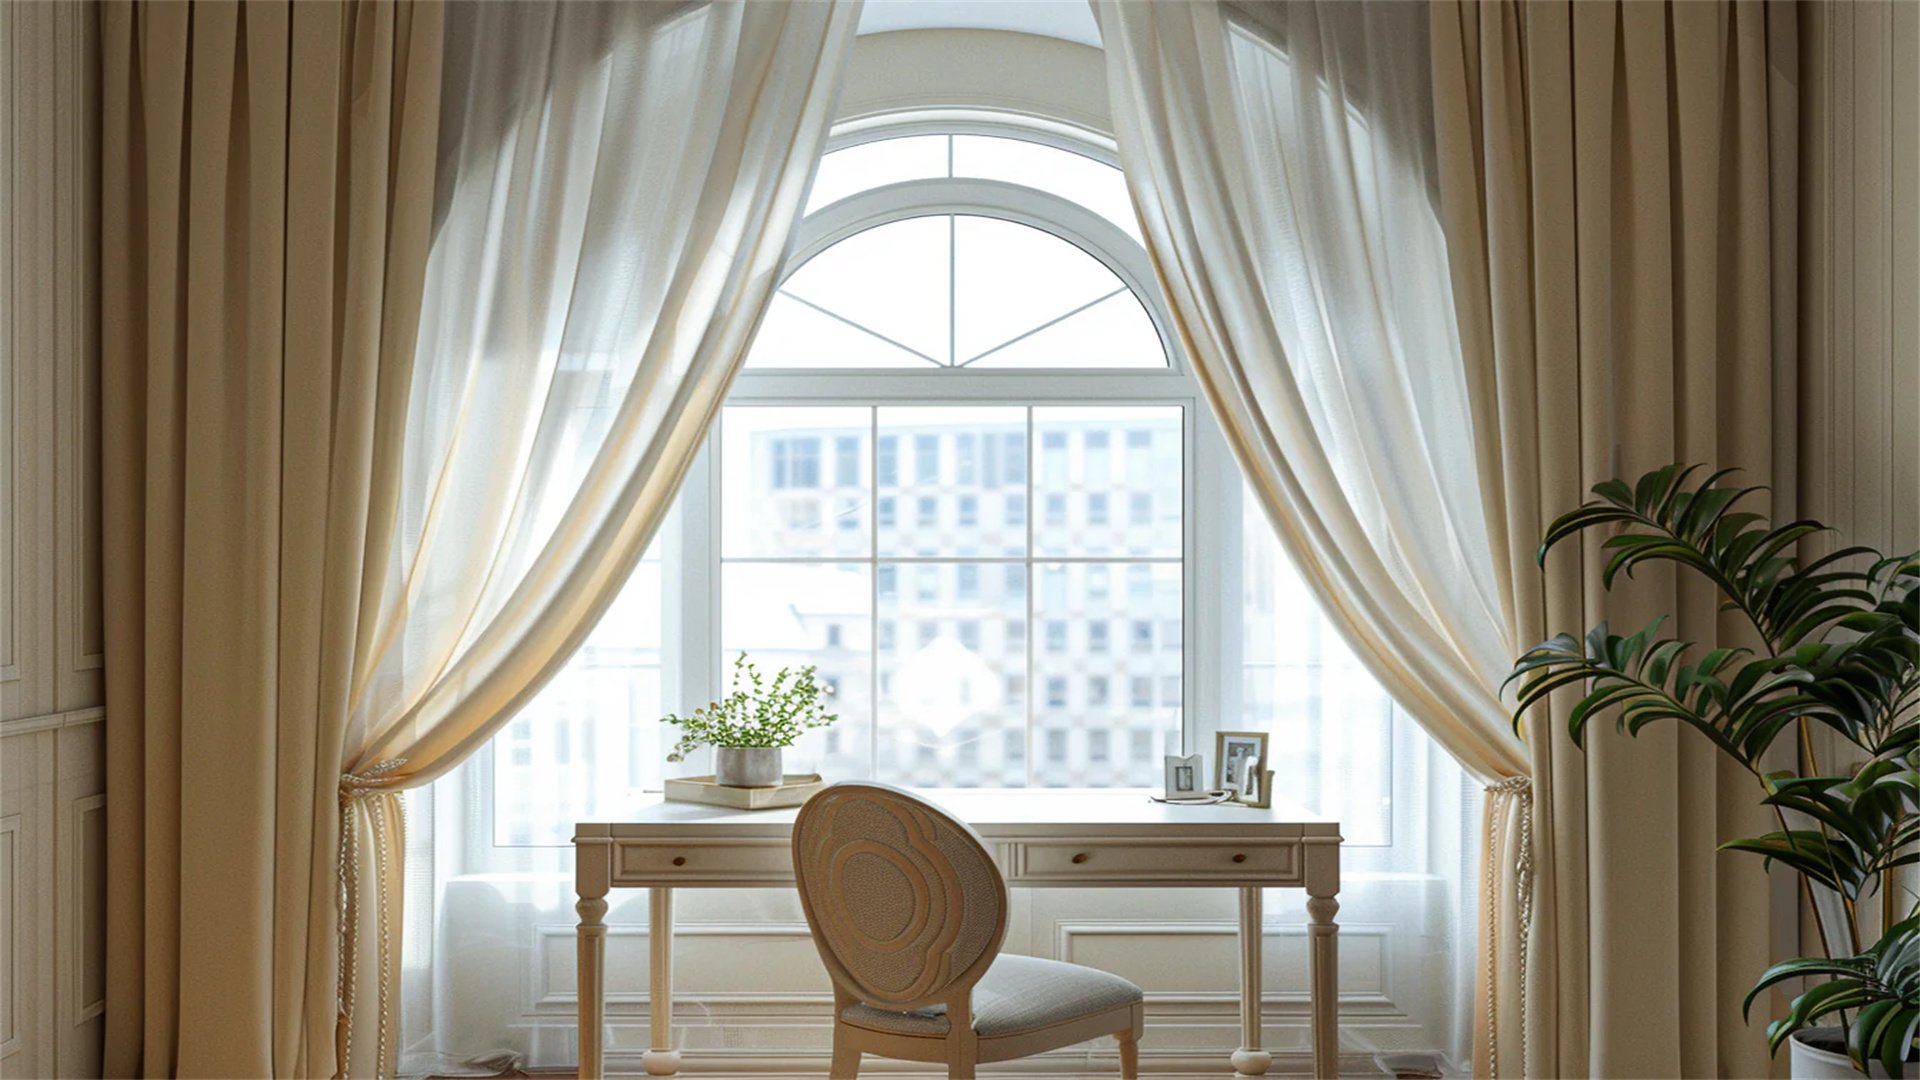
🧼 Upgrade 8: Hang Curtains to Soften Windows
Curtains do more than block light; they frame windows, add softness, and introduce color and pattern to a room. Properly hung curtains can make ceilings appear higher and spaces feel more intimate, enhancing both warmth and charm. This upgrade focuses on selecting fabrics, lengths, and hanging techniques that transform bare windows into elegant features. Drawing from interior design resources like Curtains.com, we'll explore how to achieve a professional look with DIY methods.
How to Implement
- Choose Fabric and Style: Select curtains based on function and aesthetic. For warmth, use heavy fabrics like velvet or blackout linen in rich colors; for charm, opt for sheer cotton or lace to diffuse light softly. Consider patterns like florals or stripes to add interest. Decide on style: grommet-top for modern, rod-pocket for traditional, or tab-top for casual.
- Measure and Purchase: Measure window width and height. For fullness, curtains should be 1.5 to 3 times the window width. Length-wise, choose floor-length curtains that just graze the floor or pool slightly for elegance. Hang rods 4-6 inches above the window frame and extend 3-6 inches beyond each side to make windows appear larger. Buy rods, brackets, and curtains accordingly.
- Install Curtain Rods: Mark bracket positions using a level and pencil. Drill pilot holes and secure brackets with screws, ensuring they're anchored in wall studs for heavy curtains. For renters, use tension rods or command hooks to avoid damage. Assemble and hang the rod.
- Hang and Style Curtains: Slide curtains onto the rod and hang. Adjust gathers evenly. For a layered look, pair sheer curtains with heavier drapes on double rods. Tie back curtains with tasseled holders or ribbons during the day to let in light and create charming arcs.
- DIY Customization: Sew your own curtains using fabric from stores like Joann, adding trim or pom-pom edges. Dye plain curtains for a custom color, or stencil patterns with fabric paint. Create no-sew curtains using hem tape and clip rings.
Advantages and Disadvantages
Advantages:
- Curtains improve insulation, reducing heat loss in winter and blocking sun in summer.
- They add privacy and noise reduction.
- Visually, they soften hard window lines and can make rooms feel taller and more polished.
- This upgrade is versatile, with endless fabric choices to match any decor.
Disadvantages:
- High-quality curtains and rods can be expensive.
- Installation may require drilling and precise measurements.
- Curtains need regular washing to prevent dust buildup.
- Poorly hung curtains can look sloppy or block natural light if too heavy.
Pro Tips for Success
- Use curtain liners to protect fabrics from sun damage and add insulation.
- Hang curtains from ceiling to floor to create the illusion of height in low-ceilinged rooms.
- Mix patterns by pairing solid curtains with patterned valances or blinds.
- Incorporate curtain tiebacks made from rope, fabric, or vintage jewelry for personalized charm.
- For small windows, hang curtains wider than the frame to make them appear larger.
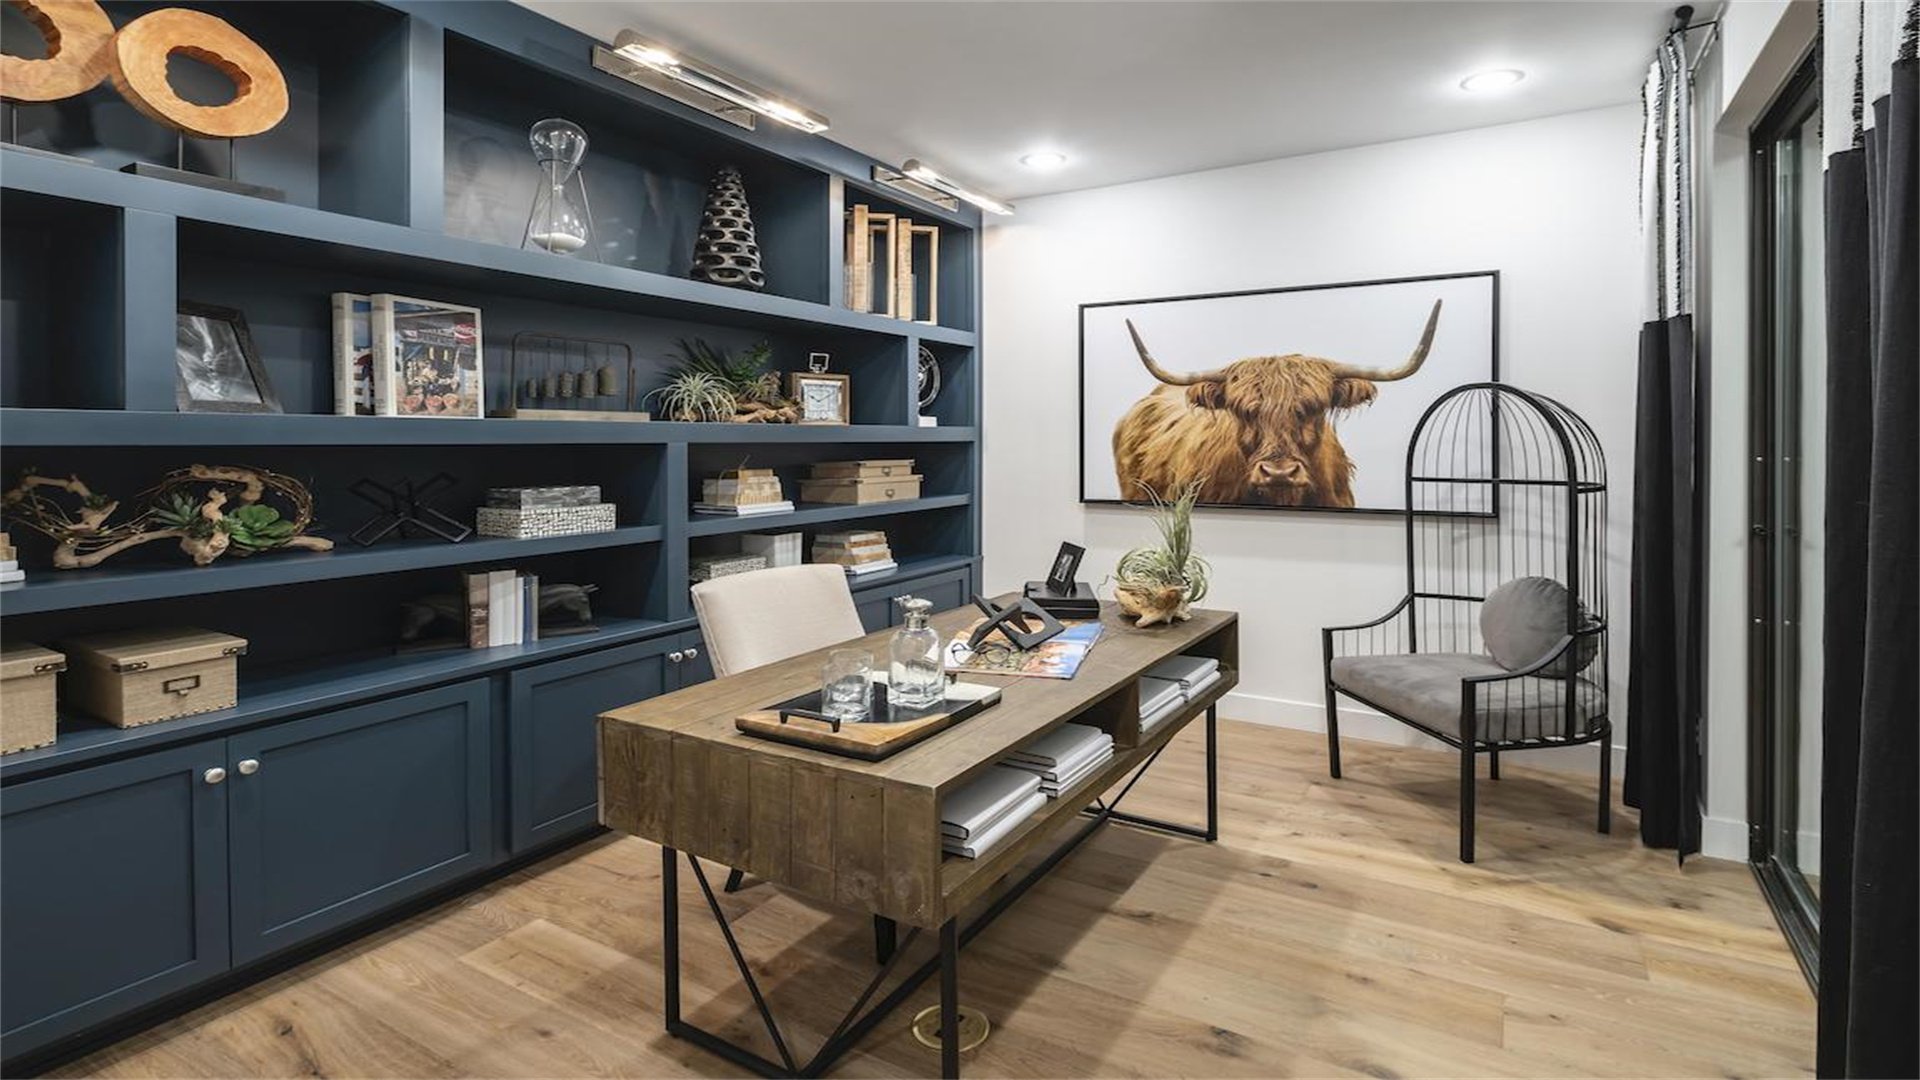
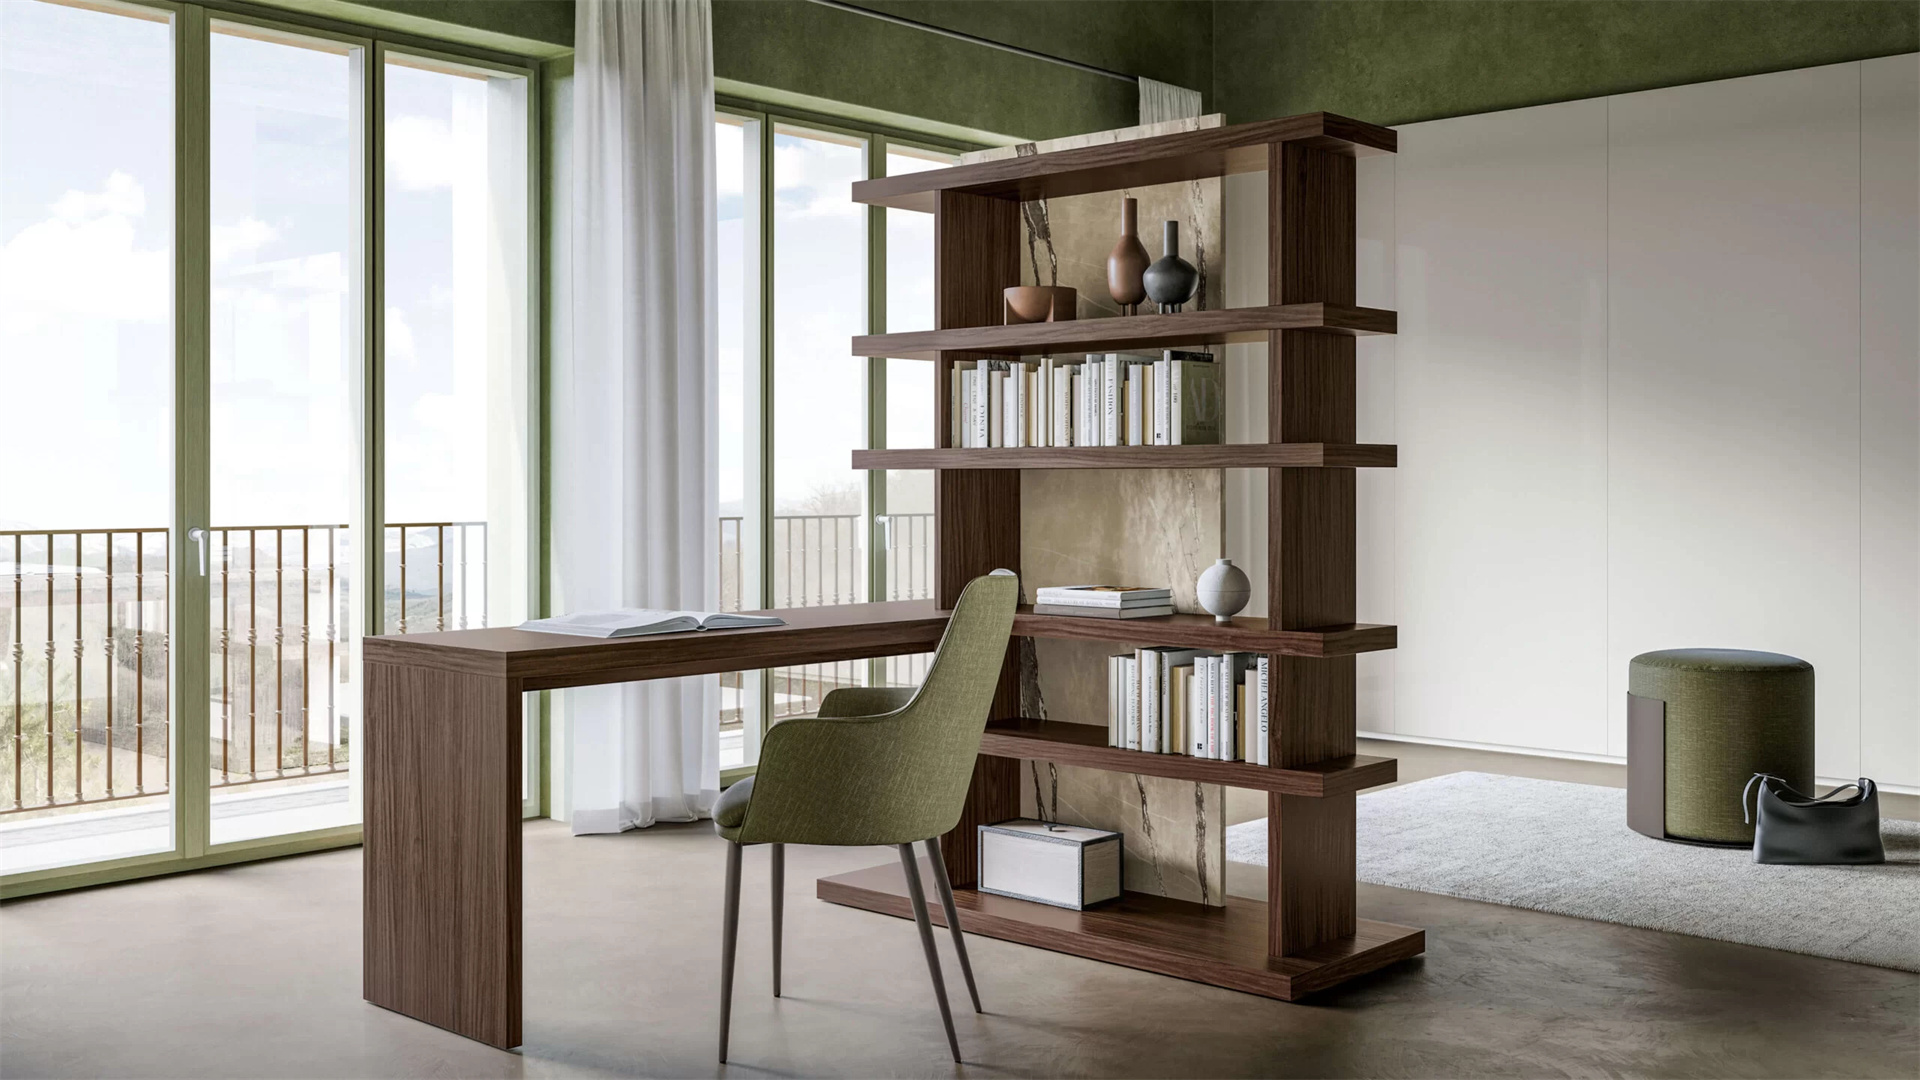
📸 Upgrade 9: Display Personal Mementos and Artwork
Personal mementos—such as travel souvenirs, family heirlooms, or handmade crafts—add soul to a home, making it feel uniquely yours. Displaying these items thoughtfully creates warmth through storytelling and charm through eclectic collections. This upgrade encourages you to curate shelves, tables, and walls with objects that hold meaning, moving beyond generic decor. Inspired by lifestyle blogs like A Beautiful Mess, we'll cover how to arrange and highlight personal treasures for maximum impact.
How to Implement
- Gather and Curate Items: Collect meaningful objects from around your home: photos, letters, trophies, shells from beaches, vintage cameras, or children's drawings. Edit to avoid clutter, selecting pieces that spark joy or memories. Group by theme, color, or material for cohesion.
- Create Display Spaces: Use shelves, mantels, console tables, or shadow boxes as stages. For shelves, employ the rule of thirds: place larger items at one end, balance with smaller pieces, and leave negative space. On tables, use trays to corral small items like trinkets or candles. Hang floating shelves for a modern look.
- Arrange with Intention: Mix heights and textures for visual interest. For example, pair a tall vase with a stack of books and a small figurine. Use odd numbers of items (3, 5, 7) for pleasing arrangements. Incorporate plants or flowers among mementos to add life. Layer items by placing some in front of others for depth.
Advantages and Disadvantages
Advantages:
- Make the wall no longer empty.
- It looks neat and orderly.
- It is suitable as a partition.
Disadvantages:
- It covers a large area and is not suitable for small spaces.
- There are too few items to reflect the function of the shelf.