Easy DIY Wall Repairs: Patch Cracks and Holes Like a Pro
Wall repairs are a common household task that many people dread, but with the right knowledge and tools, you can tackle cracks and holes like a professional. This comprehensive guide will walk you through every step of the process, ensuring you achieve a flawless finish without hiring an expensive contractor. Whether you're dealing with small nail holes, unsightly cracks, or larger damage, this article covers it all in detail. By following these instructions, you'll save money, gain valuable skills, and maintain the beauty of your home. Let's dive into the world of DIY wall repairs and transform your space with confidence.
📚 Introduction to Wall Repair Essentials
🛠️ Understanding Wall Materials
Walls can be made of drywall, plaster, or other materials, and each requires slightly different techniques. In this guide, we'll focus on drywall, as it's the most common in modern homes.
🎯 Key to Professional Repairs
The key to professional-looking repairs is patience, precision, and using the correct materials.
💪 Benefits of DIY Wall Repairs
- Cost savings compared to hiring a contractor.
- Satisfaction of a job well done and skill development.
- Regular maintenance prevents future damage, saving time and effort.
🛠️ Tools and Materials You'll Need
Having the right tools and materials is half the battle in wall repairs. Here’s a detailed list to ensure you're fully prepared:
Essential Tools
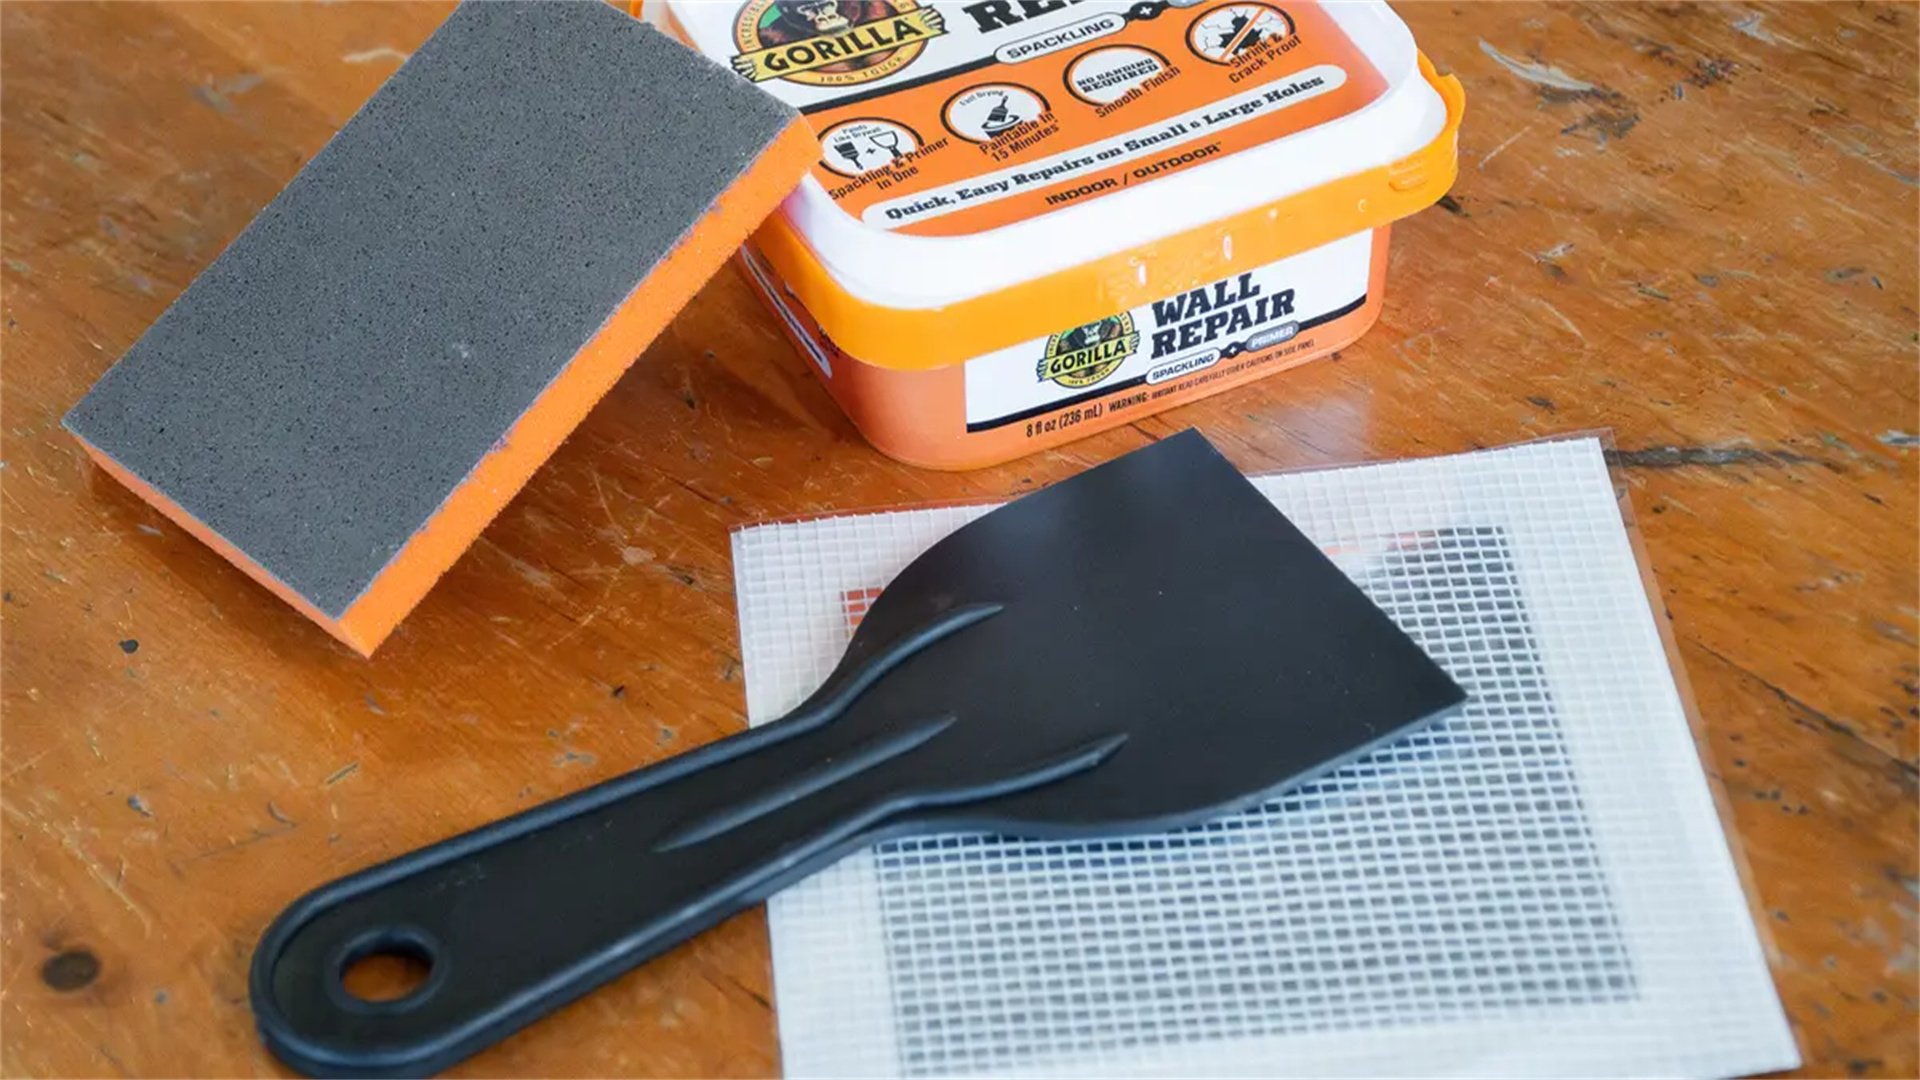
- Putty knife: A flexible putty knife in various sizes (e.g., 1-inch, 2-inch, and 6-inch) for applying compound and smoothing surfaces.
- Drywall compound: Also known as joint compound or spackle, this is used to fill holes and cracks. Choose between pre-mixed or powder versions based on your preference.
- Sandpaper or sanding sponge: Grits ranging from 120 to 220 for smoothing the repaired areas. A sanding block can help achieve an even finish.
- Drywall tape: Mesh or paper tape for reinforcing seams and larger cracks to prevent reappearance.
- Utility knife: For cutting away loose debris and trimming tape.
- Patch kits: For larger holes, consider using a drywall patch kit that includes a self-adhesive mesh or a California patch.
- Primer and paint: To match the repaired area with the surrounding wall. Use a stain-blocking primer if dealing with water damage.
- Safety gear: Safety goggles, dust mask, and gloves to protect yourself from dust and chemicals.
- Measuring tape and level: For ensuring patches are aligned and even.
- Drop cloths: To protect floors and furniture from dust and spills.
Investment Tips
Investing in quality tools can make the process smoother and results more durable. If you're on a budget, many hardware stores offer affordable options that still deliver professional outcomes.
⚠️ Safety Precautions for DIY Wall Repairs
Safety should always come first when working on home projects. Wall repair involves dust, sharp tools, and potentially hazardous materials.
Key Safety Measures
- Wear protective gear: Always use safety goggles to shield your eyes from flying debris, a dust mask to avoid inhaling drywall dust, and gloves to protect your hands from cuts and chemicals.
- Ventilate the area: Open windows or use fans to ensure proper airflow, especially when sanding or using compounds that emit fumes.
- Check for electrical hazards: Before drilling or cutting into walls, turn off power to the area if you suspect wires behind the surface. Use a stud finder to locate studs and avoid accidents.
- Secure ladders and step stools: When working on higher walls, ensure ladders are stable and placed on level ground to prevent falls.
- Dispose of materials properly: Drywall dust and old materials can be harmful if not disposed of correctly. Seal them in bags and follow local regulations for disposal.
🔍 Identifying Types of Wall Damage
Not all wall damage is the same, and understanding the type you're dealing with is crucial for choosing the right repair method.
Common Wall Damage Types
- Hairline cracks: These are thin cracks often caused by settling or temperature changes. They typically require simple filling with compound.
- Larger cracks: Cracks wider than 1/8 inch may indicate structural issues, so it's important to assess the cause. For DIY repairs, reinforcement with tape is usually needed.
- Small holes: Examples include nail holes or screw holes from hanging pictures. These can be filled directly with spackle.
- Medium holes: Holes up to 6 inches in diameter, often from doorknobs or minor impacts. These may require a patch or backing for support.
- Large holes: Holes larger than 6 inches, which can result from accidents or remodeling. These need a more extensive patch, such as a drywall piece secured to studs.
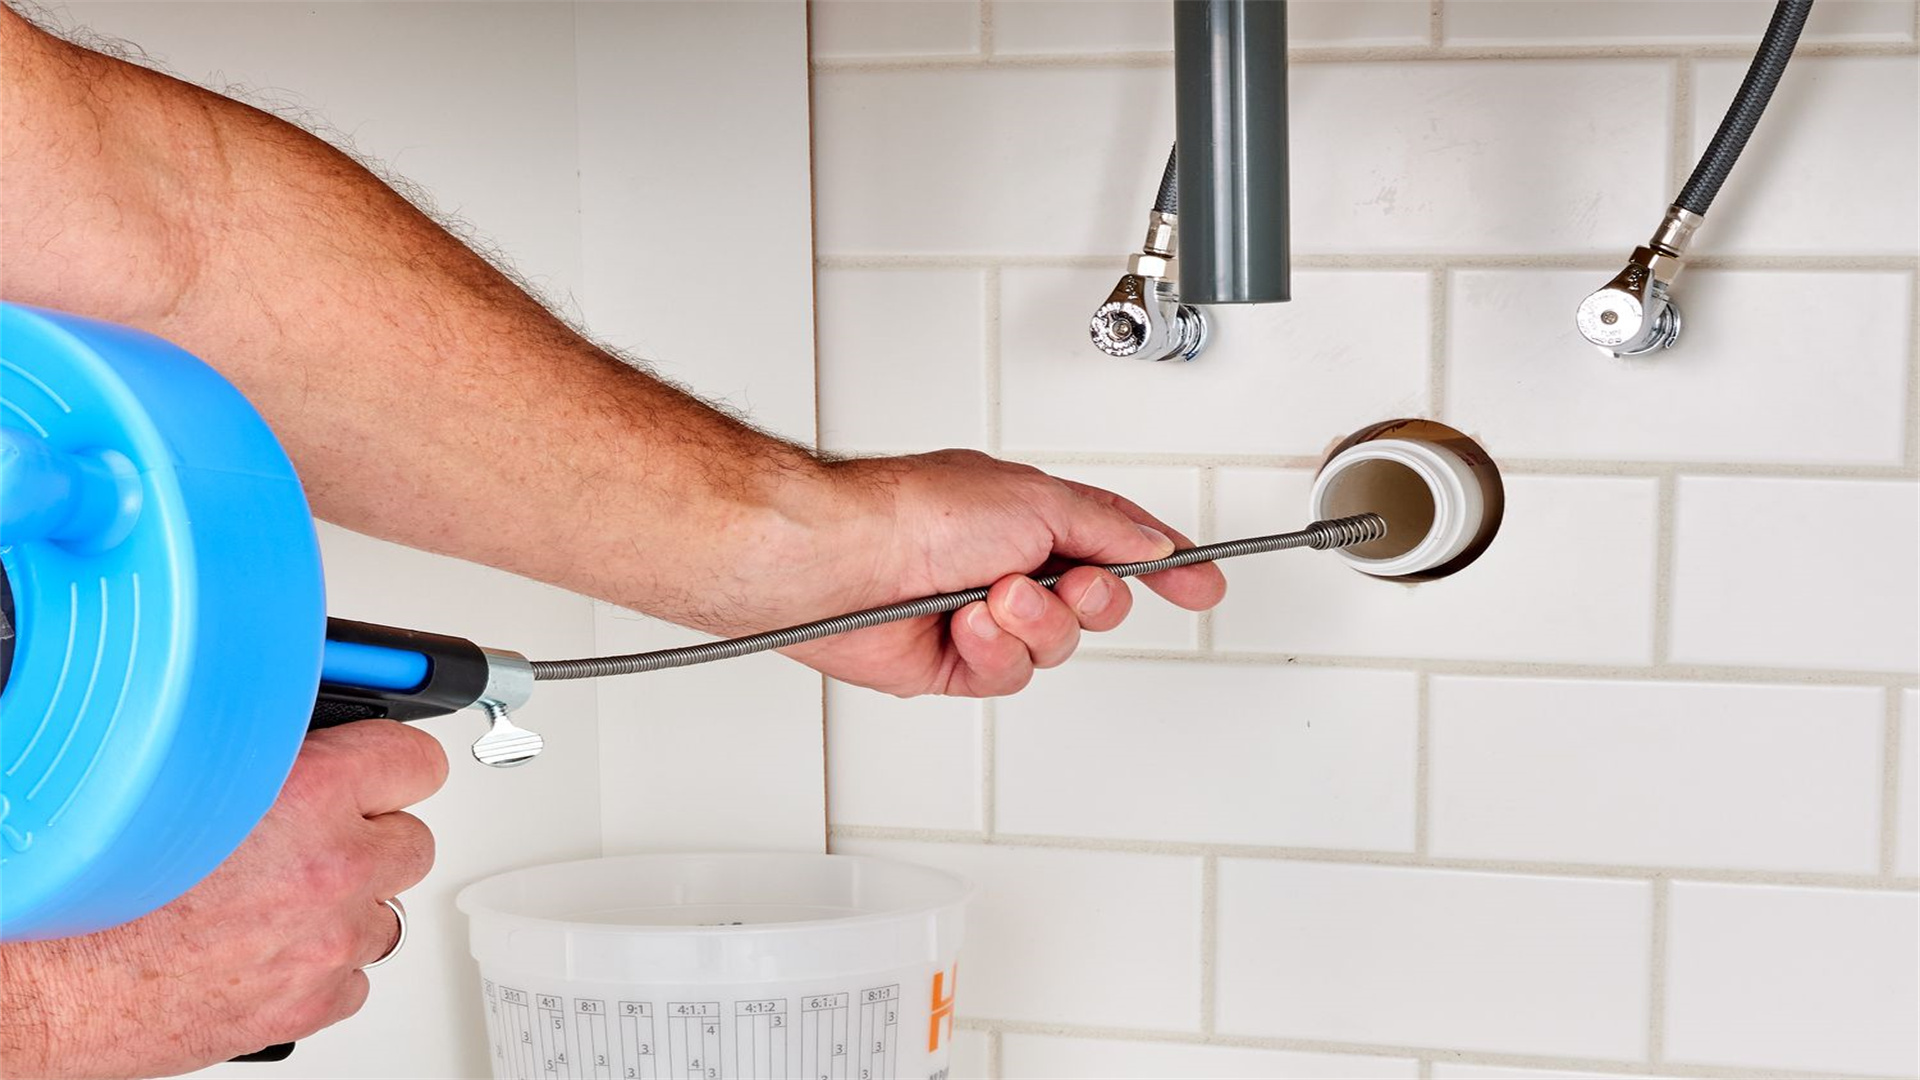
- Water damage: Stains or soft spots from leaks. Repair involves cutting out damaged areas, addressing the moisture source, and replacing drywall.
🔧 Step-by-Step Guide to Patching Cracks
Cracks in walls can be unsightly, but with meticulous care, you can make them disappear. Follow these detailed steps for a seamless repair:
Detailed Steps for Crack Patching
- Clean the crack: Use a utility knife to widen the crack slightly, creating a V-shaped groove that allows the compound to adhere better. Remove any loose debris or dust with a brush or vacuum.
- Apply drywall tape: For cracks wider than 1/8 inch, place self-adhesive mesh tape over the crack, pressing it firmly to ensure it lays flat. This tape reinforces the repair and prevents the crack from reappearing.
- Mix the compound: If using powdered compound, follow the manufacturer's instructions to mix it to a smooth, peanut butter-like consistency. Pre-mixed compound can be used directly, but stir it well to eliminate air bubbles.
- Fill the crack: Using a putty knife, apply a thin layer of compound over the crack or tape, forcing it into the groove. Smooth it out evenly, feathering the edges to blend with the wall. Allow it to dry completely, which typically takes 24 hours, depending on humidity.
- Sand the area: Once dry, use 120-grit sandpaper to sand the repaired spot until it's smooth and level with the surrounding wall. Wipe away dust with a damp cloth.
- Apply additional coats: For deeper cracks, multiple coats may be necessary. Apply a second thin layer of compound, feathering it wider than the first coat to create a gradual transition. Sand between coats for a flawless finish.
- Final sanding: After the last coat dries, use 220-grit sandpaper for a fine finish. Ensure the surface is smooth to the touch, with no visible ridges or bumps.
📌 Step-by-Step Guide to Patching Small Holes
Small holes, such as those from nails or screws, are among the easiest repairs. Here’s a comprehensive method:
Detailed Steps for Small Hole Patching
- Clean the hole: Remove any loose drywall or debris from the hole using a utility knife or your fingers. For a cleaner surface, you can lightly sand the edges.
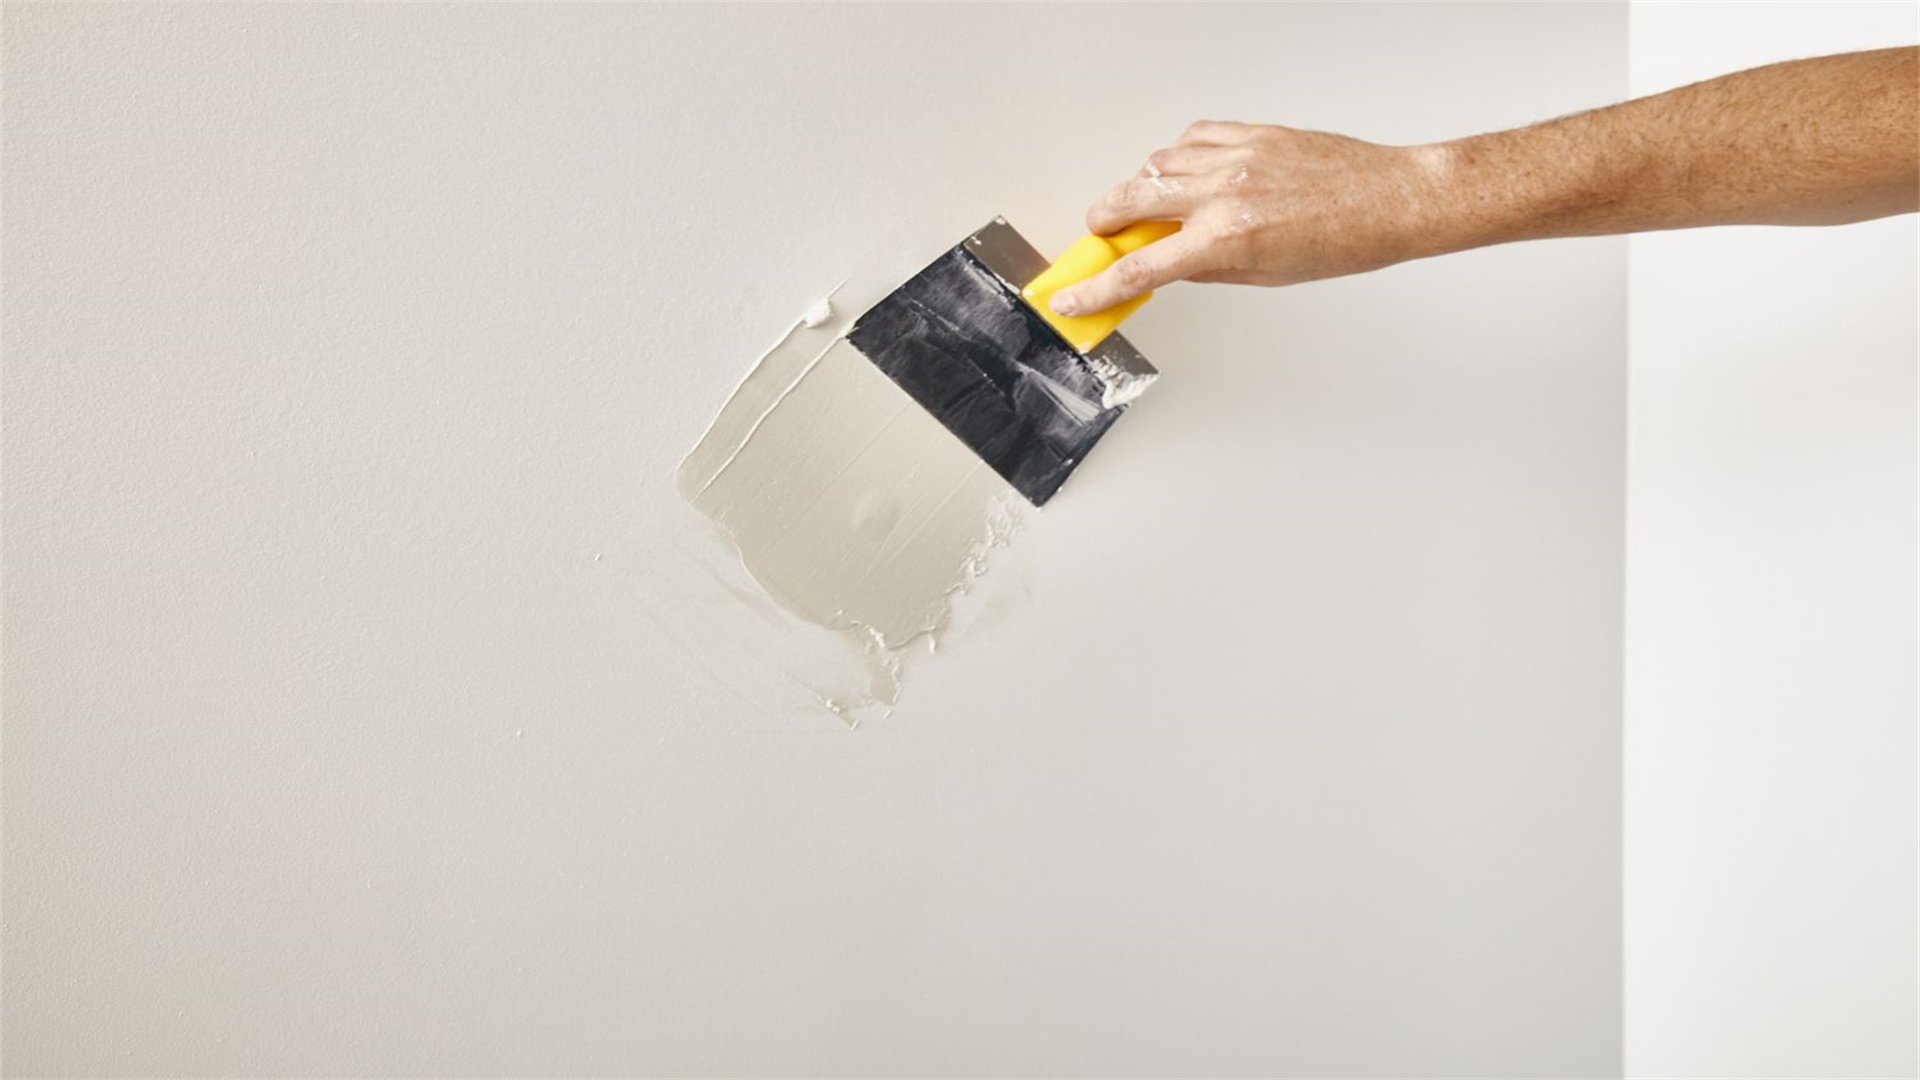
- Fill with spackle: Using a small putty knife, press spackle or lightweight compound into the hole, overfilling slightly to account for shrinkage as it dries. Smooth the surface so it's level with the wall.
- Let it dry: Allow the spackle to dry according to the product instructions—usually 1-2 hours for small amounts. Ensure the area is well-ventilated to speed up drying.
- Sand lightly: Once dry, use fine-grit sandpaper (e.g., 220-grit) to sand the spot smooth. Be gentle to avoid damaging the surrounding wall. Wipe away dust with a cloth.
- Check for imperfections: Hold a light at an angle to the wall to spot any dips or bumps. If needed, apply a second thin coat of spackle, sand again, and repeat until seamless.
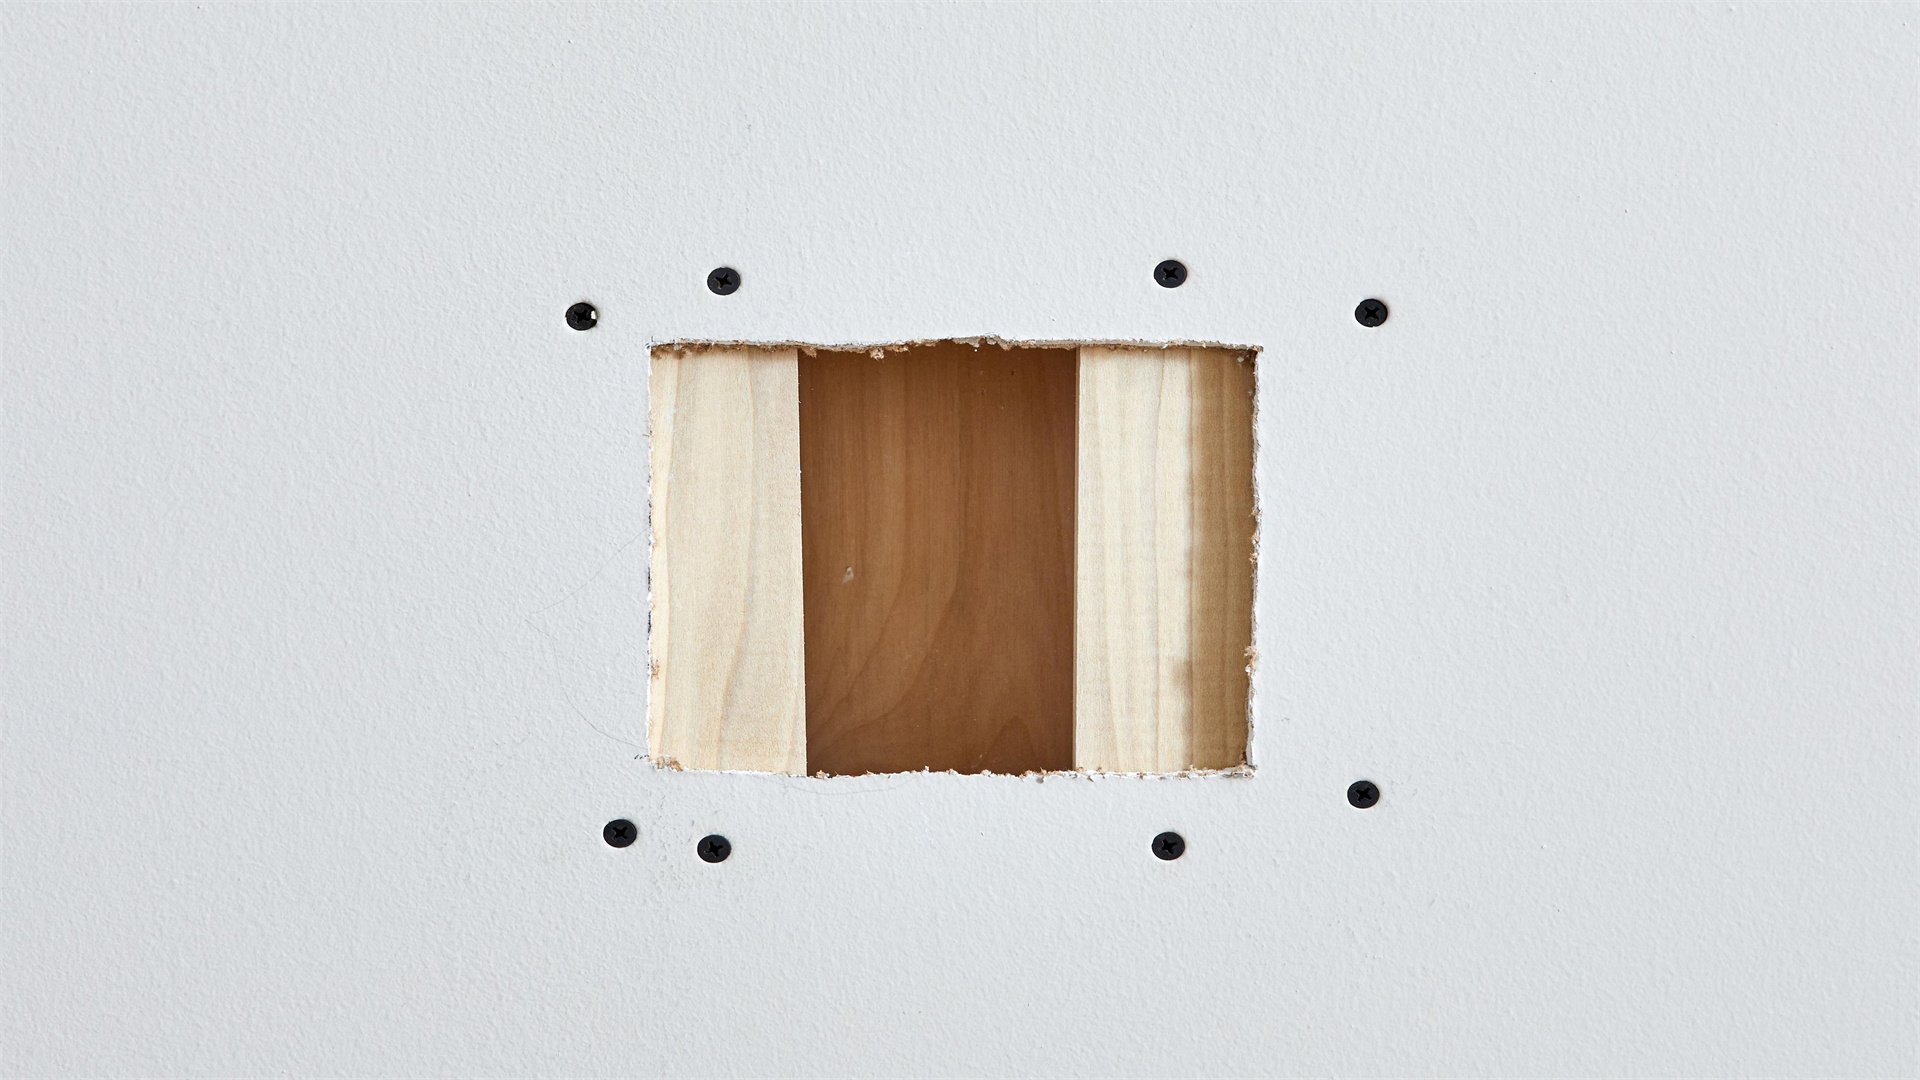
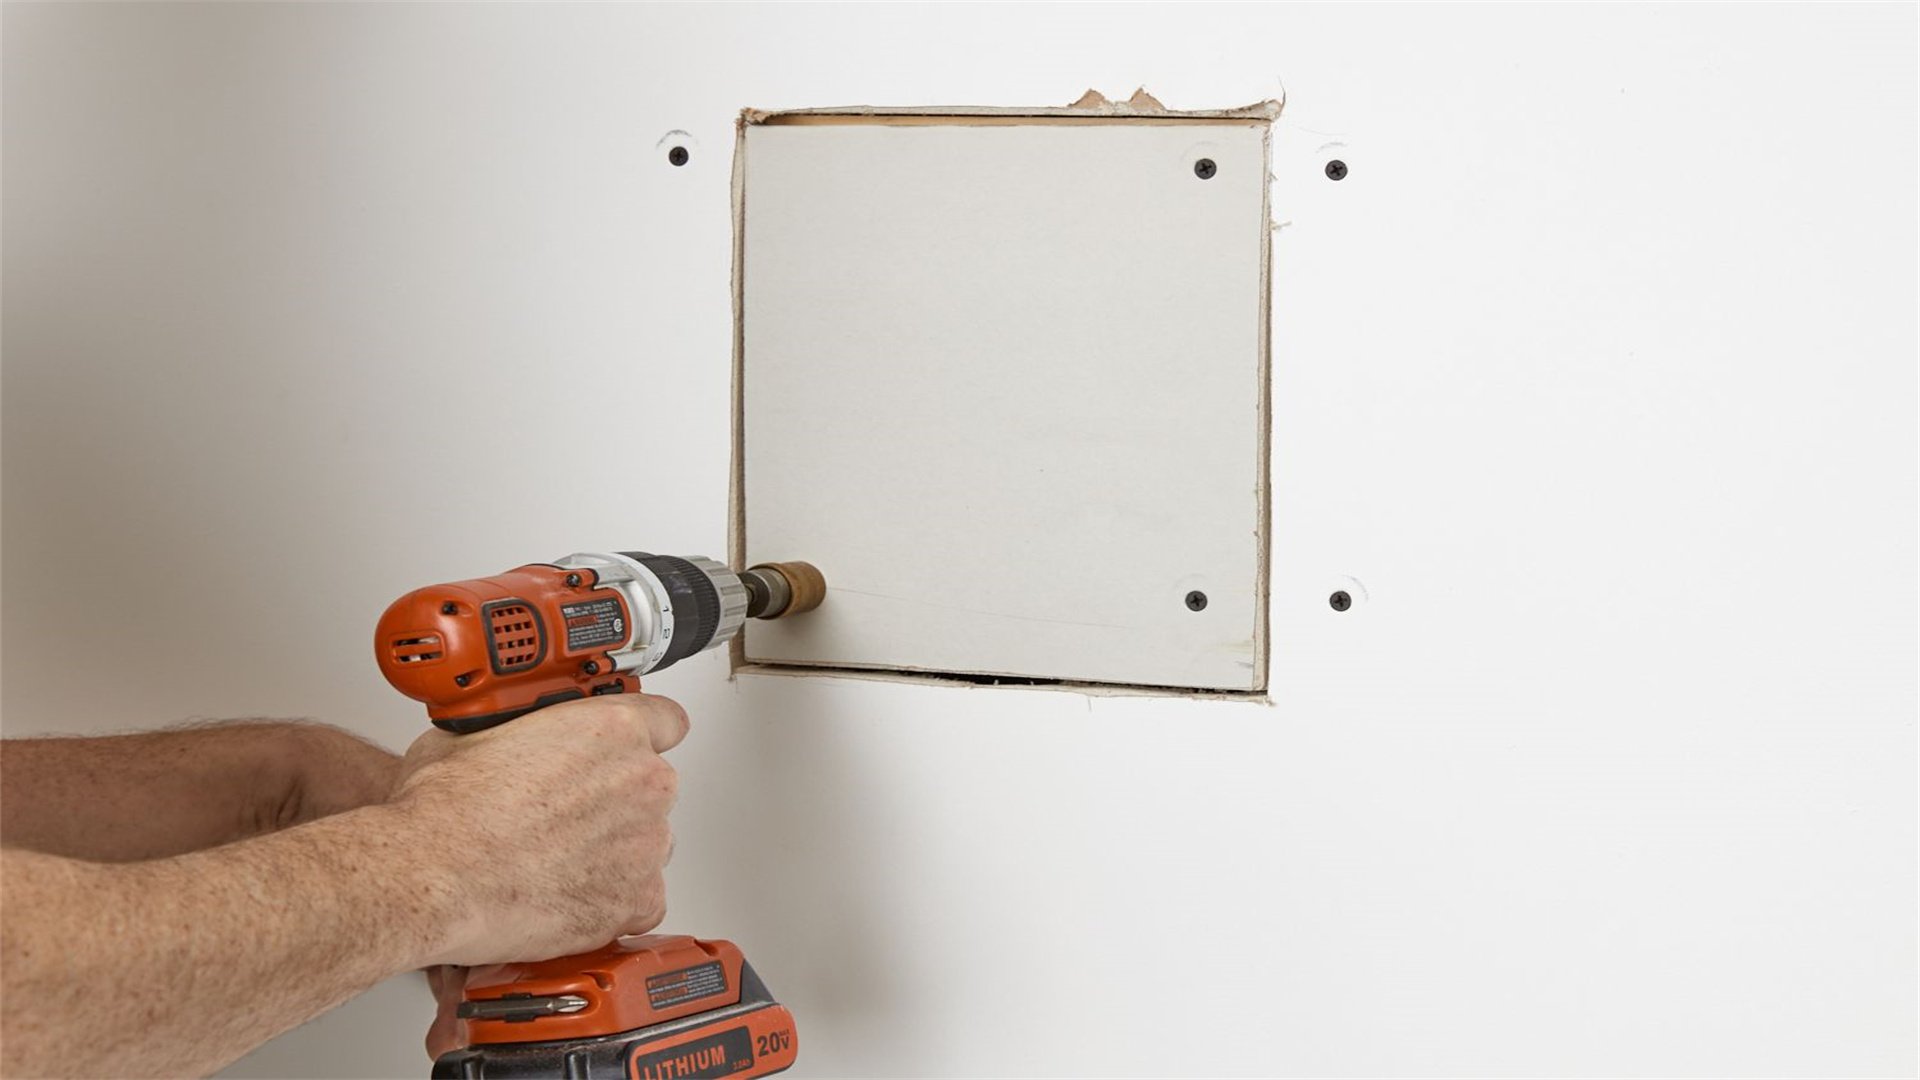
🔄 Step-by-Step Guide to Patching Medium Holes
Holes up to 6 inches in diameter require more support. Here’s how to patch them like a pro:
Detailed Steps for Medium Hole Patching
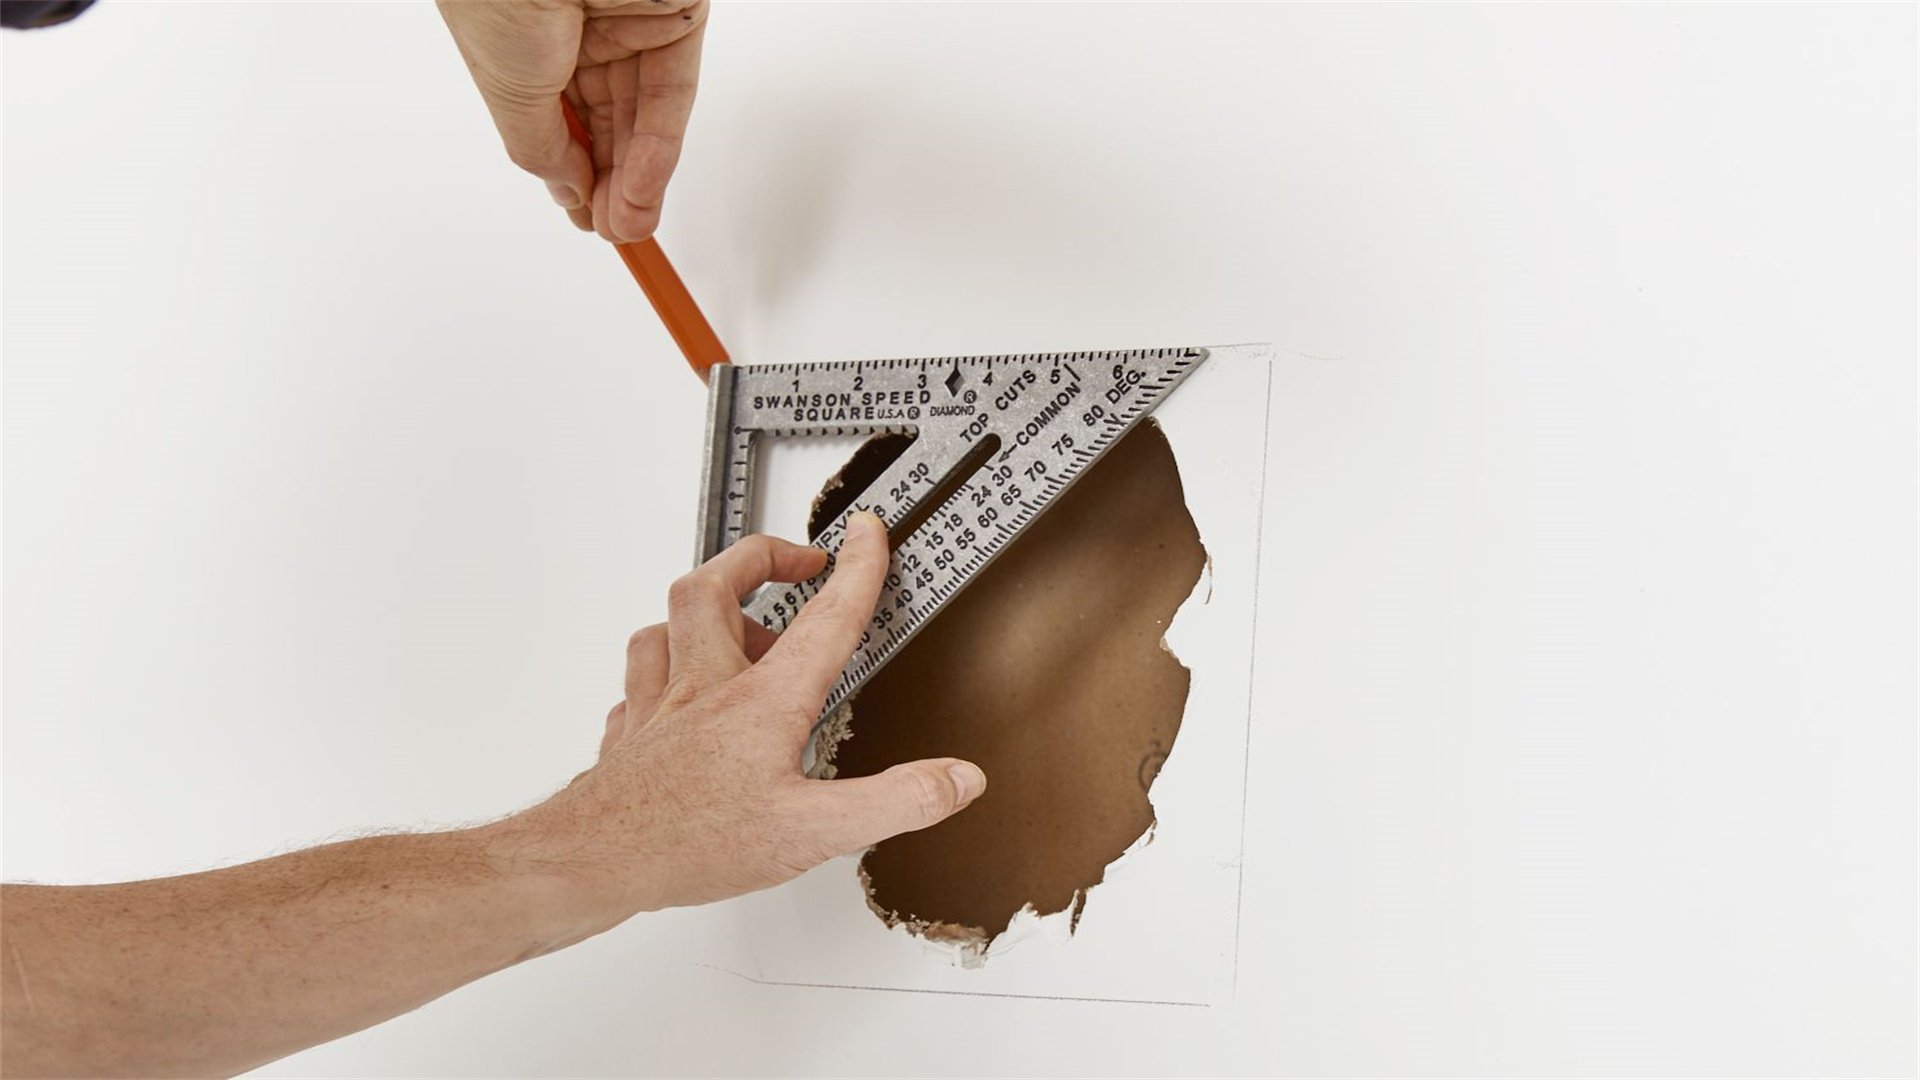
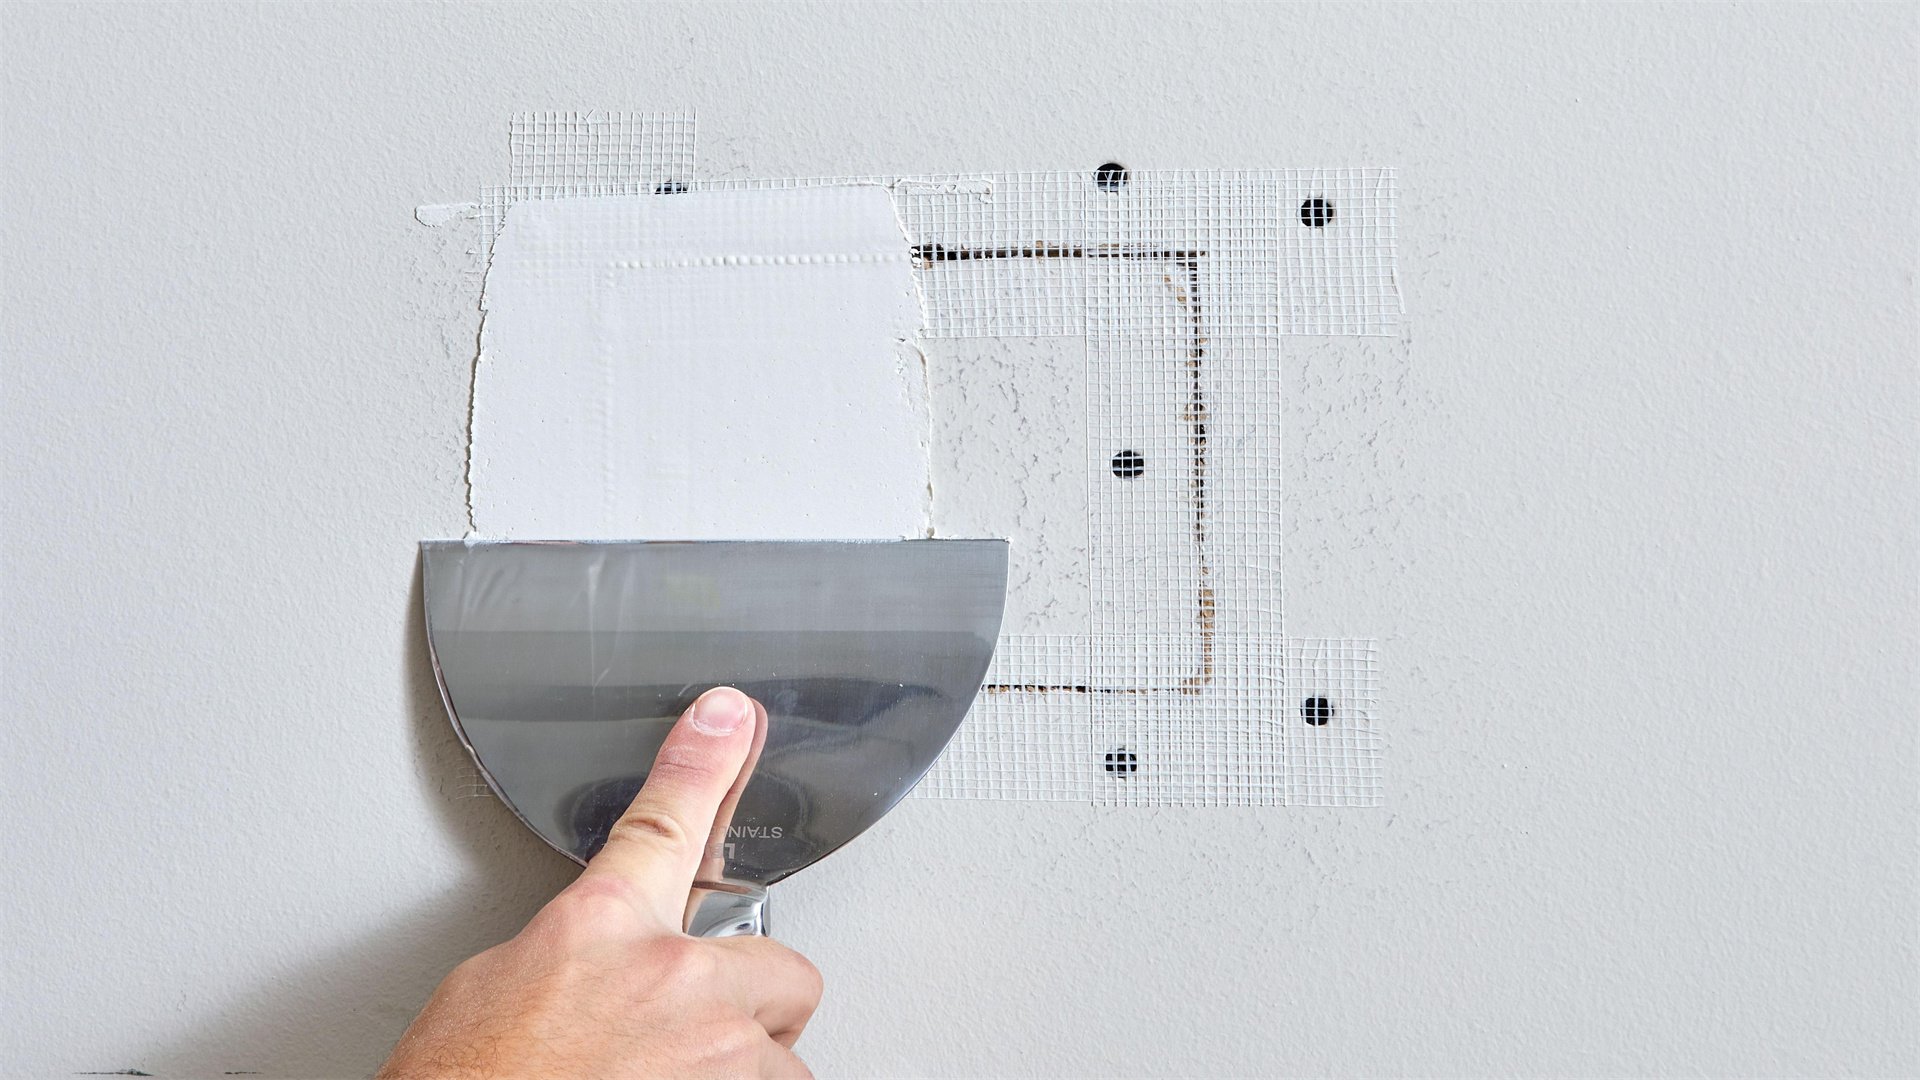
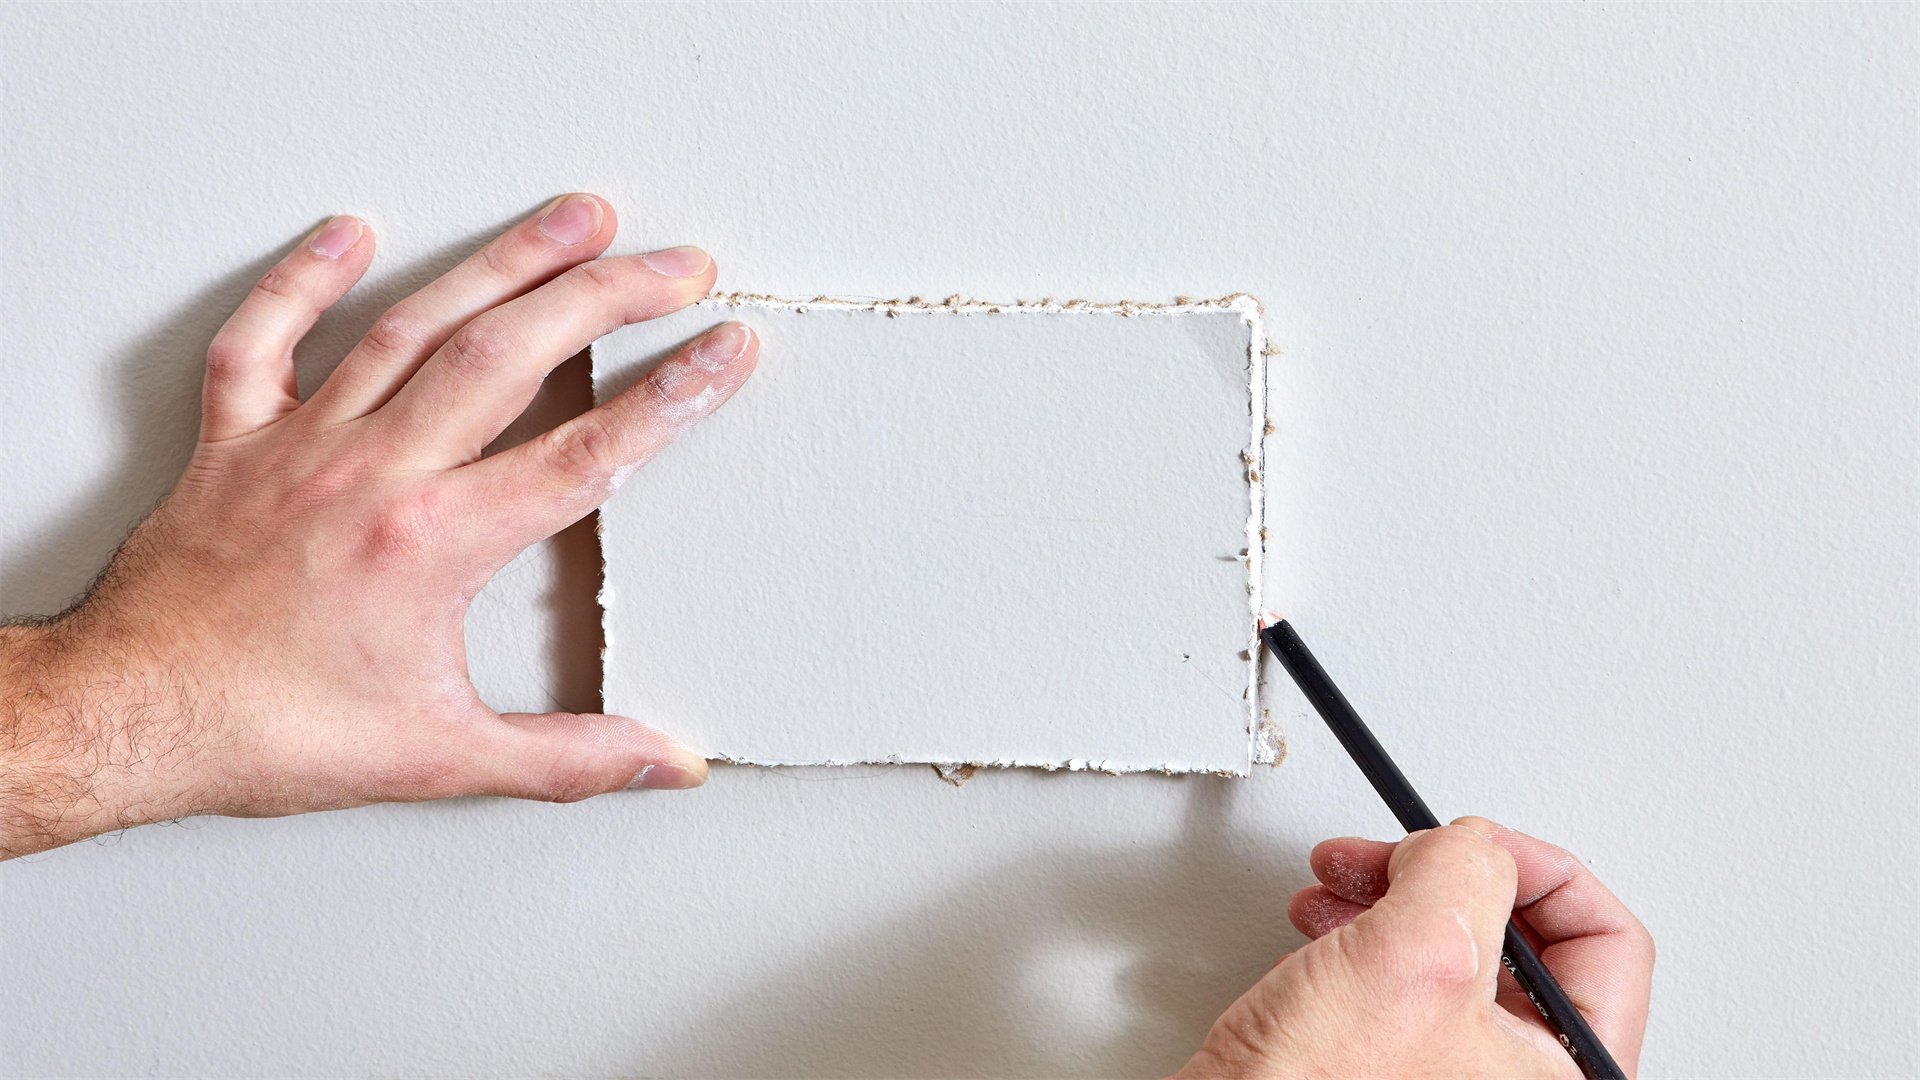
- Cut a clean opening: Use a drywall saw or utility knife to cut the damaged area into a square or rectangle. This makes it easier to fit a patch. Remove any loose drywall pieces.
- Create a backing: Cut a piece of wood or a drywall scrap slightly larger than the hole. Insert it into the hole and secure it behind the wall using drywall screws driven into the backing through the existing wall. Ensure it's flush and sturdy.
- Cut the patch: Measure the hole and cut a new piece of drywall to fit exactly. If using a patch kit, follow the included instructions for adhesive mesh.
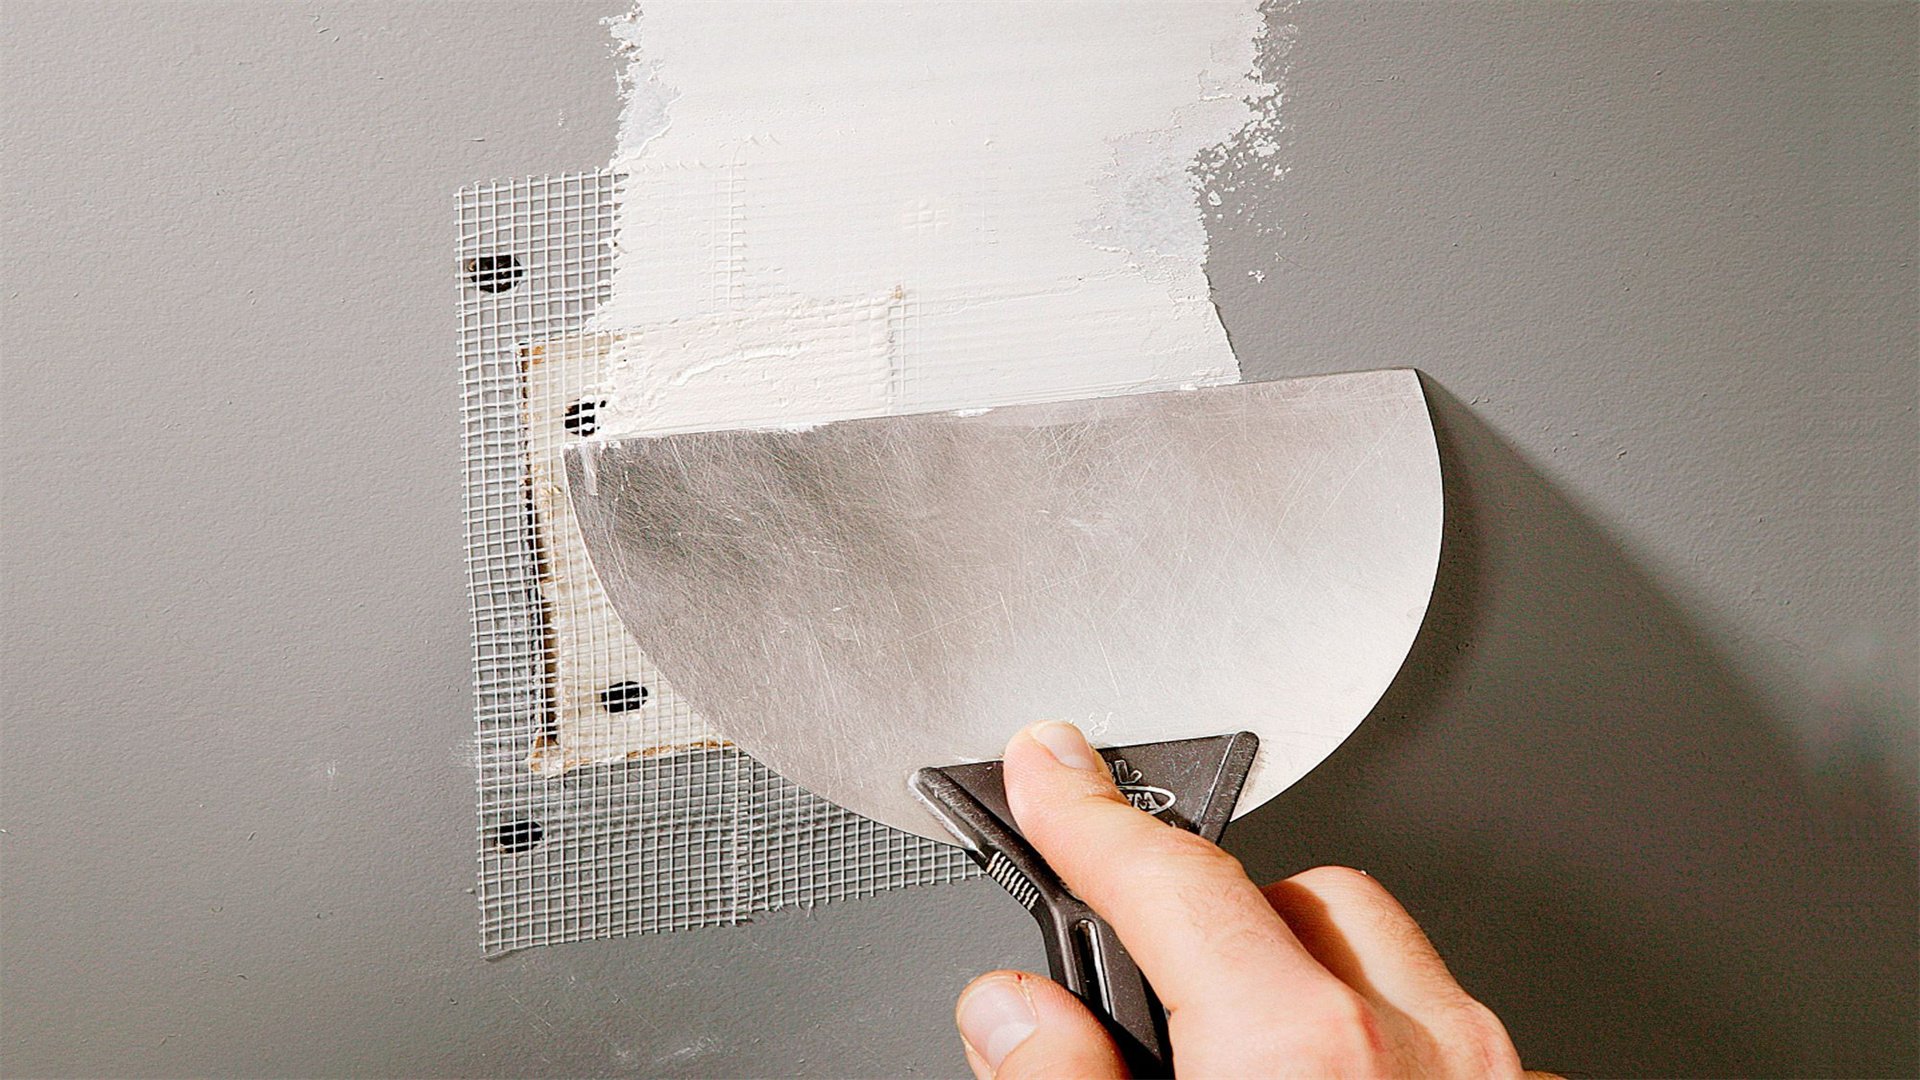
- Attach the patch: Place the drywall patch into the hole and secure it to the backing with screws. Countersink the screws slightly below the surface so they can be covered with compound.
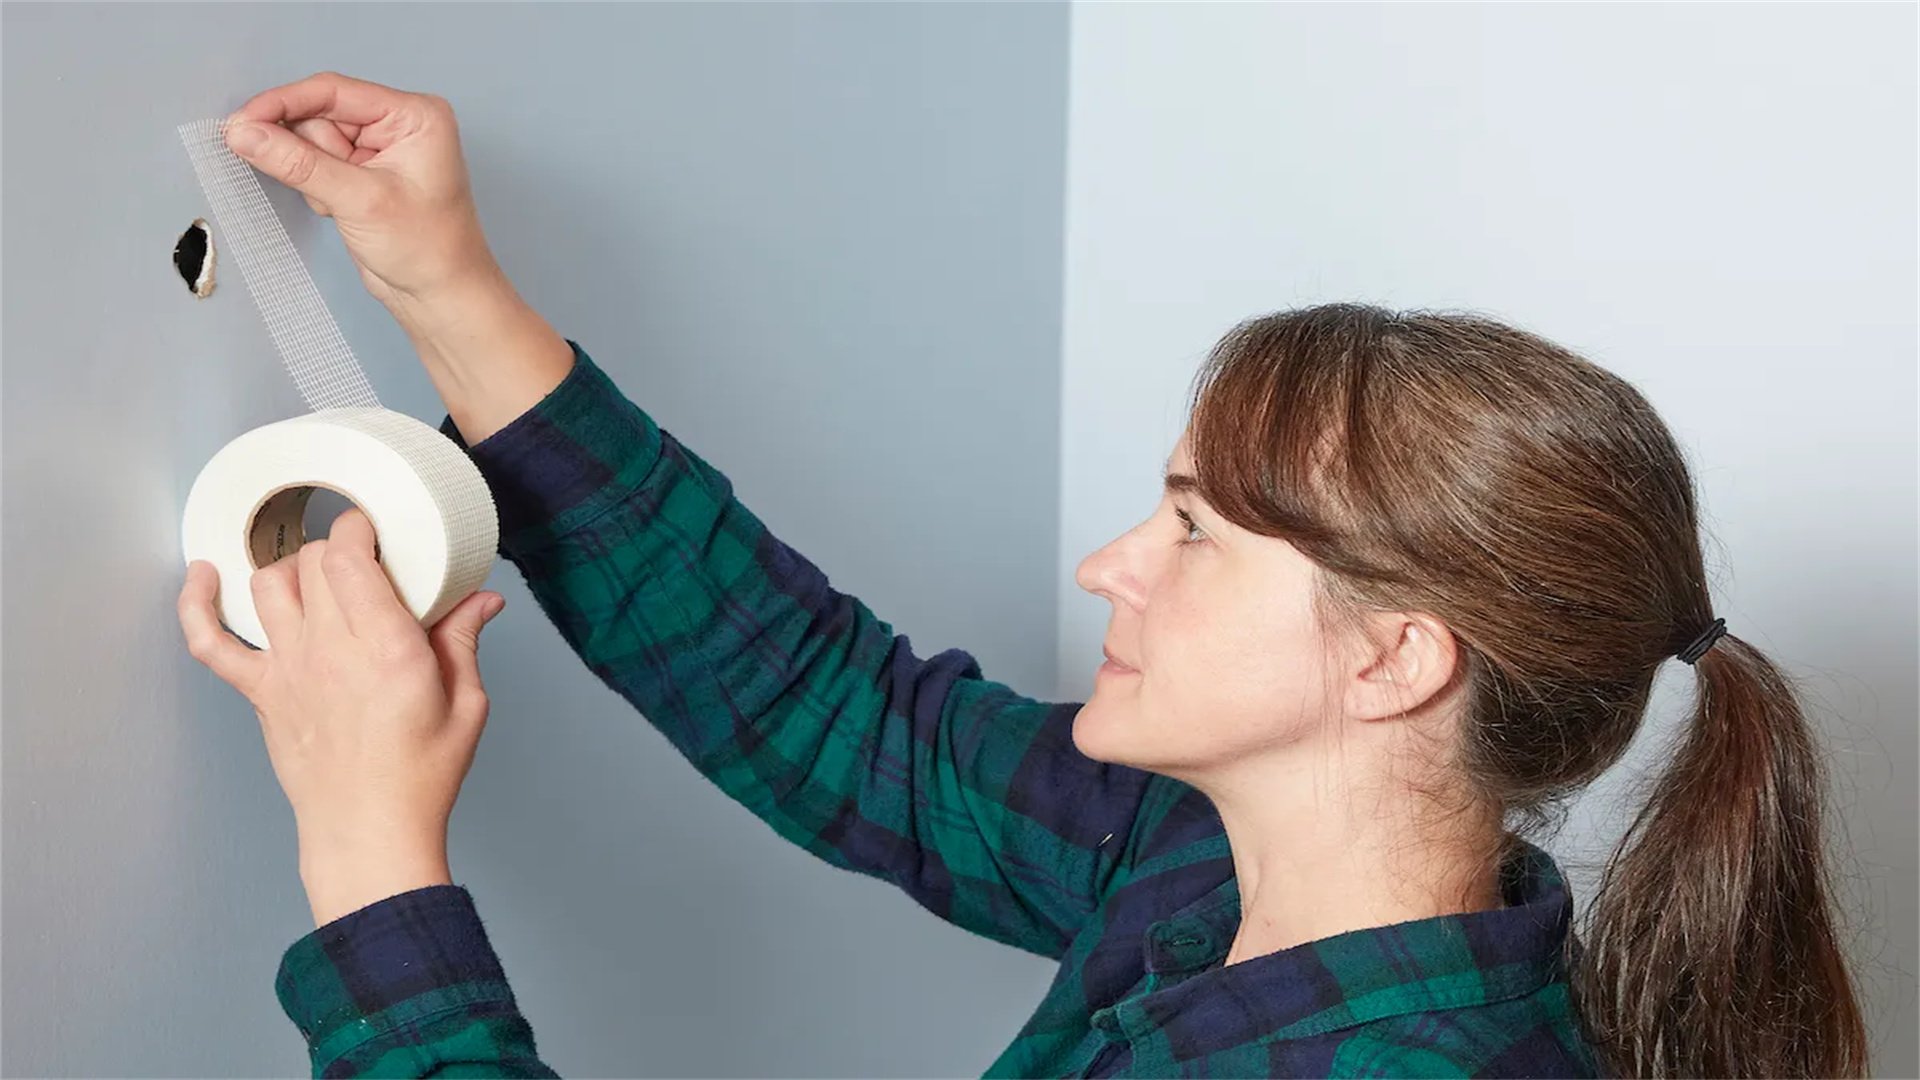
- Apply joint compound: Cover the seams and screw heads with a layer of compound, using a putty knife to spread it evenly. Embed drywall tape over the seams for added strength, then apply another coat of compound over the tape.
- Dry and sand: Allow the compound to dry completely—this may take 24 hours or more due to the thicker application. Sand the area smooth, starting with 120-grit and finishing with 220-grit.
- Feather the edges: Apply additional coats of compound, each wider than the last, to blend the patch into the wall. Sand between coats until the repair is undetectable.
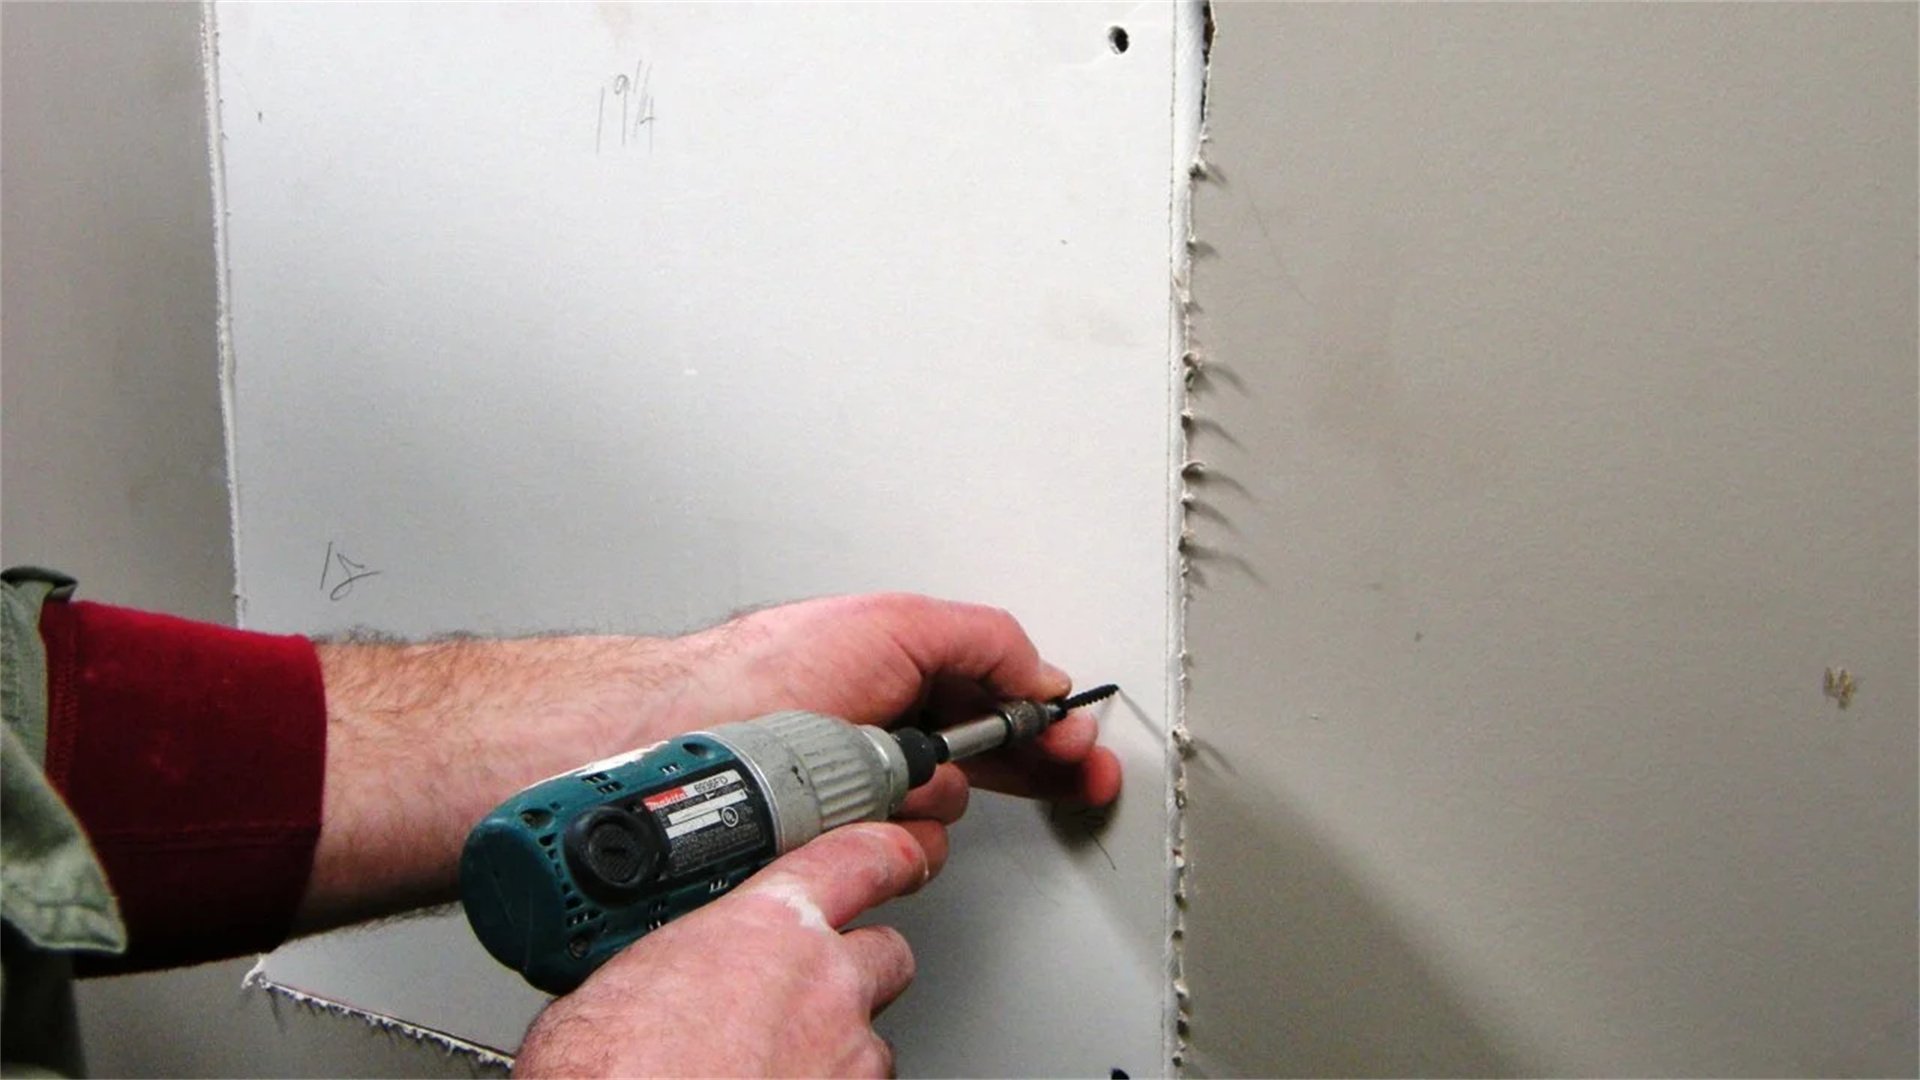
🏗️ Step-by-Step Guide to Patching Large Holes
Large holes, often from accidents or renovations, demand a systematic approach. Follow these steps for a professional result:
Detailed Steps for Large Hole Patching
- Assess the damage: Determine the extent of the hole and check for studs behind the wall. If studs are exposed, you can attach new drywall directly to them.
- Cut out the damaged area: Using a saw, cut the drywall back to the nearest studs on either side of the hole, creating a rectangular opening. Ensure the edges are straight and clean.
- Install new drywall: Measure the opening and cut a drywall piece to fit. If the hole doesn't align with studs, install wooden braces between the studs to provide support for the new piece.
- Secure the drywall: Attach the new drywall piece to the studs or braces using drywall screws, spaced every 6-8 inches along the edges. Countersink the screws as before.
- Tape and mud the seams: Apply joint compound to the seams, then embed drywall tape (paper tape is often preferred for larger seams). Smooth out any bubbles or wrinkles. Add a second coat of compound over the tape, feathering it out widely.
- Apply multiple coats: Large repairs typically require 3-4 coats of compound to build up a smooth surface. Allow each coat to dry thoroughly—this can take 24 hours per coat in humid conditions.
- Sanding and finishing: After the final coat dries, sand the entire area with progressively finer grits, from 120 to 220. Use a sanding pole for large areas to ensure even pressure. Wipe away all dust before priming.

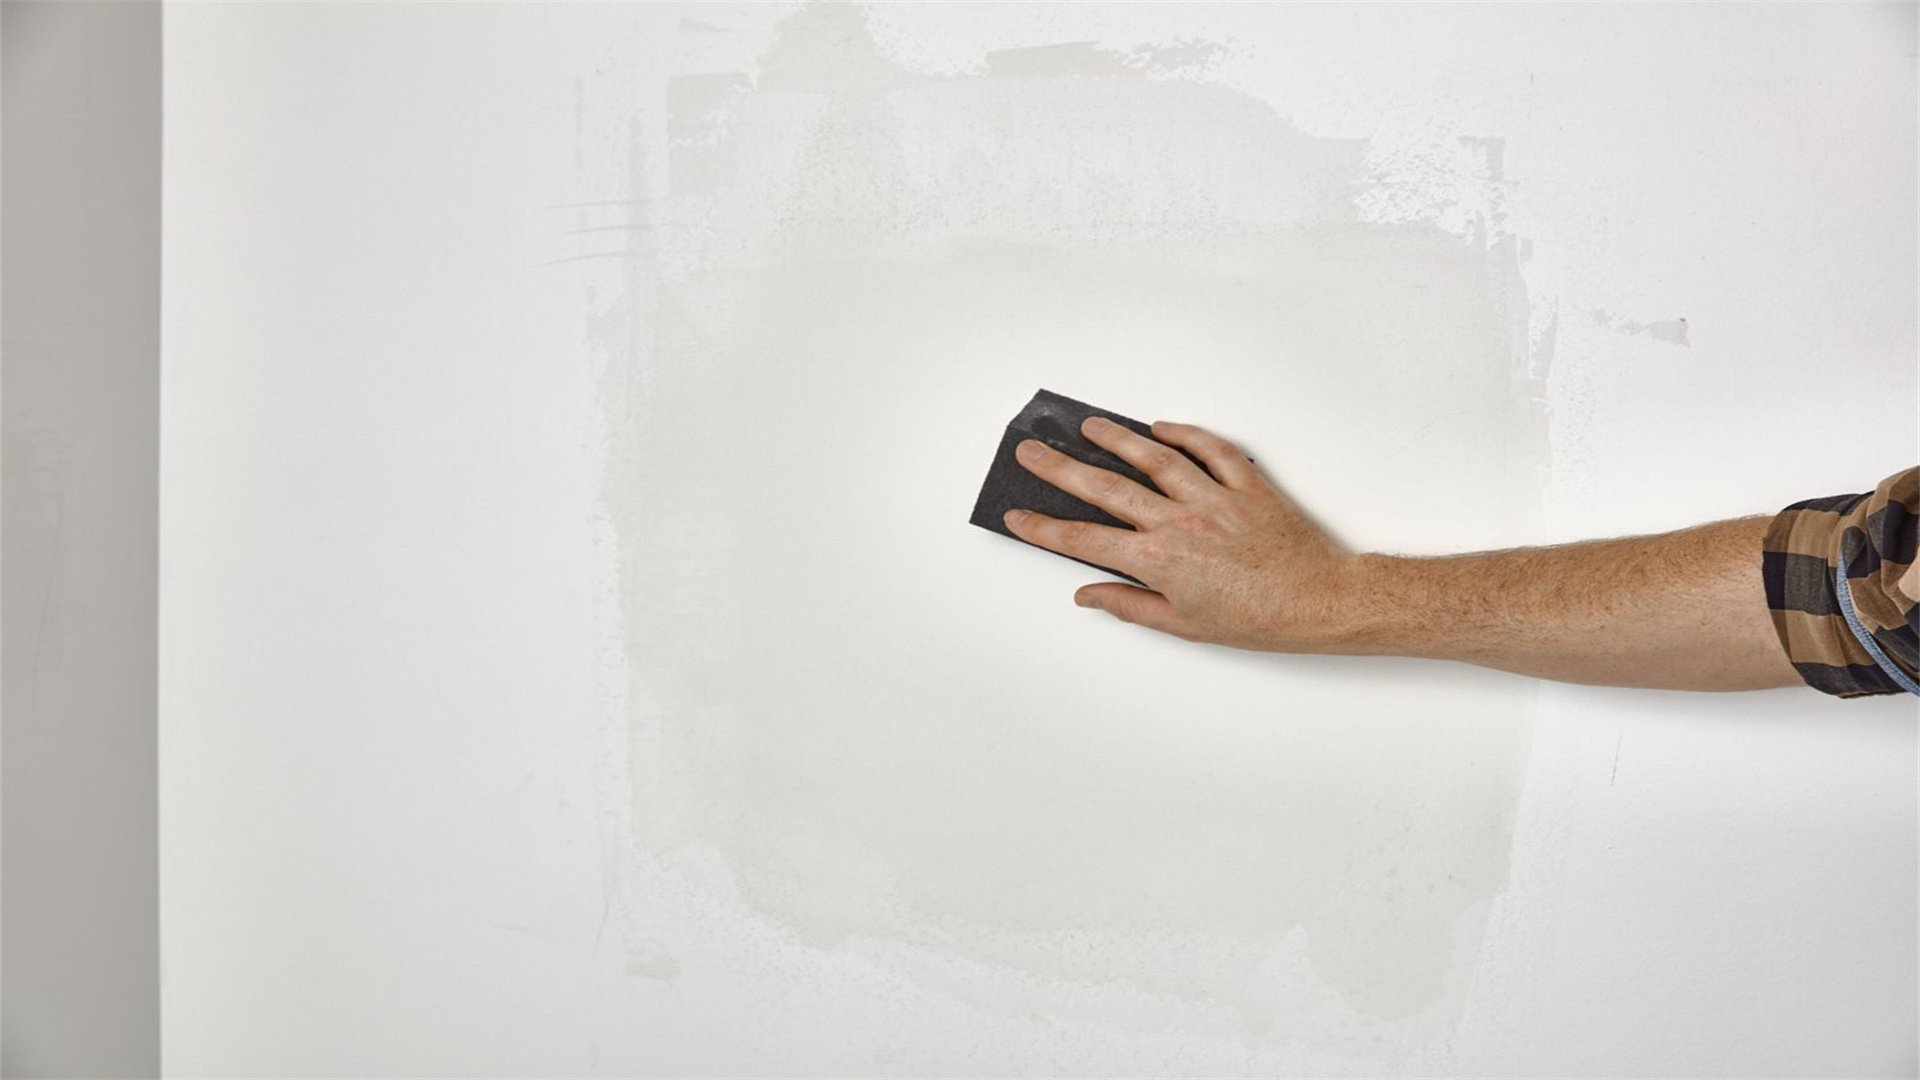
🌀 Sanding Techniques for a Smooth Finish
Sanding is critical to achieving a professional-looking repair. Here’s a deep dive into effective sanding methods:
Key Sanding Tips
- Choose the right sandpaper: Coarse grits (80-120) are for initial shaping, while fine grits (150-220) are for smoothing. Use a sanding sponge for contoured areas or corners.
- Use a sanding block: A sanding block helps distribute pressure evenly, preventing dips or gouges. For large areas, consider a pole sander to reduce strain.
- Sand in circular motions: Light, circular motions blend the repaired area with the surrounding wall. Avoid pressing too hard, which can damage the drywall paper.
- Check with a light: Hold a bright light at an angle to reveal imperfections. Sand until the surface reflects light uniformly, indicating smoothness.
- Clean as you go: Frequently wipe away dust with a damp cloth or use a vacuum with a brush attachment. Dust can hide flaws and affect primer adhesion.
- Wet sanding for dust control: For minimal dust, use a damp sanding sponge or apply a thin layer of water to the sandpaper. This technique is messy but effective for final touches.
🎨 Priming and Painting the Repaired Area
Once the repair is smooth, priming and painting ensure it blends with the rest of the wall. Here’s a detailed process:
Steps for Priming and Painting
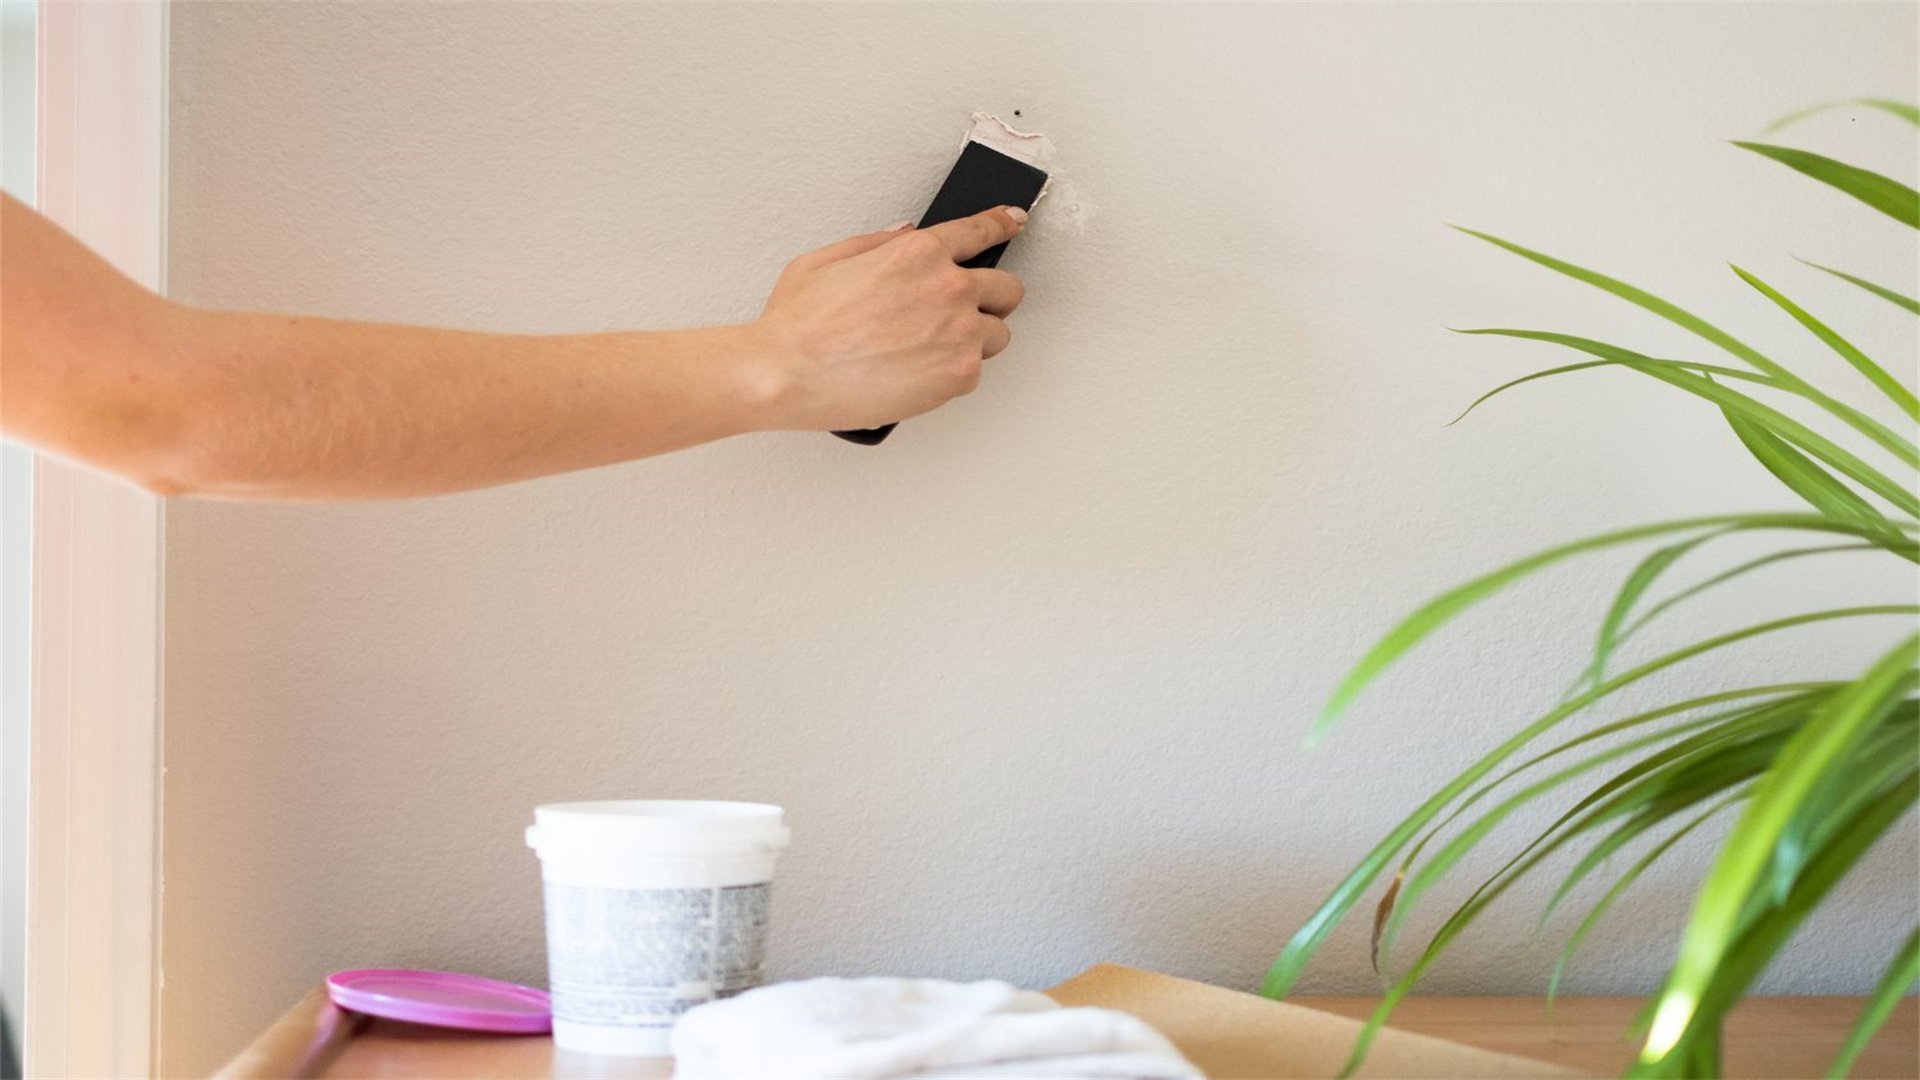
- Clean the wall: Remove all sanding dust with a tack cloth or damp sponge. Any residue can cause paint to peel or bubble.
- Apply primer: Use a stain-blocking primer to seal the repair and prevent the compound from absorbing paint unevenly. Cut in the edges with a brush, then roll primer over the larger area. Allow it to dry according to the label—usually 1-2 hours.
- Inspect the primer: After priming, look for any missed spots or imperfections. Light sanding with 220-grit sandpaper can fix minor issues before painting.
- Choose the right paint: Match the existing wall paint exactly. If you don't have leftover paint, take a sample to a hardware store for color matching. Use the same sheen (e.g., flat, eggshell, satin) for consistency.
- Paint the repair: Apply paint in thin, even coats using a roller for large areas and a brush for edges. Feather the paint outward to blend with the surrounding wall. Allow the first coat to dry completely before applying a second coat if needed.
- Blend with the wall: To avoid a "patchy" look, consider painting the entire wall from corner to corner. This ensures uniform color and sheen, especially if the existing paint has faded.
- Final touches: Once dry, inspect the repair under different lighting conditions. Touch up any areas as necessary, and clean your tools promptly for future use.
❌ Common Mistakes and How to Avoid Them
Even experienced DIYers can make errors. Here are common pitfalls and solutions:
Mistakes and Solutions
- Overfilling holes: Applying too much compound leads to excessive sanding and uneven surfaces. Solution: Apply thin layers, building up gradually.
- Skipping tape on cracks: Without tape, cracks often reappear due to movement. Solution: Always use tape for cracks wider than 1/8 inch.
- Inadequate drying time: Rushing between coats causes cracking or bubbling. Solution: Allow each layer to dry fully, using a fan or dehumidifier in humid environments.
- Poor sanding: Uneven sanding creates visible ridges. Solution: Use a sanding block and check with a light source frequently.
- Mismatched paint: Using the wrong paint sheen or color makes repairs obvious. Solution: Test paint on a small area first or paint the entire wall.
- Ignoring safety: Neglecting protective gear can lead to injuries or health issues. Solution: Always wear goggles, masks, and gloves.
🚀 Advanced Tips for Professional Results
To elevate your DIY skills, consider these advanced strategies:
Pro Tips
- Use a setting-type compound: For faster repairs, try a setting-type compound (e.g., hot mud) that hardens chemically rather than by drying. It's ideal for deep fills and reduces wait time.
- Texture matching: If your wall has texture (e.g., orange peel or knockdown), replicate it by using a texture spray or applying compound with a specialized roller. Practice on scrap drywall first.
- Repairing plaster walls: For older homes with plaster, use plaster washers or mesh to stabilize cracks, and apply plaster mix instead of drywall compound. The process is similar but requires more patience.
- Invest in quality tools: High-quality putty knives and sanders improve control and finish. Consider a drywall T-square for straight cuts on patches.
- Work in optimal conditions: Avoid repairs in extreme temperatures or high humidity, which affect drying times. Aim for a room temperature of 65-75°F (18-24°C).
- Document the process: Take photos before and after, and note paint colors and materials used for future reference. This helps with touch-ups or similar repairs later.
❓ Frequently Asked Questions (FAQs)
Here are answers to common questions about DIY wall repairs:
FAQs
- How long does wall repair take? Small holes can be fixed in a few hours, including drying time. Larger repairs may span 2-3 days due to multiple coats and drying periods.
- Can I repair water-damaged drywall? Yes, but you must first fix the leak and ensure the area is dry. Cut out all damaged material to prevent mold, then patch as described.
- What if my wall has mold? Address mold with a bleach solution or commercial mold remover before repairing. If mold is extensive, consult a professional for safety.
- How do I match wall texture? Use texture spray cans or create DIY texture with thinned compound and a sponge. Experiment on a sample board until it matches.
- Is it cheaper to DIY or hire a pro? DIY typically costs 10-20% of professional fees, but consider your skill level and time. For complex jobs, a pro may be worth it.
- Can I paint over spackle without primer? Not recommended—primer ensures even paint absorption and prevents flashing. Skipping primer often results in a noticeable patch.
🎉 Conclusion: Mastering DIY Wall Repairs
Wall repairs don't have to be daunting. By following this comprehensive guide, you've learned how to patch cracks and holes like a pro, from small fixes to large-scale projects. The key takeaways are: prepare thoroughly with the right tools, work methodically through each step, and prioritize patience during drying and sanding. DIY repairs empower you to maintain your home efficiently and cost-effectively. Remember, every repair is an opportunity to improve your skills. So grab your putty knife, embrace the process, and enjoy the satisfaction of a perfectly repaired wall. With practice, you'll be able to handle any wall damage that comes your way, keeping your living space beautiful and well-maintained for years to come.