DIY Outdoor Furniture: Building Functional and Stylish Pieces
Introduction 🌟
Creating your own outdoor furniture is not only a rewarding hobby but also a practical way to enhance your living space with functional and stylish pieces. In today's world, where personalization and sustainability are highly valued, DIY projects offer an opportunity to craft unique items that reflect your taste and needs. This article will guide you through the process of building outdoor furniture, from planning and design to construction and finishing. We'll explore various methods, materials, and techniques, ensuring that you can create durable and attractive pieces for your garden, patio, or balcony. By the end, you'll have the knowledge and inspiration to embark on your own DIY adventures, saving money and enjoying the satisfaction of handmade furniture.
Outdoor furniture serves as an extension of your home, providing comfort and elegance for relaxation, dining, and entertainment. However, store-bought options can be expensive and often lack character. DIY projects allow you to customize designs to fit your space and style, using materials that are both eco-friendly and cost-effective. Whether you're a beginner or an experienced woodworker, this article will cover essential aspects such as tool selection, material properties, and weatherproofing techniques. We'll structure the content into clear sections with points like Method One, Method Two, etc., each combined to ensure a comprehensive understanding. Let's dive into the world of DIY outdoor furniture and start building pieces that are both functional and stylish.
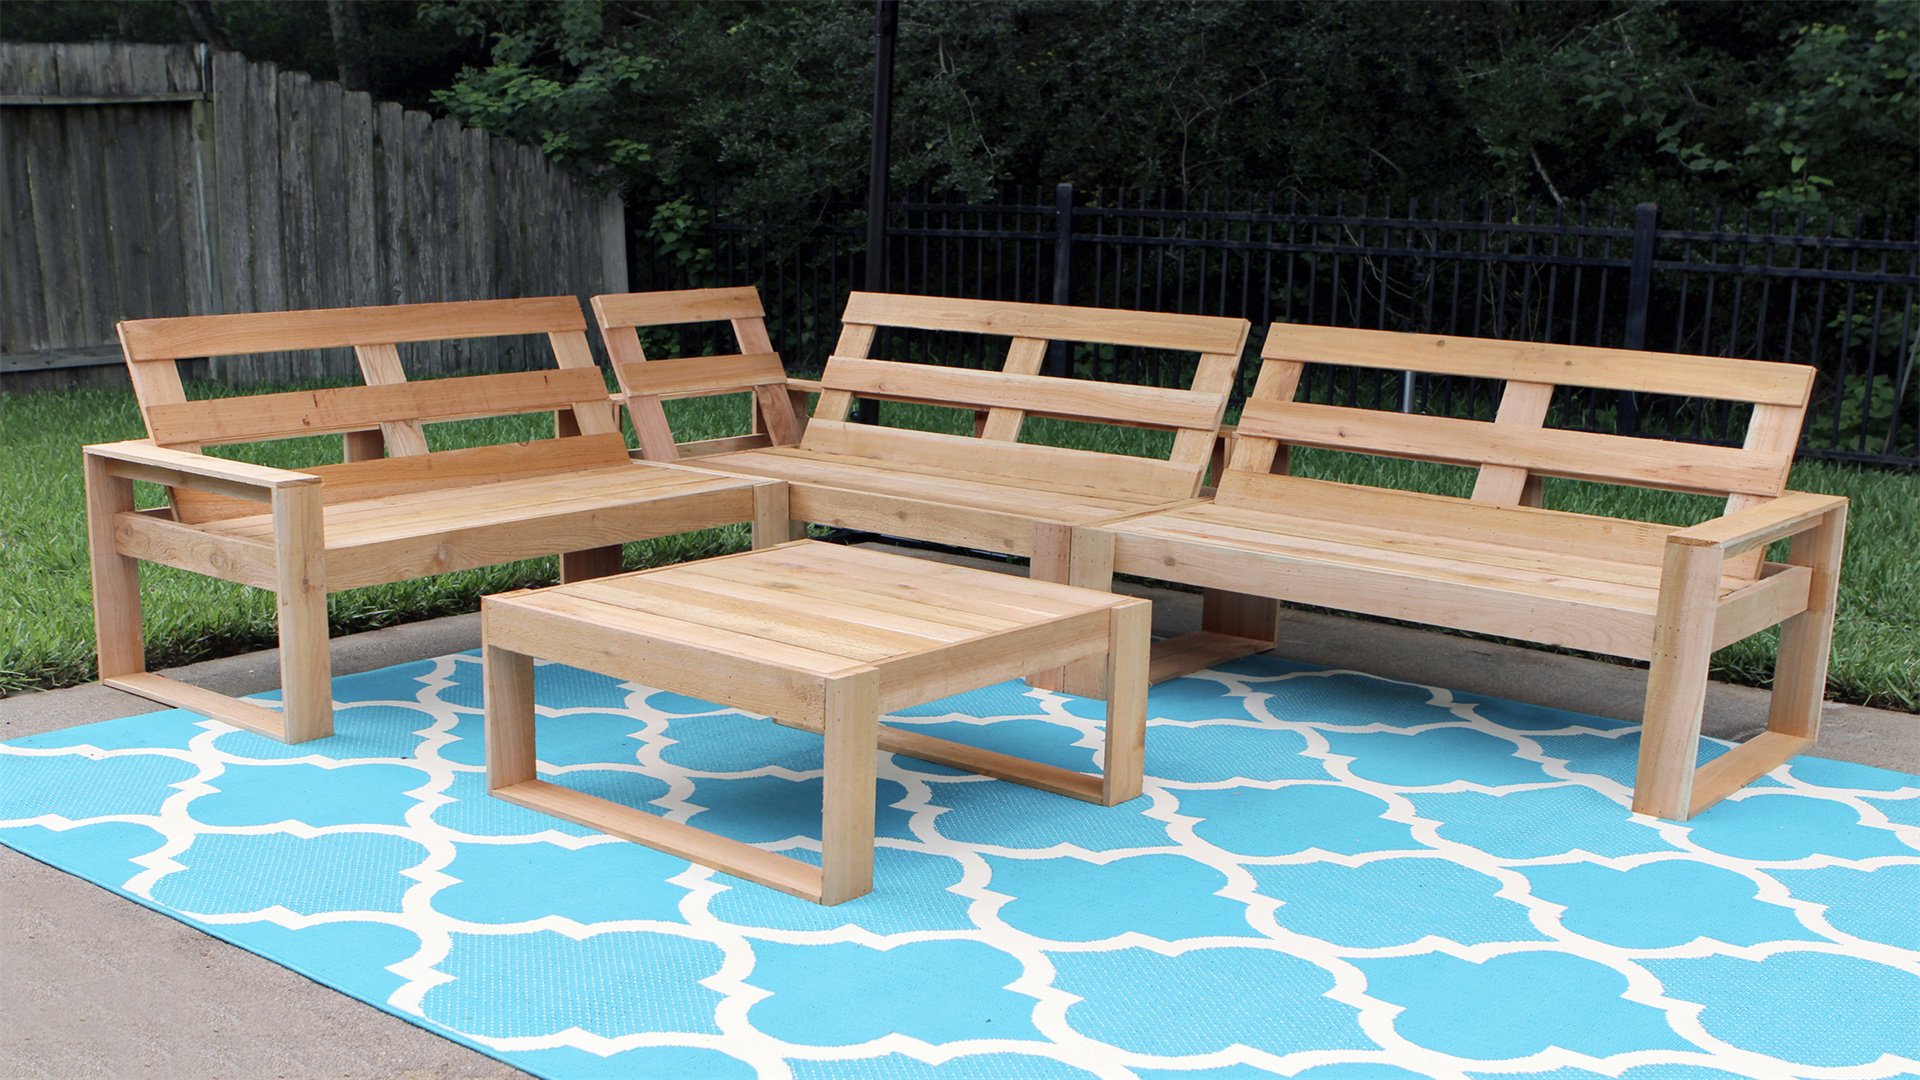
🛋️ Method One: Building a Patio Sofa with Reclaimed Wood
Advantages
- Durability: Reclaimed wood is often hardwood like oak or pine, which has natural resistance to decay.
- Rustic Charm: It adds a unique, weathered character to your outdoor space.
- Environmental Benefits: Using reclaimed wood reduces waste and promotes sustainability.
Disadvantages
- Requires Proper Treatment: It needs cleaning and application of preservatives to prevent rot and insect damage.
- May Be Heavier: Reclaimed wood can be denser and heavier than new wood.
- Availability: It might not be easily accessible in all areas.
Construction Steps
- Understand the properties of reclaimed wood. Reclaimed wood often comes from old barns, fences, or pallets, and may have unique weathering. Apply a wood preservative or sealant before construction to enhance longevity.
- Gather the necessary tools and materials. You'll need a saw, drill, screws, sandpaper, and measuring tape. Use stainless steel or galvanized screws to avoid rust, and opt for water-resistant cushions.
- Proceed with construction. Design the sofa frame based on desired dimensions. Cut wood pieces and assemble the frame using corner joints reinforced with screws. Reinforce joints with brackets or glue for stability.
- Once the frame is complete, attach the seat slats and backrest. Space slats evenly for drainage and airflow. Sand all surfaces smooth and apply a finish such as outdoor paint or stain. Stains provide UV protection, while paints offer a protective layer.
- Add cushions and accessories. Choose weather-resistant fabrics like Sunbrella or polyester, which are treated to repel water and block sunlight.
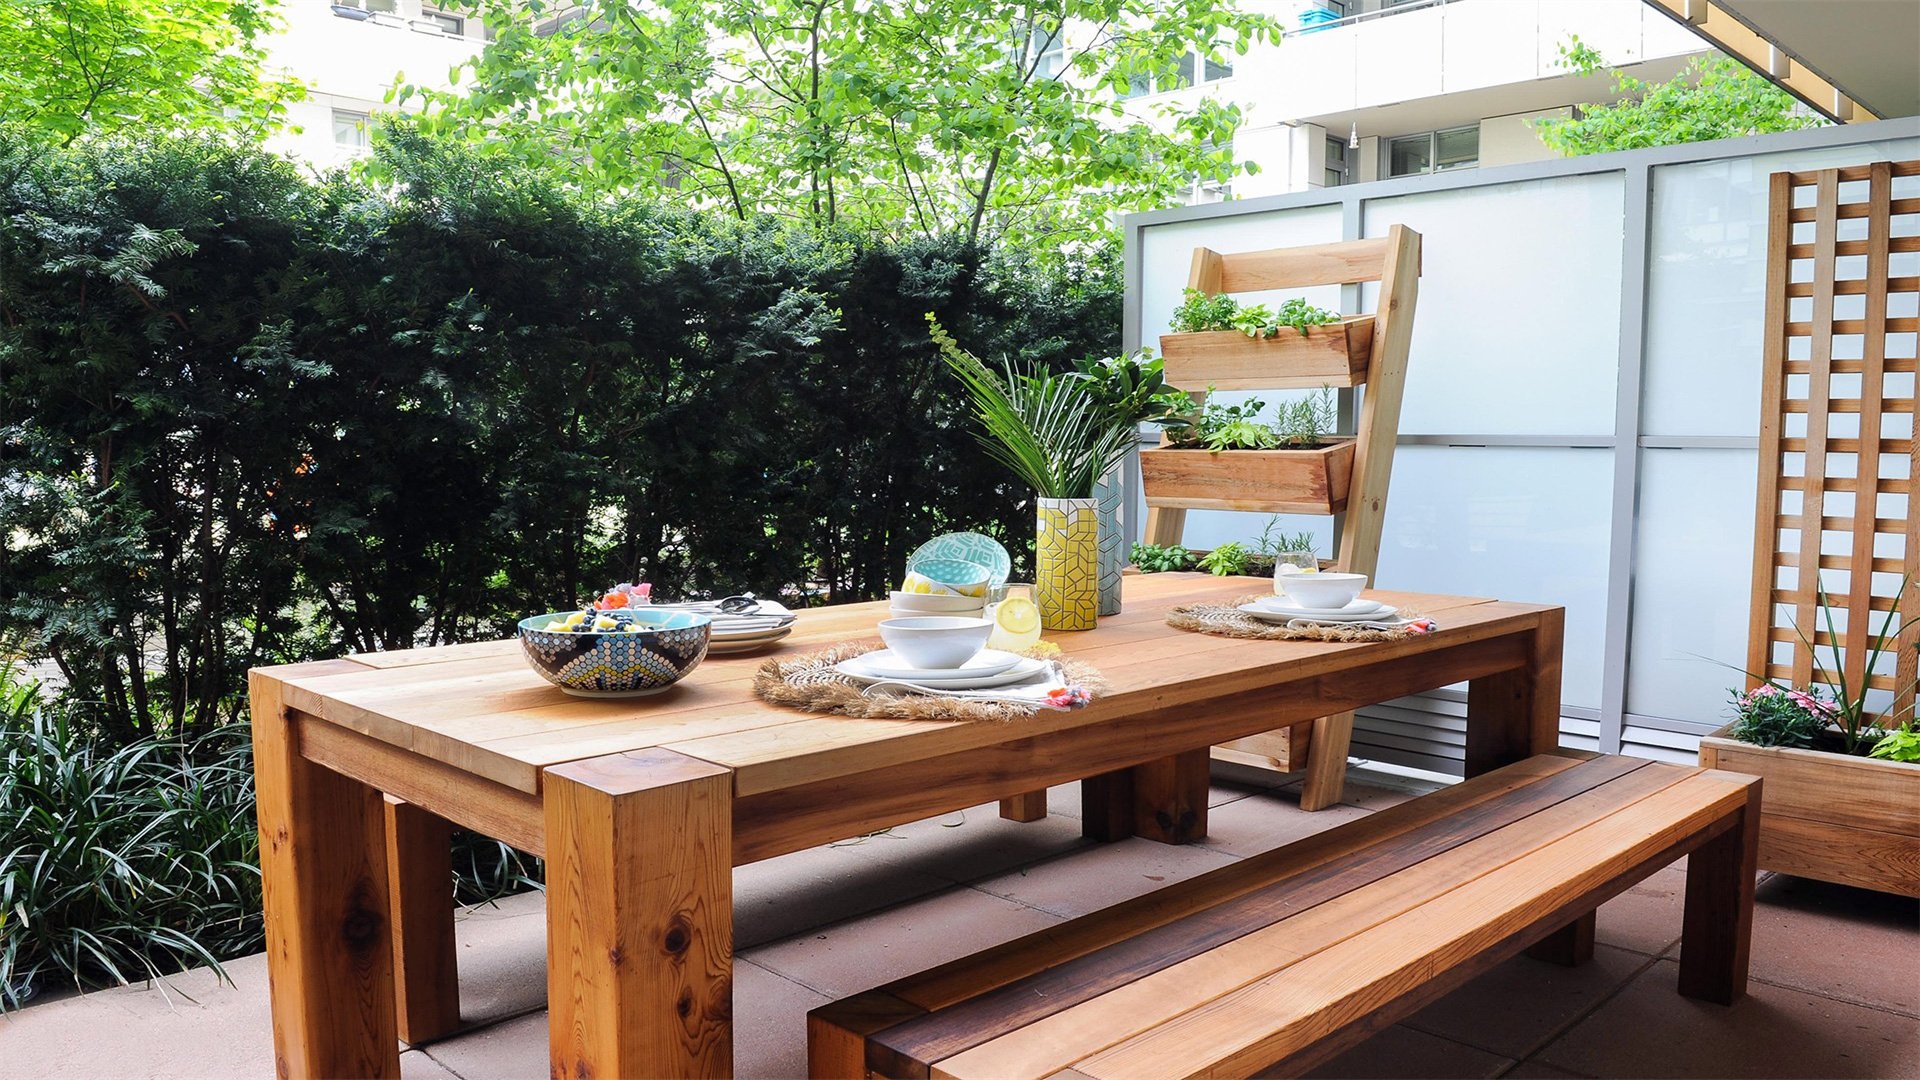
🍽️ Method Two: Constructing an Outdoor Dining Table from Cedar
Advantages
- Natural Resistance: Cedar contains oils that act as preservatives, making it resistant to rot and pests.
- Eco-Friendly: Reduced need for chemical treatments.
- Aesthetic Appeal: Pleasant aroma and attractive grain.
Disadvantages
- Softer Wood: Cedar is softwood, so it may be prone to dents and scratches.
- Cost: Can be more expensive than some other woods.
- Maintenance: Requires regular finishing to maintain appearance.
Construction Steps
- Explore why cedar is ideal for outdoor use. Cedar has natural oils that resist decay and insects, making it eco-friendly.
- Plan the table design. Decide on size and sketch the design, including tabletop, legs, and aprons. Consider a trestle design for stability.
- Gather materials and tools. Use cedar boards, sharp tools to avoid tear-out, and pre-drill holes to prevent splitting. Select kiln-dried cedar to minimize warping.
- Construct the tabletop by joining cedar boards edge-to-edge. Use biscuits or pocket holes for strong joints. Ensure flatness and sand smooth.
- Build the base by assembling legs and aprons. Use mortise-and-tenon or lap joints for durability, or reinforced butt joints for beginners. Attach base to tabletop using tabletop fasteners.
- Apply a finish to protect the cedar. Use clear sealant or cedar-toned stain for UV protection and color enhancement.
- Complete the table by adding accessories like a centerpiece or umbrella hole. Drill umbrella hole with a slight angle for water runoff.
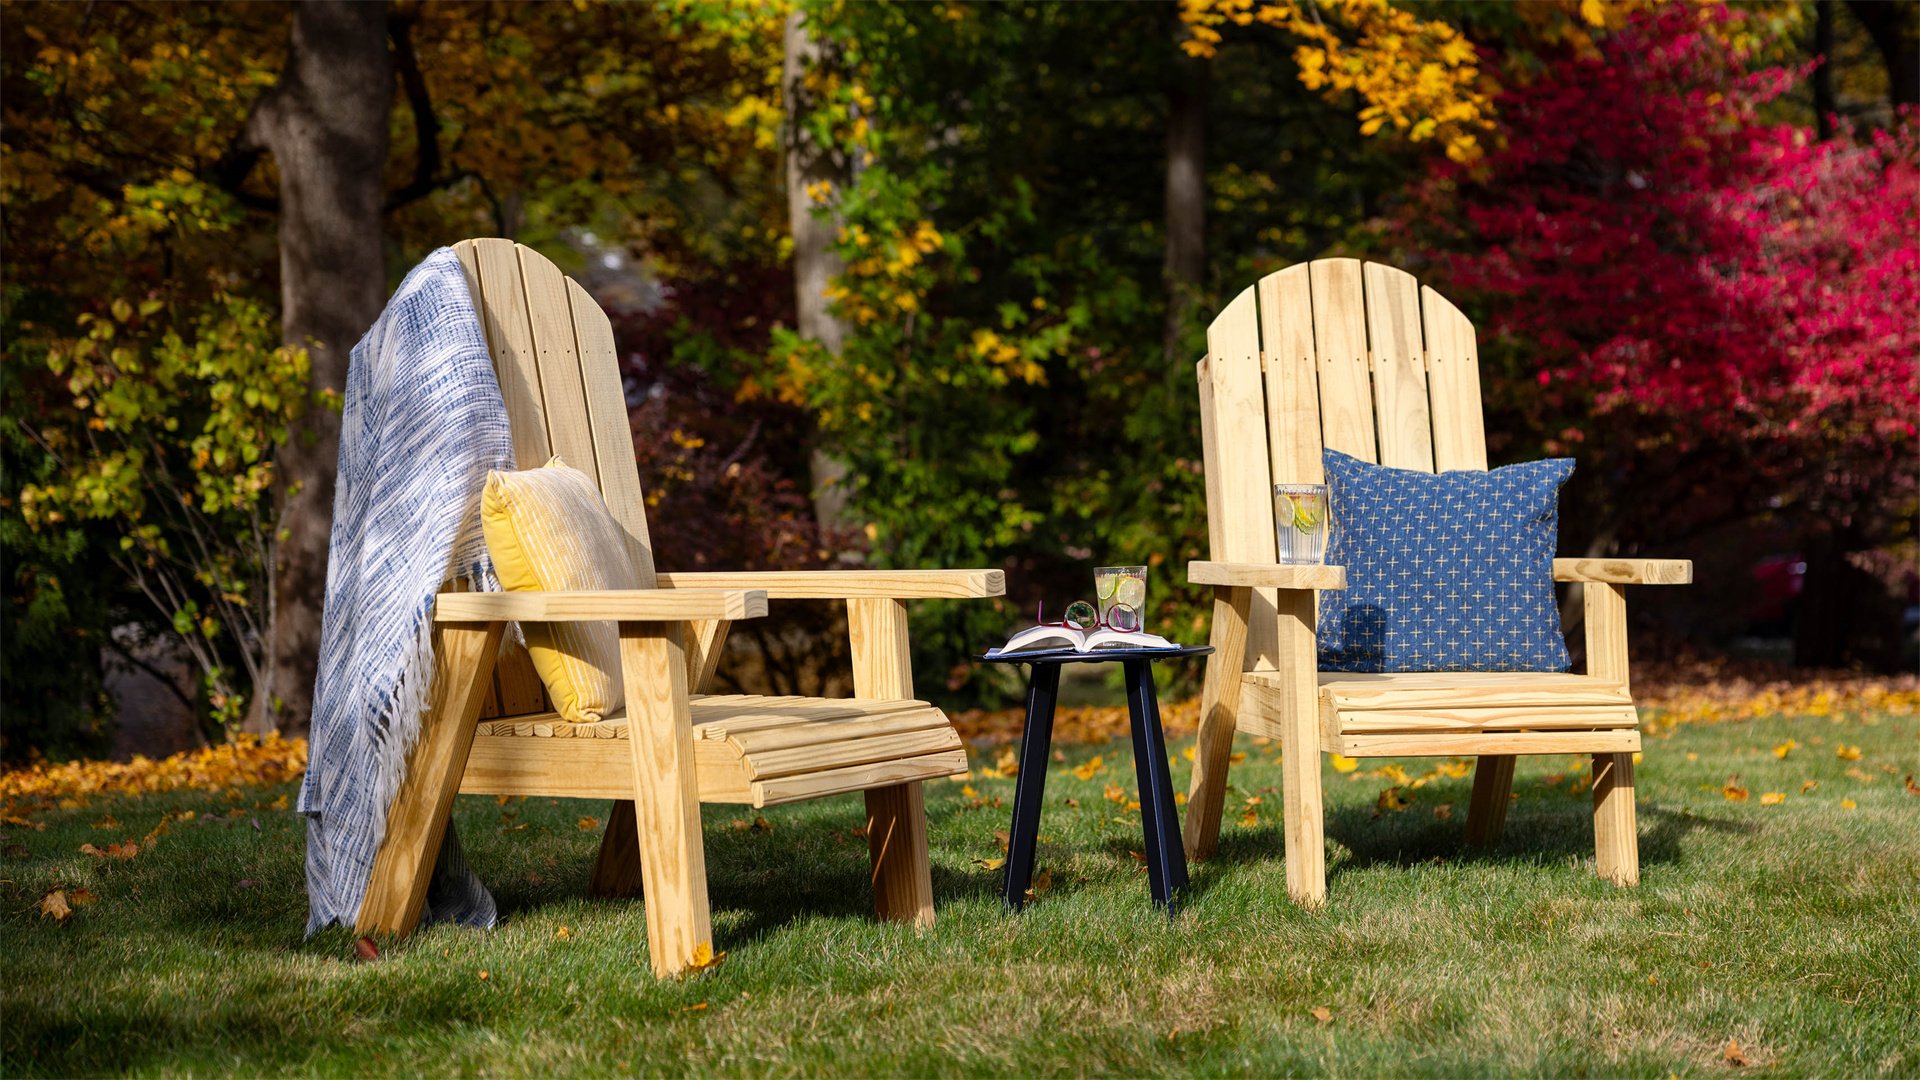
🪑 Method Three: Creating Adirondack Chairs with Composite Lumber
Advantages
- Low Maintenance: Resistant to rot, insects, and fading; doesn't require painting or staining.
- Durability: Made from wood fibers and recycled plastics, withstands outdoor conditions.
- Uniformity: Easy to cut and shape, with no grain.
Disadvantages
- Heavier: Can be heavier than traditional wood.
- Cost: More expensive than some woods.
- Dust Production: Cutting can produce dust, requiring safety measures.
Construction Steps
- Learn about composite lumber. It's a blend of wood fibers and recycled plastics, resistant to rot and fading.
- Design the Adirondack chair. Traditional designs with wide armrests and slanted back. Adjust dimensions for comfort; back angle of 15-20 degrees for optimal relaxation.
- Gather tools and materials. Use composite boards, circular saw, drill, screws, and sander. Wear a mask for dust and use corrosion-resistant screws.
- Cut the pieces according to design. Composite lumber is uniform, so measuring and cutting are straightforward. Sand edges with fine-grit sandpaper.
- Assemble the chair starting with seat and back frames. Pre-drill holes to avoid splitting. Use waterproof glue for added strength.
- Attach the arms and legs, ensuring stability. Check for wobbling and adjust as needed. Use brackets or supports if unsteady.
- Finish the chair with a composite-friendly cleaner. Composite materials don't need sealing, but periodic cleaning maintains appearance.
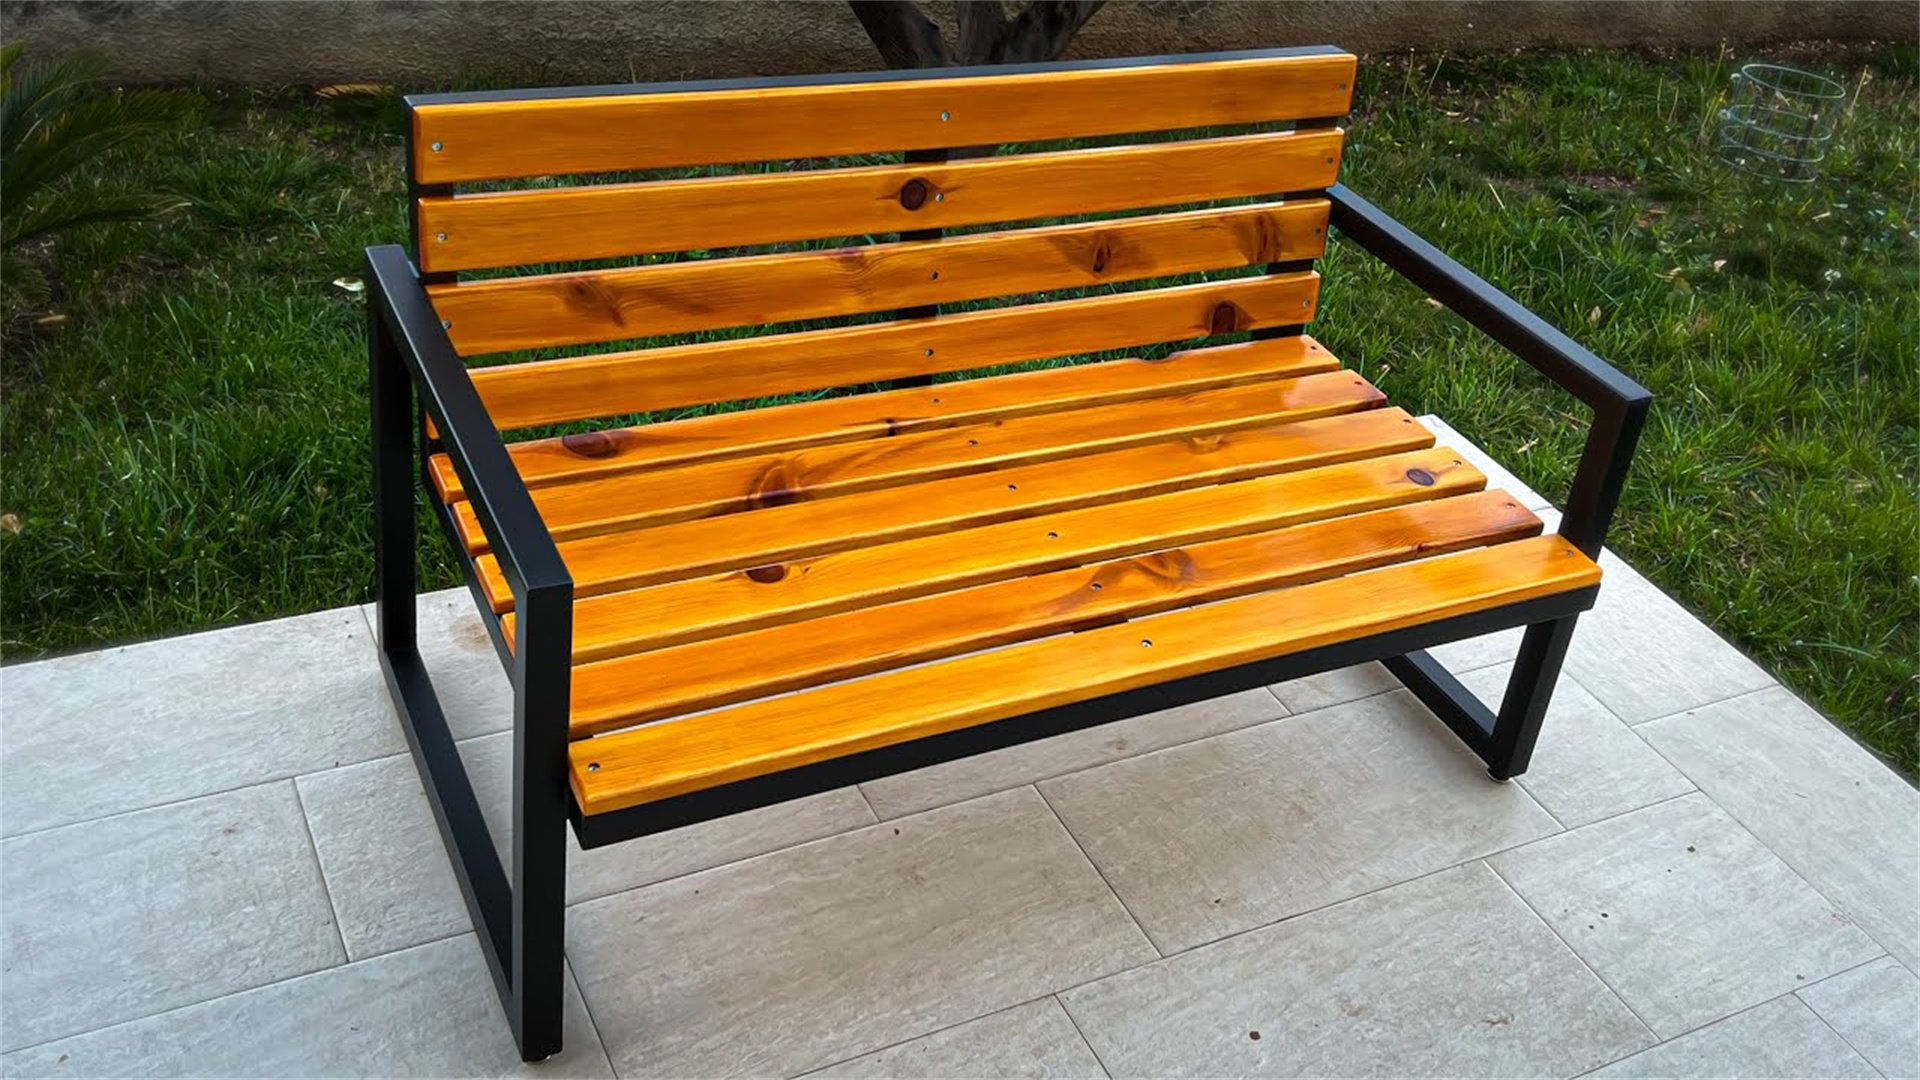
🌿 Method Four: Building a Garden Bench with Steel and Wood Combos
Advantages
- Strength and Stability: Steel provides structural integrity, wood adds warmth and comfort.
- Aesthetic Appeal: Industrial yet rustic touch.
- Customizability: Can be shaped into sleek designs.
Disadvantages
- Rust Prone: Steel must be treated properly to prevent rust.
- Weight: Steel frame can be heavy.
- Skill Required: Welding may need practice or professional help.
Construction Steps
- Understand the benefits of steel and wood combos. Steel offers strength, wood adds comfort. Use mild steel or aluminum for easier welding, and pair with weather-resistant wood.
- Design the bench. Include steel frame with wooden seat slats. Plan dimensions and add cross-braces for stability. Include drainage holes in steel.
- Gather materials and tools. Use steel tubing, wood boards, welder, angle grinder, drill, and protective gear. For beginners, consider pre-cut steel or bolted connections.
- Construct the steel frame. Cut steel tubing and weld pieces together. Practice welding on scrap first. After welding, grind seams and apply rust-inhibiting primer and paint.
- Attach wooden slats to the frame. Pre-drill holes and use stainless steel screws. Leave gaps of about 1/4 inch for drainage and airflow.
- Finish the bench with protective coatings. For steel, use outdoor-rated paint or powder coating. For wood, apply water-repellent finish.
📦 Method Five: Crafting a Storage Box with Weather-Resistant Plywood

Advantages
- Weather Resistance: Exterior-grade plywood bonded with waterproof glue, withstands moisture.
- Durability: Marine plywood has fewer voids and higher durability for humid environments.
- Practicality: Great for storing cushions, tools, or gardening supplies.
Disadvantages
- Still Needs Sealing: Edges and surfaces require sealing to prevent delamination.
- Weight: Can be heavy, especially when loaded.
- Cost: Higher-grade plywood can be expensive.
Construction Steps
- Learn about weather-resistant plywood. It's labeled as exterior-grade, with waterproof glue. Marine plywood is better for high-humidity areas.
- Design the storage box. Determine size based on storage needs. Include hinged lid with supports and consider casters for mobility. Add ventilation holes to reduce condensation.
- Gather materials and tools. Use plywood sheets, saw, drill, hinges, screws, and sealant. Use stainless steel hinges and hardware.
- Cut the plywood into panels for sides, bottom, and lid. Assemble using butt joints reinforced with screws and waterproof glue. Pre-drill holes to avoid splitting.
- Attach the lid with hinges and add a latch for security. Install casters if desired, using locking mechanisms for heavy boxes.
- Seal the box inside and out. Apply waterproof sealant or paint, paying attention to edges. Allow proper drying time between coats.
🎉 Conclusion: Embracing DIY for Outdoor Living
DIY outdoor furniture projects offer endless possibilities for creating functional and stylish pieces that enhance your outdoor living experience. Throughout this article, we've explored various methods, from building patio sofas with reclaimed wood to crafting storage boxes with plywood, each enriched to deepen your understanding. By following these guidelines, you can tackle projects with confidence, using materials and techniques that ensure durability and appeal.
The key to successful DIY outdoor furniture lies in careful planning, proper material selection, and attention to detail. Whether you're aiming for a rustic look with wood or a modern vibe with composites, the skills you develop will empower you to customize your space. Remember to prioritize safety, weatherproofing, and maintenance to extend the life of your creations.
As you embark on your DIY journey, start with simpler projects and gradually take on more complex ones. Share your achievements with friends and family, and enjoy the satisfaction of using furniture you built yourself. With the knowledge from this article, you're well-equipped to build outdoor pieces that are not only functional and stylish but also a reflection of your personal touch. Happy building!