DIY Guide to Replacing Broken Switches and Outlets Safely
⚡ Introduction to Electrical Safety and Why It Matters
Key Points on Electrical Safety
Replacing broken switches and outlets is a common home improvement task that can enhance safety, functionality, and aesthetics. However, working with electrical systems requires caution and knowledge to prevent hazards like electric shocks, fires, or damage to your home's wiring. This comprehensive guide provides step-by-step instructions, safety protocols, and detailed explanations to help you tackle this project confidently. Drawing from reputable DIY resources and electrical standards, we'll cover everything from tools and preparation to installation and testing. Whether you're a beginner or an experienced DIYer, this guide ensures you approach the task with clarity and safety in mind.
Electrical work, even simple tasks like replacing switches and outlets, involves risks that should never be underestimated. According to the U.S. Consumer Product Safety Commission, electrical failures account for thousands of home fires annually. By following safe practices, you can mitigate these risks. This guide emphasizes safety first, with procedures aligned with the National Electrical Code (NEC) and common DIY guidelines from sites like Home Depot, This Old House, and Family Handyman. We'll start by explaining the basics of home electrical systems, including circuits, voltage, and grounding, to give you a solid foundation before diving into the hands-on work.
🛠️ Tools and Materials You'll Need
Essential Tools and Materials List
Having the right tools and materials is crucial for a successful and safe replacement. Below is a detailed list, along with explanations of each item's purpose. Ensure all tools are in good condition and rated for electrical work.
- Voltage Tester or Non-Contact Voltage Detector: This device helps verify that power is off before you start working. It's essential for preventing electric shocks. Models like Klein Tools or Fluke are reliable.
- Screwdrivers: Both flat-head and Phillips-head screwdrivers, preferably insulated with rubber handles. You'll need them for removing faceplates, terminals, and mounting screws.
- Wire Strippers: Used to strip insulation from wires without damaging conductors. Look for strippers with gauge markings for common wire sizes (e.g., 14-gauge or 12-gauge).
- Needle-Nose Pliers: Helpful for bending wires, gripping small parts, and tightening connections. Ensure they have insulated grips.
- Circuit Breaker Finder or Labeling Tools: If your electrical panel isn't labeled, a circuit breaker finder can identify the correct breaker to turn off. This saves time and enhances safety.
- Replacement Switches and Outlets: Purchase devices that match your existing ones. Common types include single-pole switches, three-way switches, and duplex outlets. Consider upgrading to tamper-resistant or GFCI outlets for added safety.
- Wire Nuts (Connectors): Used to secure wire connections. Have various sizes on hand, and ensure they are UL-listed.
- Electrical Tape: For insulating wire connections, though wire nuts are often sufficient. Use high-quality tape rated for electrical use.
- Flashlight or Headlamp: Working in electrical boxes can be dark, so good lighting is key.
- Safety Gear: Includes safety glasses to protect eyes from debris, and insulated gloves for an extra layer of protection.
- Optional Tools: A multimeter for advanced testing, a fish tape for pulling wires, and a stud finder if you're installing new boxes.
Before purchasing, check local codes—some areas require specific types of devices, such as AFCI outlets in bedrooms. Always buy from reputable hardware stores and avoid counterfeit products.
✅ Safety Precautions: The Non-Negotiable Steps
Critical Safety Measures
Safety should be your top priority. Rushing or skipping steps can lead to dangerous outcomes. Follow these precautions meticulously.
- Turn Off the Power
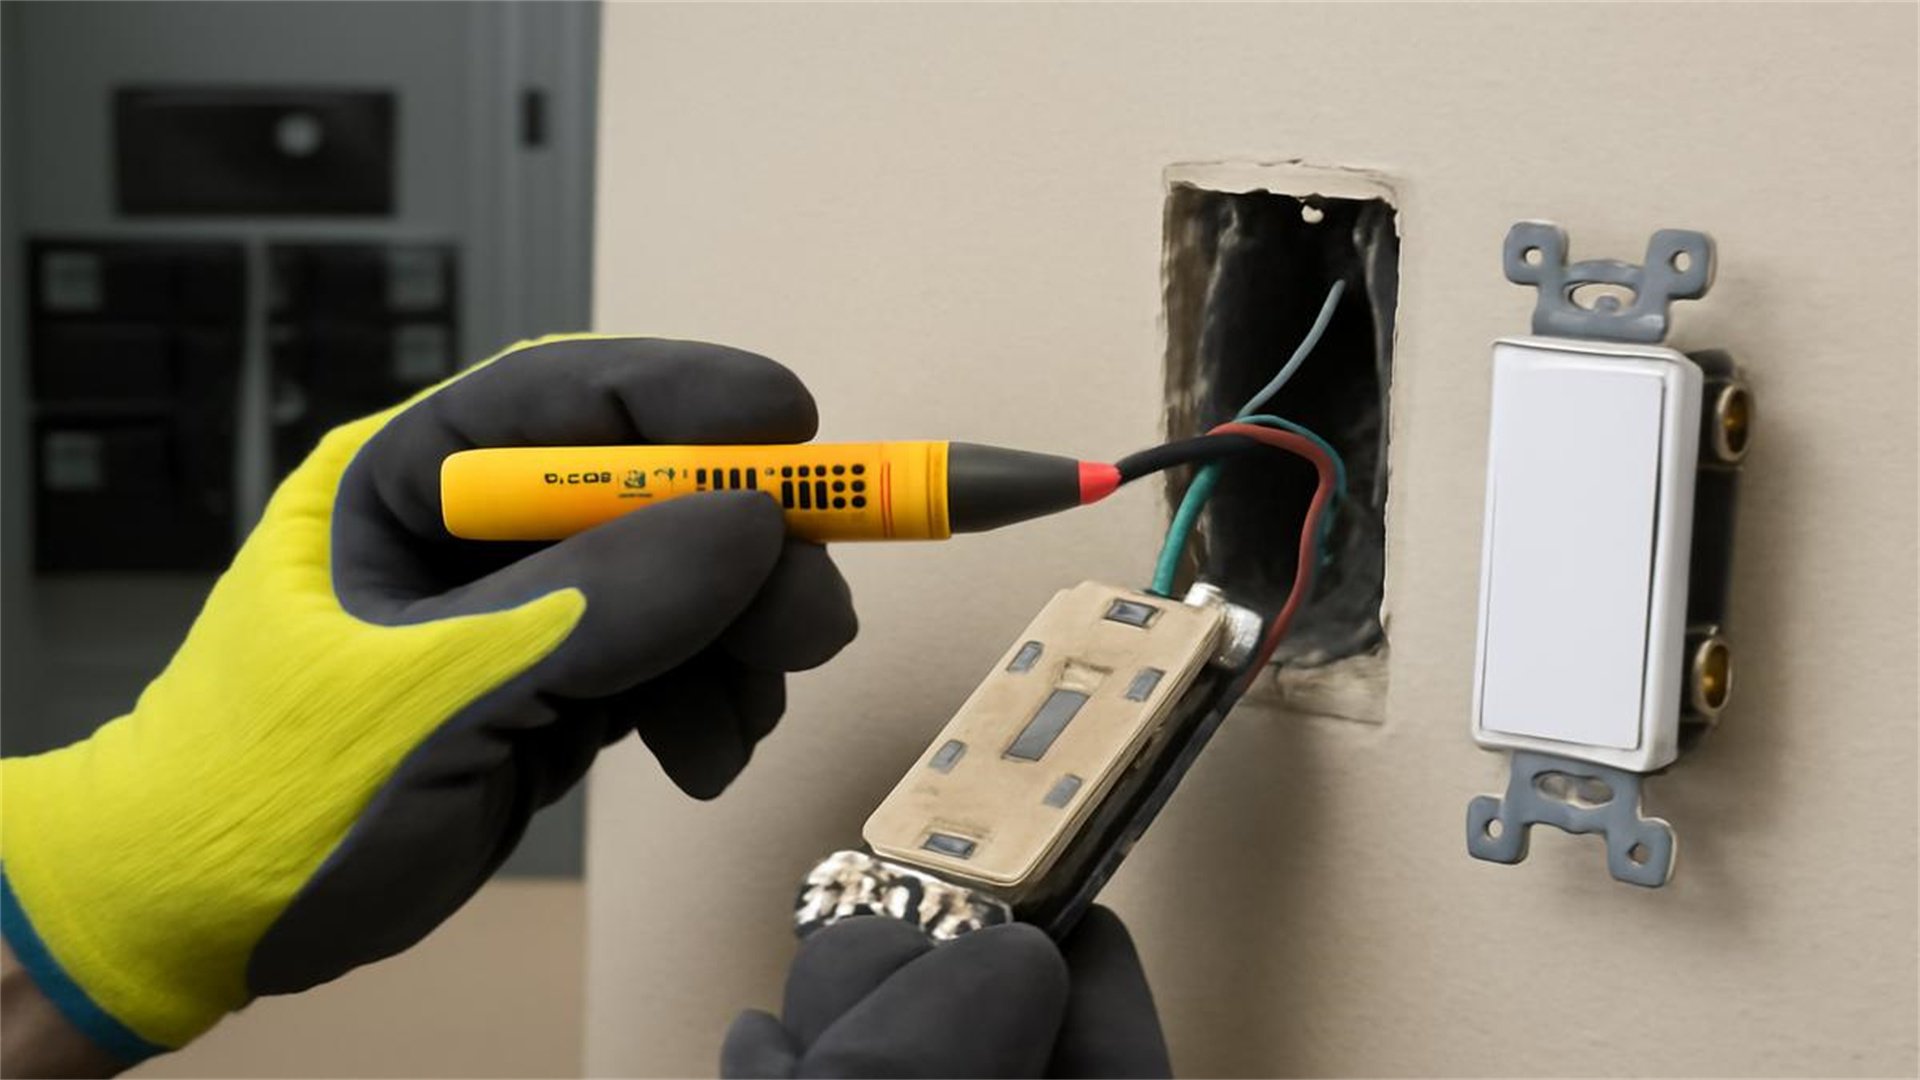
Locate your home's electrical panel (breaker box). Identify the circuit breaker that controls the switch or outlet you're replacing. If breakers aren't labeled, use a circuit breaker finder: plug the transmitter into the outlet, and scan the panel with the receiver to pinpoint the breaker. Turn the breaker to the "off" position. For added safety, switch off the main breaker if you're unsure, but this will cut power to the entire house, so plan accordingly. - Test for Power
Even with the breaker off, always test for live wires. Use a non-contact voltage tester: hold it near the switch or outlet after removing the faceplate. If it beeps or lights up, power is still present—recheck the breaker or call an electrician. For outlets, insert a plug-in tester into the slots to confirm no voltage. Double-check by testing between wires in the box. - Work in a Dry Environment
Ensure your hands and the work area are dry. Water conducts electricity, increasing shock risk. Avoid working in damp basements or near sinks without extra precautions. - Use Insulated Tools and Gear
Insulated tools reduce conductivity. Wear safety glasses to shield against sparks or wire fragments. If possible, stand on a rubber mat or dry wood to insulate yourself from ground. - Never Assume Wires Are Safe
Treat all wires as live until proven otherwise. Avoid touching bare wires with your hands, even after testing—use tools to handle them.
These steps may seem tedious, but they form the backbone of safe DIY electrical work. Document your process and keep a phone nearby for emergencies.
🔌 Understanding Switch and Outlet Types

Types of Switches
- Single-Pole Switch: The most common type, controlling a light or fixture from one location. It has two terminals (usually brass-colored) and a ground screw.
- Three-Way Switch: Used in pairs to control a light from two locations, like at the top and bottom of stairs. It has three terminals: one common (usually darker) and two travelers.
- Four-Way Switch: Used with three-way switches to control lights from three or more locations. It has four terminals.
- Dimmer Switch: Allows adjustable light levels. Ensure compatibility with your bulbs (e.g., LED or incandescent).
Types of Outlets
- Duplex Outlet: Standard outlet with two receptacles. Can be ungrounded (two-prong) or grounded (three-prong). Modern homes use grounded outlets.
- GFCI Outlet (Ground Fault Circuit Interrupter): Required in wet areas like bathrooms and kitchens. It has "Test" and "Reset" buttons to protect against shocks.
- AFCI Outlet (Arc Fault Circuit Interrupter): Designed to prevent fires by detecting arcing faults. Often used in bedrooms and living areas.
- USB Outlet: Includes USB ports for charging devices. A convenient upgrade.
Examine your existing device: note the number of wires, colors, and how they're connected. Take photos for reference before disconnecting anything. If you see aluminum wiring, consult an electrician, as it requires special handling.
🔧 Step-by-Step Guide to Replacing a Broken Switch
Step-by-Step Procedure
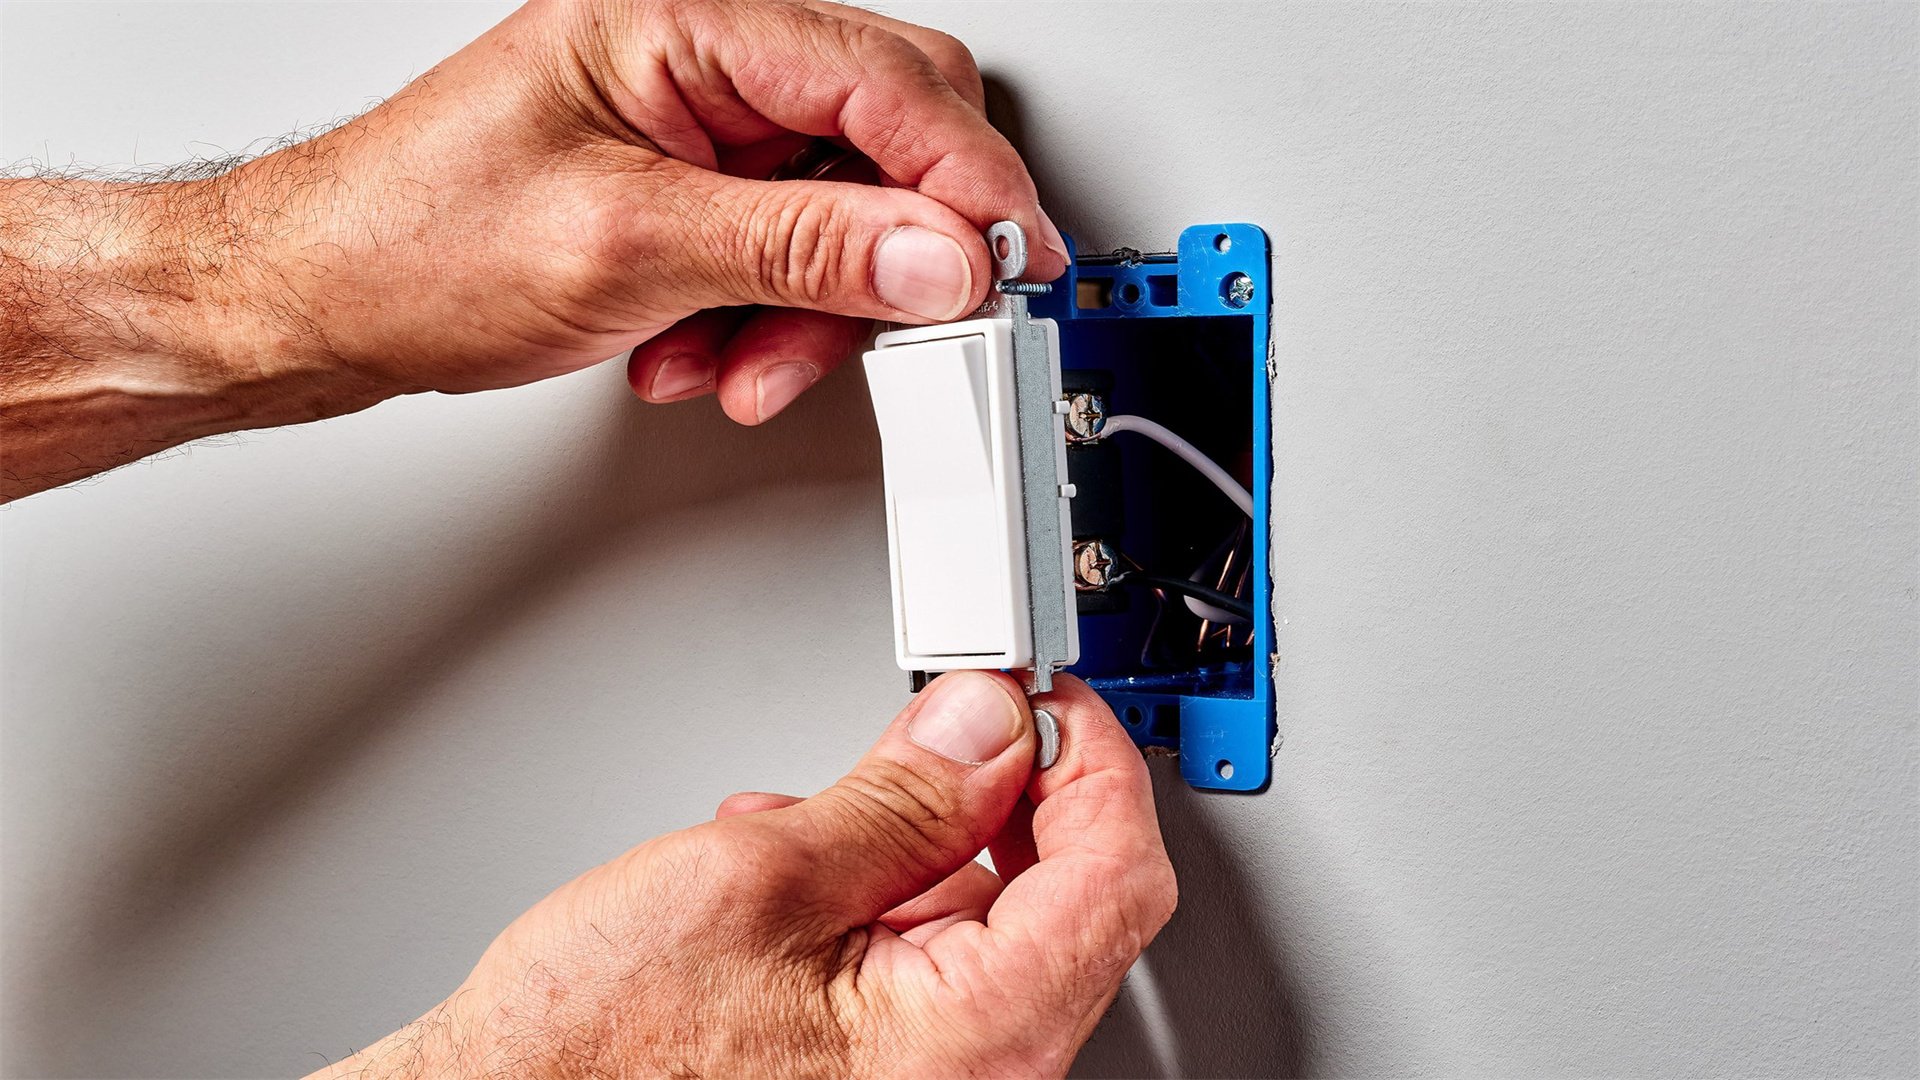
- Preparation and Power Off
Gather tools and materials. Turn off the power at the breaker and test with a voltage tester. Confirm the switch is dead by flipping it on and off—the connected light should not work. - Remove the Faceplate and Switch
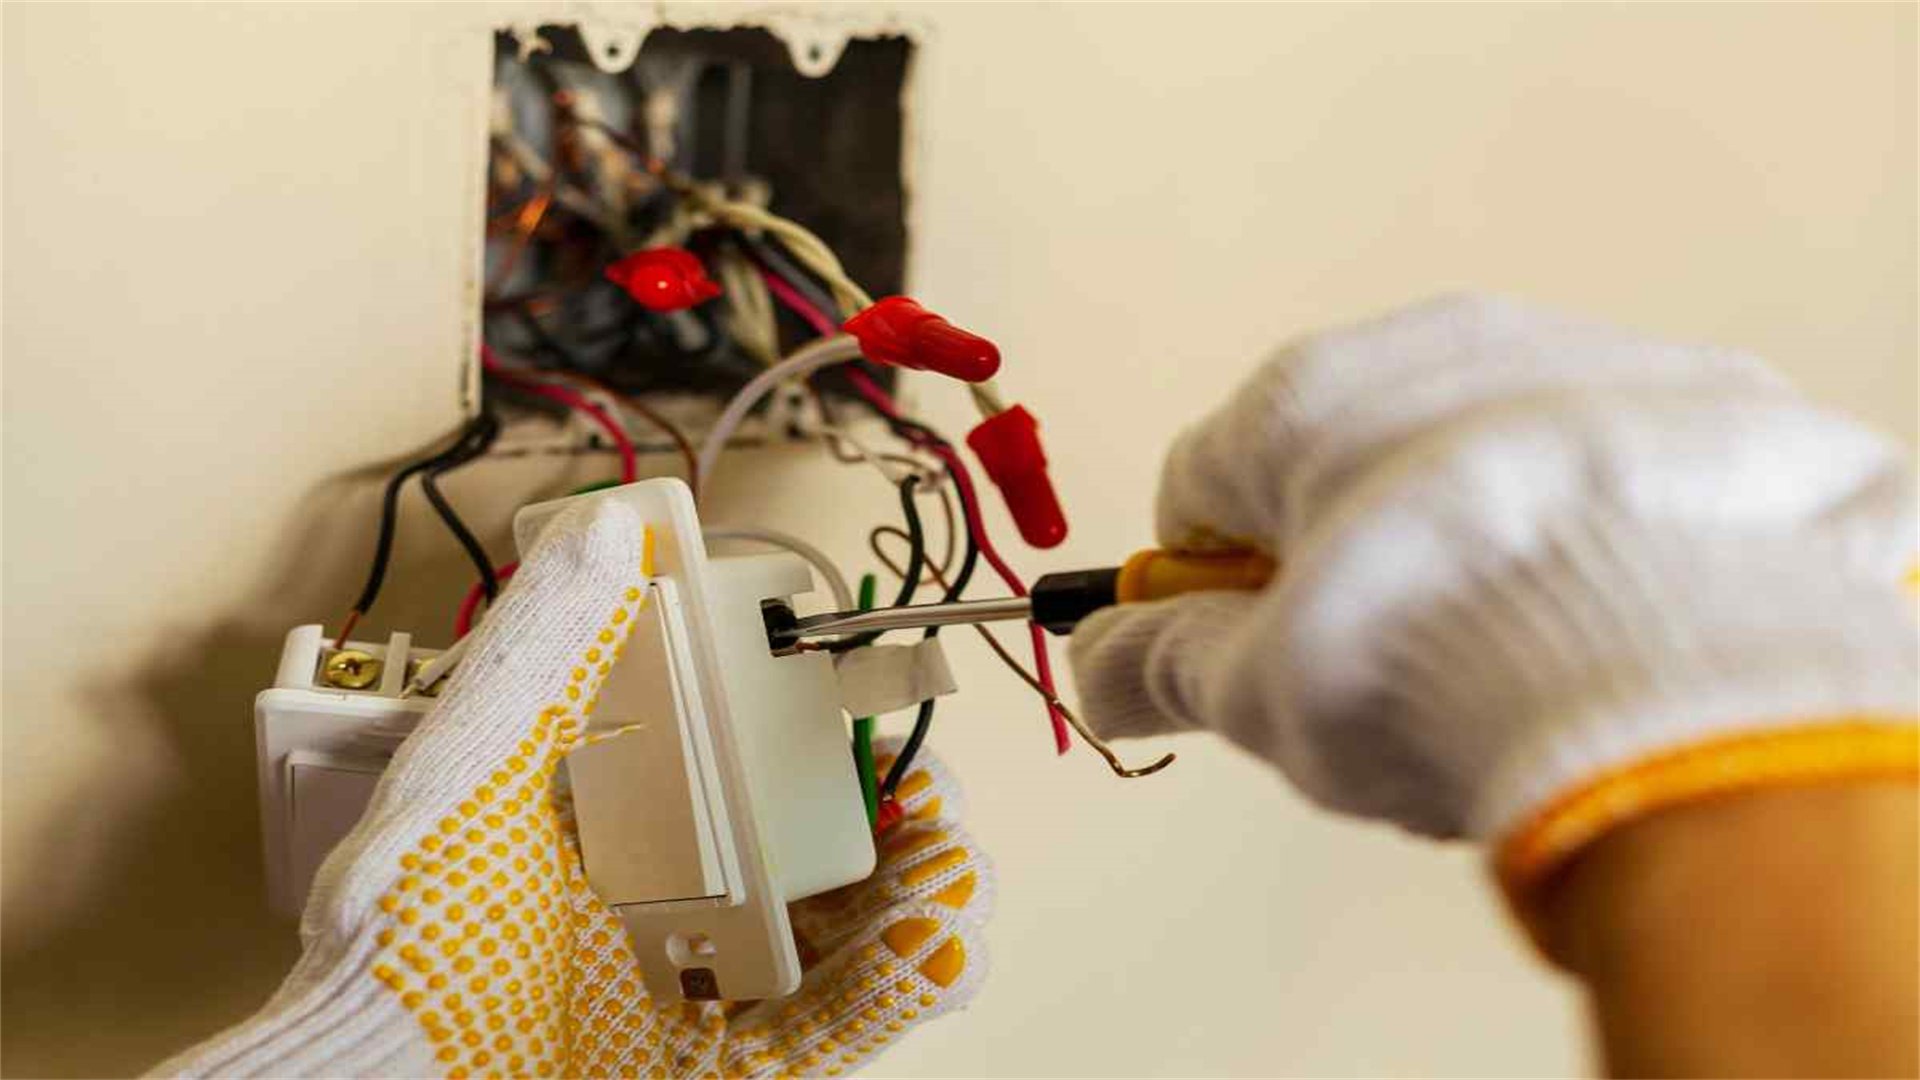
Use a screwdriver to remove the faceplate screw, then the plate. Next, unscrew the mounting screws that hold the switch to the electrical box. Gently pull the switch out, exposing the wires. Be careful not to tug on wires; they may be stiff or fragile. - Disconnect the Wires
Observe the wiring: typically, a black (hot) wire connects to a brass terminal, a white (neutral) wire may be capped off or connected, and a bare or green (ground) wire attaches to the ground screw. Use a screwdriver to loosen the terminal screws and free the wires. If wires are back-stabbed (inserted into holes), press the release slot or cut and strip them. Note: In some setups, white wires may be used as hot wires—mark them with black tape to indicate this. - Prepare the New Switch
If the new switch has different terminals, refer to its instructions. For a single-pole switch, connect the black hot wire to the brass terminal, and the ground wire to the green screw. If there's a white neutral wire, cap it off with a wire nut unless the switch requires it (e.g., for smart switches). Bend the wires into hooks using pliers for secure connections. - Connect the Wires
Attach the wires to the appropriate terminals: wrap hooked wires clockwise around screws and tighten firmly. Avoid over-tightening, which can strip screws. For push-in terminals, insert straight, stripped wires until they click. Secure the ground wire first for safety. - Mount the Switch and Test
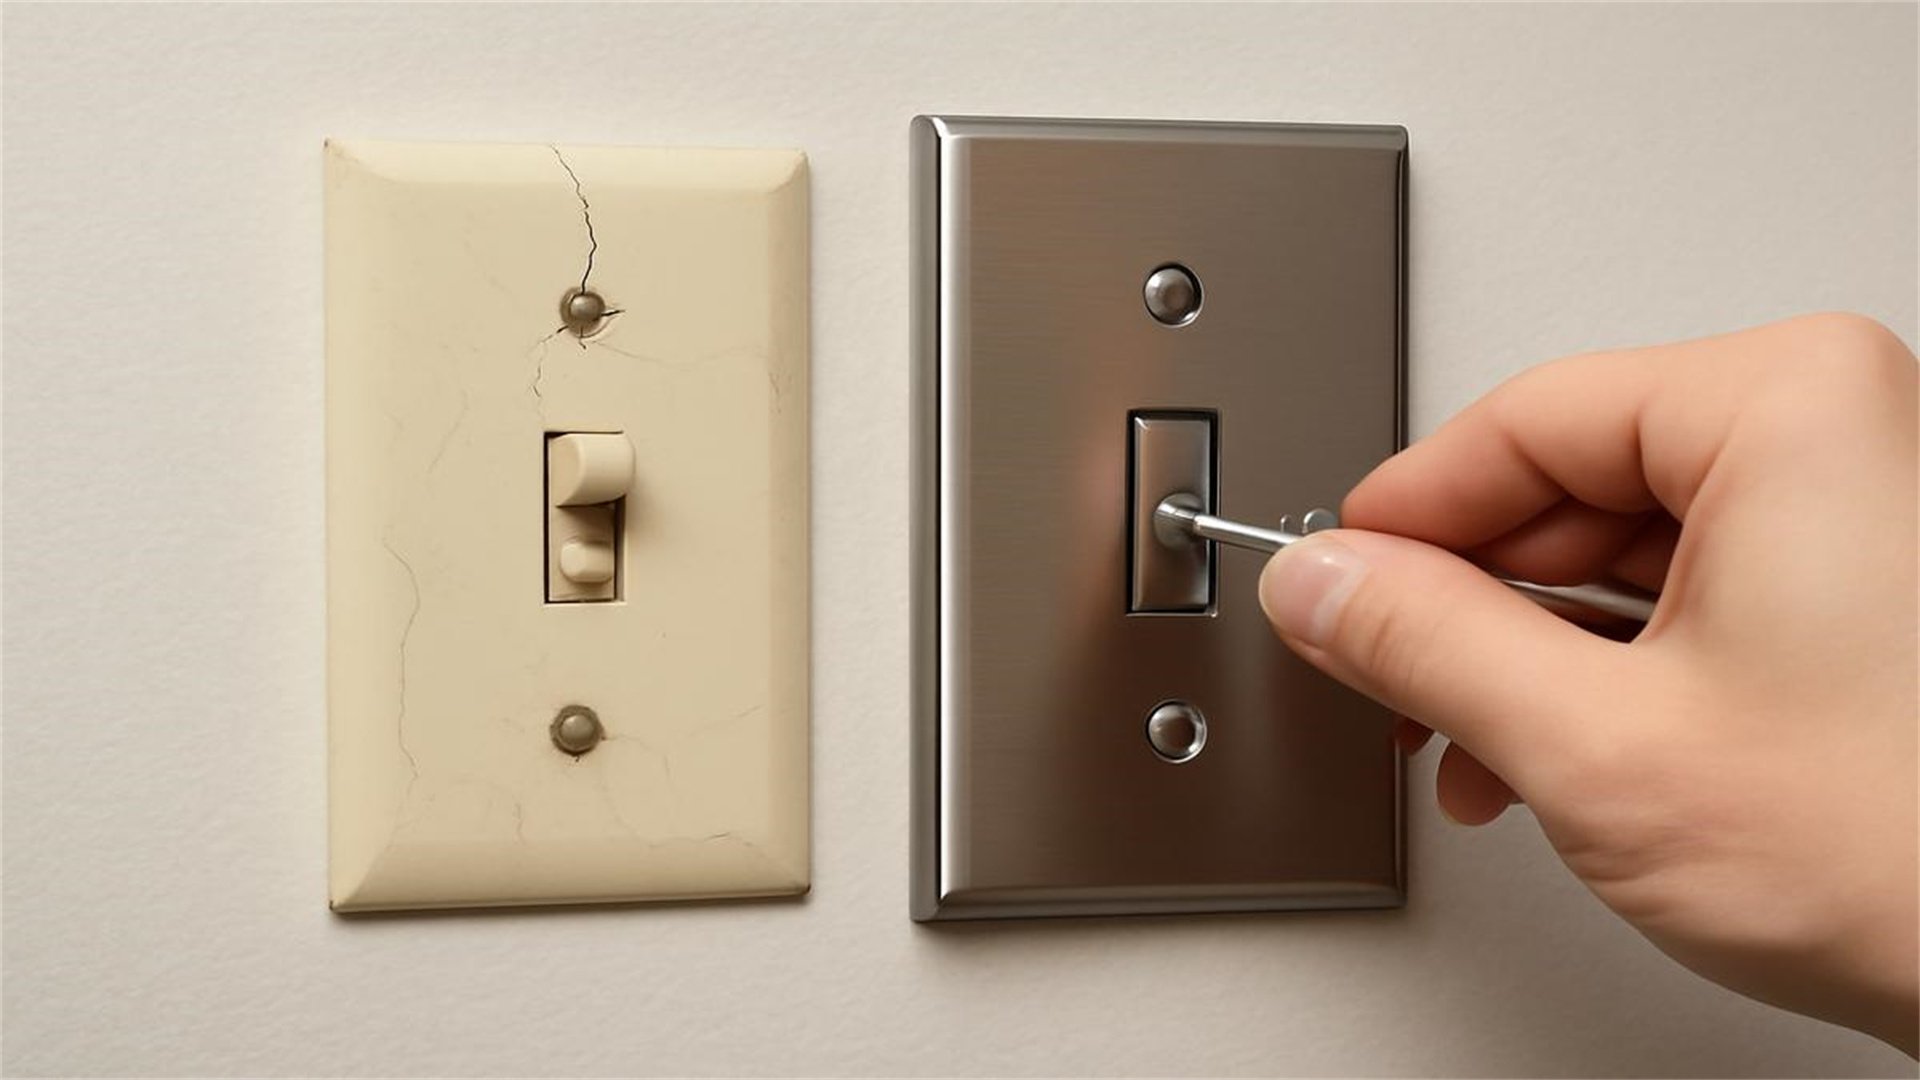
Carefully tuck the wires back into the box, ensuring no bare wire is exposed. Align the switch vertically (usually "on" position up) and secure it with mounting screws. Attach the faceplate. Turn the power back on at the breaker and test the switch by operating it. If the light works correctly, you're done. If not, turn power off and recheck connections.
For three-way switches, label the wires (common, travelers) before disconnecting. The process is similar, but wiring varies—consult a diagram or use a multimeter to identify wires.
🔌 Step-by-Step Guide to Replacing a Broken Outlet
Step-by-Step Procedure
- Safety and Power Down
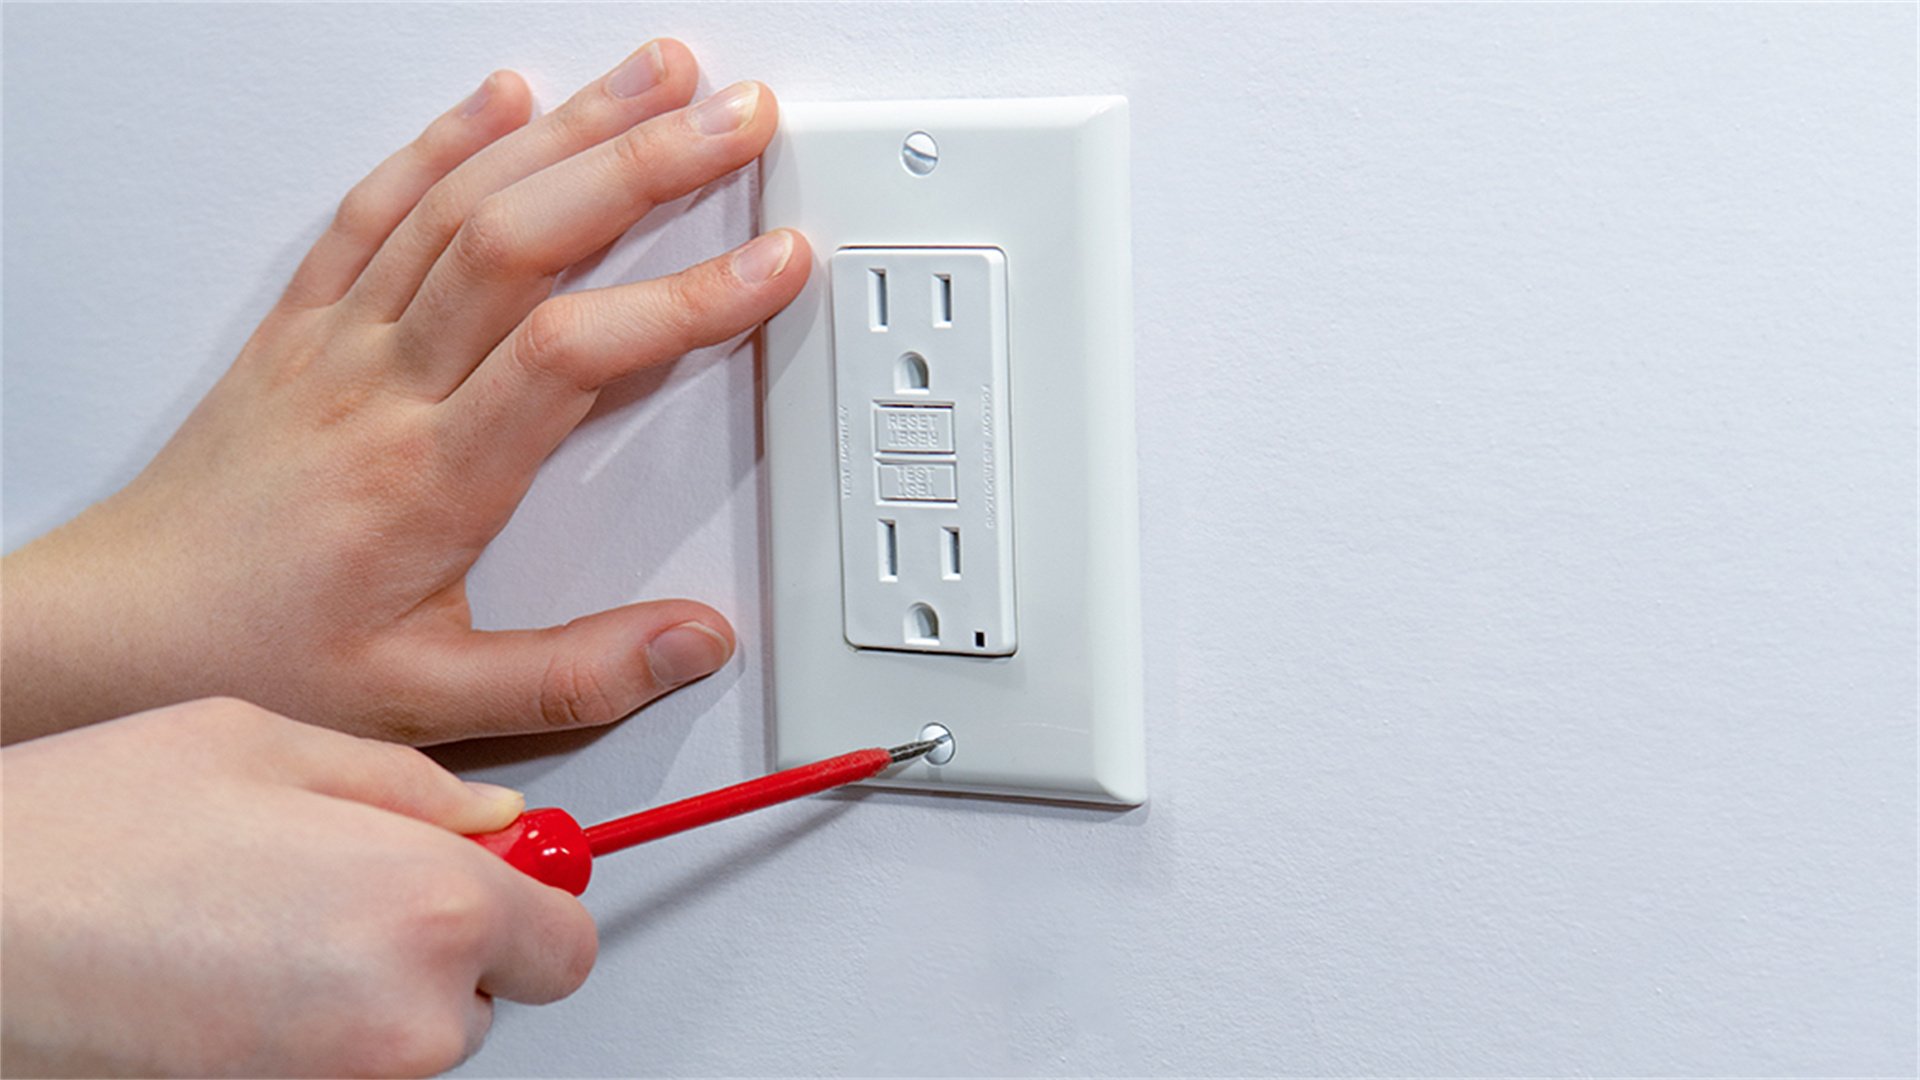
As with switches, turn off the breaker and test the outlet with a voltage tester. Use a plug-in tester to confirm no power. - Remove the Faceplate and Outlet
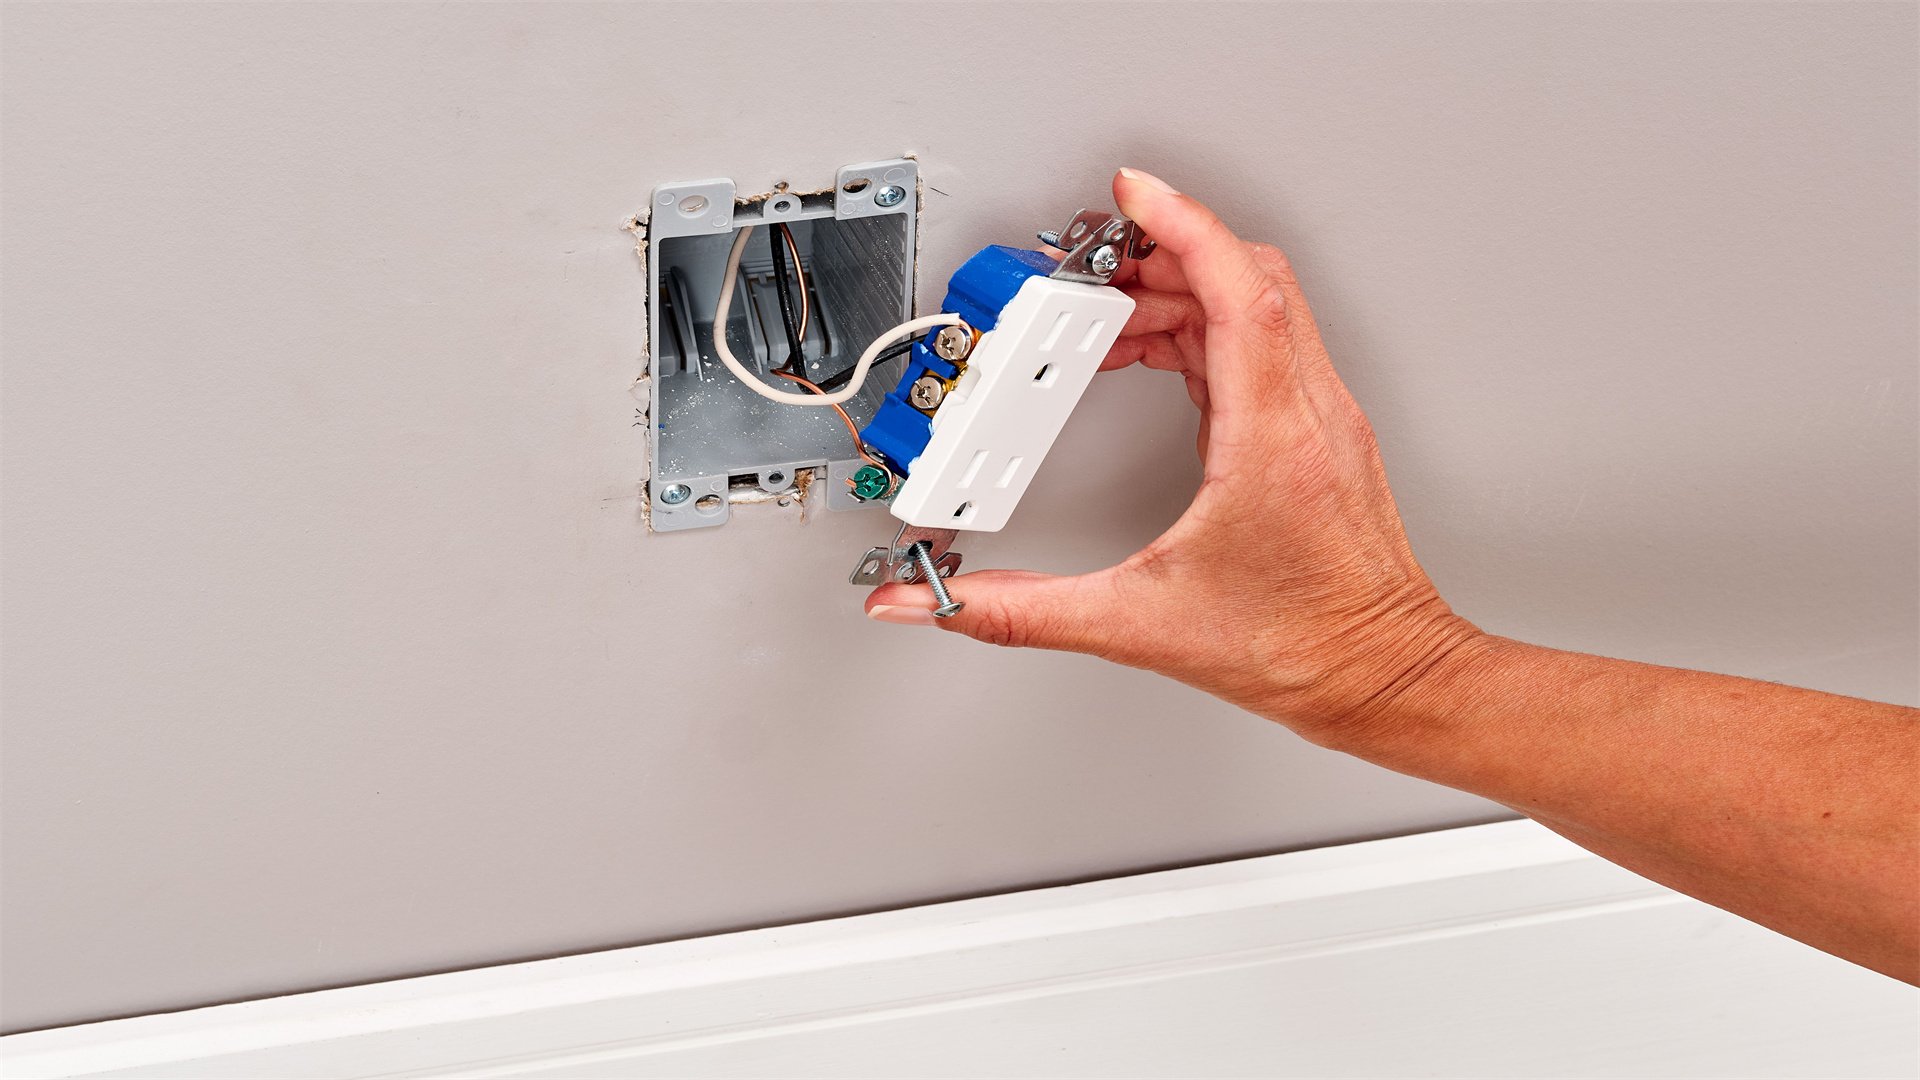
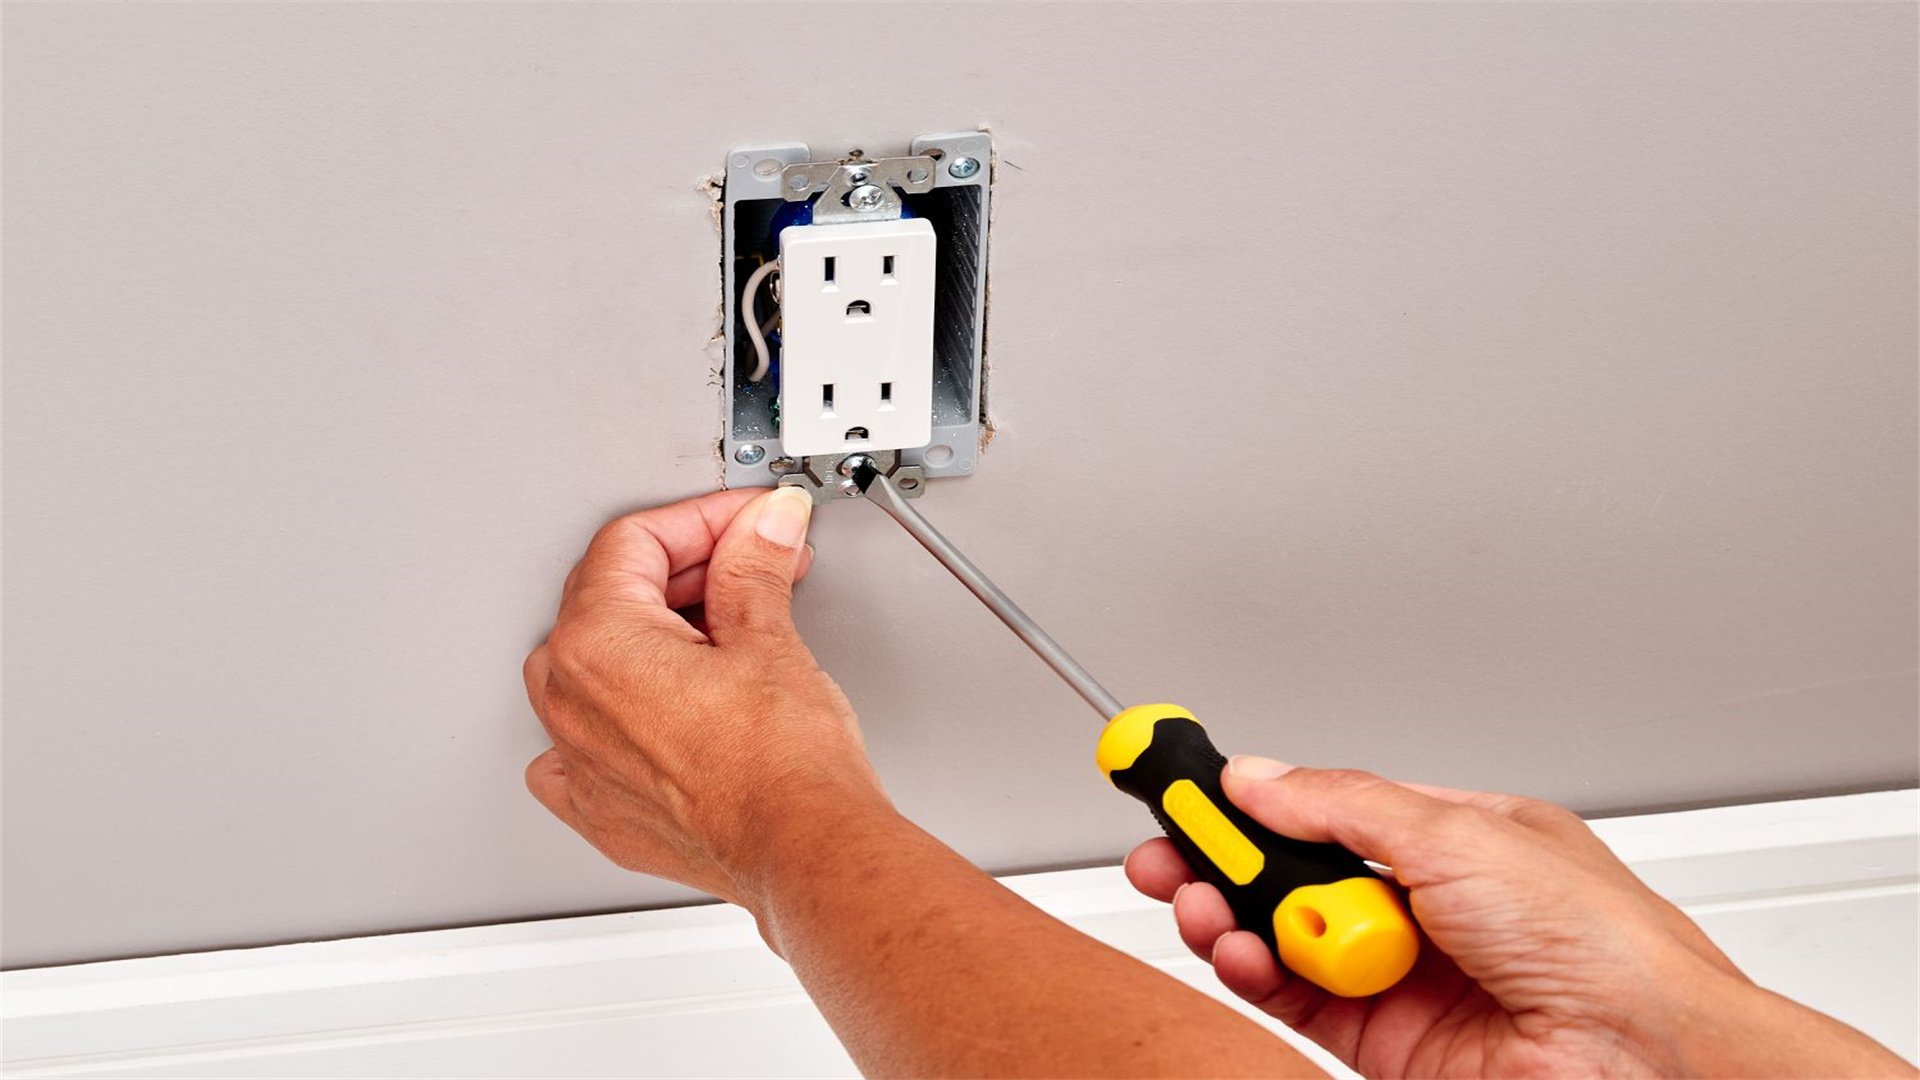
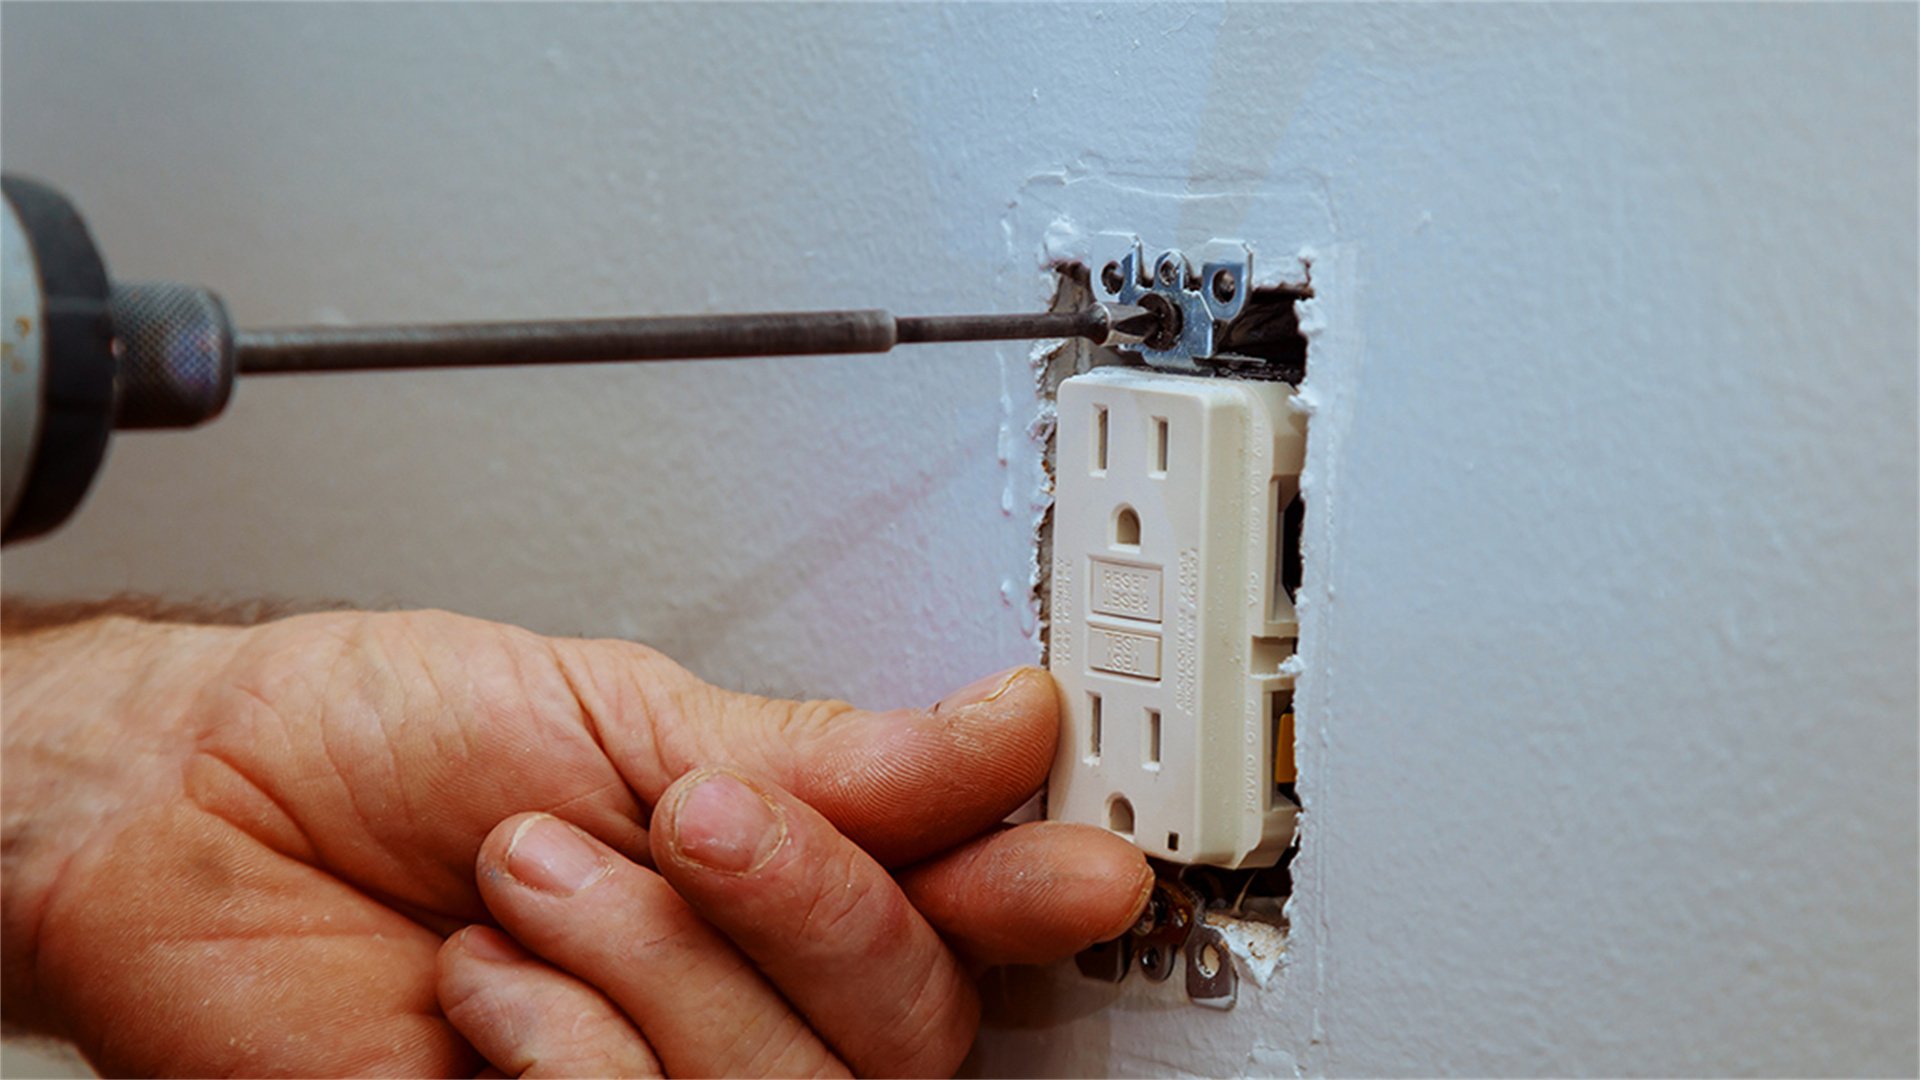
Unscrew the faceplate and set it aside. Remove the mounting screws that hold the outlet in the box. Pull the outlet out gently, supporting the wires. - Disconnect the Wires
Standard outlets have two brass screws for hot wires (usually black or red), two silver screws for neutral wires (white), and a green screw for ground. Loosen the screws and detach the wires. If multiple wires are under one screw, note their positions—it's better to pigtail them (connect with a short wire to the outlet). Back-stabbed wires can be removed by pressing a release tool or cutting. - Prepare the New Outlet
Choose a replacement that matches the ampacity (usually 15A or 20A) and type. For grounded outlets, ensure the ground wire is intact. Strip about 3/4 inch of insulation from wires if needed. Make hook bends for screw terminals. - Connect the Wires
Connect the hot wires to brass screws, neutral wires to silver screws, and ground to green. Maintain polarity: hot on brass, neutral on silver. This ensures devices plug in safely. If the outlet is at the end of a circuit, only one set of wires will be present. If it's in the middle, you may have two sets—connect like colors together via pigtails or use the outlet's terminals (check local codes). - Secure and Test
Tuck wires neatly into the box, avoiding pinching. Screw the outlet into place, ensuring it sits flush. Attach the faceplate. Restore power and test with a plug-in tester: it should indicate correct wiring. Plug in a device to verify functionality. For GFCI outlets, press "Reset" and test with the "Test" button to ensure protection works.
🚨 Advanced Scenarios and Troubleshooting
Common Issues and Solutions
- No Power After Replacement
If the switch or outlet doesn't work, first recheck the breaker—it may have tripped. Turn it off and on again. Inspect connections: ensure wires are tight and not touching each other. Use a multimeter to test for continuity or voltage. If the problem persists, there may be a fault in the wiring or box; consider consulting an electrician. - Flickering Lights or Intermittent Power
Loose connections are often the culprit. Turn off power and tighten all terminals. Check for damaged wires or corrosion in the box. Replace the device if it's faulty. - Grounding Issues
If your outlet tester shows "open ground," the ground wire may be disconnected or absent. In older homes, you might need to install GFCI outlets for safety or run a ground wire—a job for a professional. - Upgrading to Smart Switches or Outlets
Smart devices often require a neutral wire. If your box lacks one, you may need to use alternatives like no-neutral switches or hire an electrician to run a wire. Follow manufacturer instructions carefully. - Dealing with Old Wiring
Knob-and-tube or cloth-insulated wiring is fragile. Avoid disturbing it; call an electrician for replacements. For aluminum wiring, use CO/ALR-rated devices and anti-oxidant paste.
Document any changes you make for future reference, especially if you modify wiring configurations.
📋 Maintenance and Long-Term Safety Tips
Maintenance Tips
- Regular Inspections: Periodically check switches and outlets for signs of wear, such as cracks, discoloration, or warmth. These can indicate underlying problems.
- Test GFCIs Monthly: Press the "Test" button on GFCI outlets to ensure they trip, then "Reset" to restore power. This verifies they're working correctly.
- Avoid Overloading: Don't plug too many devices into one outlet, especially with power strips. This can cause overheating and fires.
- Childproofing: Use tamper-resistant outlets or safety covers if you have young children.
- Label Your Electrical Panel: Update breaker labels after any changes to make future work easier and safer.
- Consider Whole-Home Upgrades: If your home has outdated wiring, plan a full electrical inspection and upgrade by a licensed electrician.
By staying proactive, you can extend the life of your switches and outlets and ensure a safe living environment.
🎯 Conclusion
Final Thoughts
Replacing broken switches and outlets is a manageable DIY project that can save money and improve your home's safety. By following this guide—emphasizing thorough preparation, strict safety protocols, and detailed steps—you can successfully complete the task without risks. Remember, if at any point you feel unsure or encounter complex wiring, don't hesitate to call a professional electrician. Electrical work isn't about bravery; it's about smart, careful actions. With the right tools and knowledge, you can tackle this and many other home repairs confidently. Stay safe, and enjoy the satisfaction of a job well done.
This guide is based on general electrical principles and DIY best practices. Always adhere to local codes and regulations, and when in doubt, seek expert advice. For further reading, consult resources like the NEC handbook, DIY network tutorials, or manufacturer instructions for specific devices.