DIY Garden Pathways: Simple Ideas for Style and Function
🌱 Introduction to DIY Garden Pathways
DIY garden pathways are a popular project among gardening enthusiasts and homeowners because they offer a balance of affordability, customization, and satisfaction. A pathway can define garden zones, prevent soil erosion, and improve accessibility, especially in wet weather. Moreover, it adds a visual element that complements plants, hardscapes, and overall garden themes. By taking the DIY route, you save on labor costs and gain control over every detail, from material choice to layout. However, it requires careful planning to ensure durability and safety. This section will outline the key considerations before you start, such as assessing your garden’s size, climate, and existing features.
When designing a pathway, think about both style and function. Style refers to the aesthetic aspects—like color, texture, and pattern—that match your garden’s vibe, be it modern, cottage, or tropical. Function involves practical elements such as slip-resistance, drainage, and ease of maintenance. A successful pathway blends these elements seamlessly. For example, a curved gravel path might offer a natural look but require regular topping up, while a paved stone path is more permanent but costlier. We’ll explore these trade-offs in detail. First, let’s look at the essential tools and materials you might need for most DIY pathway projects.
🔧 Essential Tools and Materials for DIY Pathways
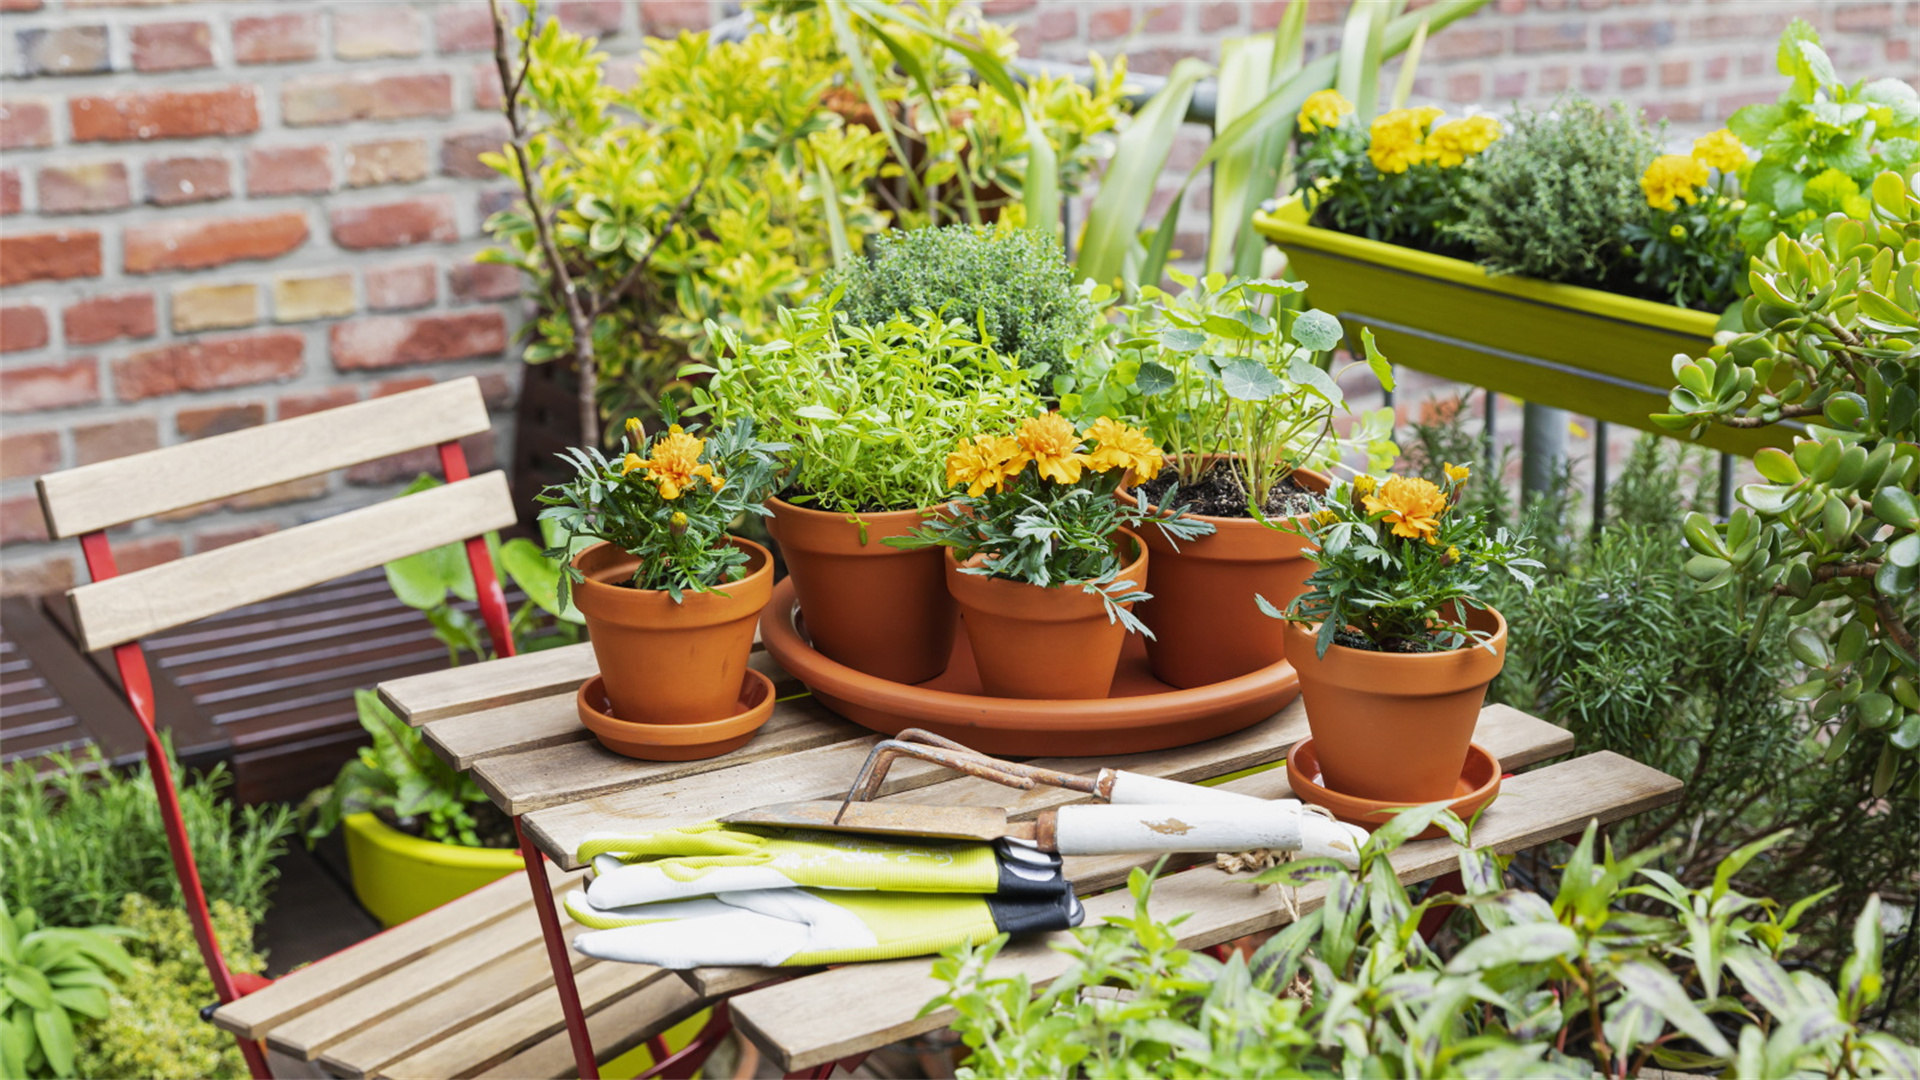
Before diving into specific ideas, it’s helpful to gather common tools and materials. Having the right equipment can make the installation process smoother and more efficient. Here’s a list of items you may need:
- Tools:
- Shovel
- Rake
- Wheelbarrow
- Tamper
- Level
- Measuring tape
- String lines and stakes
- Safety gloves and knee pads
- Saw or cutter for materials
- Materials:
- Base materials (e.g., gravel, sand)
- Edging options (e.g., metal, plastic, or wood)
- Pathway surfaces (e.g., stones, bricks, mulch)
- Adhesives or jointing compounds (if needed)
- Safety Gear:
- Protective eyewear
- Masks for dust
Depending on the pathway type, additional items might be required. We’ll specify these in each section. Now, let’s move on to the core ideas, structured into methods with advantages, disadvantages, and implementation steps.
🎸 Method One: Gravel Pathways
Gravel pathways are a classic choice for DIY enthusiasts due to their affordability and rustic charm. They consist of loose stones, typically crushed rock or pea gravel, laid over a prepared base. This method is ideal for informal gardens or areas with good drainage.
Advantages of Gravel Pathways
- Cost-Effective:
- Gravel is inexpensive and widely available.
- It is a budget-friendly option for large areas.
- Easy Installation:
- Requires minimal tools and skills.
- You can simply spread gravel over a leveled area.
- Good Drainage:
- The porous nature allows water to seep through.
- Reduces puddles and soil erosion.
- Versatile Aesthetics:
- Available in various colors and sizes.
- Can complement different garden styles.
Disadvantages of Gravel Pathways
- Maintenance Intensive:
- Gravel can shift over time.
- Requires regular raking and topping up.
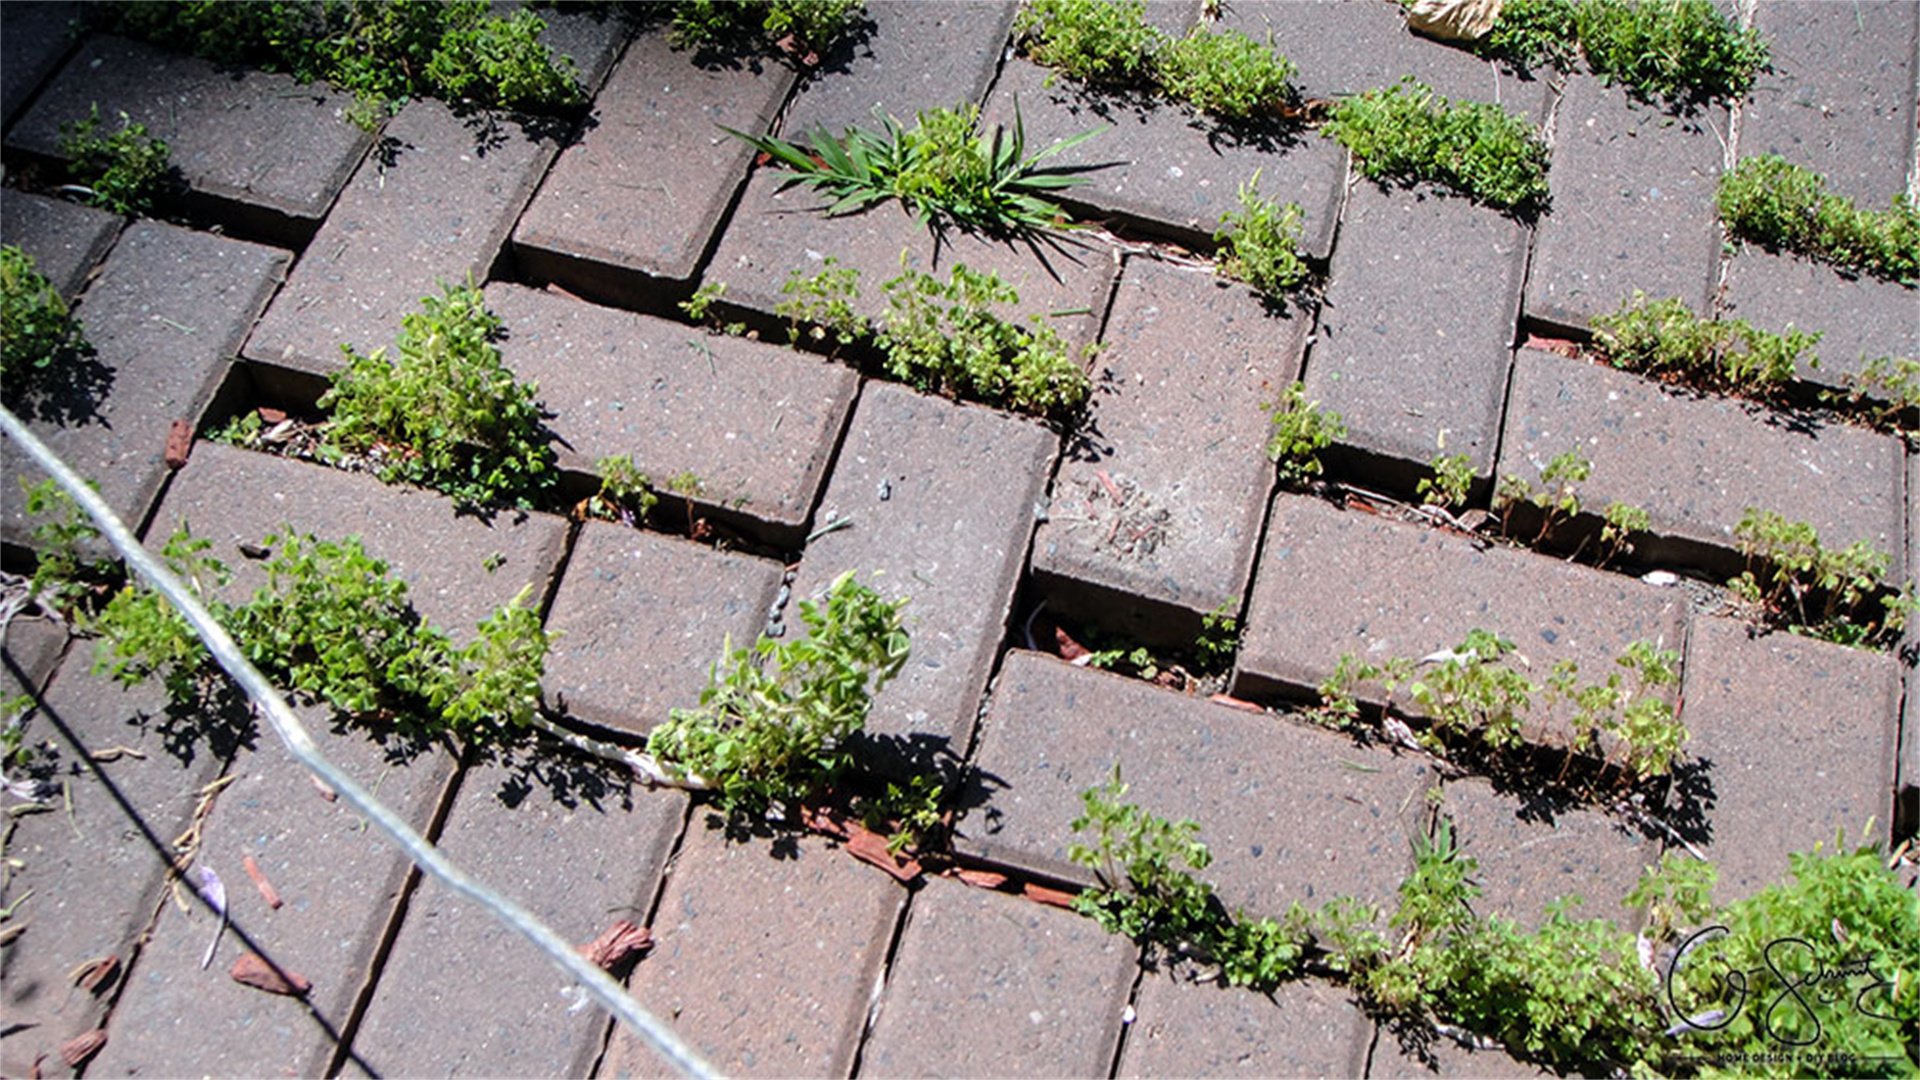
- Potential for Weed Growth:
- Weeds may sprout through the gravel.
- Necessitates weed barriers or herbicides.
- Less Stable for Heavy Use:
- Not suitable for high-traffic areas.
- Can be difficult for wheelchair access.
- Can Be Messy:
- Gravel stones might scatter into garden beds.
- Requires edging to contain them.
How to Implement a Gravel Pathway
- Plan the Layout:
- Use string lines and stakes to mark boundaries.
- Consider a width of at least 3 feet.
- Opt for curved lines to mimic natural flow.
- Excavate the Area:
- Dig a trench about 4-6 inches deep.
- Remove grass, roots, and debris.
- Install Edging:
- Place edging materials along the sides.
- Secure metal or plastic edging with stakes.
- Add a Base Layer:
- Pour a 2-3 inch layer of crushed stone.
- Compact it with a tamper for stability.
- Lay Weed Barrier:
- Roll out landscape fabric over the base.
- Trim to fit and overlap seams.
- Spread Gravel:
- Add a 2-3 inch layer of chosen gravel.
- Rake evenly and check for smoothness.
- Compact and Finish:
- Lightly tamp the surface to settle gravel.
- Add more gravel if needed and sweep edges.
For enhanced style, consider mixing gravel colors or adding stepping stones at intervals. Regular maintenance involves raking every few months and replenishing gravel annually.
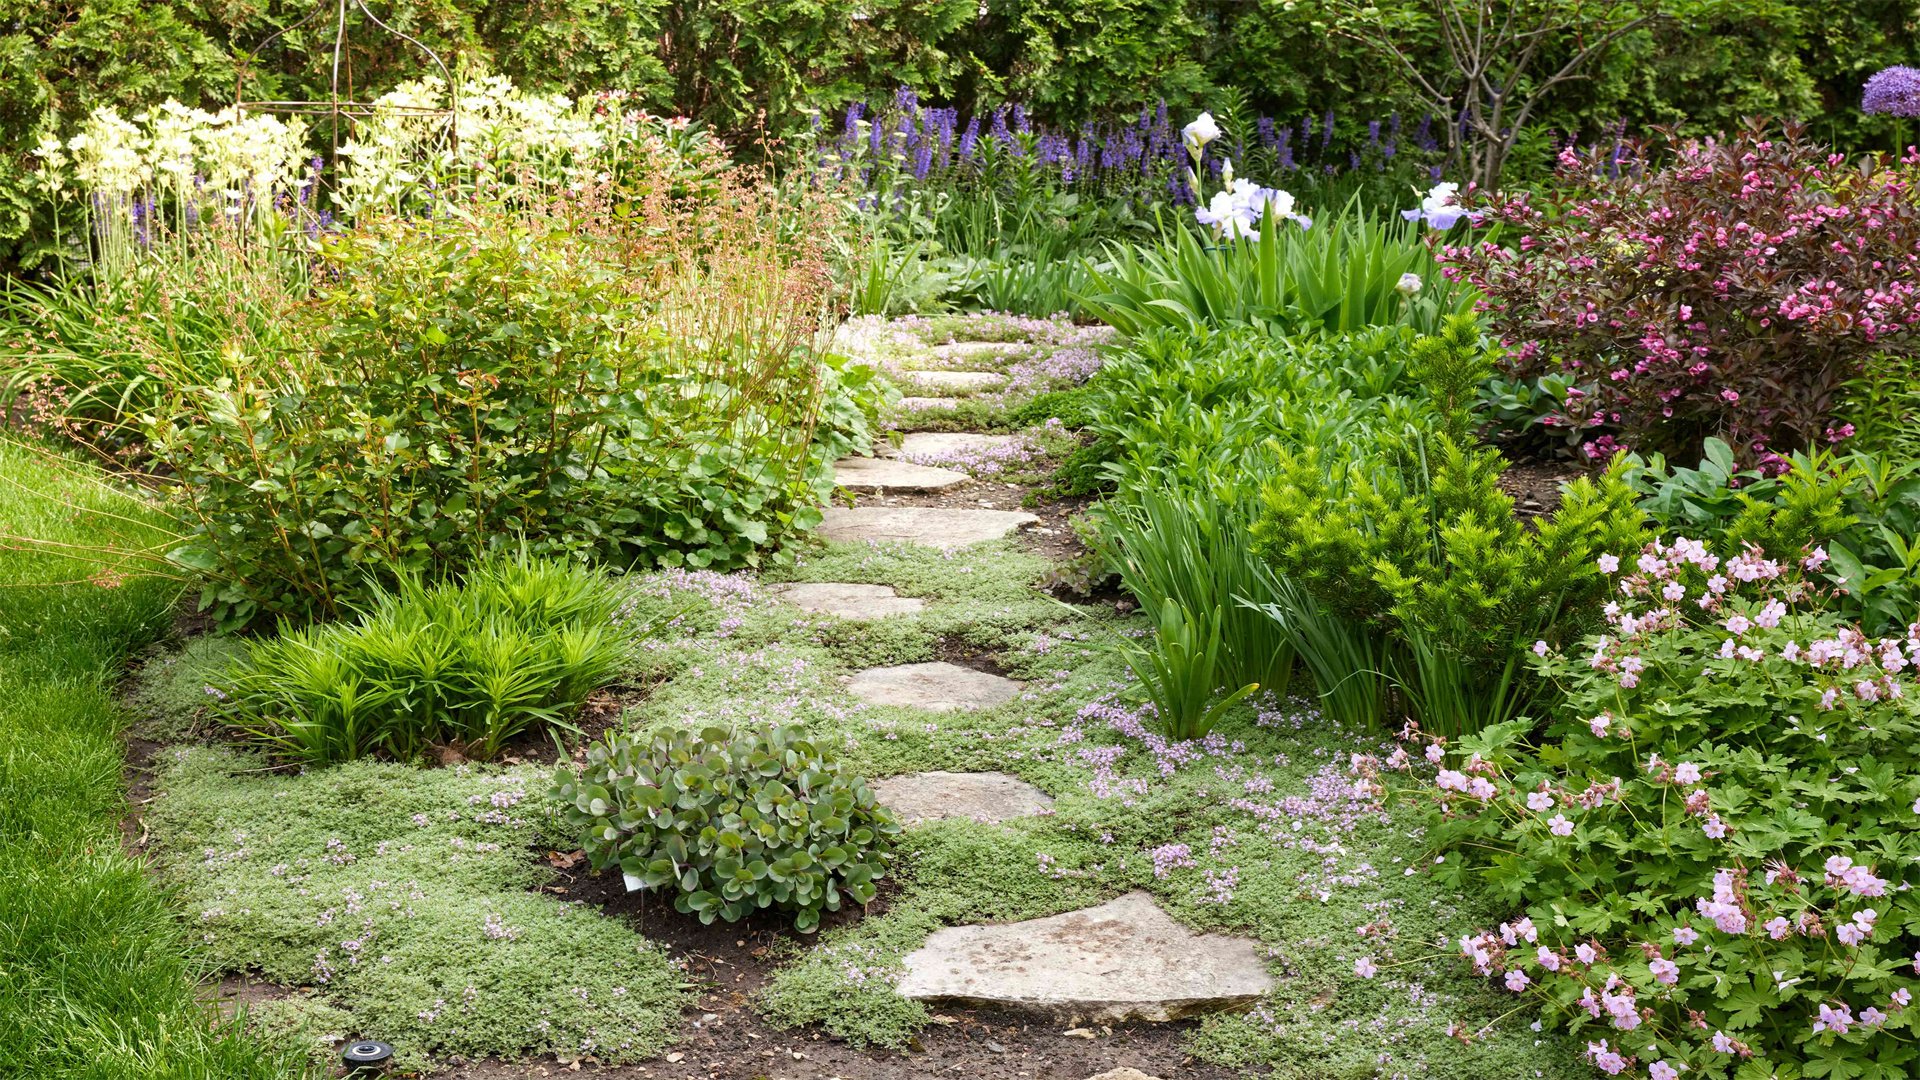
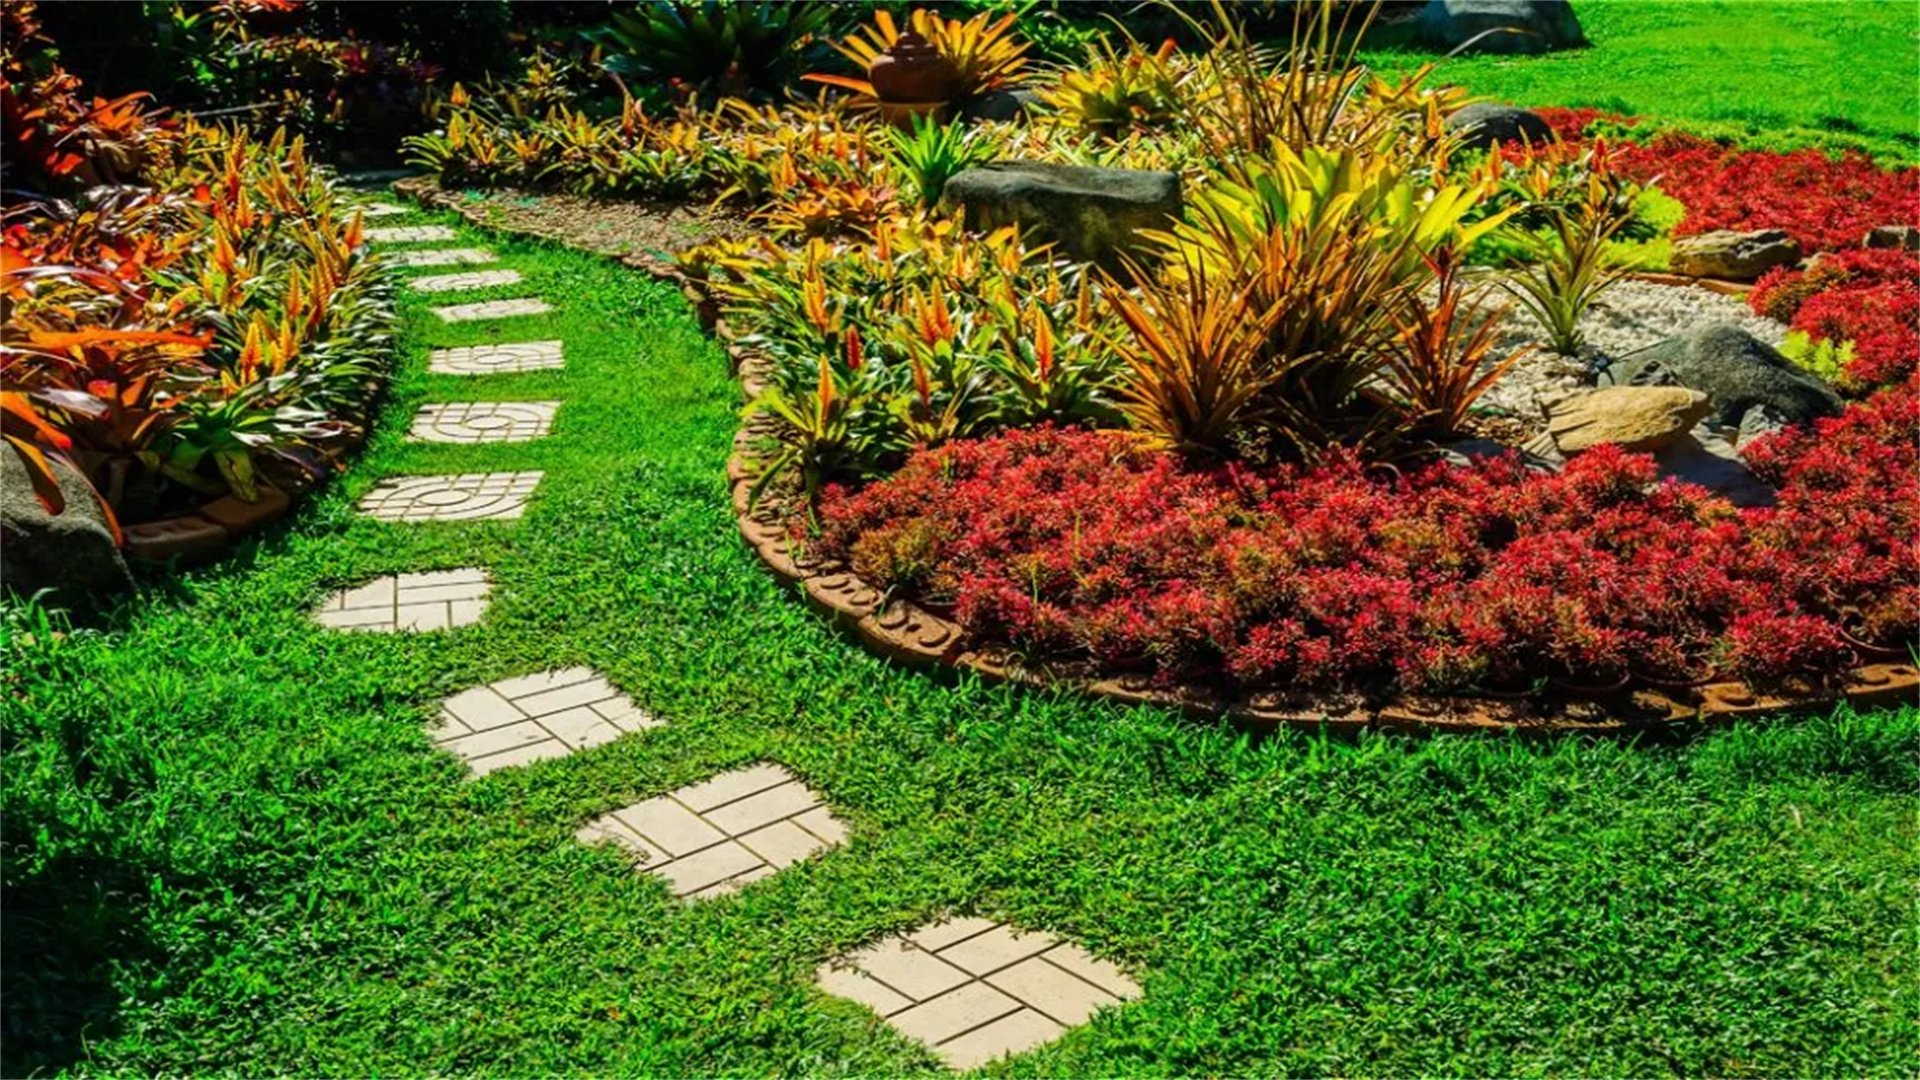
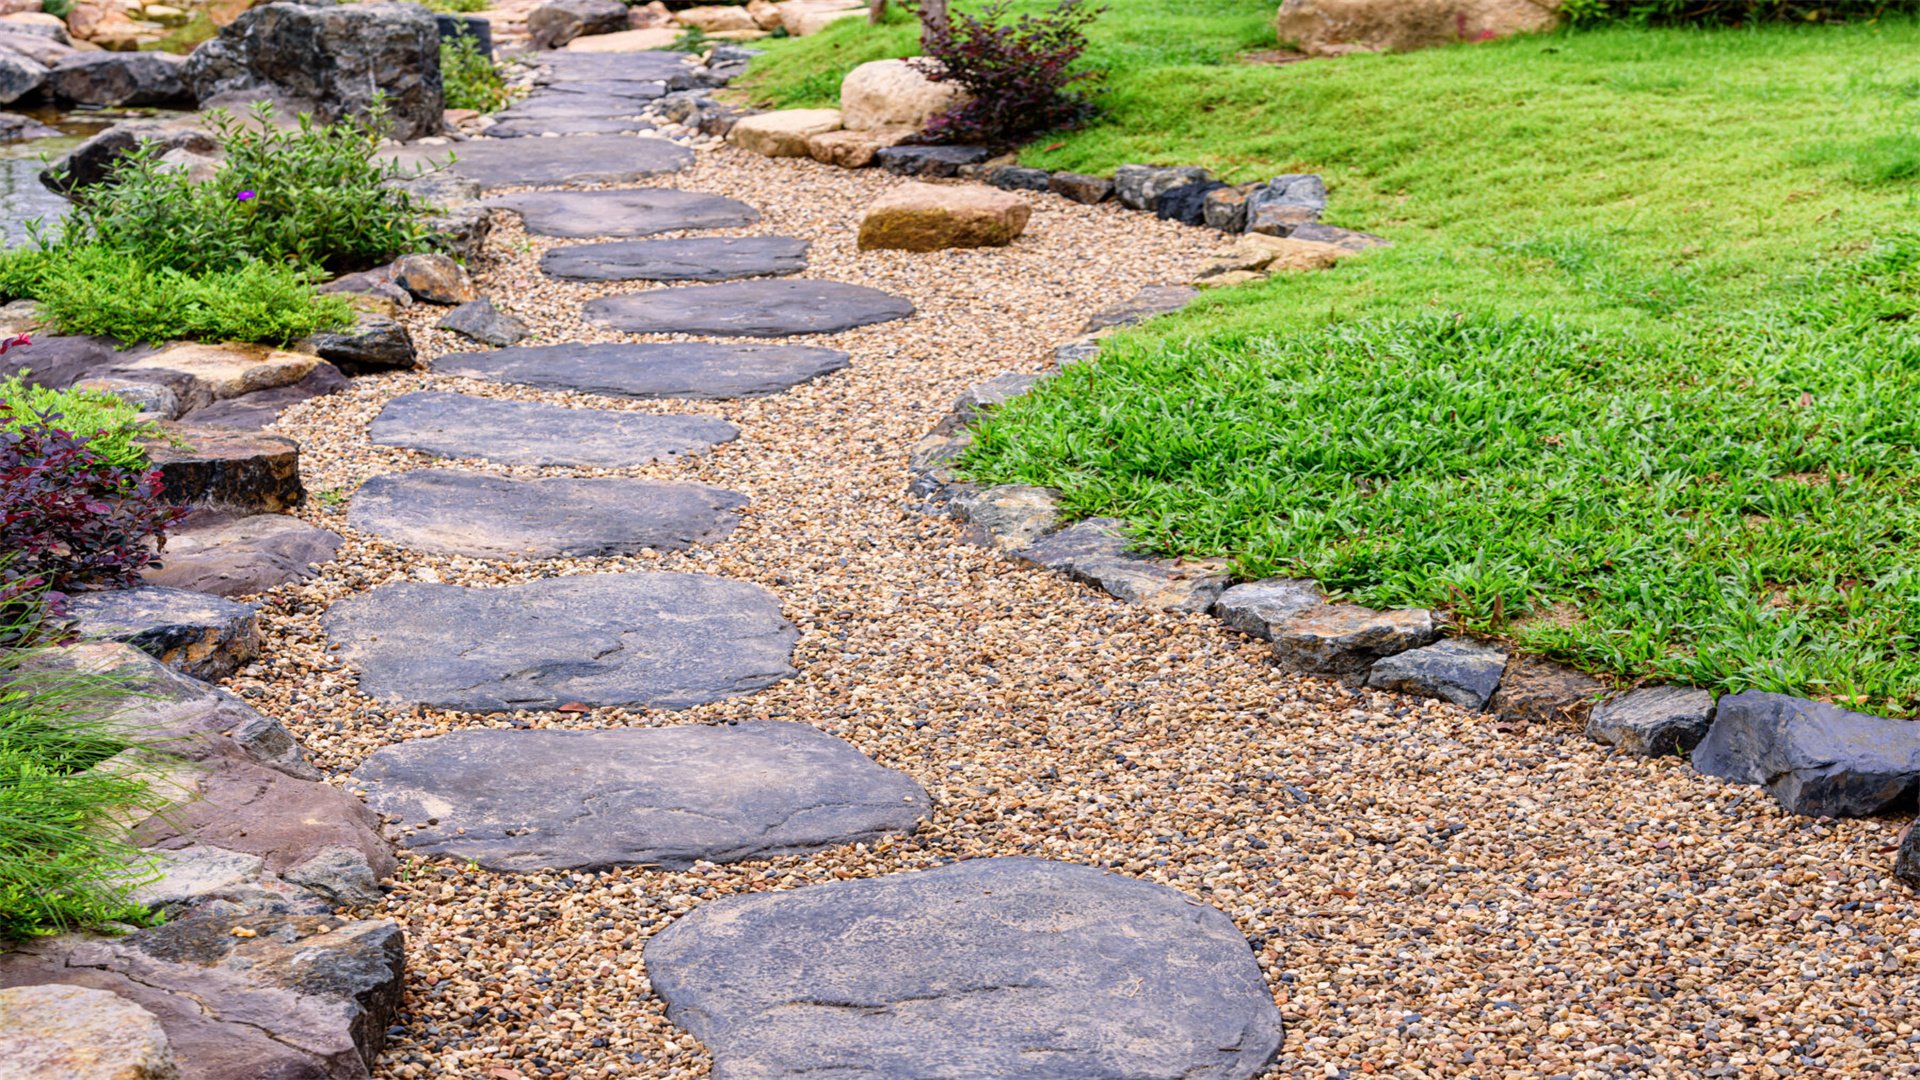
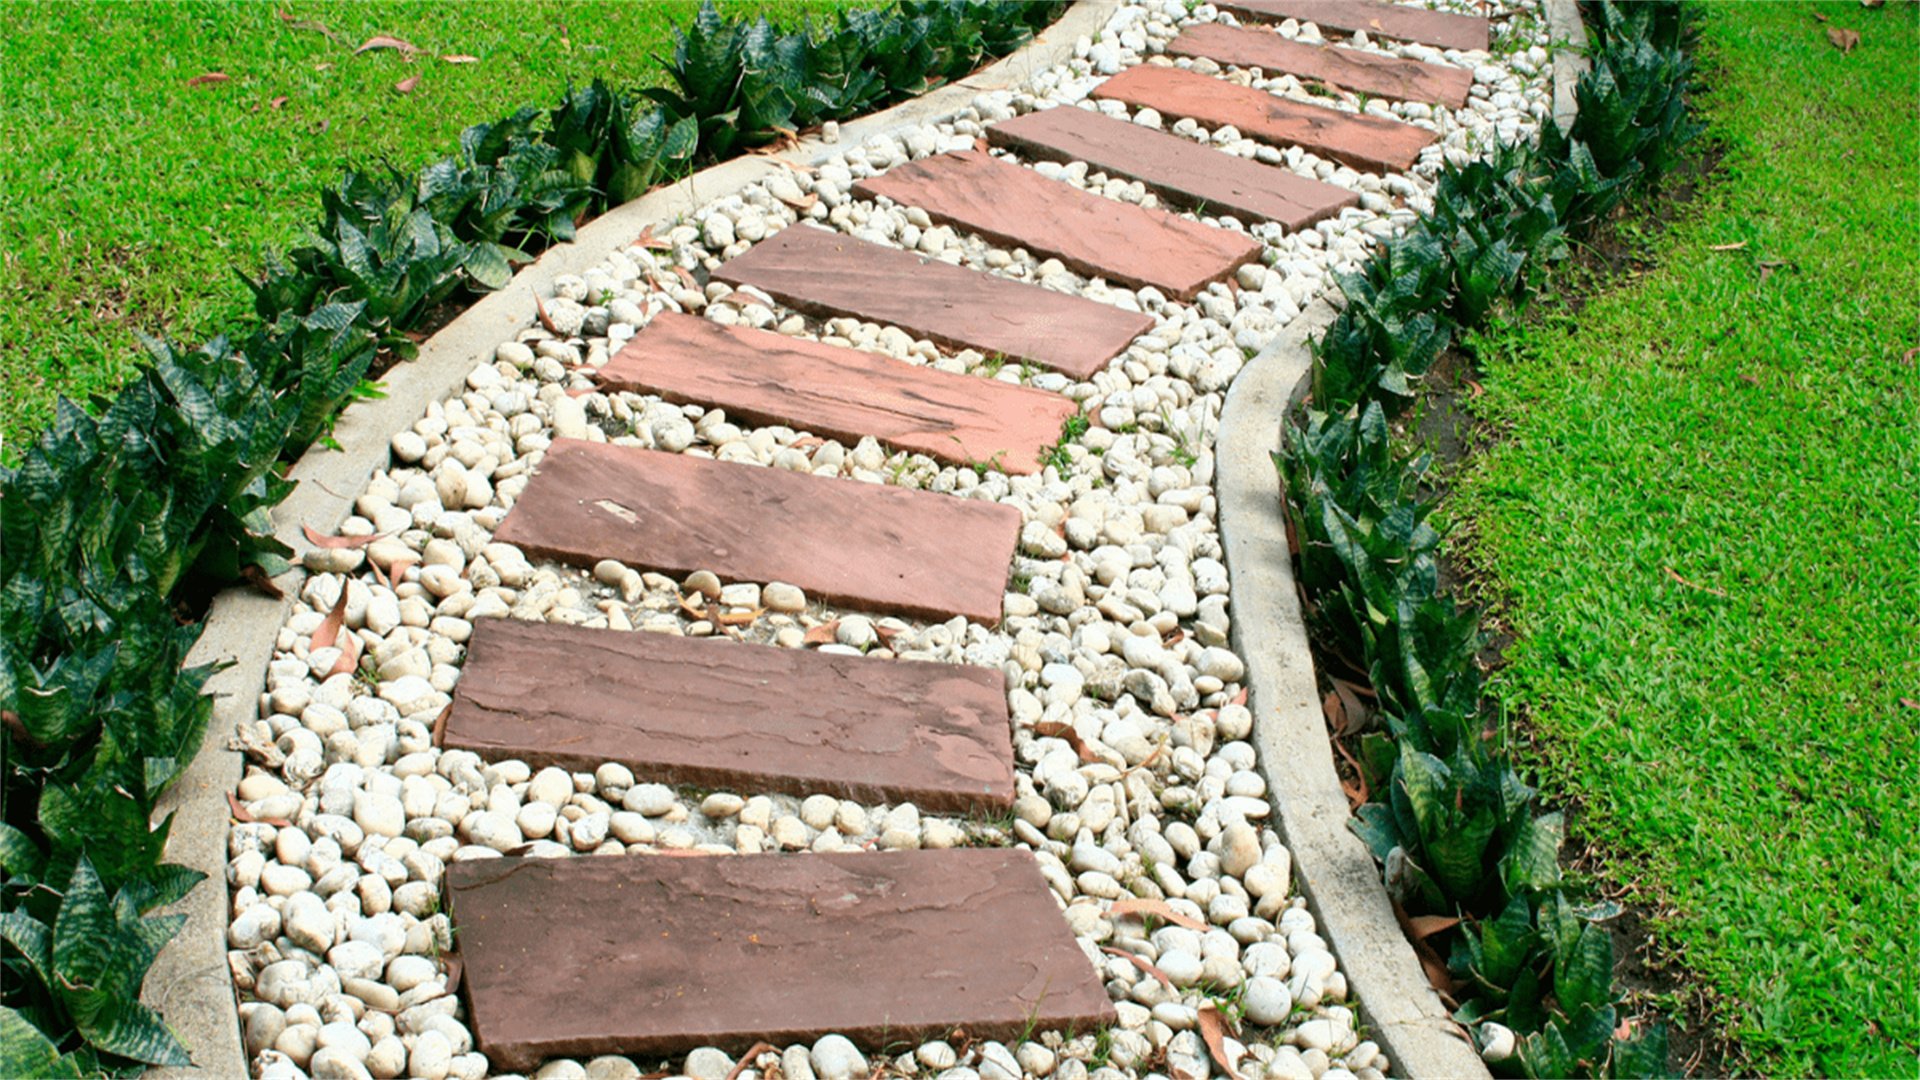
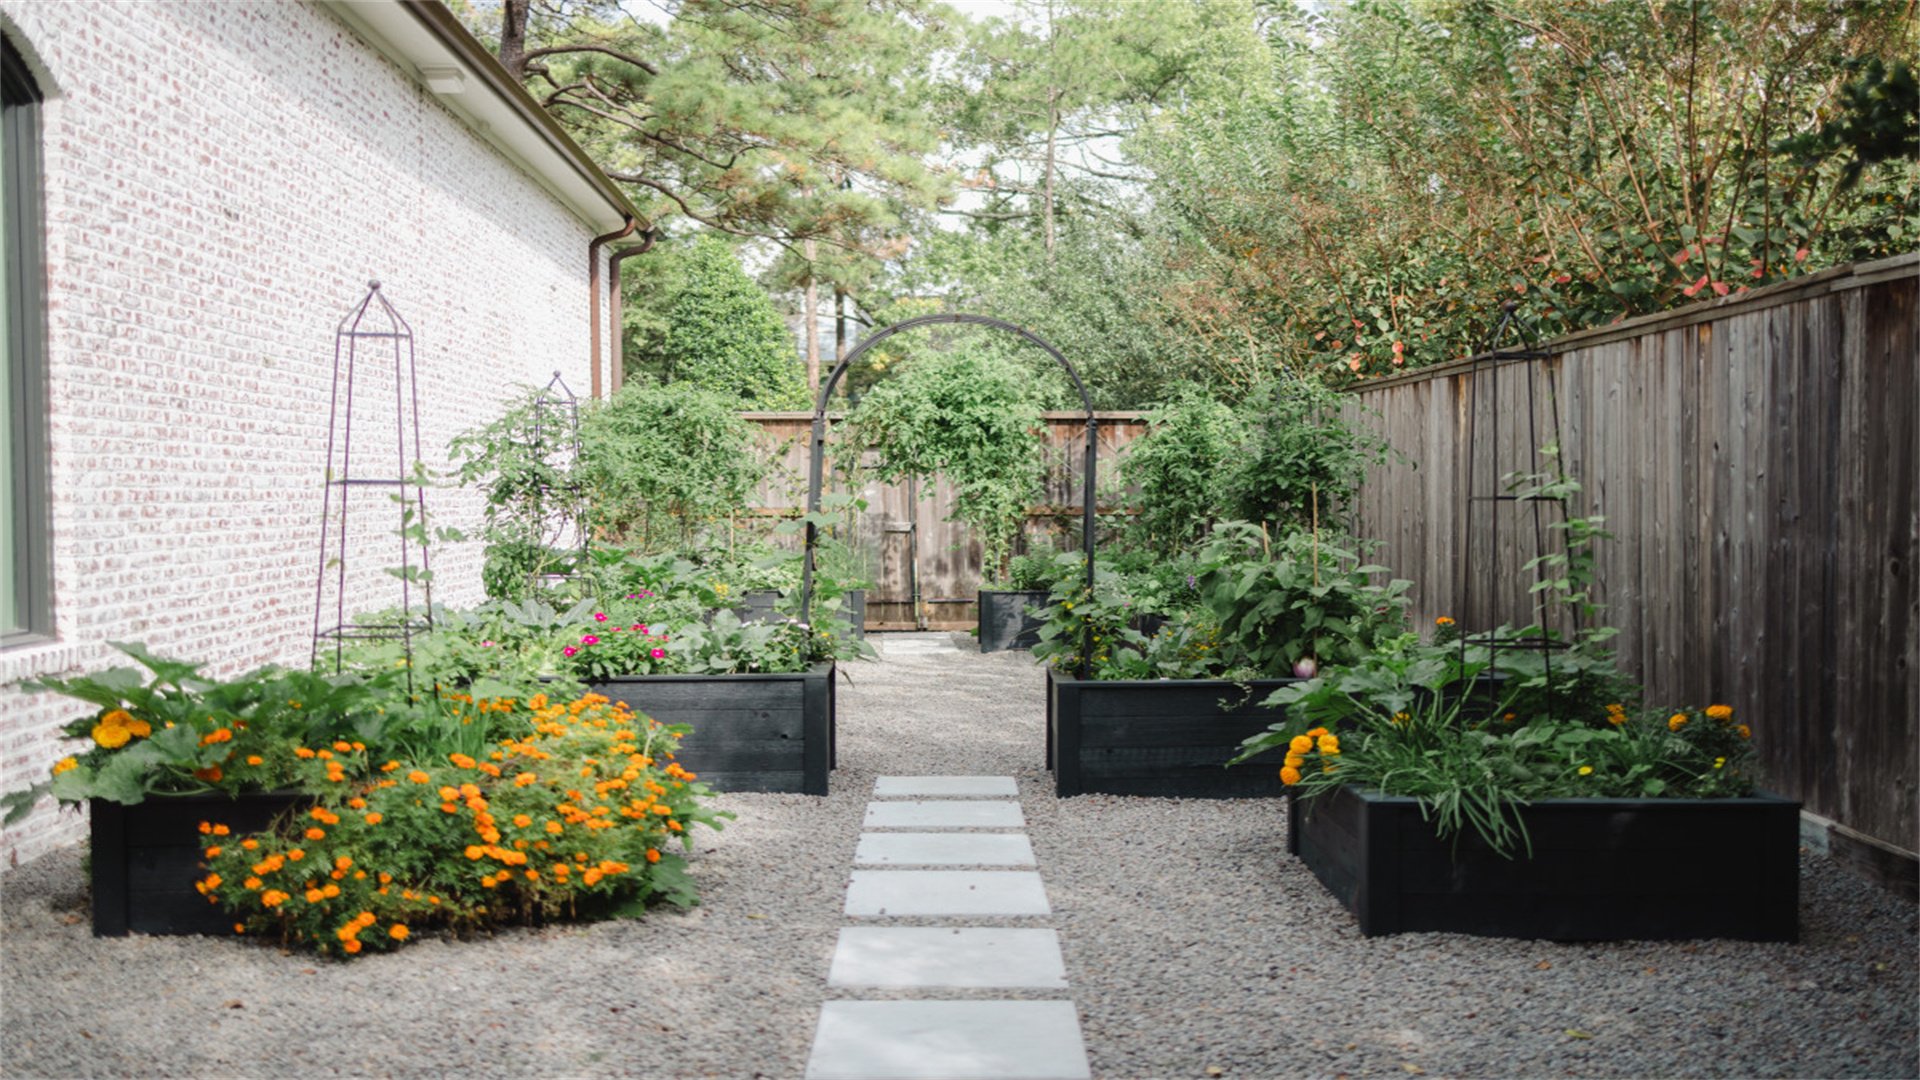
🧱 Method Two: Stone Pavers Pathways
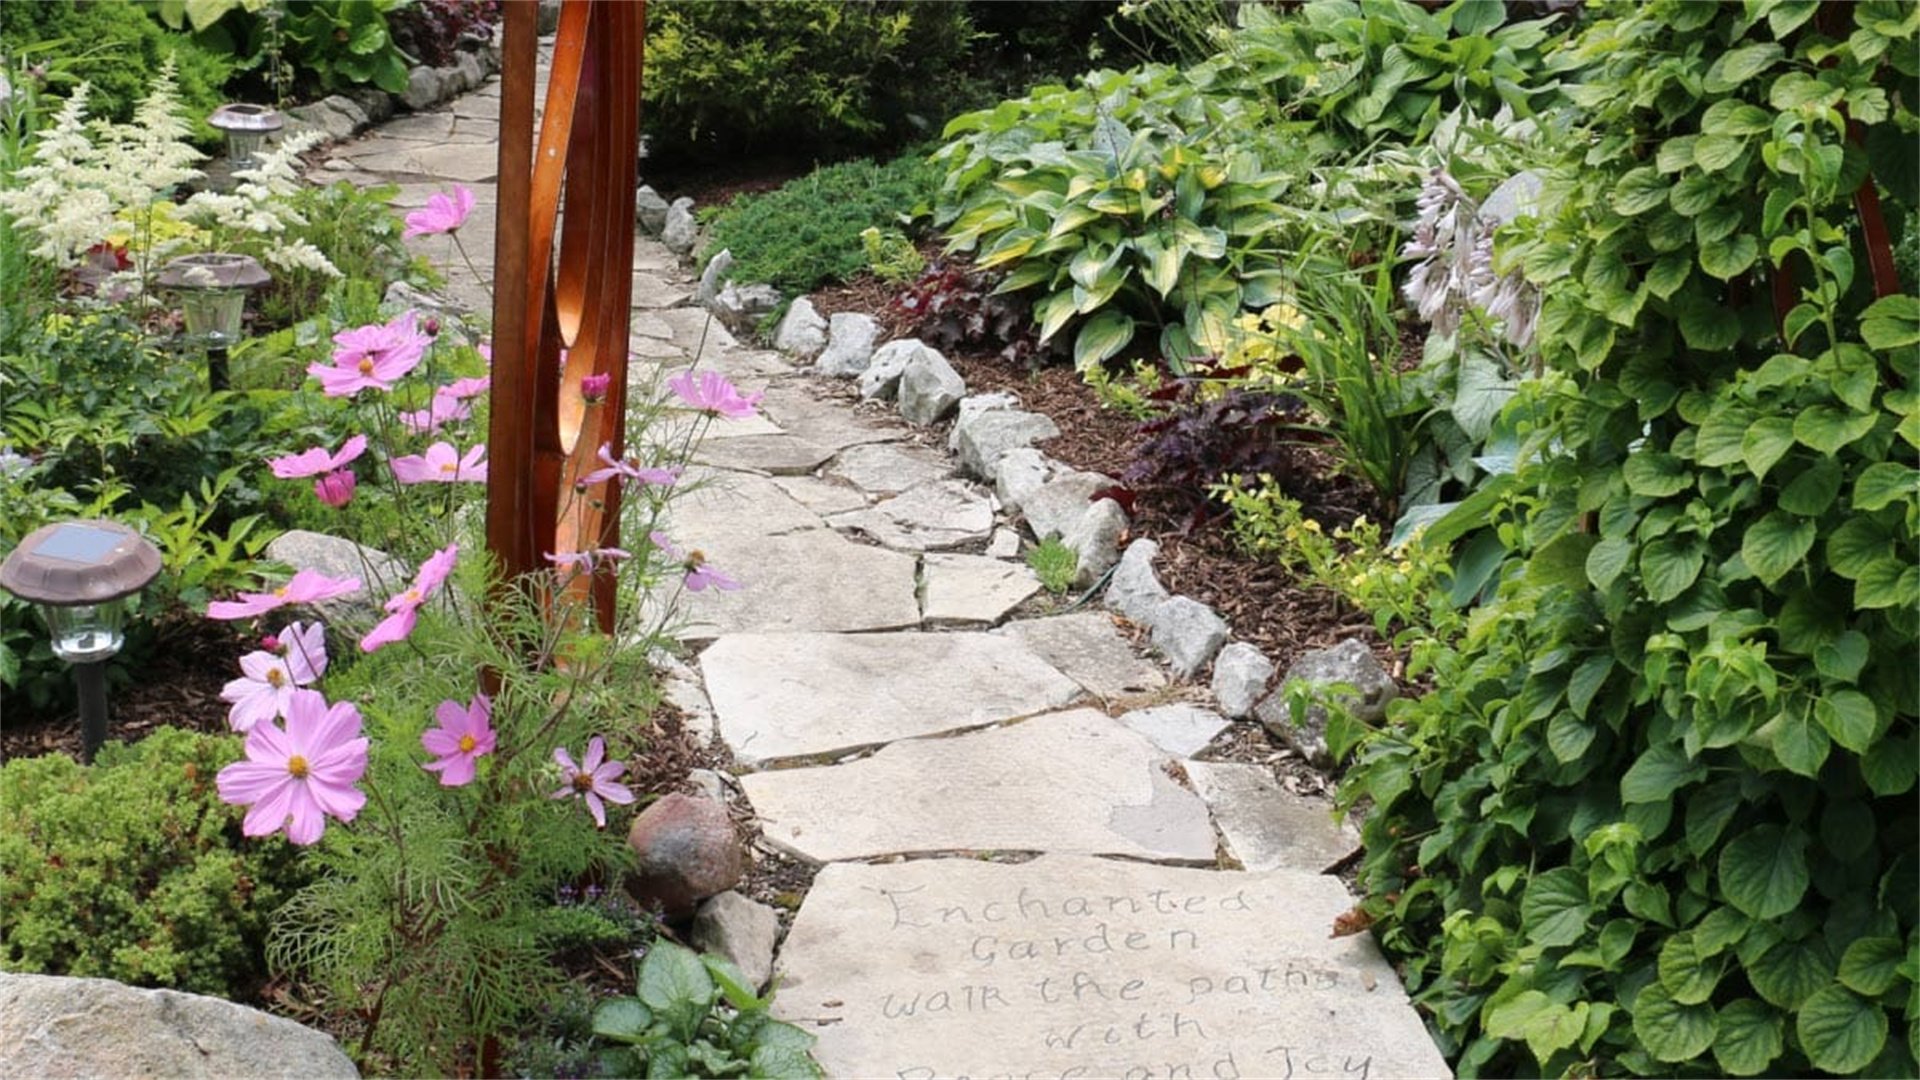
Stone pavers offer a more formal and durable option for garden pathways. They come in various shapes, such as flagstone, slate, or concrete pavers, and can be arranged in patterns for a customized look. This method is suitable for high-traffic areas and adds a timeless elegance to gardens.
Advantages of Stone Pavers Pathways
- Durability:
- Long-lasting and withstands weather extremes.
- Can handle heavy use without significant damage.
- Low Maintenance:
- Requires minimal upkeep once installed.
- Only occasional cleaning and weed removal from joints.
- Design Flexibility:
- Allows creation of intricate patterns.
- Can match your garden’s style (e.g., herringbone).
- Improved Accessibility:
- Flat, solid surface ideal for walking.
- Suitable for strollers or wheelchairs.
Disadvantages of Stone Pavers Pathways
- Higher Cost:
- Stone pavers are more expensive than gravel.
- Installation may require additional materials.
- Labor-Intensive Installation:
- Involves precise leveling and cutting.
- Can be time-consuming and physically demanding.
- Potential for Uneven Settling:
- Pavers may shift if base isn’t properly prepared.
- May require re-leveling over time.
- Weight and Handling:
- Stone slabs are heavy.
- Might need assistance or equipment to move.
How to Implement a Stone Pavers Pathway
- Design and Measurement:
- Sketch your pathway design with dimensions.
- Calculate the number of pavers needed.
- Choose stones that complement your garden.
- Prepare the Ground:
- Mark the pathway with stakes and string.
- Excavate to a depth of about 8 inches.
- Add geotextile fabric if soil is soft.
- Install a Base Layer:
- Add a 4-6 inch layer of crushed gravel.
- Compact it thoroughly with a plate compactor.
- Add Sand Bedding:
- Spread a 1-2 inch layer of coarse sand.
- Level it with a screed board.
- Lay the Pavers:
- Start from one end and place pavers in pattern.
- Leave consistent gaps for jointing material.
- Use a rubber mallet to tap pavers into place.
- Secure the Edges:
- Install edging along the sides.
- Anchor plastic or metal edging with spikes.
- Fill the Joints:
- Sweep polymeric sand into the gaps.
- Mist the surface with water to activate sand.
- Compact and Clean:
- Use a plate compactor over the entire pathway.
- Brush off excess sand and rinse the surface.
For added style, consider mixing paver sizes. Ensure the pathway slopes slightly for drainage.
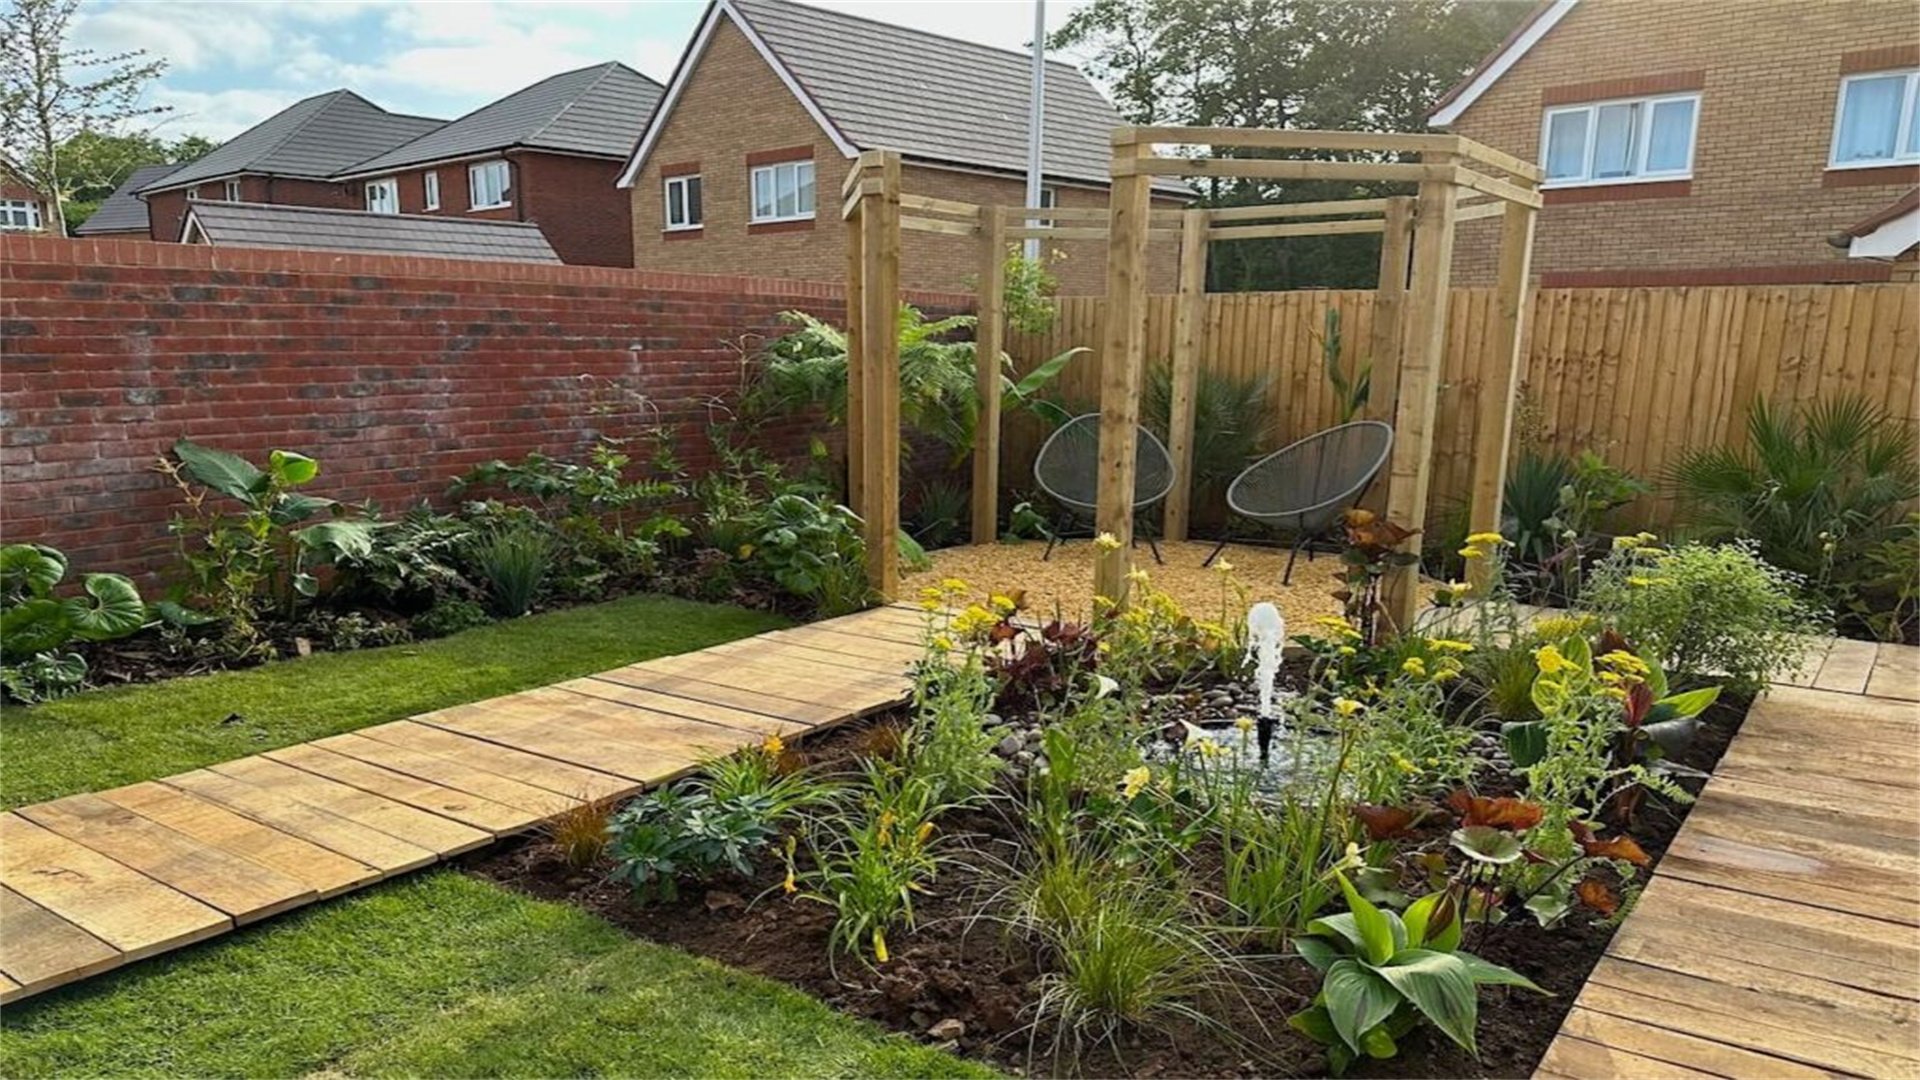
🪁 Method Three: Wooden Walkways
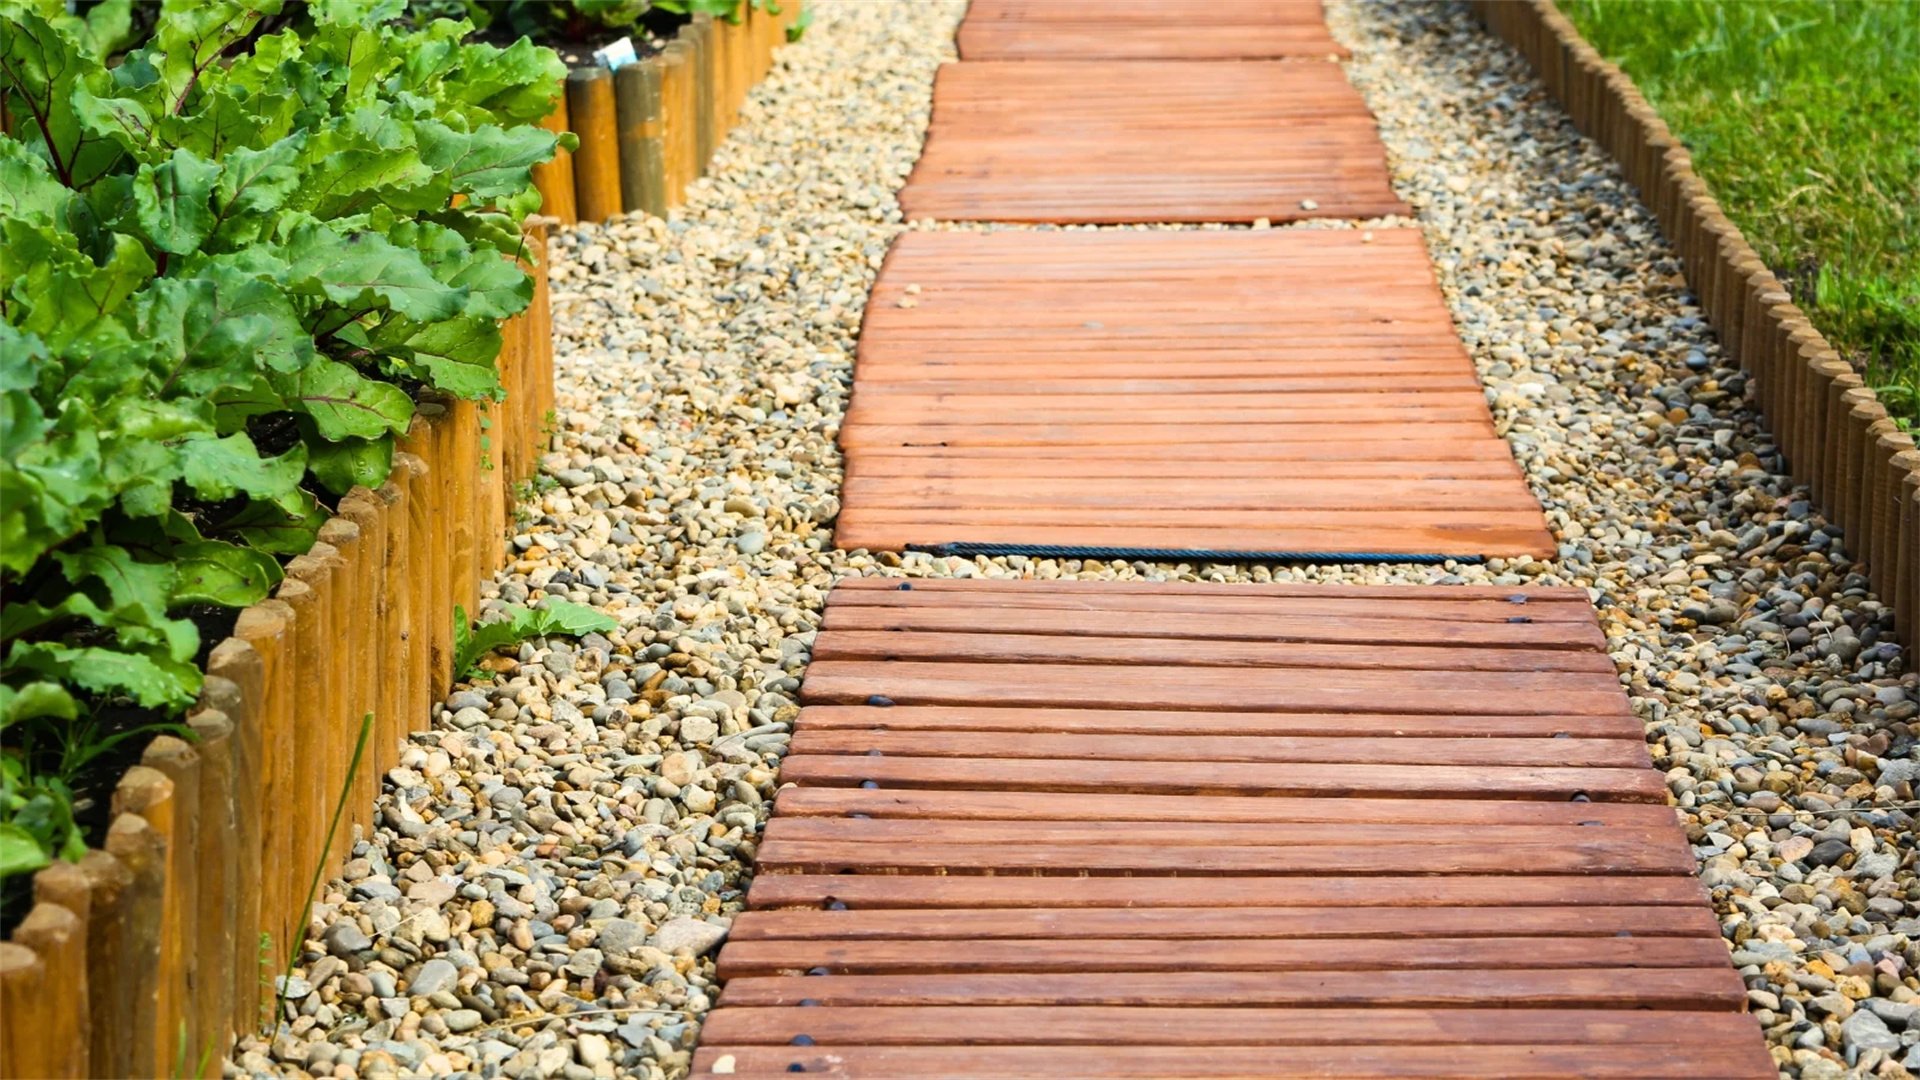
Wooden walkways, such as boardwalks or stepping stone logs, bring a natural, warm element to gardens. They work well in woodland settings, near ponds, or as raised pathways over uneven terrain. Using treated lumber or durable woods like cedar can ensure longevity.
Advantages of Wooden Walkways
- Aesthetic Appeal:
- Blends seamlessly with organic garden environments.
- Offers a cozy, rustic charm.
- Customizable Design:
- You can build curved or straight sections.
- Add railings or lighting for safety and style.
- Good for Sloped Areas:
- Raised pathways can traverse hills.
- Requires less excavation on uneven terrain.
- Relatively Easy to Construct:
- With basic carpentry skills, assembly is quick.
- Can use pre-cut boards or logs.
Disadvantages of Wooden Walkways
- Susceptibility to Decay:
- Wood can rot, warp, or attract insects.
- Especially problematic in moist climates.
- Slippery When Wet:
- Smooth wood surfaces may become hazardous.
- Requires anti-slip treatments or textures.
- Higher Cost Over Time:
- Initial costs might be moderate.
- Ongoing maintenance like staining adds expense.
- Limited Lifespan:
- May need replacement every 5-10 years.
- Shorter lifespan compared to stone or concrete.
How to Implement a Wooden Walkway
- Choose the Wood Type:
- Select pressure-treated lumber, cedar, or redwood.
- Avoid untreated pine, which decays quickly.
- Plan the Route and Support:
- Determine if walkway will be ground-level or raised.
- Mark the path with spray paint or flags.
- Prepare the Ground:
- Clear vegetation and level the soil.
- For raised structures, dig holes for posts and set in concrete.
- Build the Frame:
- Construct a frame using 2x6 or 2x8 lumber.
- Secure with galvanized screws and check for levelness.
- Install Decking Boards:
- Cut boards to length and attach to frame.
- Leave small gaps for expansion and drainage.
- Add Safety Features:
- Apply a non-slip coating or use grooved boards.
- Install railings if the path is elevated.
- Finish and Maintain:
- Seal the wood with a waterproof stain.
- Reapply every 2-3 years and inspect for rot.
To enhance style, incorporate curves. For function, ensure the walkway is wide enough.
🔴 Method Four: Brick Pathways
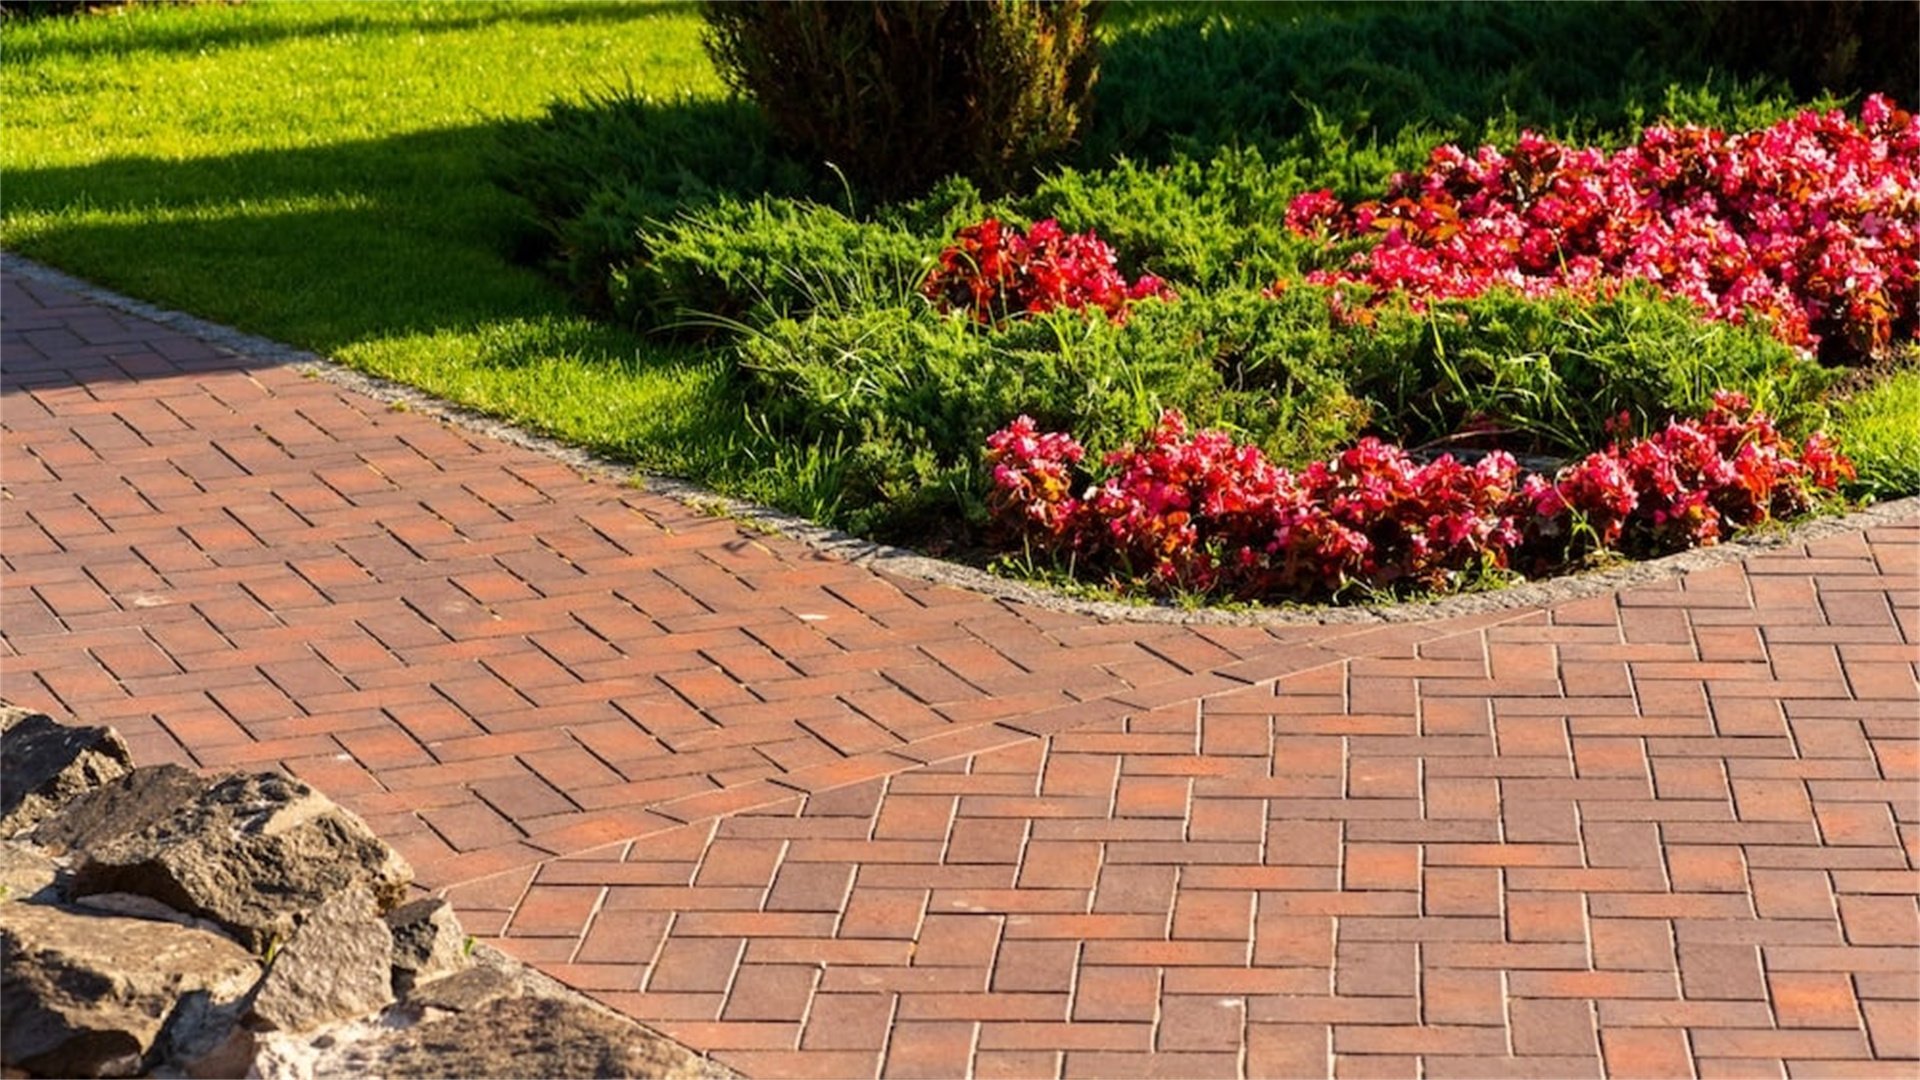
Brick pathways evoke a classic, timeless feel, perfect for cottage gardens or traditional landscapes. Bricks are durable and can be laid in various patterns, such as basket weave or running bond. This method offers a balance of formality and charm.
Advantages of Brick Pathways
- Durability and Longevity:
- Bricks are fired clay, resistant to weathering.
- Can last decades under heavy foot traffic.
- Low Maintenance:
- Requires minimal upkeep.
- Occasional weeding of joints and cleaning.
- Design Versatility:
- Come in colors like red, brown, or gray.
- Patterns can create visual interest.
- Eco-Friendly Option:
- Reclaimed bricks are available.
- Reduces environmental impact.
Disadvantages of Brick Pathways
- Cost and Labor:
- Bricks can be expensive.
- Installation is labor-intensive.
- Potential for Frost Heave:
- In cold climates, bricks may shift.
- Requires proper drainage and base.
- Surface Irregularities:
- Older bricks might be uneven.
- Could lead to a slightly bumpy surface.
- Color Fading:
- Bricks may fade due to sun exposure.
- Can add a weathered patina over time.
How to Implement a Brick Pathway
- Select Bricks and Pattern:
- Choose clay bricks suitable for outdoors.
- Decide on a pattern (e.g., herringbone).
- Prepare the Site:
- Mark pathway boundaries with string and stakes.
- Excavate to a depth of 8-10 inches.
- Install Base and Sand Layers:
- Add a 4-6 inch layer of crushed stone.
- Compact well, then add a 1-2 inch sand layer.
- Lay the Bricks:
- Start from one corner and place bricks tightly.
- Use a rubber mallet and check with a level.
- Add Edging:
- Install plastic or metal edging along sides.
- Alternatively, set bricks vertically as a border.
- Fill Joints:
- Sweep fine sand or polymeric sand into gaps.
- Water the sand to solidify if using polymeric type.
- Compact and Clean:
- Use a plate compactor to set bricks firmly.
- Brush off excess sand and wash surface gently.
For style, mix brick colors. For function, ensure the pathway slopes for drainage.
🍂 Method Five: Mulch or Bark Pathways
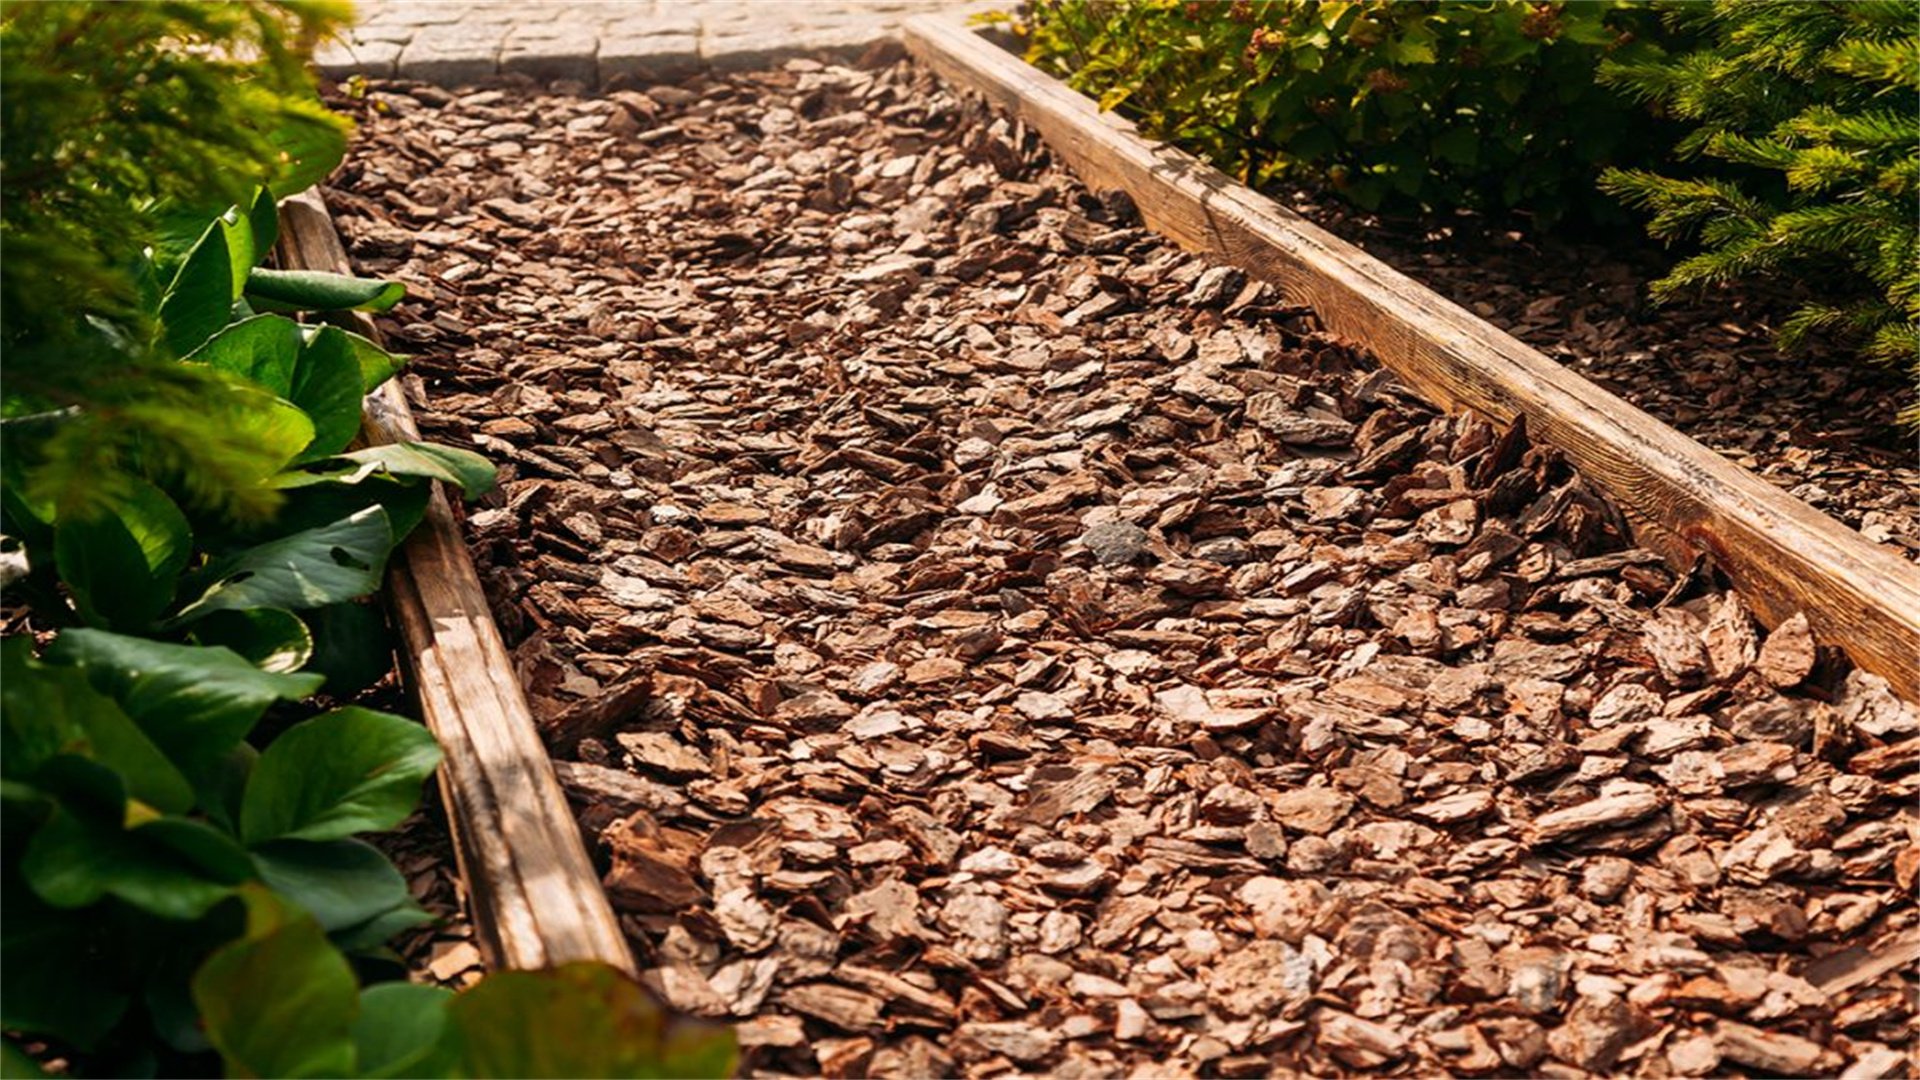
Mulch or bark pathways are an economical and natural option, often used in informal or woodland gardens. They involve spreading organic materials like wood chips, bark nuggets, or cocoa bean shells over a prepared base. This method is quick to install and enriches the soil as it decomposes.
Advantages of Mulch or Bark Pathways
- Low Cost and Easy Installation:
- Mulch is affordable.
- Can be spread directly over soil.
- Soil Health Benefits:
- Adds nutrients to the soil as it breaks down.
- Improves moisture retention for nearby plants.
- Soft Surface:
- Provides a cushioned walkway.
- Gentle on feet and reduces soil compaction.
- Natural Appearance:
- Blends well with garden beds.
- Creates a seamless transition.
Disadvantages of Mulch or Bark Pathways
- Short Lifespan:
- Decomposes over time.
- Requires replenishment every 1-2 years.
- Weed and Pest Issues:
- Can attract weeds or insects.
- Needs a thick layer or barrier.
- Messiness:
- May scatter in windy conditions.
- Can stick to shoes and track indoors.
- Less Stable:
- Not ideal for high-traffic areas.
- Loose, uneven texture unsuitable for wheelchairs.
How to Implement a Mulch or Bark Pathway
- Plan the Path:
- Define the pathway shape (curved works well).
- Mark it with garden hose or spray paint.
- Clear and Level the Area:
- Remove grass, weeds, and rocks.
- Rake soil smooth but avoid over-compacting.
- Install Edging and Barrier:
- Add edging along the sides.
- Lay landscape fabric over soil and secure with pins.
- Spread Mulch:
- Pour a 3-4 inch layer of mulch.
- Use a rake to distribute evenly.
- Compact Lightly:
- Tamp the surface gently with a rake.
- Avoid making it too dense.
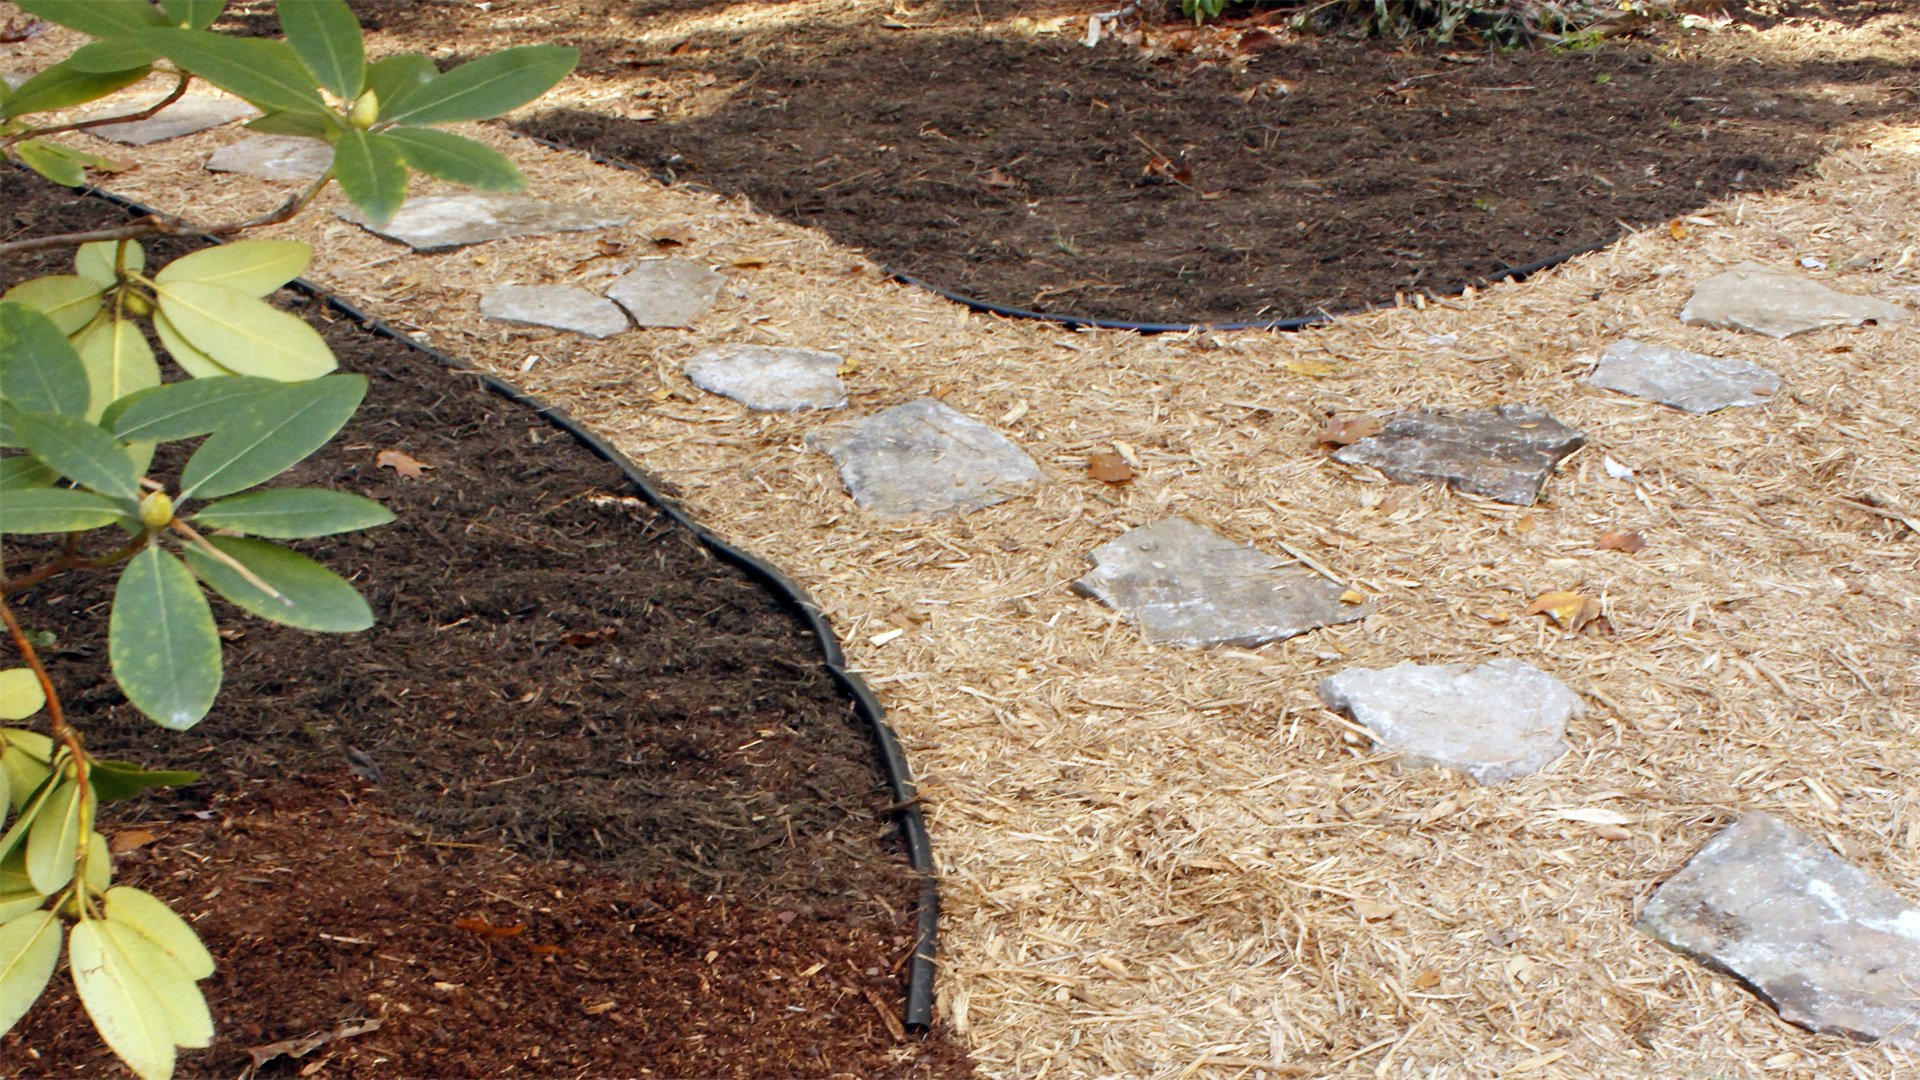
- Add Stepping Stones (Optional):
- Place flat stones at intervals.
- Embed them slightly to be flush with mulch.
- Maintain Regularly:
- Top up mulch annually as it decomposes.
- Rake occasionally to prevent matting.
To enhance style, edge the path with plants. For function, choose mulch that decomposes slowly.
🎨 Design Considerations for Style and Function

Beyond material choices, several design elements can elevate your DIY garden pathway. Integrating style and function requires attention to details like lighting, curves, and integration with garden features. Here are key considerations:
- Pathway Width:
- For Style: Vary widths to create interest.
- For Function: Ensure at least 3 feet for two people, or 2 feet for single file.
- Curves vs. Straight Lines:
- Curved Pathways: Add a sense of mystery and flow.
- Straight Paths: More formal and efficient for direct routes.
- Lighting:
- Style Options: Lanterns, bollard lights, or embedded LEDs.
- Functionally: Prevents trips and extends evening usability.
- Drainage Solutions:
- Slope the pathway slightly (1-2% grade).
- Use permeable materials like gravel or porous pavers.
- Edging and Borders:
- Defines the path aesthetically.
- Use materials that contrast or complement the surface.
- Integration with Plants:
- Soften edges with low-growing plants.
- Avoid tall plants that obstruct the path.
By balancing these aspects, you can create a pathway that is both beautiful and practical.
⚠️ Common Challenges and Solutions in DIY Pathway Projects
DIY pathway projects can encounter obstacles, but with foresight, you can overcome them. Here are common issues and how to address them:
- Uneven Ground:
- Challenge: Slopes or bumps in the garden.
- Solution: Consider terracing or building raised pathways. Use retaining walls or steps.
- Poor Drainage:
- Challenge: Water accumulation damaging the path.
- Solution: Install a base layer of gravel or add drain pipes. Choose permeable materials.
- Weed Infestation:
- Challenge: Weeds ruining appearance and stability.
- Solution: Lay quality weed barrier fabric. Use jointing sand that inhibits growth.
- Material Sourcing:
- Challenge: Finding affordable, quality materials.
- Solution: Shop at local quarries, recycling centers, or online. Consider recycled materials.
- Time Management:
- Challenge: Large pathways taking longer than expected.
- Solution: Break the project into phases. Enlist help from friends or family.
- Safety Concerns:
- Challenge: Risks from tools, heavy lifting, uneven surfaces.
- Solution: Always wear protective gear. Lift with your legs. Test pathway stability before full use.
By anticipating these challenges, you can plan effectively and ensure a smooth DIY experience.
✨ Conclusion: Embracing DIY for Garden Transformation
DIY garden pathways are a rewarding project that blends creativity with practicality. From gravel to stone, wood to brick, each material offers unique benefits for style and function. By following the methods outlined—complete with advantages, disadvantages, and step-by-step instructions—you can create a pathway that enhances your garden’s beauty and usability. Remember to tailor your choice to your climate, budget, and personal taste. Incorporate design elements like lighting and curves to make the path inviting, and address functional needs such as drainage and maintenance.
As you embark on this DIY journey, take pride in the hands-on process. A well-crafted pathway not only improves your outdoor space but also adds value to your home. Start with a small section to gain confidence, then expand as you see fit. With these simple ideas, you can transform your garden into a styled and functional oasis, one step at a time. Happy building!