A Complete Handbook for Crafting Artistic Garden Features
Welcome to the ultimate guide for transforming your garden into a stunning artistic sanctuary. In this comprehensive handbook, we delve into the intricate world of crafting artistic garden features, offering practical insights, step-by-step instructions, and inspiration drawn from global gardening trends. Artistic garden features go beyond mere decoration; they are expressions of creativity that harmonize with nature, enhancing the aesthetic appeal and functionality of outdoor spaces. Whether you're a seasoned gardener or a beginner, this handbook will equip you with the knowledge to design, build, and maintain unique garden elements that reflect your personal style. We'll explore various types of features, from sculptures and water installations to plant-based art and lighting designs, ensuring you have a holistic understanding. By the end, you'll be ready to embark on your own gardening projects with confidence.
Artistic garden features have evolved significantly over the years, influenced by cultural movements, environmental awareness, and technological advancements. Modern gardens often blend traditional craftsmanship with contemporary materials, creating spaces that are both beautiful and sustainable. This handbook is structured to provide a total overview, followed by detailed breakdowns of each feature type, and concluding with synthesis tips. We'll avoid vague suggestions—instead, focusing on concrete methods, materials, and techniques. For instance, rather than saying "use paint," we'll explain how to apply eco-friendly pigments to create murals on garden walls. Let's begin our journey into the art of garden crafting.
📚 Understanding the Fundamentals of Artistic Garden Features
Before diving into specific projects, it's crucial to grasp the core principles that underpin successful artistic garden features. These fundamentals will guide your design choices and ensure your creations are both visually appealing and functional.
Key Design Principles
Every artistic garden feature should adhere to basic design principles to achieve harmony and balance. Here are the essential elements to consider:
- Unity and Cohesion: Ensure all features complement each other and the overall garden theme.
- For example, if your garden has a rustic style, opt for natural materials like stone and wood.
- Scale and Proportion: Match the size of features to the garden space.
- Oversized sculptures can overwhelm small areas, while tiny elements may get lost in large landscapes.
- Color Theory: Use color palettes that enhance mood.
- Cool colors like blues and greens for tranquility, warm colors like reds and yellows for energy.
- Incorporate seasonal plants to add dynamic color changes.
- Texture and Contrast: Combine smooth, rough, soft, and hard textures to create visual interest.
- For instance, pair glossy metal sculptures with matte foliage.
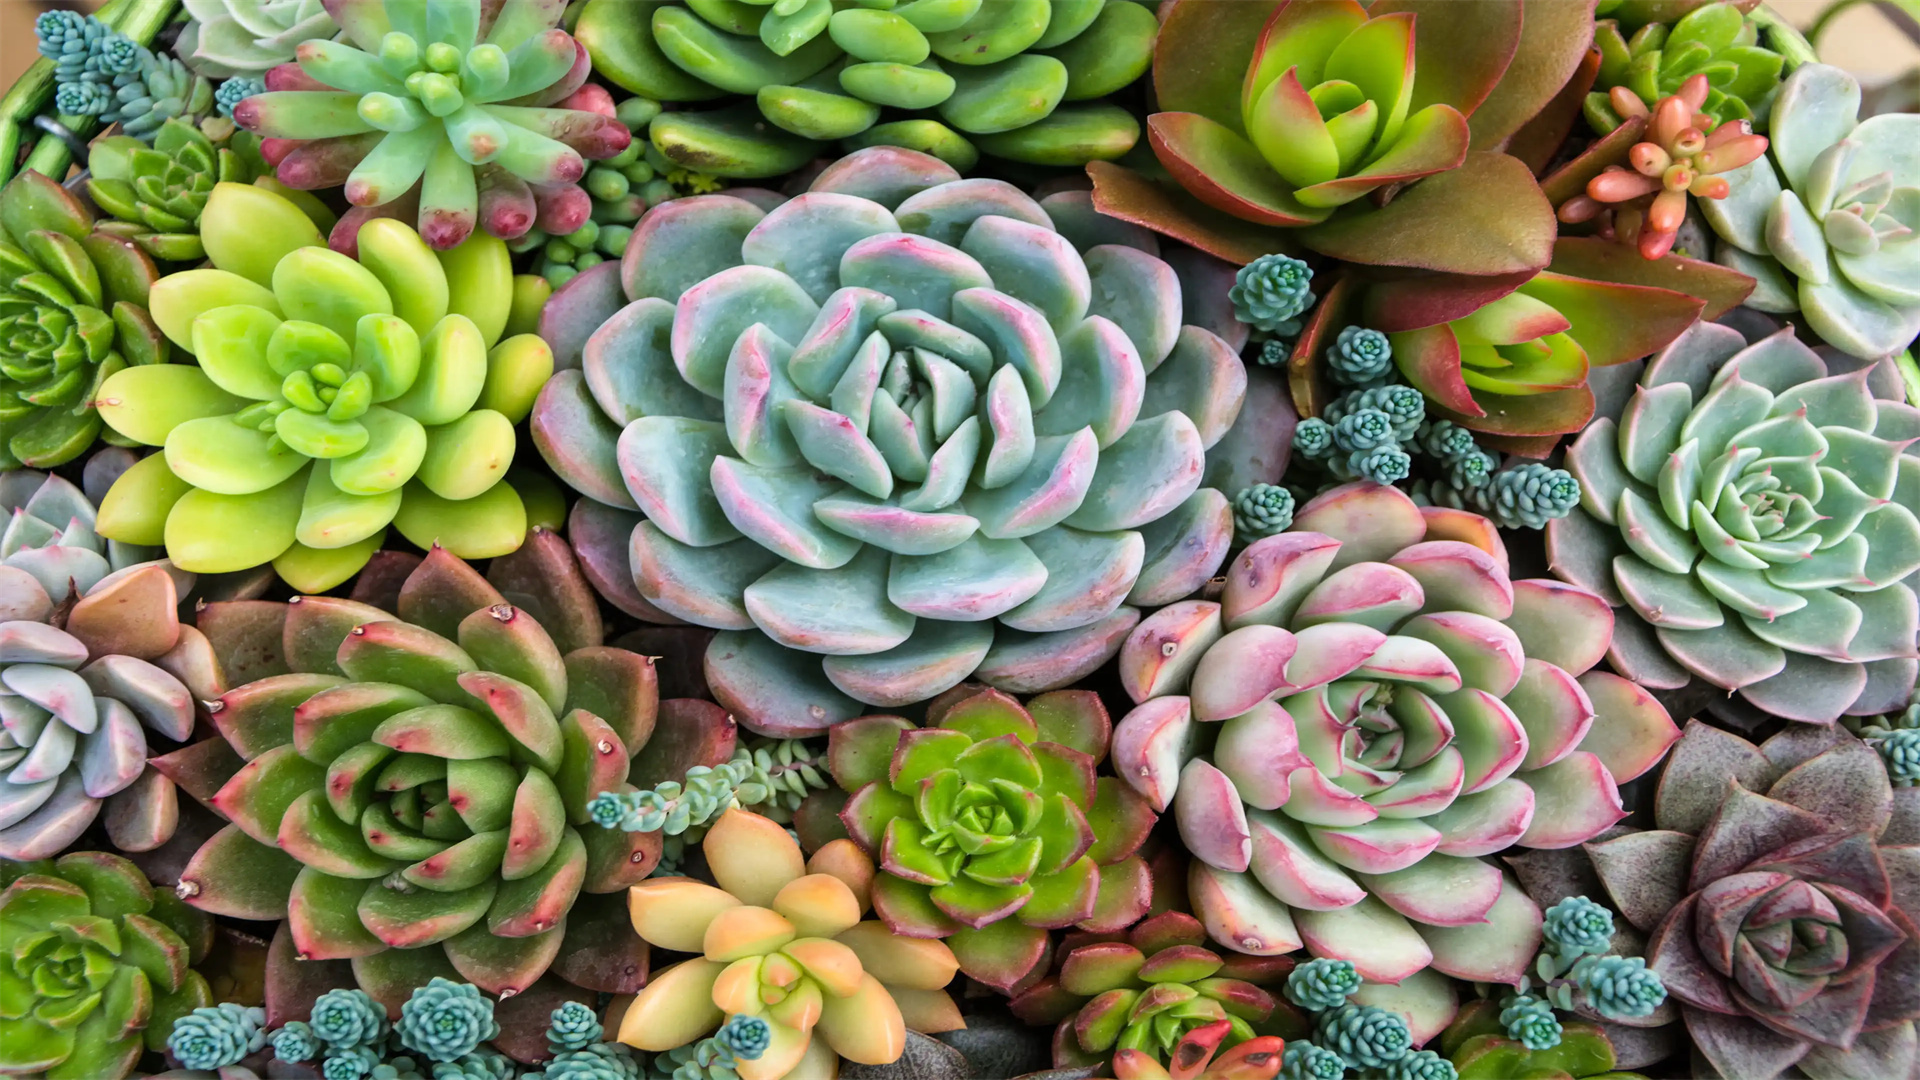
- Sustainability: Choose eco-friendly materials and practices.
- Use recycled metals or drought-resistant plants to minimize environmental impact.
Planning and Preparation
Proper planning is the backbone of any garden project. Follow these steps to set a solid foundation:
- Site Assessment: Evaluate your garden's soil type, sunlight exposure, drainage, and existing flora.
- Use tools like soil test kits or consult with local gardening experts.
- Budgeting: Determine your budget for materials, tools, and potential professional help.
- Allocate funds for unexpected expenses, such as weather-related delays.
- Sketching and Modeling: Create rough sketches or digital models of your garden layout.
- Software like SketchUp or even hand-drawn plans can help visualize feature placements.
- Material Sourcing: Research local suppliers for materials like ceramics, metals, or native plants.
- Consider upcycling items from thrift stores or scrap yards to add uniqueness.
- Timeline Creation: Develop a realistic timeline, accounting for seasons.
- Some projects, like planting perennials, are best done in spring or fall.
🛠️ Types of Artistic Garden Features and Their Crafting Methods
This section explores various artistic garden features in detail, each with its own methods, advantages, disadvantages, and implementation steps. We'll cover multiple categories to cater to diverse interests and skill levels.
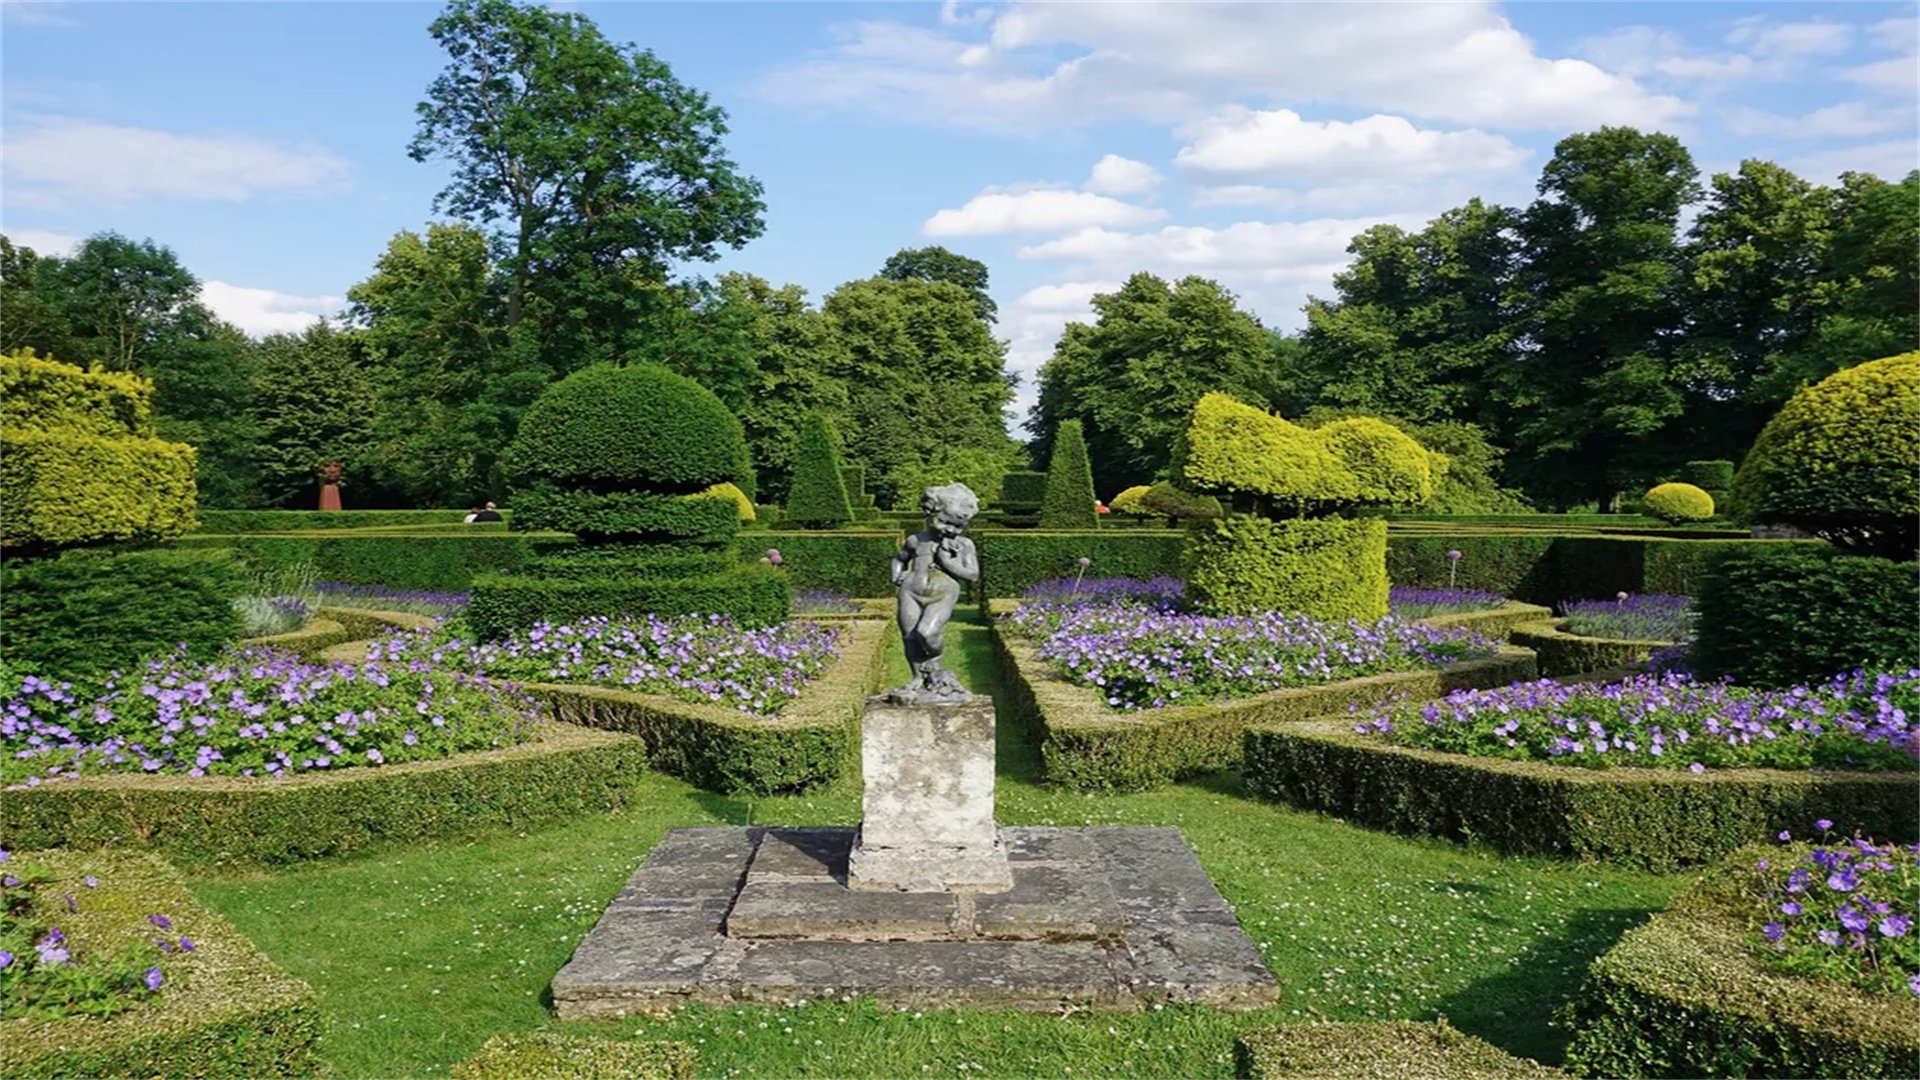
🗿 Feature Type 1: Garden Sculptures and Installations
Garden sculptures are three-dimensional artworks that serve as focal points. They can be made from materials like metal, stone, wood, or recycled objects.
Advantages and Disadvantages
- Advantages:
- Sculptures add year-round visual interest, can be customized to any style, and often require minimal maintenance once installed.
- They also increase property value by enhancing curb appeal.
- Disadvantages:
- High-quality materials can be expensive, and large sculptures may require professional installation.
- Some materials, like wood, are prone to weathering and need periodic treatment.
How to Create a Metal Garden Sculpture
Follow these steps to craft a simple metal sculpture:
- Design Concept: Start with a sketch of your sculpture, considering abstract shapes or representational forms like animals.
- For inspiration, look at works by artists like Henry Moore or local metal artisans.
- Material Selection: Choose rust-resistant metals like stainless steel, aluminum, or corten steel.
- Purchase sheets, rods, or scraps from metal suppliers.
- Ensure you have safety gear: gloves, goggles, and a welding mask.
- Fabrication Process:
- Cut the metal using a plasma cutter or angle grinder based on your design measurements.
- Weld pieces together using a MIG or TIG welder; if you're a beginner, consider taking a welding class or hiring a professional.
- Grind down rough edges and apply a protective finish, such as a clear coat or patina solution, to prevent corrosion.
- Installation: Dig a hole in the garden, pour a concrete foundation for stability, and secure the sculpture with anchors.
- For lighter pieces, use heavy-duty stakes driven into the ground.
- Maintenance: Inspect annually for rust or damage, and reapply finishes as needed.
- Clean with mild soap and water to remove dirt buildup.
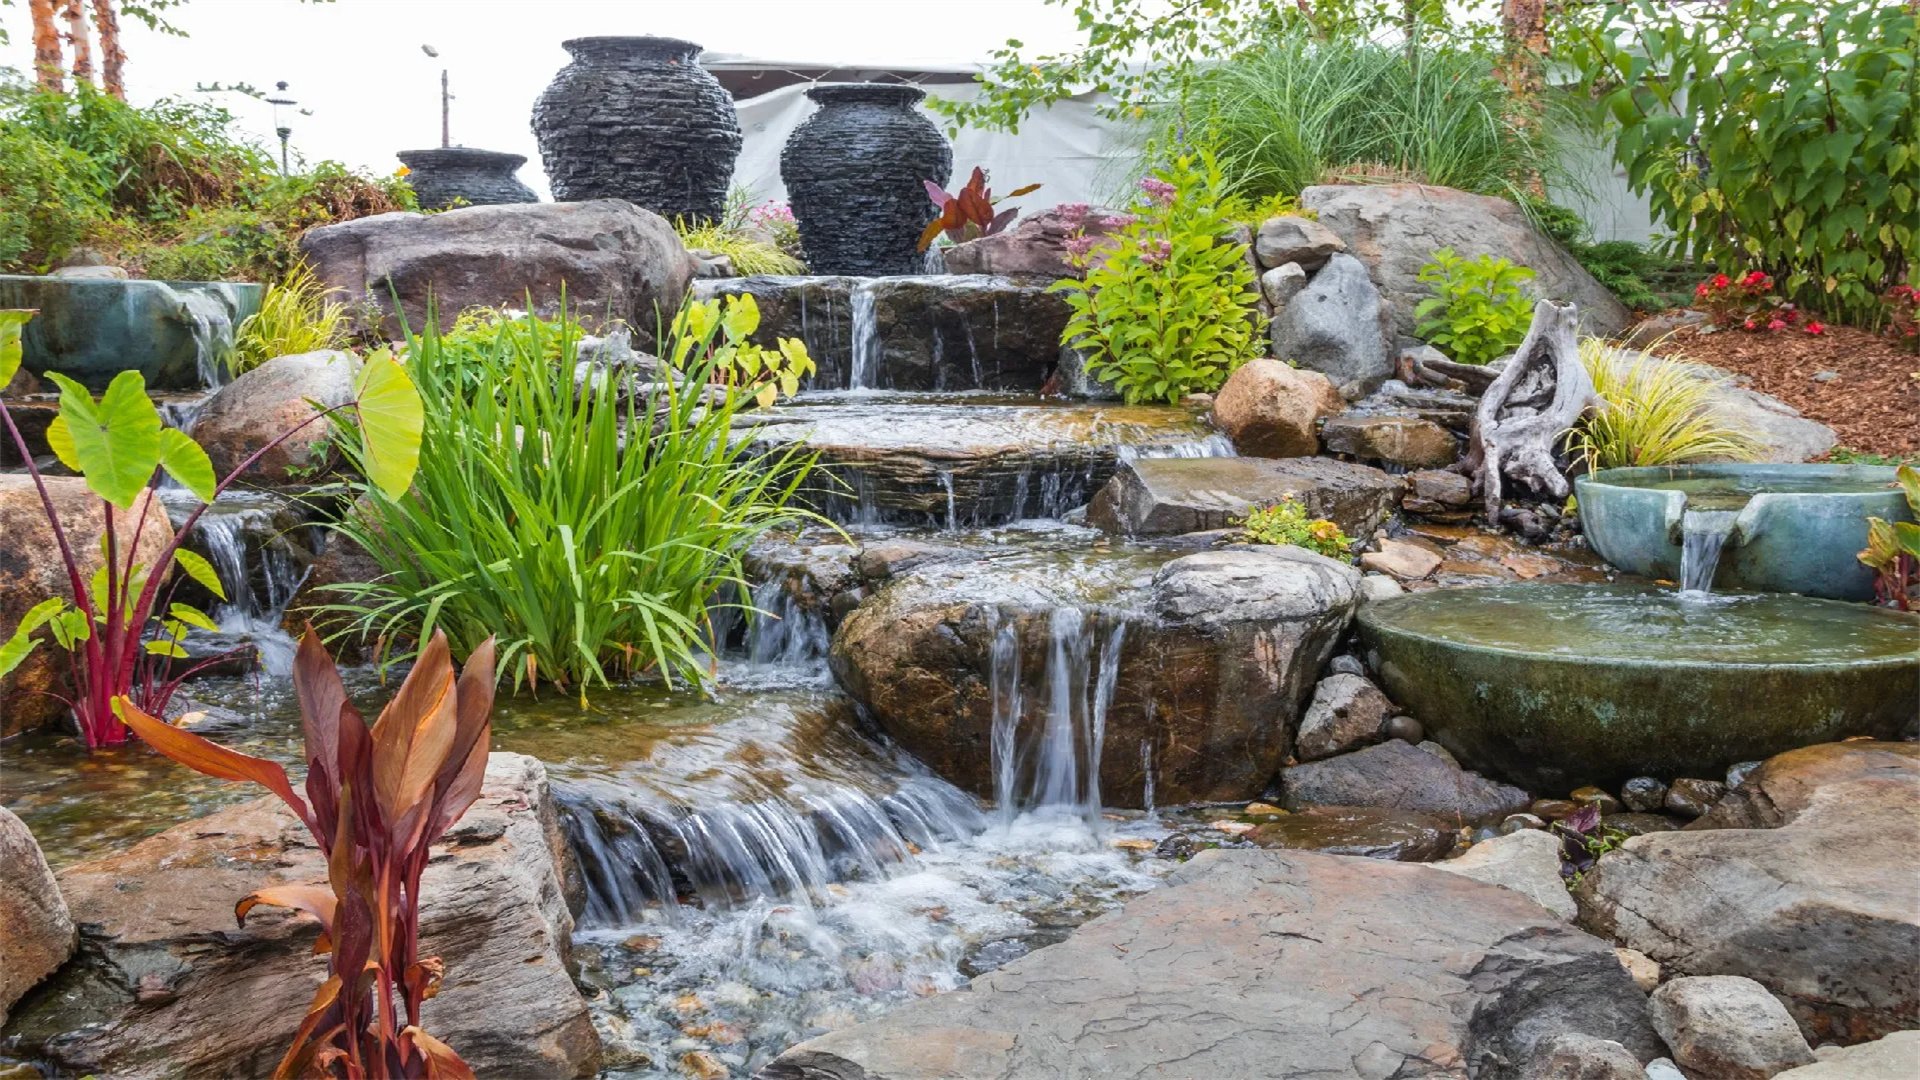
💧 Feature Type 2: Water Features
Water features, such as fountains, ponds, and waterfalls, introduce movement and sound, creating a serene atmosphere. They can be customized from pre-made kits or built from scratch.
Advantages and Disadvantages
- Advantages:
- Water features attract wildlife like birds and butterflies, mask noise from nearby streets, and promote relaxation through soothing sounds.
- They also help with garden microclimates by increasing humidity.
- Disadvantages:
- They require regular maintenance to prevent algae growth and pump issues.
- Installation can be complex, involving plumbing and electrical work, and may consume significant water and energy.
How to Build a Tiered Stone Fountain
This project involves stacking stones to create a cascading water effect. Here's a detailed guide:
- Planning and Design: Decide on the fountain's size and location—ensure it's near a power source for the pump.
- Sketch a tiered structure with at least two levels for visual appeal.
- Materials and Tools: Gather flat stones (slate or granite), a waterproof basin or liner, a submersible pump, PVC piping, silicone sealant, and a drill with masonry bits.
- You'll also need a shovel and level.
- Construction Steps:
- Excavate a hole for the basin, ensuring it's level and deep enough to accommodate the pump and piping. Place the basin and backfill around it for stability.
- Assemble the pump inside the basin, connecting it to PVC pipes that will run up through the stone tiers. Use silicone to seal joints and prevent leaks.
- Stack the stones, drilling holes for the piping if necessary. Arrange them in a stable, aesthetically pleasing manner, starting with the largest base stone.
- Test the water flow, adjusting the pump settings to achieve a gentle cascade. Add decorative elements like pebbles or aquatic plants around the base.
- Maintenance Routine: Clean the pump filter monthly, refill water lost to evaporation, and treat with algaecide as needed.
- In winter, drain and cover the fountain to prevent freezing damage.
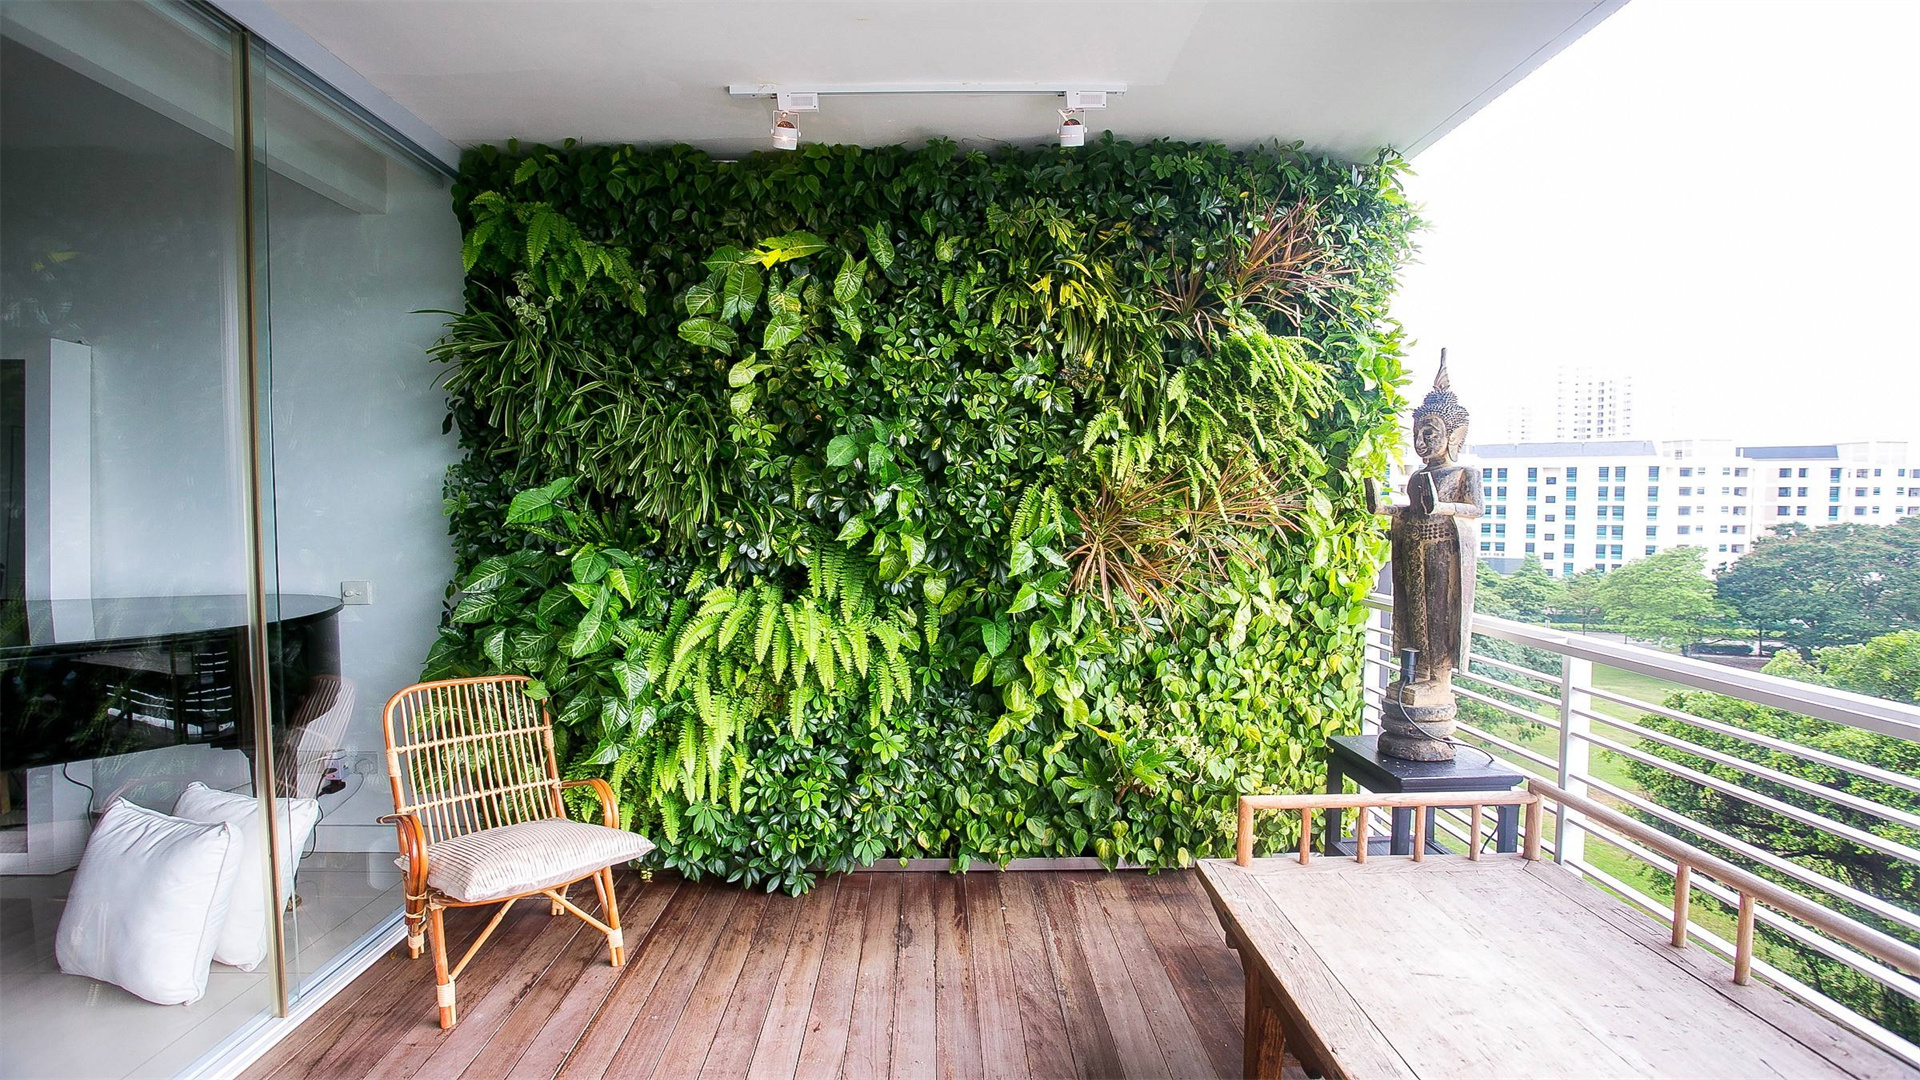
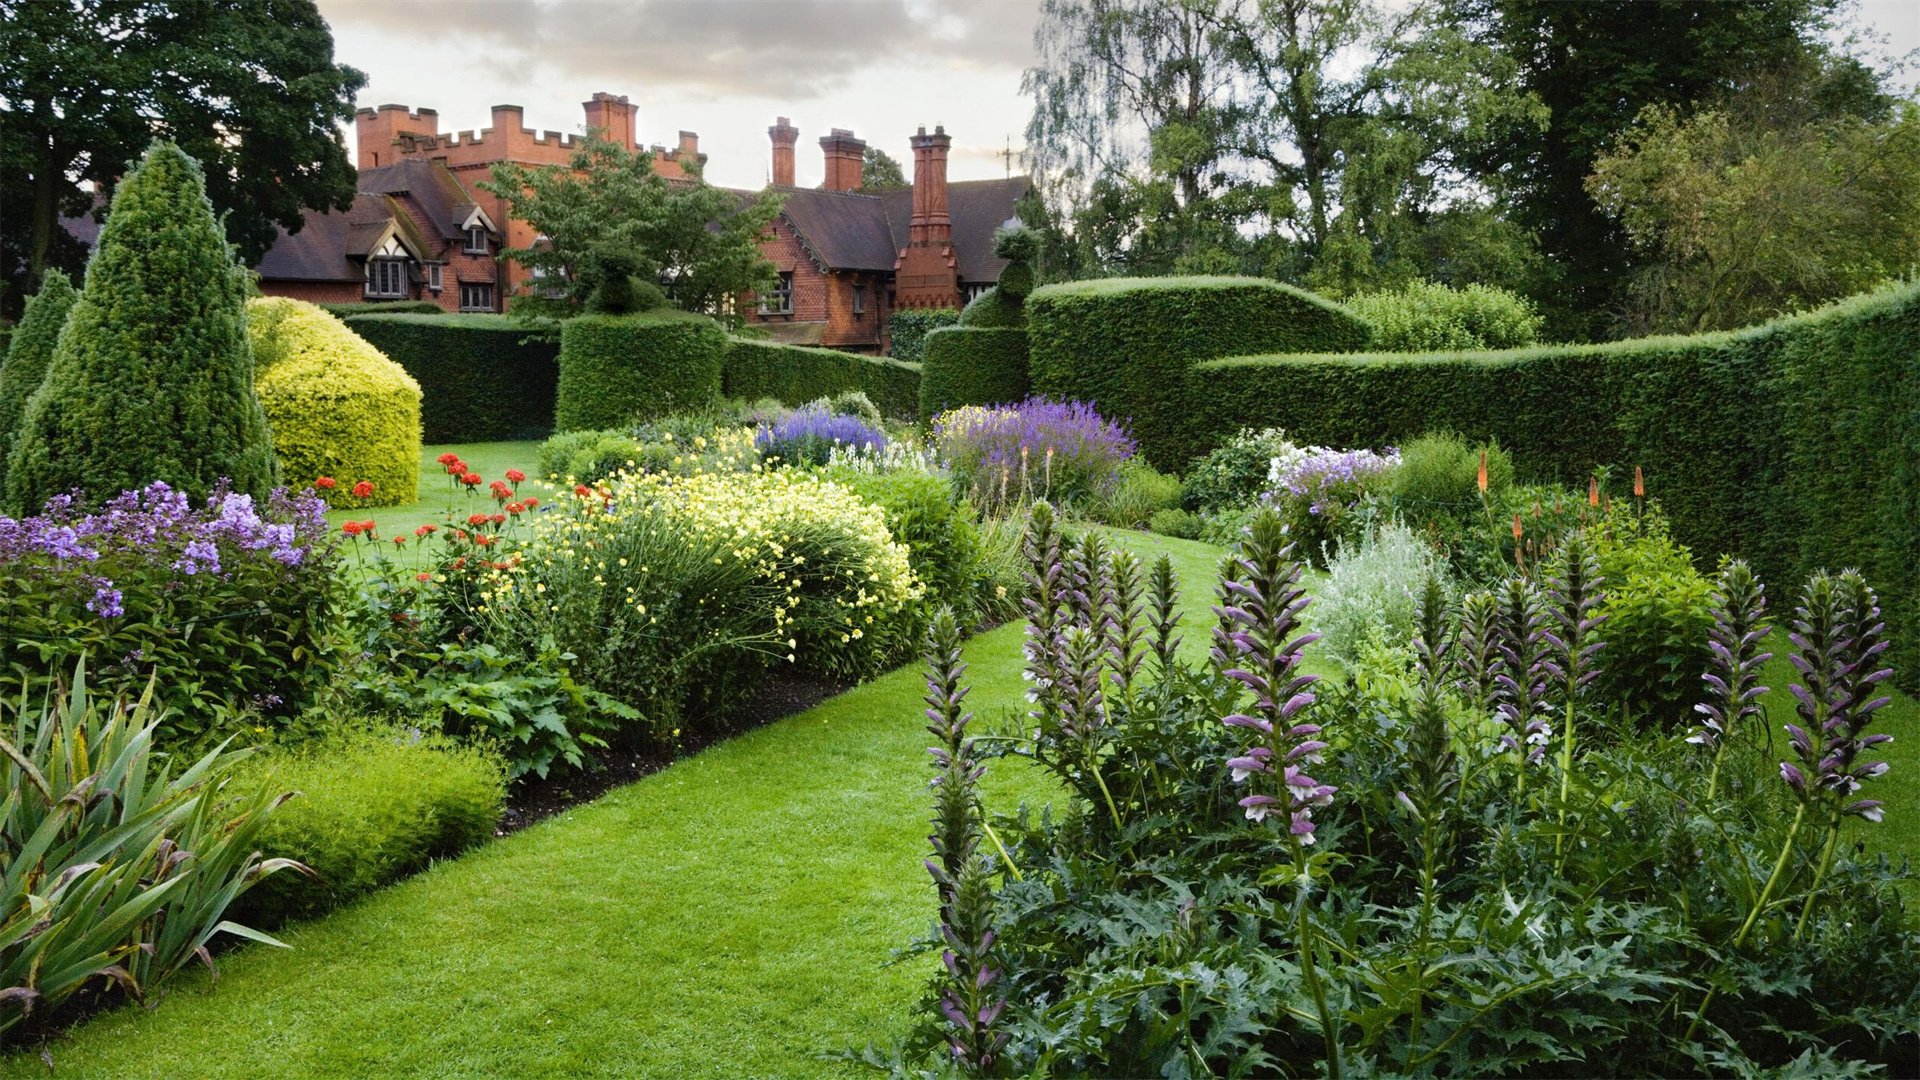
🌿 Feature Type 3: Plant-Based Art and Topiary
Plant-based art uses living plants to create shapes, patterns, and structures. This includes topiary, espalier, and living walls, which blend horticulture with artistic expression.
Advantages and Disadvantages
- Advantages:
- These features are eco-friendly, improve air quality, and evolve with seasons, offering dynamic beauty.
- They can also provide privacy or shade when used as green screens.
- Disadvantages:
- They require ongoing care, such as pruning and watering, and may take years to reach full form.
- Pests and diseases can affect plant health, necessitating vigilant monitoring.
How to Create a Geometric Topiary
Topiary involves shaping shrubs into precise forms. Here's a method for a cube-shaped topiary:
- Plant Selection: Choose dense, evergreen shrubs like boxwood (Buxus) or yew (Taxus), which respond well to pruning.
- Purchase young plants from a nursery, ensuring they are healthy and pest-free.
- Preparation: Plant the shrub in well-draining soil with adequate sunlight. Allow it to establish for a growing season before starting heavy pruning.
- Set up a frame or template—you can use wire mesh shaped into a cube to guide cutting.
- Shaping Process:
- Begin by trimming the shrub into a rough cube shape using sharp hedge shears. Work slowly, removing small amounts at a time to avoid over-pruning.
- Use the wire frame as a guide, clipping branches that extend beyond it. Focus on maintaining symmetry by stepping back frequently to assess progress.
- For intricate details, switch to hand pruners. Trim new growth every 4-6 weeks during the growing season to maintain shape.
- Care and Maintenance: Water regularly, especially during dry spells, and apply balanced fertilizer in spring.
- Monitor for common issues like leaf blight, and treat with organic fungicides if needed.
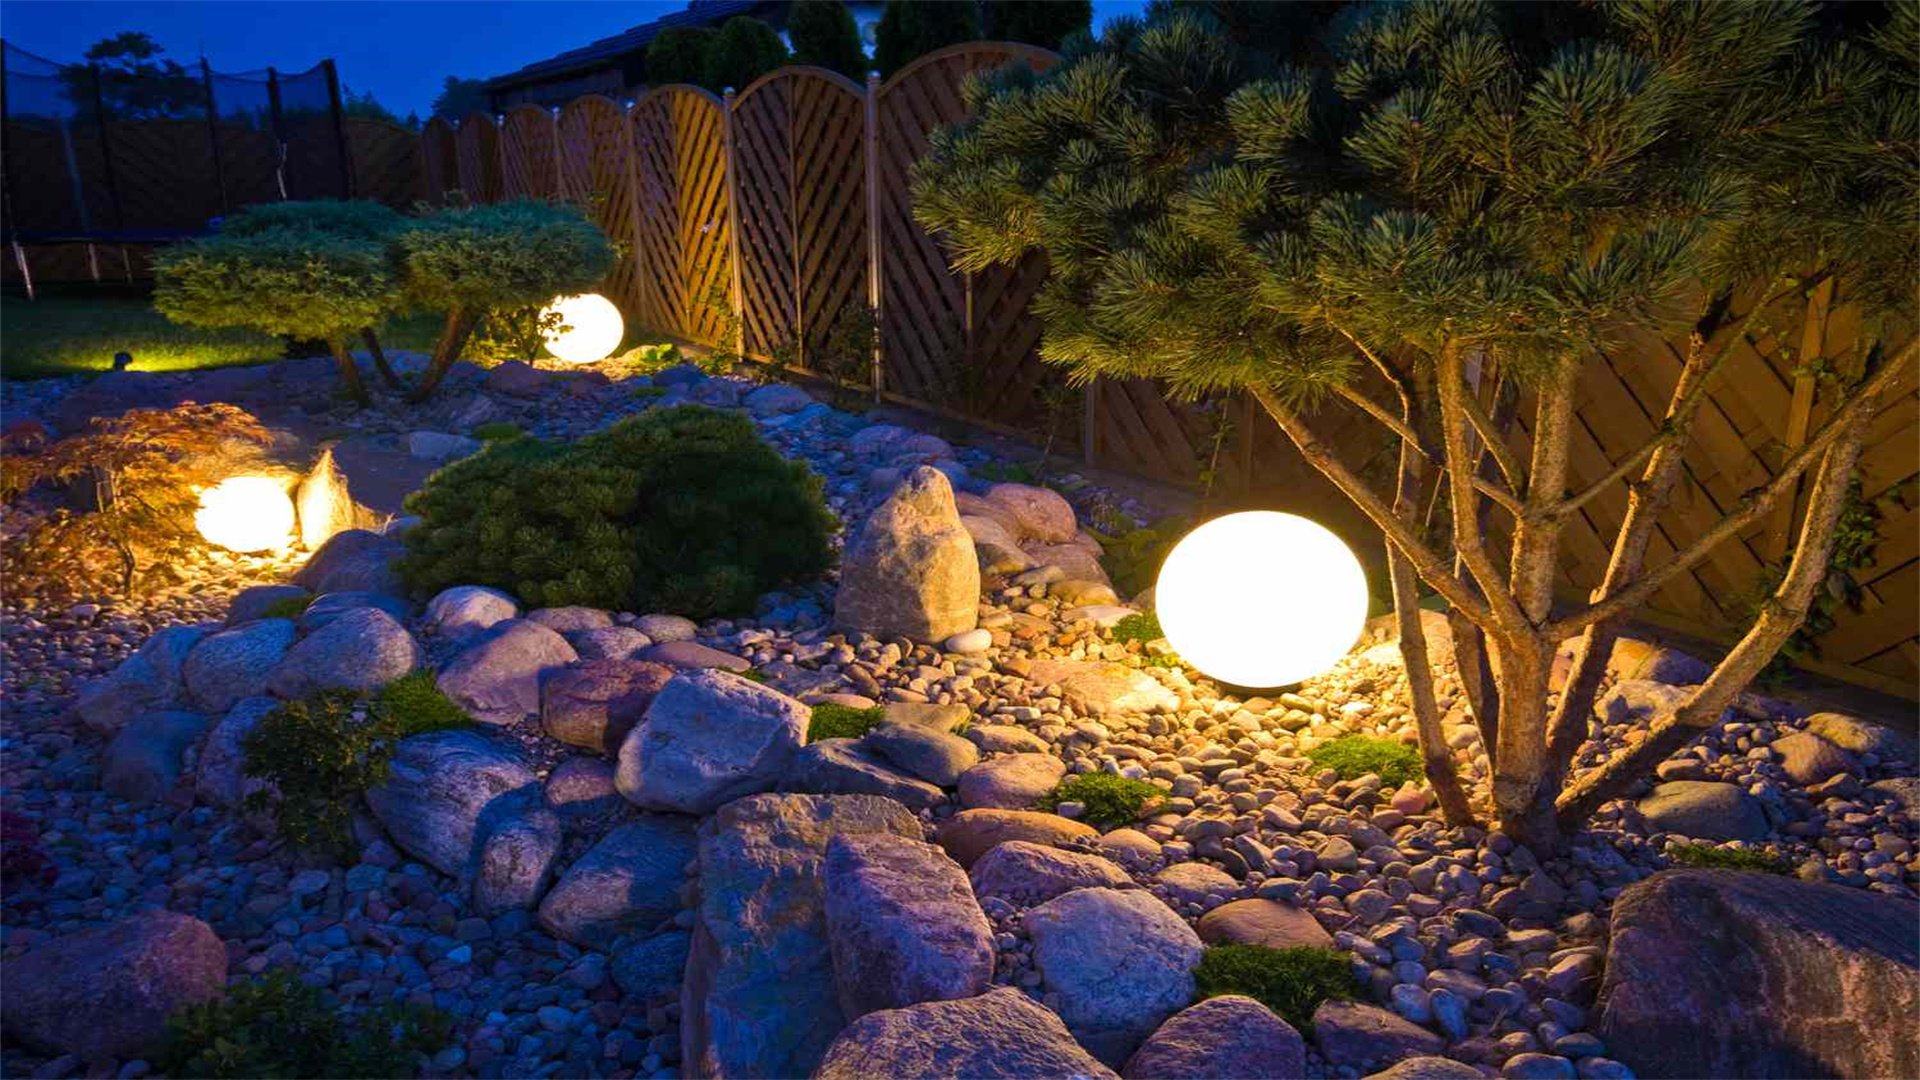
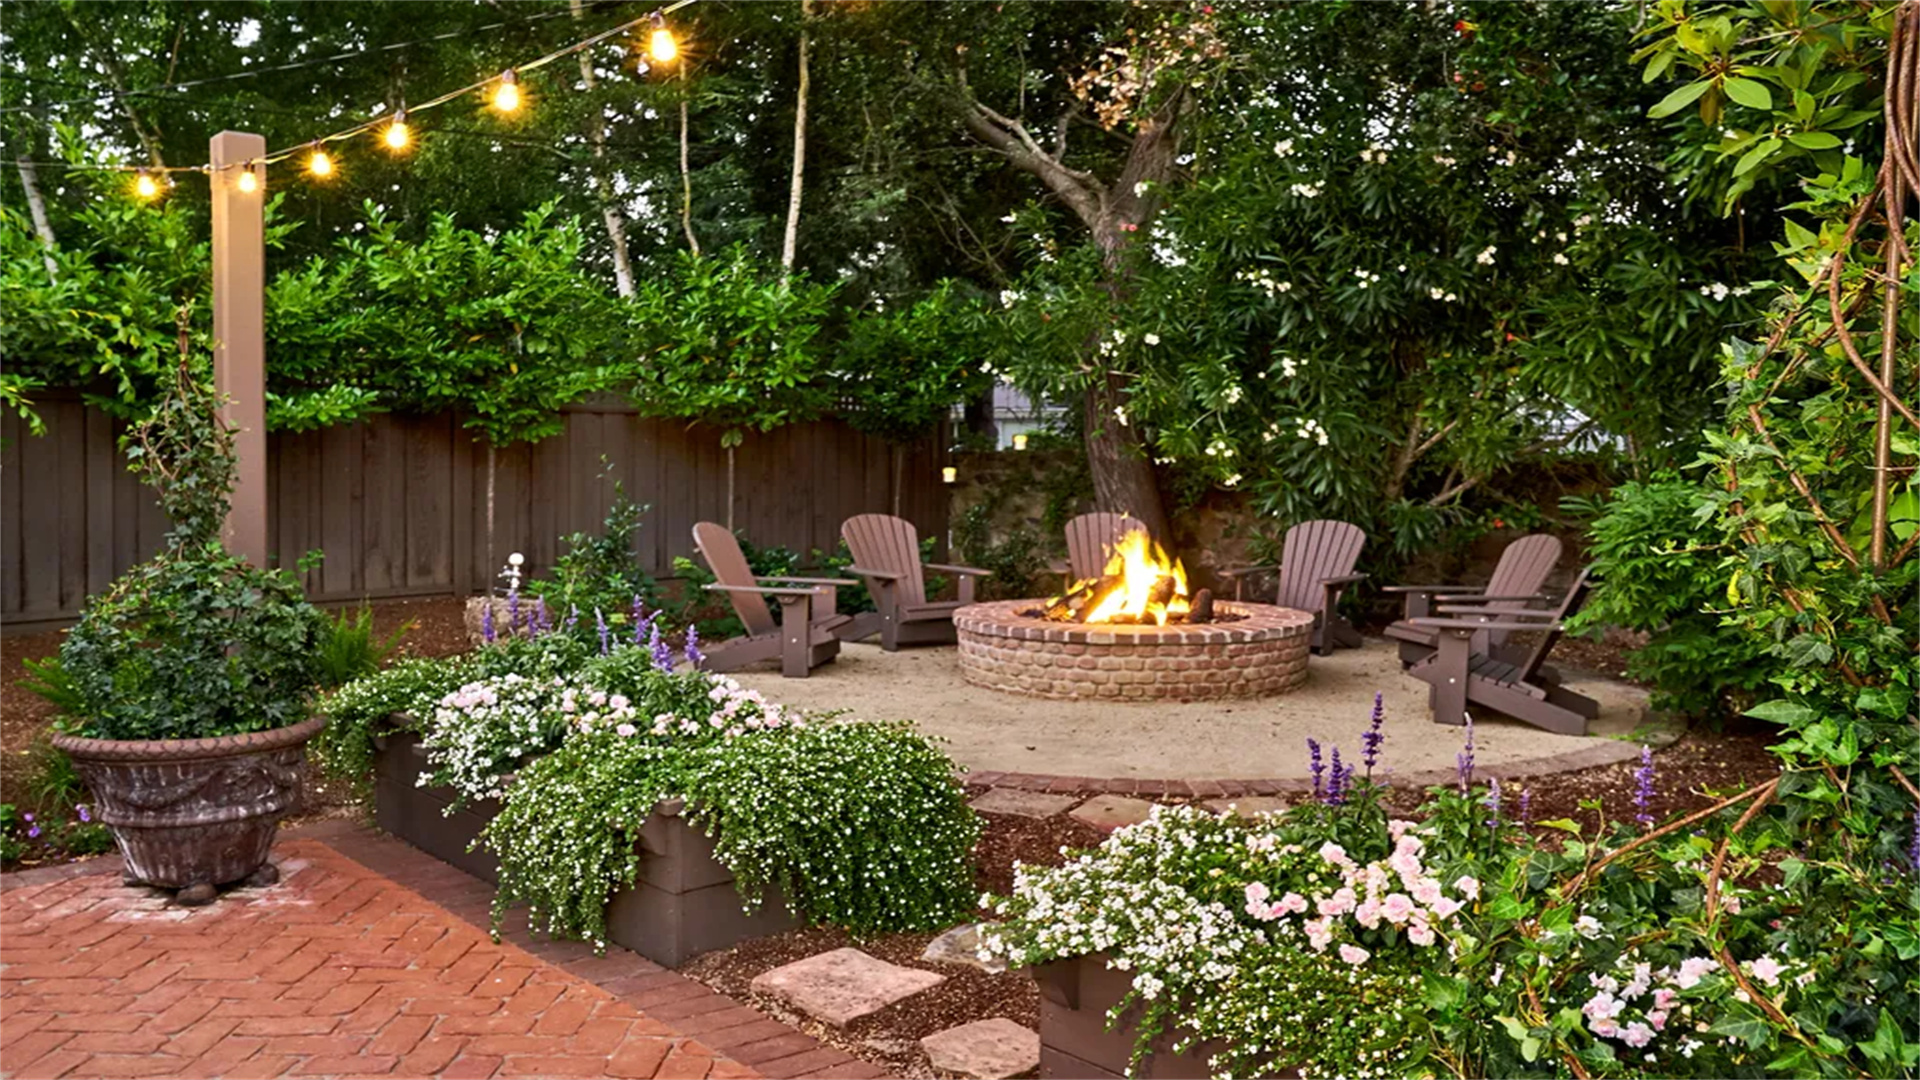
💡 Feature Type 4: Garden Lighting and Illumination
Lighting enhances garden features by extending visibility into the evening and creating dramatic effects. Options include solar lights, LED strips, and lanterns.
Advantages and Disadvantages
- Advantages:
- Lighting improves safety by illuminating paths, highlights key features, and sets moods for outdoor entertaining.
- Solar options are energy-efficient and easy to install.
- Disadvantages:
- Electrical installations require professional expertise to avoid hazards.
- Some lights may attract insects, and cheaper models can be less durable in harsh weather.
How to Install a Low-Voltage Lighting System
This system uses transformers to reduce voltage, making it safe for DIY projects. Follow these steps:
- Design Layout: Map out where you want lights—along pathways, near sculptures, or in trees.
- Use stakes and string to mark positions, ensuring even spacing for balanced illumination.
- Materials and Tools: Purchase a low-voltage transformer, waterproof cables, LED light fixtures, and connectors.
- You'll also need a shovel for trenching, wire cutters, and a voltage tester.
- Installation Steps:
- Mount the transformer near an outdoor GFCI outlet, following manufacturer instructions. Ensure it's protected from rain and has a timer or photocell for automatic operation.
- Dig shallow trenches (about 6 inches deep) for cables along your marked layout. Lay the cables, leaving slack at each light location.
- Connect the lights to the cables using waterproof connectors. Bury the cables, then test the system by turning on the transformer. Adjust light angles to highlight features like flower beds or water elements.
- Maintenance Tips: Clean light lenses periodically to remove dirt, check connections for corrosion, and replace bulbs as they burn out.
- In winter, store removable lights to prevent damage from snow.
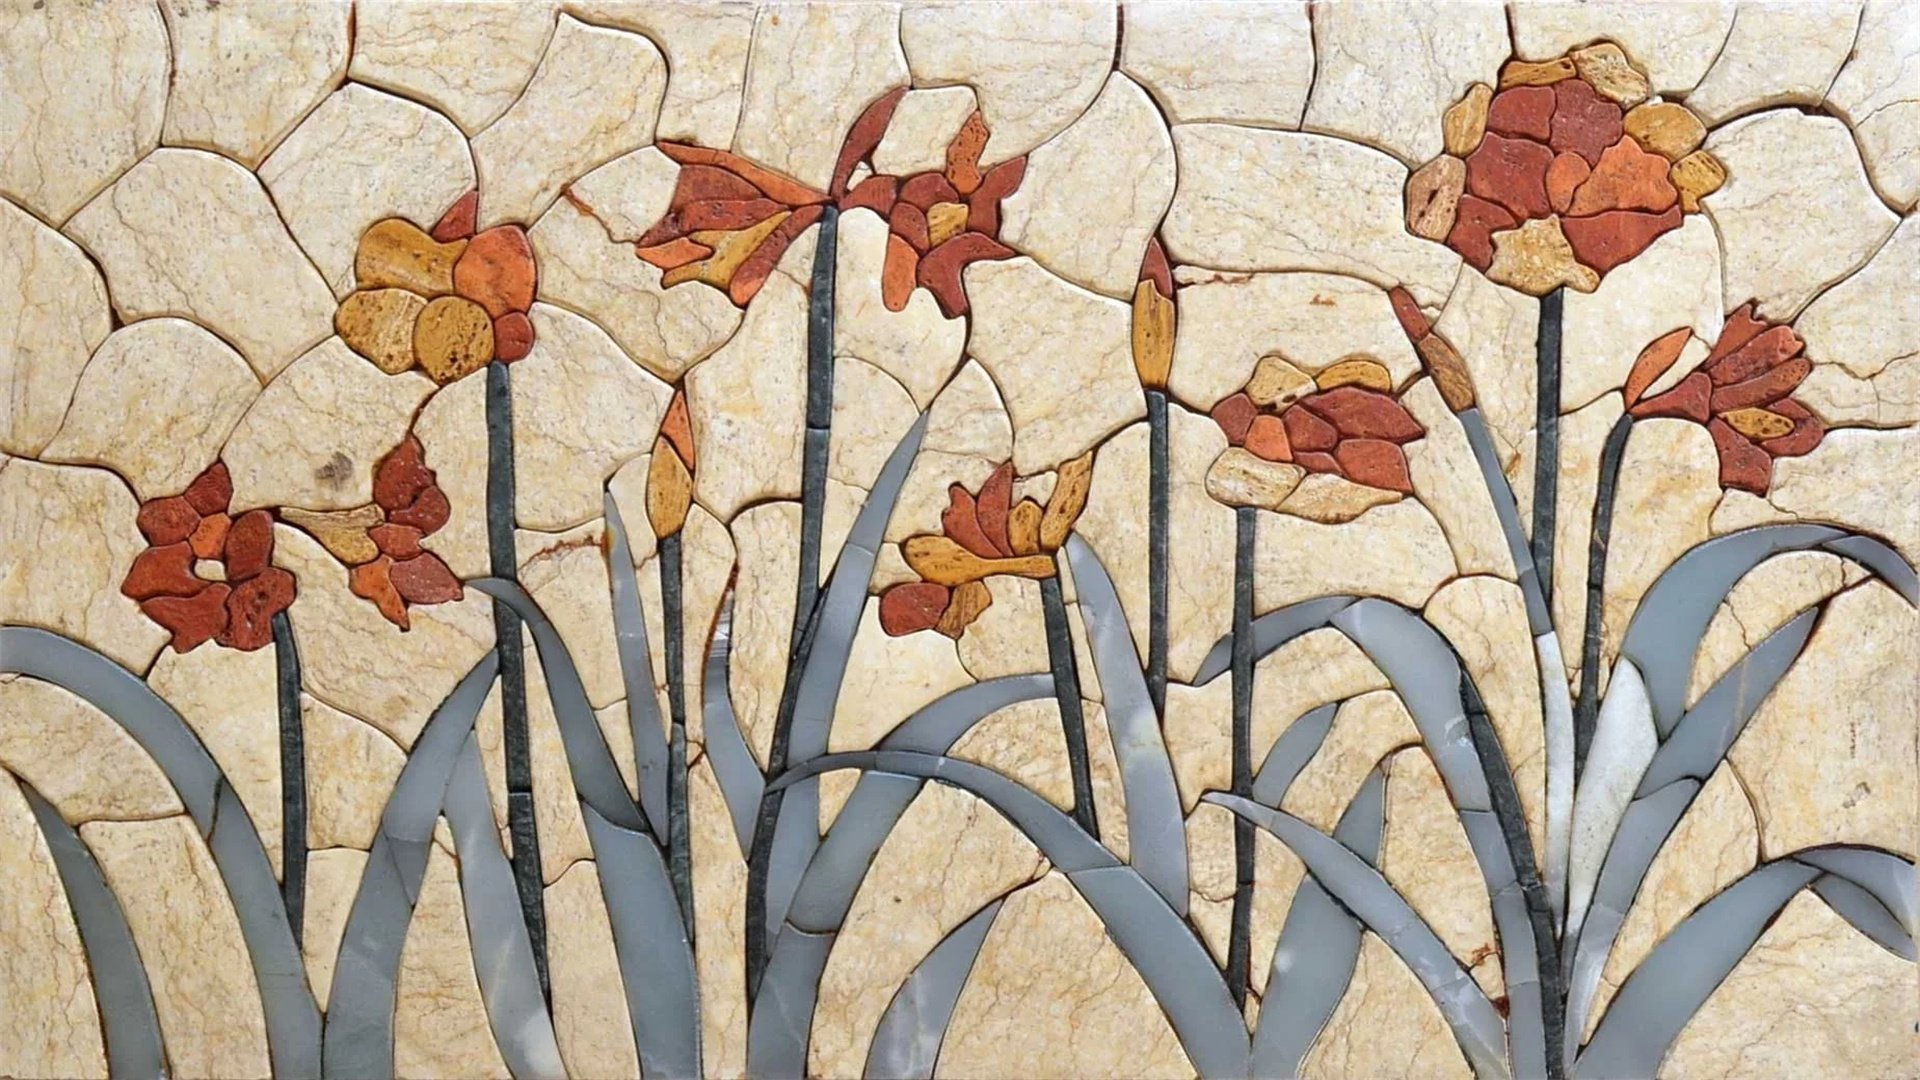
🧩 Feature Type 5: Mosaic and Tiled Art
Mosaics involve arranging small pieces of tile, glass, or stone to create patterns or images on surfaces like walls, tables, or stepping stones.
Advantages and Disadvantages
- Advantages:
- Mosaics are durable, weather-resistant, and add vibrant color to gardens.
- They allow for high customization, from abstract designs to detailed scenes, and can be made from recycled materials like broken ceramics.
- Disadvantages:
- The process is time-consuming and requires precision.
- Materials can be sharp, necessitating careful handling, and grout may crack over time, needing repairs.
How to Craft a Mosaic Garden Stepping Stone
Stepping stones are a beginner-friendly project. Here's how to make one:
- Design and Planning: Sketch a simple design, such as a floral motif or geometric pattern.
- Choose a color scheme that complements your garden—earth tones for natural looks, bright colors for whimsy.
- Materials: Gather a concrete stepping stone mold, mosaic tiles (ceramic, glass, or pebbles), tile nippers, adhesive (like thin-set mortar), grout, a trowel, and sealant.
- Safety gear includes gloves and goggles.
- Creation Process:
- Prepare the mold by lightly oiling it to ease removal. Mix concrete according to package instructions and pour into the mold, smoothing the surface. Let it cure for 24-48 hours.
- Arrange tiles on the cured stone using adhesive, pressing them firmly. Use tile nippers to cut pieces for edges or intricate details. Allow the adhesive to dry completely.
- Apply grout with a trowel, pressing it into gaps. Wipe excess with a damp sponge, then let the grout set for 24 hours. Buff with a dry cloth to remove haze.
- Seal the mosaic with an outdoor-rated sealant to protect against moisture and UV rays.
- Installation and Care: Place the stepping stone in a garden path, ensuring it's level.
- Clean periodically with mild detergent, and reapply sealant every few years to maintain appearance.
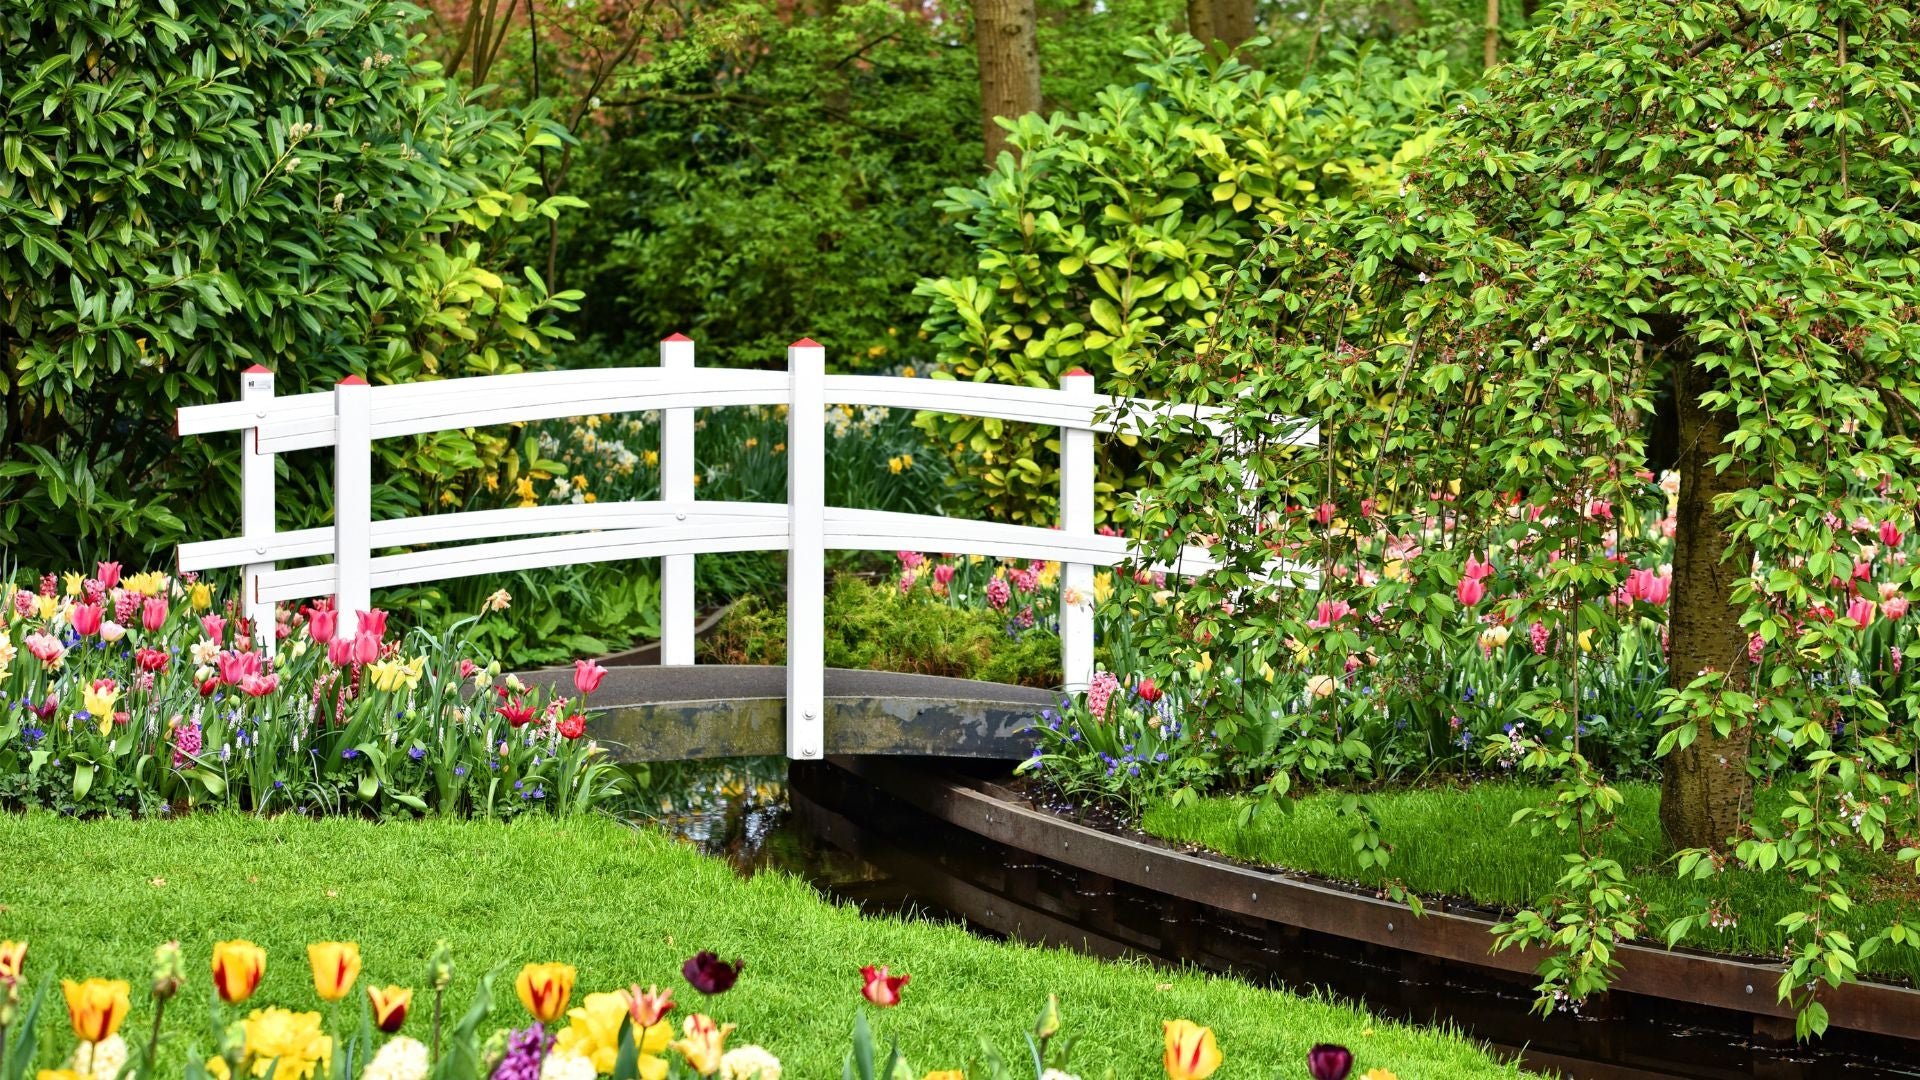
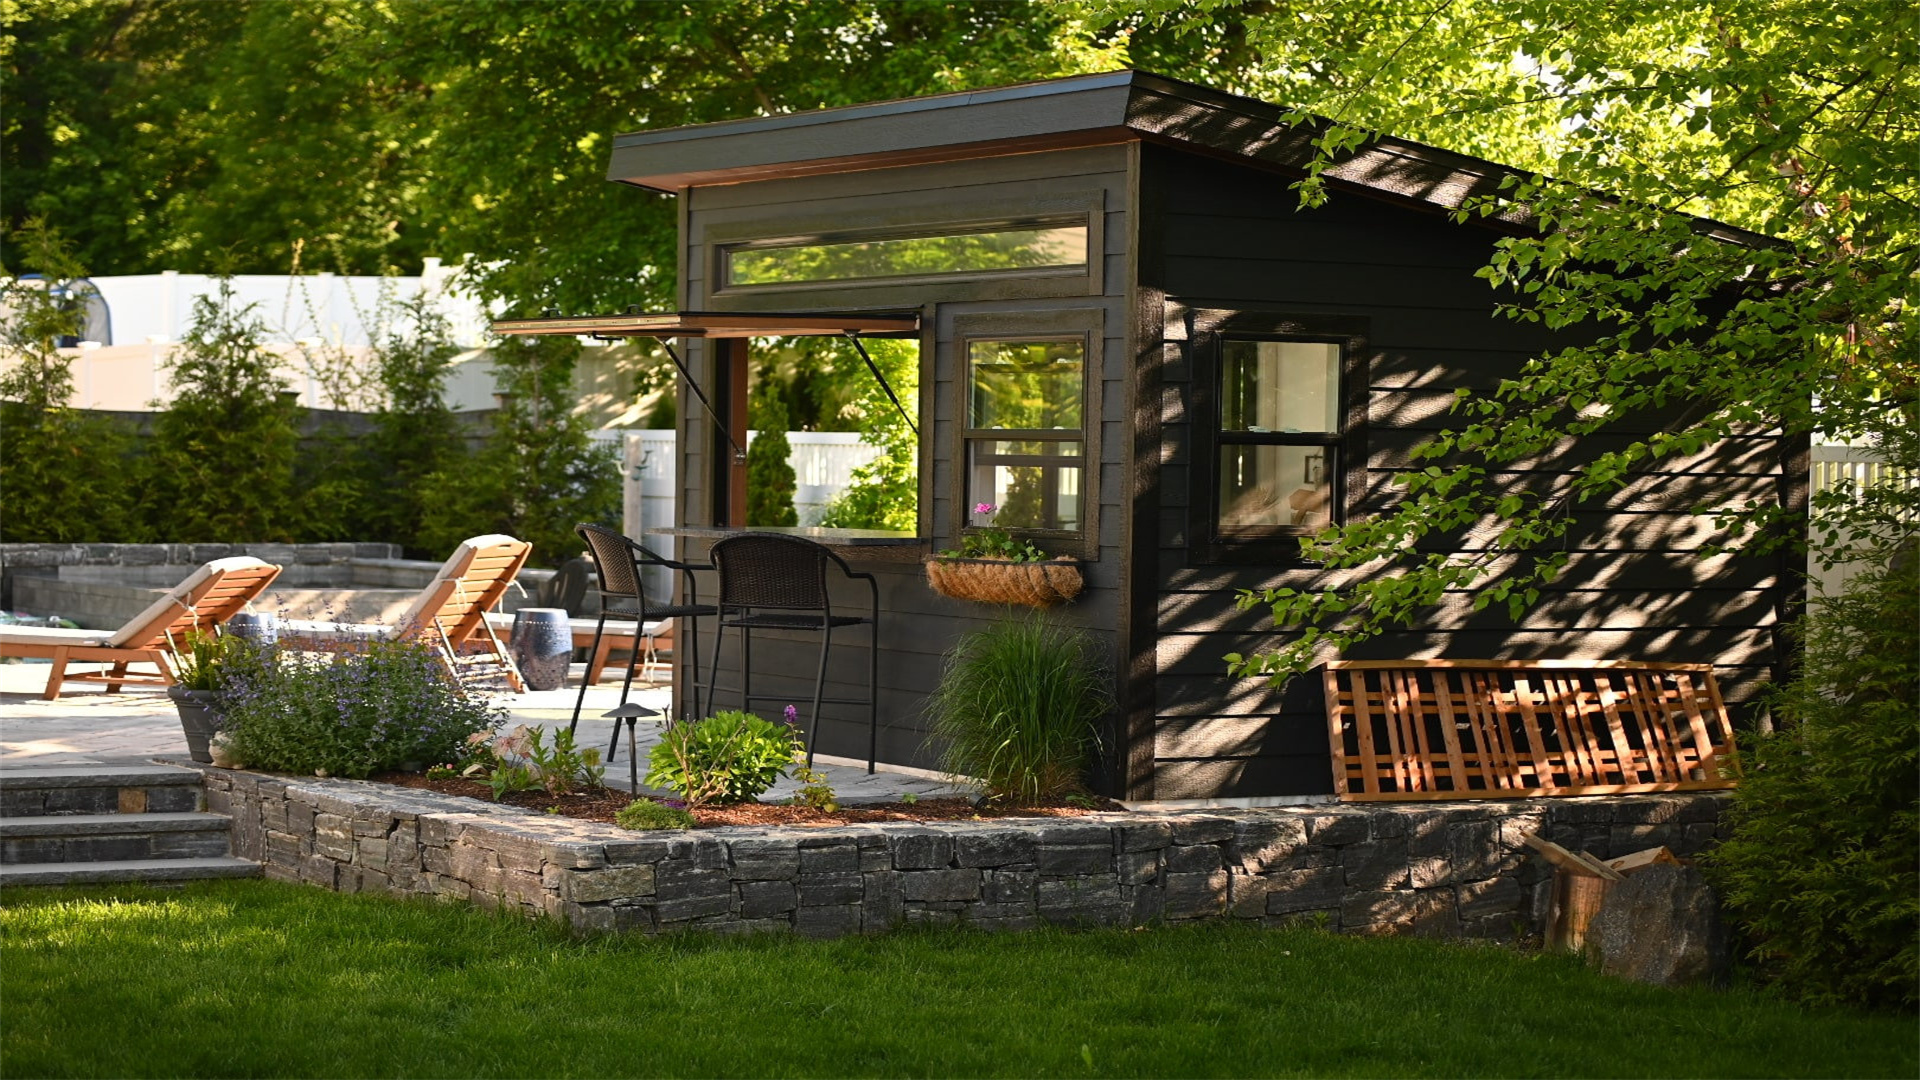
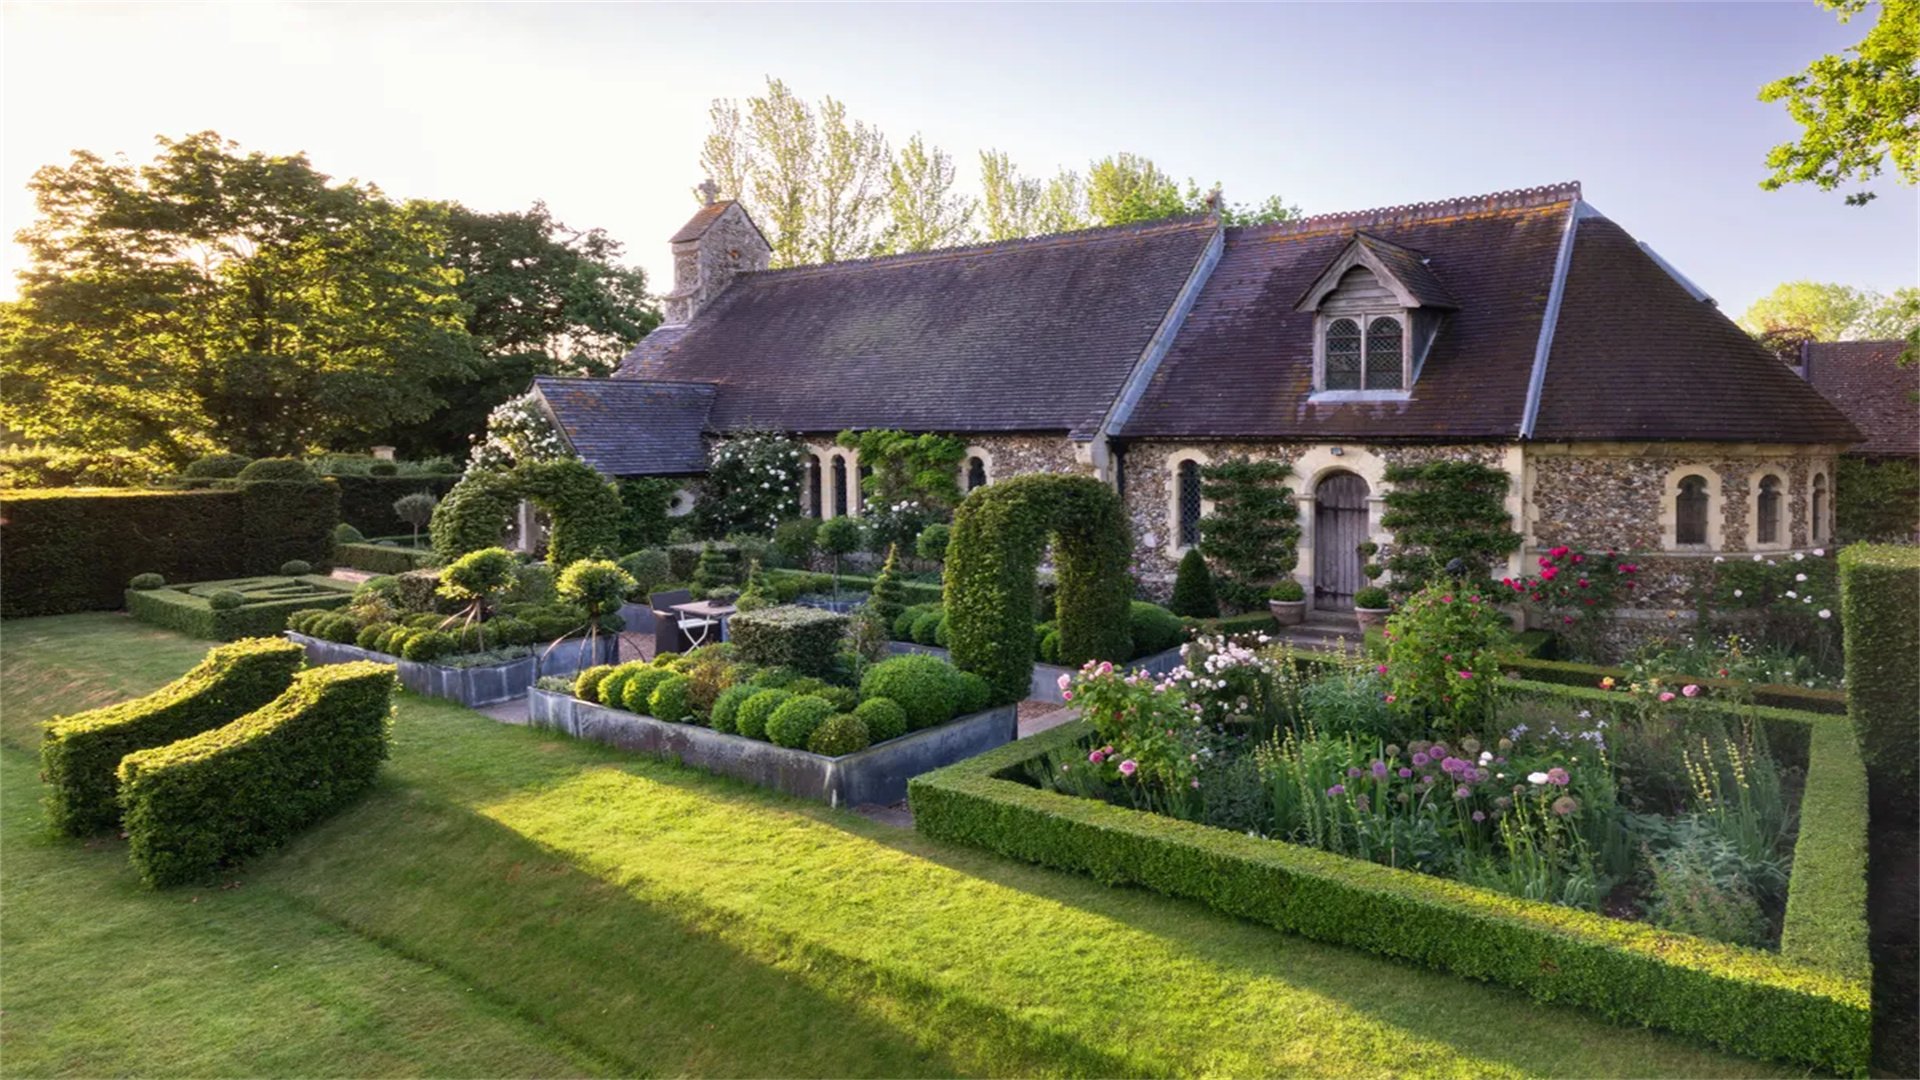
🌐 Integrating Multiple Features for Cohesive Garden Design
Creating a harmonious garden involves blending various artistic features seamlessly. This section covers strategies for integration, ensuring your garden feels unified rather than disjointed.
Design Harmony Techniques
Use these methods to connect different features:
- Thematic Consistency: Choose a central theme, such as "Zen retreat" or "modern minimalist," and select features that align with it.
- For a Zen garden, incorporate raked gravel, stone lanterns, and minimalist sculptures.
- Repetition of Elements: Repeat colors, materials, or shapes across features.
- For example, if you have a metal sculpture, use similar metal finishes in lighting fixtures or furniture.
- Pathway Integration: Design pathways that guide visitors through feature clusters. -
- Use materials like mosaic stepping stones or lighted borders to enhance the journey.
- Focal Points: Establish one or two dominant features, such as a large water fountain, and arrange smaller elements around them to create visual hierarchy.
Practical Implementation Steps
- Site Zoning: Divide your garden into zones—e.g., entertainment area, quiet corner, vegetable patch—and assign features accordingly.
- This prevents overcrowding and ensures functionality.
- Mock-Up Testing: Before permanent installation, use temporary markers or digital tools to simulate feature placements.
- Adjust based on sightlines and traffic flow.
- Seasonal Considerations: Plan for year-round appeal by incorporating evergreen plants, weather-resistant sculptures, and lighting that adapts to shorter days in winter.
- Budget Allocation: Prioritize features based on impact and cost.
- Start with high-value items like a centerpiece sculpture, then add smaller accents over time.
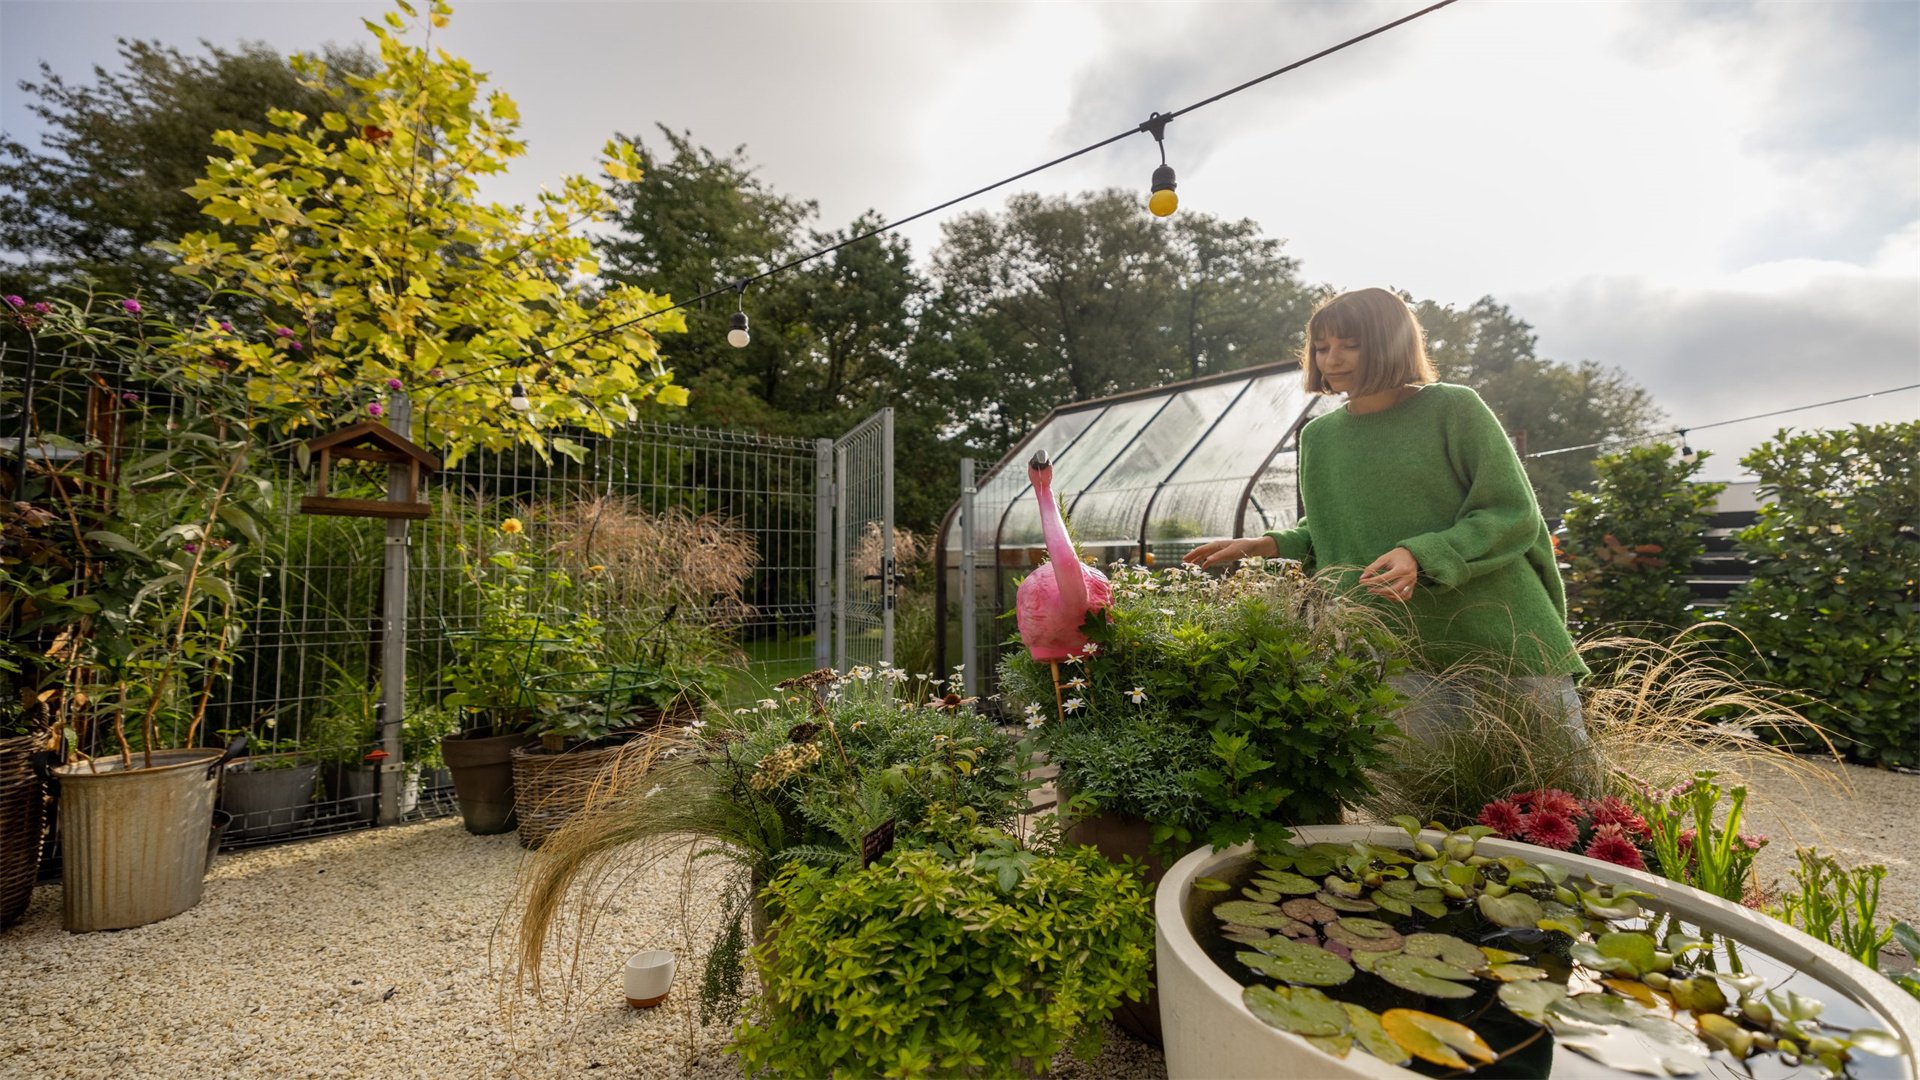
🔧 Maintenance and Long-Term Care for Artistic Garden Features
Artistic features require ongoing upkeep to preserve their beauty and functionality. This section provides a maintenance framework tailored to different feature types.
General Maintenance Guidelines
Follow these universal tips to keep your garden in top shape:
- Regular Inspections: Conduct monthly walkthroughs to check for damage, wear, or pest infestations.
- Address issues promptly to prevent escalation.
- Cleaning Schedules: Clean features based on material—e.g., wipe metal sculptures with a cloth, pressure wash stone paths, and prune plants seasonally.
- Weather Protection: In regions with extreme weather, use covers or move portable features indoors during storms or freezing temperatures.
- Record Keeping: Maintain a garden journal noting installation dates, maintenance tasks, and plant growth patterns.
- This helps track progress and plan future projects.
Feature-Specific Care Plans
Here are detailed care routines for each feature type discussed earlier:
- Sculptures:
- For metal, apply anti-rust coatings annually; for wood, treat with preservatives every 2-3 years.
- Stone sculptures may need sealing to prevent moss growth.
- Water Features:
- Clean pumps quarterly, check water levels weekly, and use beneficial bacteria to control algae.
- In winter, drain and insulate pipes to avoid cracking.
- Plant-Based Art:
- Prune topiary every 4-6 weeks during growing seasons, fertilize in spring and fall, and monitor for diseases like powdery mildew.
- Lighting:
- Replace bulbs as needed, clean solar panels monthly for efficiency, and inspect wiring for fraying or animal damage annually.
- Mosaics:
- Re-grout if cracks appear, reseal every 2-3 years, and avoid using harsh chemicals that could discolor tiles.
🏁 Conclusion: Embracing Creativity in Your Garden
In this handbook, we've explored the multifaceted world of crafting artistic garden features, from sculptures and water installations to plant-based art and lighting. By following the detailed methods, advantages, and implementation steps outlined, you can transform any garden into a personalized masterpiece. Remember, the key to success lies in careful planning, sustainable practices, and regular maintenance. Artistic garden features not only enhance visual appeal but also create immersive experiences that connect us with nature. Whether you start with a simple mosaic stepping stone or a complex tiered fountain, each project adds unique value to your outdoor space. We encourage you to experiment, adapt these ideas to your local environment, and share your creations with fellow gardening enthusiasts. Happy crafting!
As a final note, consider joining local gardening clubs or online forums to exchange tips and inspiration. The journey of garden artistry is ongoing, with endless possibilities for innovation. By integrating the principles from this handbook, you'll build a garden that reflects your artistic vision and stands the test of time.