6 DIY Steps to Build a Striking Vertical Garden in Small or Confined Spaces — Ultra-Expanded Edition
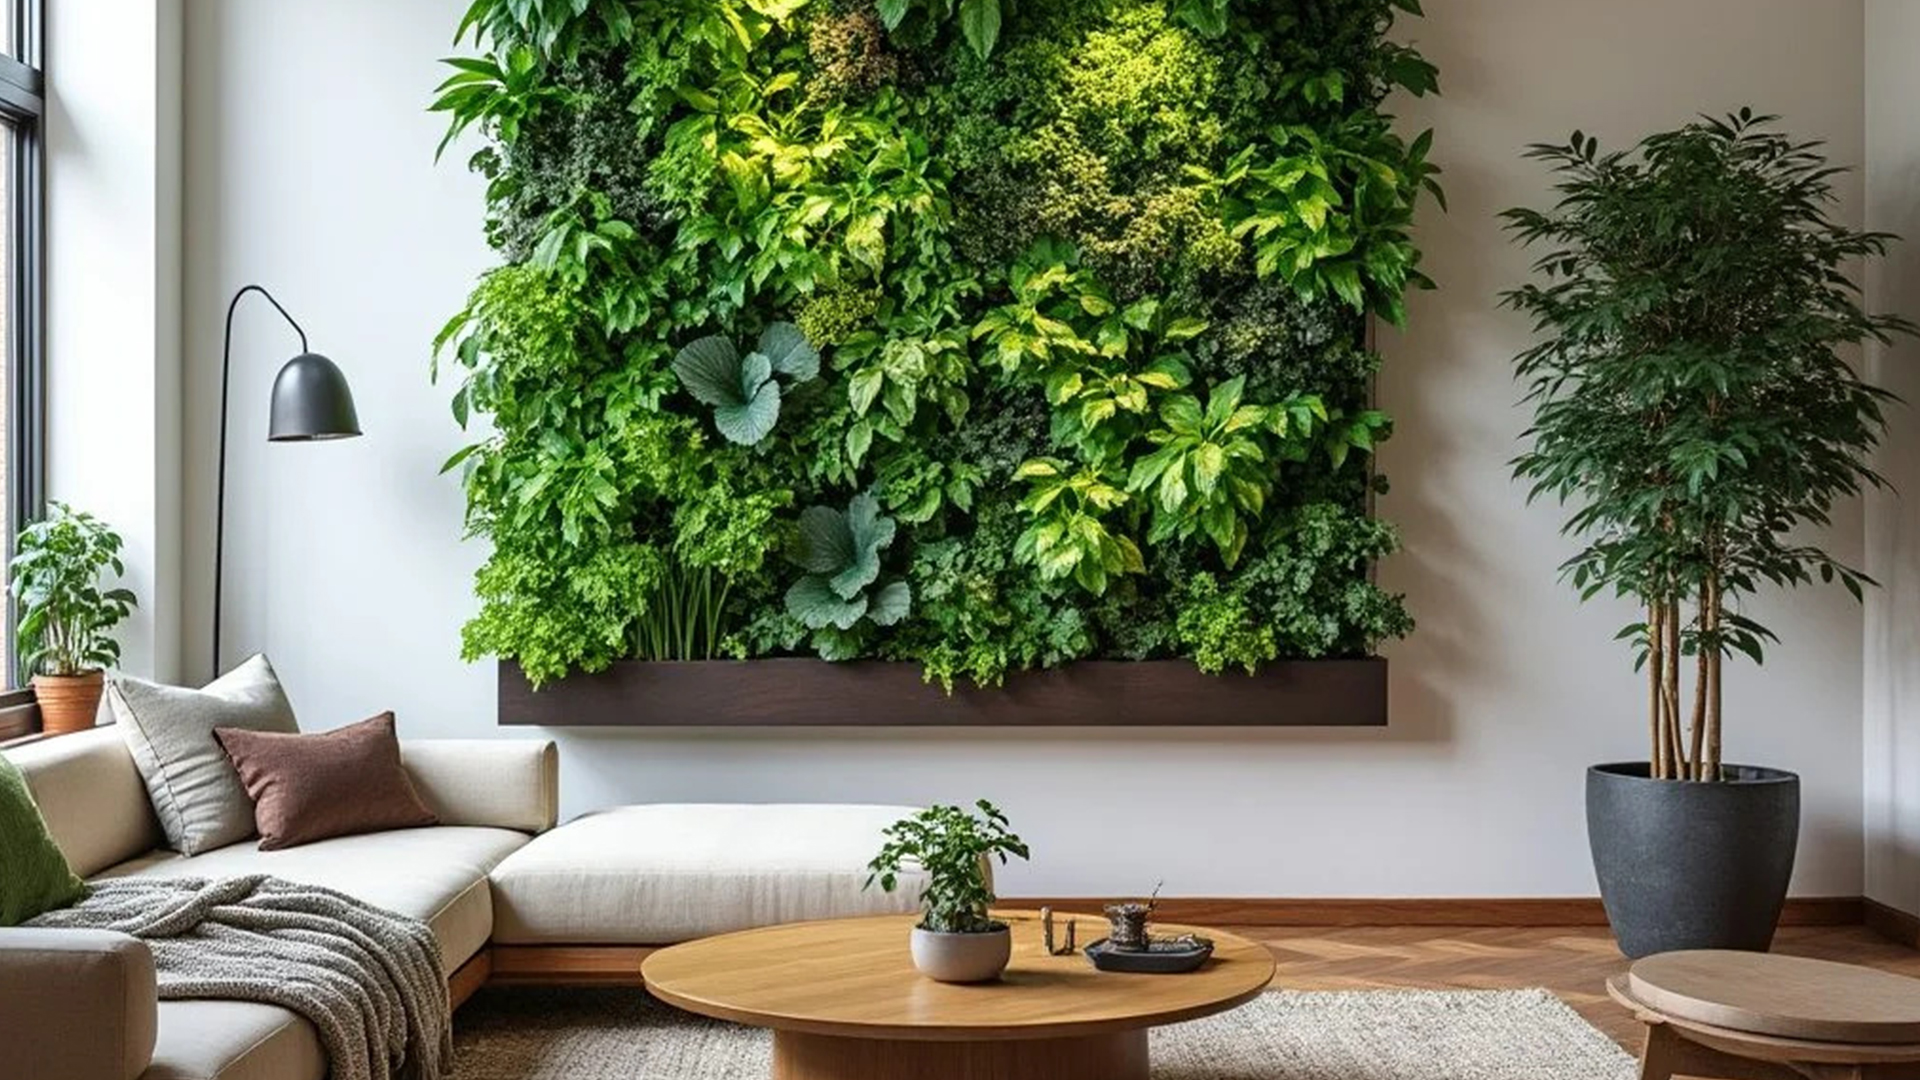
Living in a compact home or an apartment with limited access to outdoor areas often makes people believe that gardening is out of reach. But even the smallest spaces—those corners you barely notice, the narrow ledges along your window, the slim balcony that can only fit a chair, or even the blank wall near your kitchen—can be transformed into flourishing green zones with the help of vertical gardening. This method relies on height rather than floor space, giving you the opportunity to bring nature indoors or enhance small outdoor nooks without overcrowding your living environment.
Vertical gardens offer countless benefits beyond aesthetics. Plants help purify the air by absorbing pollutants, they soften harsh architectural lines, and they bring a sense of serenity into busy urban living. They can create privacy screens, reduce the echo inside a room, cool down sun-drenched balconies, and offer fresh herbs or small vegetables right where you cook. Whether you are new to gardening or already skilled with DIY tools, this expanded guide will walk you through each step with more depth, options, and creative ideas than before—making it easier than ever to build a healthy, stunning, and truly personalized vertical garden.

Step 1: Discover the Perfect Location for Your Vertical Garden
Your vertical garden’s success begins long before you plant your first seed—it starts with choosing the ideal spot. While most plants require 4–6 hours of light, not all light is equal. Morning sunlight is gentler and ideal for delicate plants, whereas afternoon sunlight is stronger and suits sun-loving species. As you assess your space, observe how light shifts throughout the day and how shadows move across walls or balconies.
Possible locations include:
Balcony railings or privacy screens
Sturdy fences in small backyards
Blank interior walls close to bright windows
Underused corners of kitchens or living rooms
Bathroom walls with enough ventilation
A sunlit hallway or landing
The side of a stairway or loft area
Even if you live in a high-rise, you can still find micro-spots with reliable natural light.
DIY Pro Tip: If sunlight is inconsistent, blend shade-loving plants (like calatheas or ferns) with adaptable species (like pothos or philodendrons). Indoor gardeners can supplement with LED grow lights on timers—set them for 10–12 hours to simulate consistent daylight without worrying about overexposure.
Extra Insight: Avoid placing your vertical garden near heaters, air conditioners, or drafty windows. Extreme temperature fluctuations stress plants, drying soil and causing leaf drop. Try checking humidity levels with a small hygrometer if your chosen location is indoors; you’ll be surprised how much humidity varies between rooms.

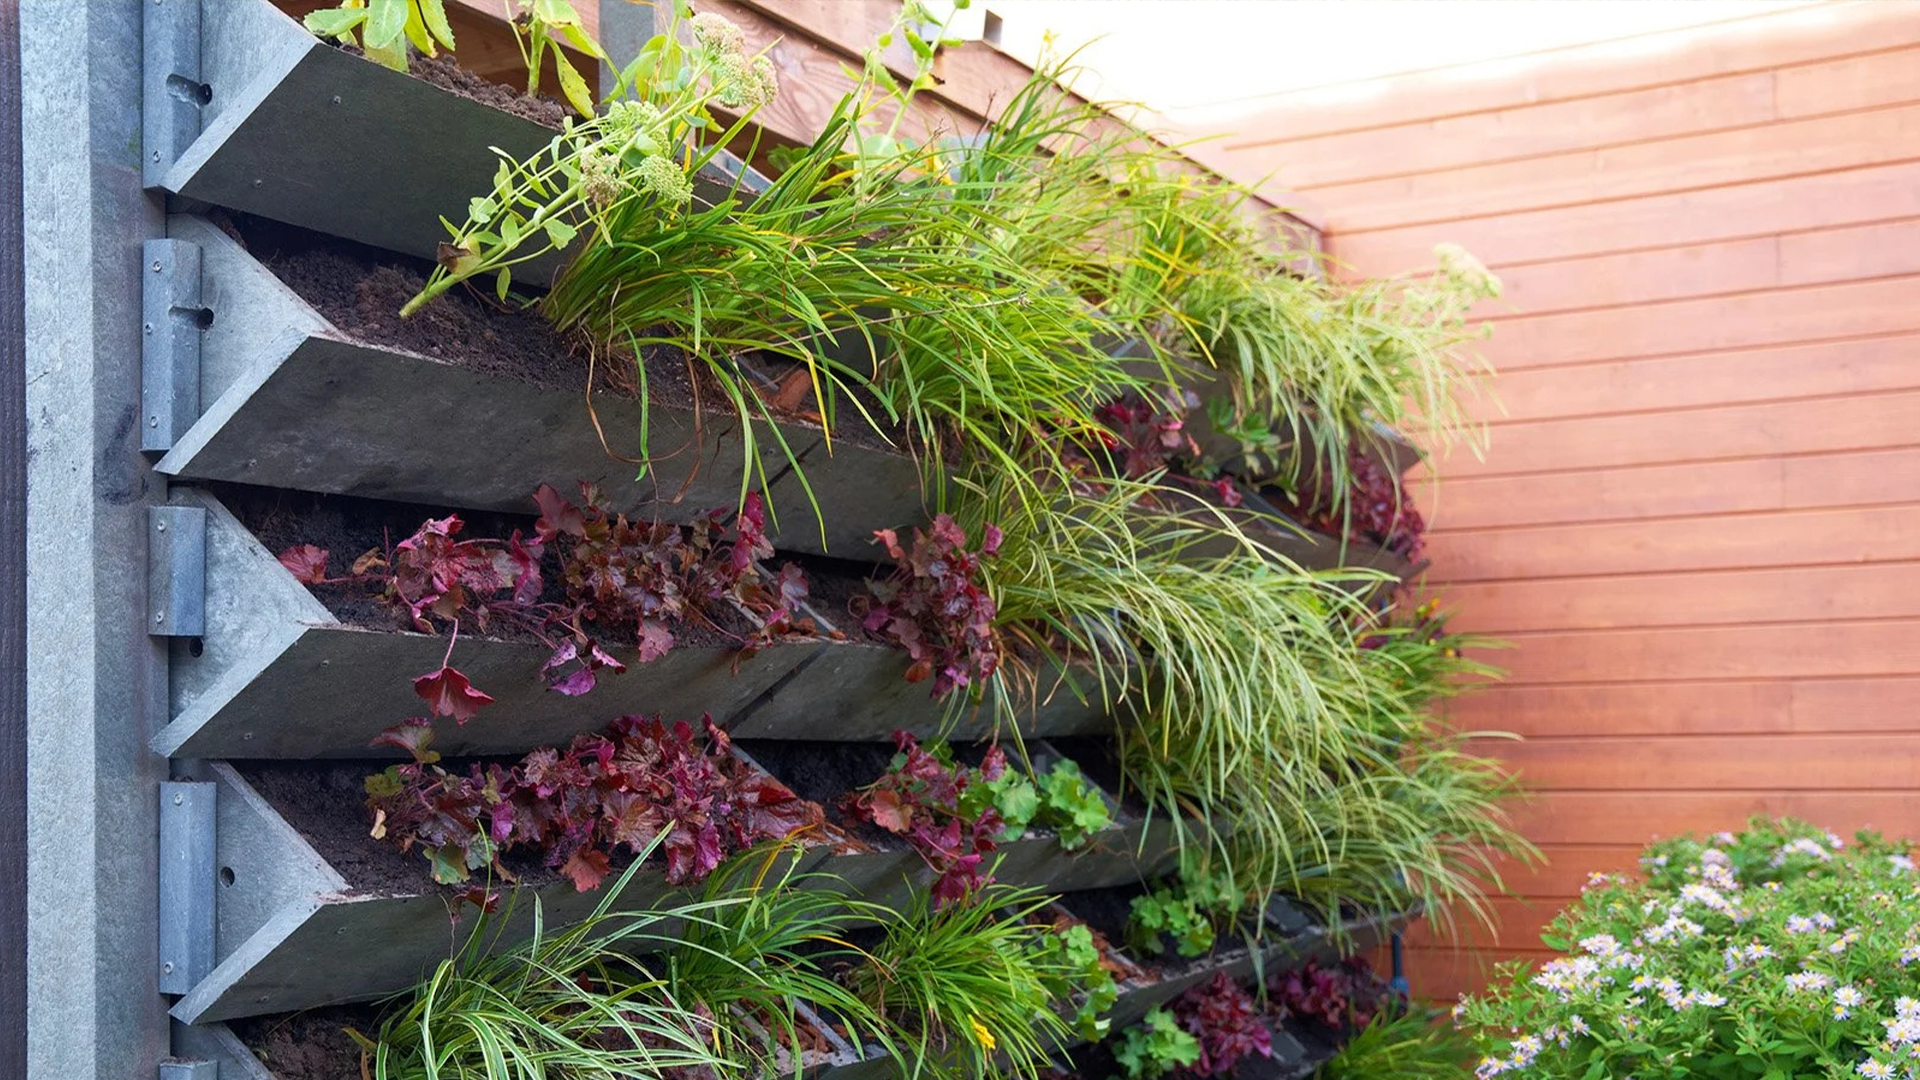
Step 2: Build or Select a Stable Structure to Support Your Garden
Your structure is the backbone of your vertical garden. With the right support system, your plants will grow securely and you’ll have an easier time watering, pruning, or rearranging containers.
Here are several structural styles to consider, each with its own advantages:
Repurposed Wooden Pallets
A popular choice for DIY enthusiasts, pallets offer a rustic charm. They can be used horizontally or vertically, painted or left natural, and they adapt well to both indoor and outdoor environments.
Metal Trellises and Grid Panels
Durable and sleek, these structures create a modern look and are perfect for vining plants. Their open design encourages airflow, which helps prevent fungal issues.
Fabric Pocket Organizers
Lightweight and easy to mount, these organizers are ideal for herbs or trailing plants. They require minimal tools and allow you to switch plants in and out quickly.
Stacked Shelves or Ladder Racks
These offer mobility—great for renters who need a non-permanent garden. They also allow for creative styling and varied pot heights.
Custom-Made Vertical Boxes
If you’re comfortable with woodworking, you can design a multi-tiered system with shelves, hooks, or integrated irrigation channels.
DIY Pro Tip: When using pallets or untreated wood, coat them with a waterproof outdoor sealant to prevent rot. For indoor installations, also place a moisture barrier behind the structure to protect your wall from condensation.
Extra Insight: Consider attaching wheels to your structure if you want flexibility—rolling units allow you to change layout, move plants toward light, or even take the whole garden outdoors on sunny days.
Step 3: Select Containers That Support Healthy Root Systems
The container acts as your plant’s home, and its shape, size, and material will influence watering needs, root growth, and long-term plant health. Vertical gardens often require lighter containers to reduce strain on the support structure.
Popular options include:
Fabric grow pockets
Shallow plastic pots
Recycled water bottles
Cut and painted tin cans
Hanging baskets or wire-framed pots
Ceramic pots (for lower rows only due to weight)
Good drainage is a must. Without it, water collects at the bottom, suffocating roots and encouraging rot.
DIY Pro Tip: For repurposed containers that don’t allow drainage (like mason jars), layer the bottom with pebbles or clay beads to improve airflow and reduce excess moisture.
Extra Insight: Aesthetic balance matters. Try mixing containers of varying heights and widths but unify them with a recurring color theme—for example, all white containers with pops of greenery, or earth-tone pots that create a natural vibe.

Step 4: Select the Best Plants for Vertical Growing Conditions
Vertical gardens thrive when populated with species that tolerate limited soil space and fluctuating moisture levels. Instead of deep-rooted plants, choose species that stay compact and adapt easily.
Herbs for Culinary Convenience
Herbs add fragrance and flavor—perfect for kitchens.
Try:
Basil, oregano, and rosemary
Cilantro, parsley, and dill
Lemongrass for added height
Leafy Greens for Fresh Harvests
Many leafy vegetables grow beautifully in limited soil.
Try:
Loose-leaf lettuces
Baby kale
Mizuna
Arugula
Flowering Plants for Visual Appeal
Flowers can bring life and vibrant color.
Try:
Viola and petunia
Impatiens and begonias
Sweet alyssum for soft cascades
Trailing or Cascading Beauties
These add softness and movement.
Try:
Tradescantia
String-of-pearls
English ivy
Scindapsus pictus
DIY Pro Tip: Group plants based on water needs. For example, keep succulents together in a dry zone and water-loving greens together in a moist, shaded area.
Extra Insight: Add at least one “feature plant” or “hero plant” to your design—a striking fern, a flowering vine, or something with dramatic leaf patterns. This anchors the entire garden visually and gives it a focal point.

Step 5: Build a Watering Routine That Ensures Long-Term Plant Health
Watering is typically the most challenging part of maintaining a vertical garden. Because gravity pushes moisture downward, upper and lower rows often experience very different conditions.
To maintain balance:
Use Drip Irrigation
This slow-release method conserves water and ensures consistent moisture levels.
Install Self-Watering Reservoirs
A great option for travelers or busy owners—these deliver water from the bottom up.
Practice Slow, Gentle Hand-Watering
Pour water slowly from the top row and allow excess moisture to trickle downward naturally.
DIY Pro Tip: Touch the soil to test moisture rather than relying on visual cues. Soil may look dark but still be dry below the surface.
Extra Insight: Don’t forget airflow. Proper ventilation prevents mildew—especially in dense gardens. A small fan indoors or strategic spacing outdoors can dramatically improve plant health.
Step 6: Personalize Your Vertical Garden and Let It Reflect Your Style
When your garden is assembled, the final step is personalization. This is where your vertical garden becomes more than just a plant wall—it becomes an expression of creativity, personality, and lifestyle.
Enhancement ideas:
Soft fairy lighting for nighttime ambiance
Chalkboard labels with plant names and dates
A wooden sign with your garden’s name (“Herb Haven,” “Leafy Corner,” etc.)
Mini wind chimes or hanging wooden beads
Color-coordinated pots for a unified appearance
DIY Pro Tip: Add scents intentionally. Lavender, rosemary, mint, or jasmine can transform your space into a relaxing sensory environment.
Extra Insight: Refresh your garden seasonally. Swap in warm-weather plants in spring and summer, and transition to hardy greens or decorative foliage in the fall and winter.
Let Your Small Space Flourish—One Vertical Row at a Time
A vertical garden proves that limited space doesn’t limit creativity. With imagination, patience, and the right tools, you can transform empty walls, cramped balconies, and forgotten corners into vivid, thriving green sanctuaries. Start with a modest setup, experiment with different plant pairings, and allow your garden to grow and evolve gradually.
Every compact home has hidden gardening potential. All it takes is a little curiosity and a willingness to build upward. Once finished, your vertical garden won’t just brighten your surroundings—it will enrich your daily life with beauty, freshness, and a calming presence of nature.